A Baby Shower for Everett

I know I've written a lot lately about all the baby showers our friends and family have spoiled us with, but what I haven't mentioned is that a LOT of my friends are also getting ready to have babies of their own.  Not every baby shower I've attended lately has been all about me.  In fact, the last one I was at was one I was lucky enough to help host, and it was all about a sweet little boy named Everett and his mama, my friend Allison. For this shower, I teamed up with my friends Jenny and Sarah as hostesses.  Since our house is still a wreck and Sarah lives out of town, the party was held at Jenny's house.  Luckily for us, Allison had posted pictures of Everett's nursery so we were able to use that as a jumping off point for our shower theme.  The nursery has several cute tree decals, so a tree-theme was obvious.  We also settled on an orange and green color scheme.

Jenny was in charge of the flower decorations, and she did a great job!  I had my doubts about how she was going to pull off an orange and green arrangement, but she really pulled it off!  I love the tulips and daisies.

Some arrangements also had green hydrangeas mixed in.

For the front door, Jenny made a simple wreath with the invitation to the shower and a couple tulips.

The invitations we sent out were wearing cloth diapers.

Sarah was in charge of bringing cute napkins.  She went all out and ended up making some napkins out of two super cute green and orange fabrics.

She also brought with her these cute mini cupcakes with little green leaf toppers.

We did our best to make all of the foods fit in with the theme... We had green and orange veggies with spinach dip,

leaf-shaped pimento cheese (and bacon!) sandwiches,

green apples with toffee caramel dip,

baked tomato, mozzarella, and basil cups,

oreo truffles (ok, so maybe these don't really match the theme, but they tasted good!),

and orange sherbert punch.

Is anybody else all of a sudden really hungry?  No?  Just me?

I also tried out a new recipe to make these peanut butter pretzel truffles.  They were really tasty!  And this leaf dish is something we received as a wedding gift that I haven't gotten to use a ton, but it was perfect for this shower!

Keeping with the tree theme, we set out this tree trunk with instructions for everyone to add their fingerprint as a leaf on the tree.

I should've taken another picture of the tree at the end of the shower, because it looked really cute all filled up with colorful leaves!  Allison got to take it home with her in the frame and I think has already added it to Everett's nursery.

The guest of honor arrived just as we finished setting out all the food.  Perfect timing.

We had a really good turnout for the party.  Lots of people showed up to love on Mr. Everett!

Allison had a whole pile of presents to go through.  She and Everett received lots of great gifts!

Jenny watched from the back.  Thanks for having us in your home, J!

We made sure to get a picture of Allison with the three of us hostesses.  I do much better at remembering to take pictures when the shower's not for me!

We also tried for a group picture of most of the girls there, but I think some people got hidden in the back.  Oops!

As our guests left, we sent them on their way with a baby "Everett-green" tree.

They were individually wrapped tree sapplings with a tag that said, "Every backyard needs an Everett-green tree.  Like the boy, it'll grow tall as can be!"  We also attached the planting instructions so hopefully they'll be lots of growing evergreen trees scattered around town.

Baby Everett should arrive within the next month.  We are all so excited to meet him!!  And don't you worry, I have a feeling there will be lots of photo shoots with him and our little girl...

I'm Ready

  • I'm ready to plop down on the bed belly first and sleep on my stomach all night long.
  • I'm ready to eat sushi.
  • I'm ready to wear cute fall clothes without an elastic waist.
  • I'm ready to sleep for more than an hour and half without needing a bathroom break.
  • I'm ready to be able to lean over the kitchen sink while washing dishes instead of having my belly in the way.
  • I'm ready to eat a cold bologna sandwich.
  • I'm ready to make a box of brownies and dip my finger into the raw-egg-chocolatey-goodness that is the batter and lick it off (and then do it again!).
  • I'm ready to wear my wedding rings again.
  • I'm ready to have more energy.
  • I'm ready for a big, frozen margarita.
  • I'm ready for my restless legs to settle down.

But most of all...

  • I'm ready to meet my sweet girl.  I'm ready to see her precious face and fall in love.  I'm ready to show her to her daddy.  I'm just ready.

Nursery Reveal

I am finally ready to reveal the nursery pictures!  Hallelujah! Of course, it's not 100% finished.  I mean, really, what room is?  They're always a work in progress, right?  This one is no different.  But it's as finished as it's gonna be before our sweet little girl arrives, so let's get to it!

Disclaimer: I am not a good photographer.  The lighting in these pictures is sometimes a little wonky.  I don't know how all those nurseries on Pinterest get photographed with no shadows or anything.

Without further adieu, here's the view of the crib wall from the door to Little Miss's room.

Behind the crib is the plank wall that Doc and my dad helped put up.  It's painted Pure White - same as all the trim in the room that got a fresh coat of paint.  The other three walls are painted Essential Grey by Sherwin Williams.

From that view, if you turned to the right, you would see this side of the room.

The fabric on the glider and curtains are both Premier Prints, specifically the Bella/Twill collection.  I ordered the glider and ottoman directly from Premier Fabric, and my super awesome mom made the curtains.  They're lined with black-out fabric since there are no blinds on the windows.

The other side of the room has the main door, the bathroom door, and the closet.

That's a quick 360 of the room.  Let's go back to where we started: the crib wall.  The crib was our splurge.  It's the Casablanca crib in Pewter by Bratt Decor.

Like the glider and curtains, the crib bedding is all Premier Prints.  It was hard to get a good shot of the different fabrics, but they're all pink and white.

The bumpers are still missing their ties - those should go on this weekend.  The inside of the bumper pads is a soft pink minky dot.  And yes, the bumpers will come off for a while until she's old enough to have them on her bed.

Above the crib is the alphabet.  Most of the materials for this project (that seemed to take forever!) came from either Hobby Lobby or Michael's.  I bought all the wooden plaques and covered them in either paint, fabric, or scrapbook paper.  It's hard to tell in the picture, but several plaques are painted grey on the sides.  The alphabet is mostly in order except for her monogram that's in the middle.  Hopefully this won't confuse her when she gets older and is learning her ABC's!

The crib is flanked by two pink bookshelves.  These were a last minute addition to the room when, after bringing in the furniture that we had, I decided there was too much room left on the plank wall and something needed to fill in the space.  Doc and I used these plans from Ana White's website and cranked them out over Labor Day weekend.  We labored hard that weekend and completed them from start to finish in a little over 24 hours!  I took some of the pink fabric to Home Depot and had it color-matched, so the bookshelves match the bedding pretty perfectly!

Everything on the shelves is just randomly sitting wherever right now.  I haven't really "styled" them yet.

RIght now, sitting on this bookshelf are these three bunnies.  They're McCarty Pottery and were gifted to us by my mom and two of her best friends (thank you, Mom, Jenny, and Leslie!!).  My whole life, anytime I've seen things like this grouped in threes, I've always thought of them as being me and my two brothers.  Weird, I know, but its' immediately what I thought when I opened these.  It's me, Nick, and Ben!  Of course now, it can be our three children - Wyatt, Anna, and baby girl.

Also on this bookshelf is my mom's old silver cup and spoons.  I opened a sweet silver spoon at one of my baby showers that I've added to them (it's the shinier one!).  I still need to polish these up a little.  I love the little silver cup - it's got my mom's name engraved on it.  Part of our little nugget's name!

I decided to place a lamp on the bookshelf to the left.  That required us to drill a hole in the back of our newly built and freshly painted bookshelf for the cords to go through.  It was hard to do so soon after completing them!  The lamp is just a simple silver one with a white shade from Lowe's and matches the floor lamp beside the glider.  I had a really hard time finding lamps I liked and ended up just going with these so I could call it done.  I think they work fine, though!

The changing table that we refinished sits between the two windows.

It's stocked with all our diaper changing necessities.

Above the changing table is a pink shelf we made while building the bigger bookshelves.  It holds all of the little pink shoes we received as gifts. :)

And above her shoes are two shadowboxes that hold Barbie doll gowns handmade by my grandmother.  When my dad's sisters were little, they played with Barbies all the time and my grandmother made all of their playclothes.  The Barbies got a new wardrobe every year for Christmas!  When I was little, I played with all their Barbies any time I was at my grandmother's house.  I would play for hours!  So, at my last shower, I opened a gift from my grandmother and inside it was our little girl's first Barbie doll and a whole box of handmade Barbie clothes!  What a perfect gift!  Most of the clothes are made out of scrap fabric my grandmother had on hand - which I love because they all look a little vintage.  These two gowns she crocheted and felt much more special.  I thought they deserved to be displayed until our baby girl is old enough to actually play with (and appreciate!) them.

The wardrobe you've seen from this post.  I'm slowly filling it up with all her cute tiny pink clothes!

This chalkboard hangs between the bathroom and closet doors.  It was a gift from my friend, Dana, and is the insert to a cabinet door that she painted.  Cool, huh?

I had a small swatch of pink and grey chevron fabric that I loved, but never could figure out how to work it into the room.  I was afraid it would be too busy to do anything big in.  When we switched out all the outlets from cream to white (this resulted in two days of no electricity in the nursery....electricians we are not), I decided to mod podge the fabric onto one of the old light switch plates just to see if it would work.  It did!  And so I hung it up on the main light switch for the room.

Here's a peek into the bathroom from the nursery.  We did a little mini-reno in here.  The walls and trim both got painted (Pure White and Essential Grey, both Sherwin Williams) and we also had the painters paint the cabinet.  It was a medium shade of brown and they painted it the same as the trim.  The toilet got a new seat and all the hardware and fixtures were switched out.  They were shiny gold but are now a nice brushed nickel.  (Except for all the doorknobs - those are all still shiny gold right now.  They're on the list.)

I forgot to take a closeup of the new knobs on the cabinets, but they're from Anthropologie and are just like the ones on the wardrobe and changing table, except they're clear instead of pink.

The bathroom didn't have a hand towel holder, so I bought a freestanding one from Lowe's.  Pottery Barn Outlet had hand towels in the perfect shade of pink, so I picked up two of them and hung them on the holder.  The pink basket is from Babies R Us and holds all of our baby shampoos and whatnot.  I'm sure they won't stay there for long.

I bought these two birds at a craft fair last weekend.  They are a little brighter than everything else in the nursery, but I loved them enough to hang them anyway.

This is the wall opposite of the sink and toilet.

I didn't get a great shot of the shower curtain, but it was also made by my mom and is another Primier Print.  The curtains in the nursery are white with big pink dandelions; this fabric is pink with small white dandelions.

This painting was another baby shower gift.  It was handpainted by one of my mom's friends and matches the nursery colors perfectly.  And of course, I love this bible verse.

My mom monogrammed a couple towels for us to hang on the towel bar.  I love the girly font.

And that's it!  I hope you enjoyed the tour of our sweet little girl's room.

Right now, this little girl thinks it's her room.

She has no idea who this "Sister" is we keep talking about.

All she knows is someone is coming, and we're all just waiting...

Any day now.  We're officially ready for her!!

Before and After: Nursery Furniture

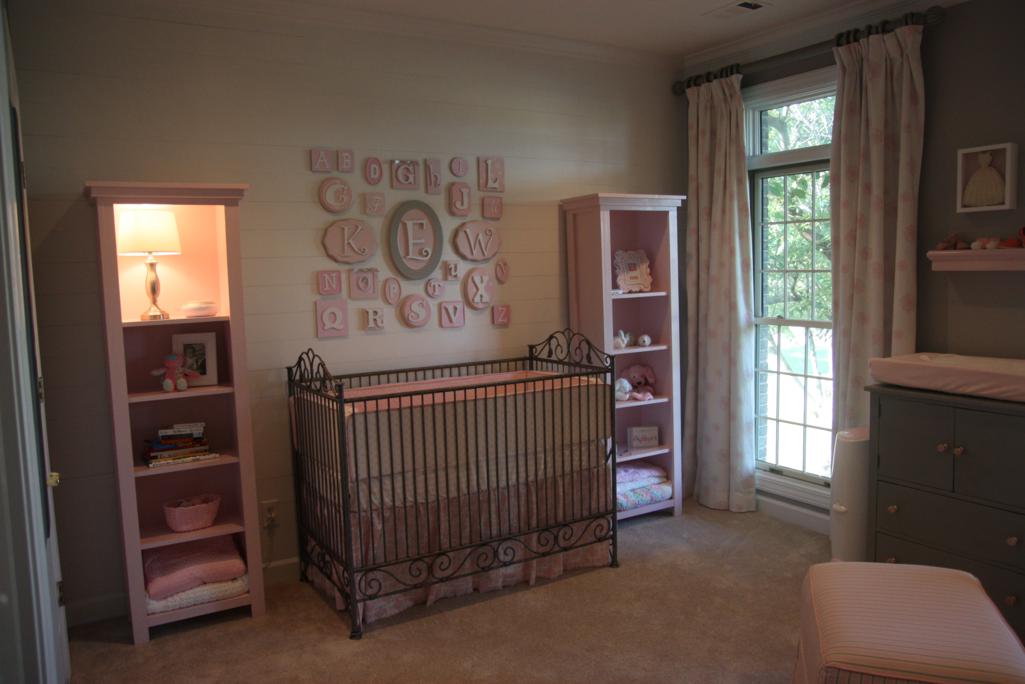
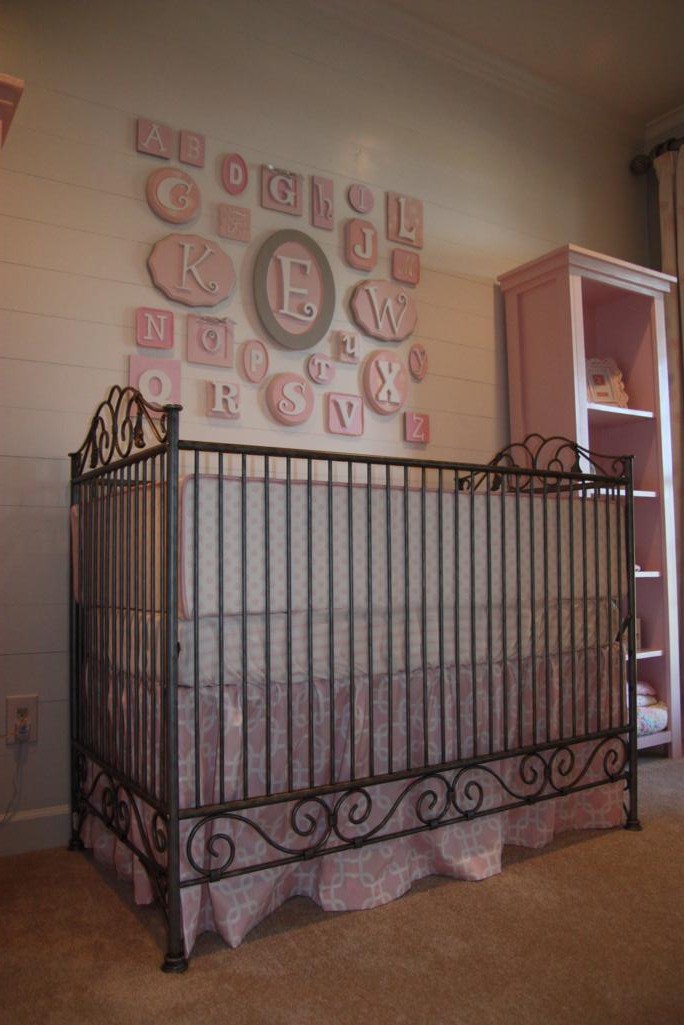
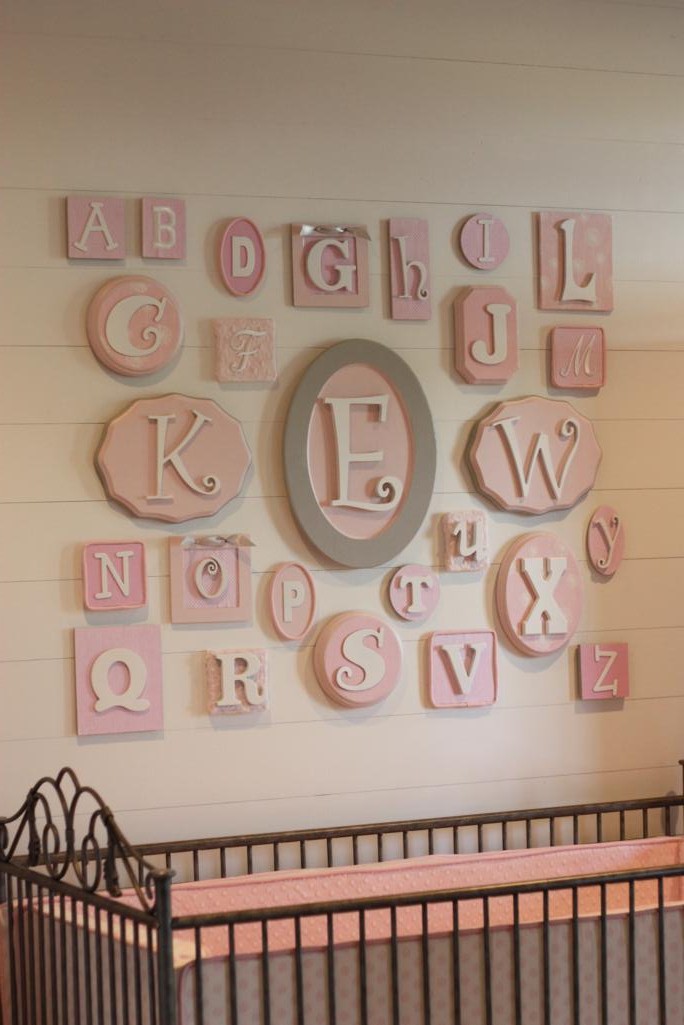
Early on, when we found out we were expecting a little girl and started shopping for furniture, I found the most perfect girly wrought-iron crib.  I wanted it so badly.  Only problem?  It would be a bit of a splurge.  After lots of serious thought (and maybe some convincing), Doc allowed me to buy the crib since I promised to try to go cheap with everything else in the room.  Isn't he the best? :) Obviously the room would need more furniture than just a crib, so to "go cheap" I started shopping at antique and thrift stores for the perfect pieces to make over.  This seemed like a more affordable idea than just logging onto a furniture website and ordering multiple matching pieces of furniture.

Let me preface the rest of this post by saying in the end, I'm not sure that I really saved a ton of money.  But we all poured a lot of hard work and labor into the nursery furniture, and that's gotta count for something, right?

I started shopping for the first piece for the nursery.  I knew I needed drawers of some sort to put clothes in, but I didn't really want just a plain ol' chest of drawers.  Surely we could find something cuter than that.  After scouring craigslist and some local thrift stores to no avail, my mom and I hopped in the car one Saturday and drove to Sheffield Antiques Mall.  We'd heard they were having a sale and you know we couldn't miss that!

Thank heavens we didn't have the boys with us because we took our time and walked up and down every single aisle and touched probably every single piece of furniture there!  After lots of deliberation between three different pieces - we knocked on 'em, tapped on 'em, opened their drawers, gave 'em a good shake - we decided this would be the one.  Hooray!

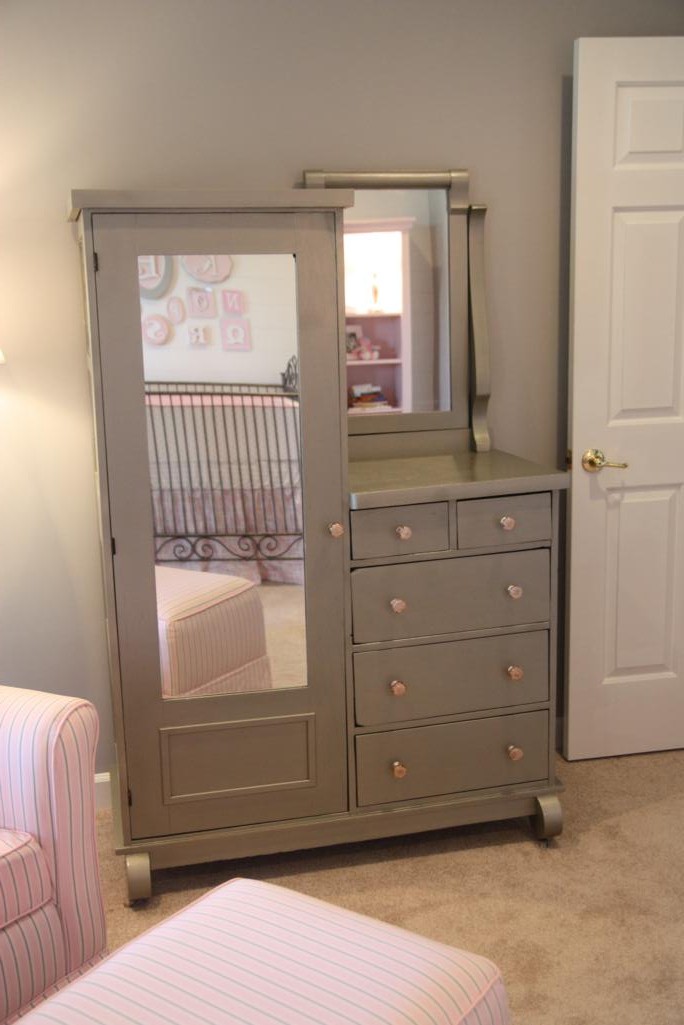
It's an antique piece with drawers down one side (beneath a small mirror) and a mirrored door for hanging clothes on the other side.  It's solid wood (I don't know what kind) that had a nice stained finish on it and was in really good condition.

I grabbed the discounted price tag off of it, took it up to the register, and made that sweet piece of furniture mine!

And then we encountered our first problem: it didn't fit in the car.  Whomp, whomp.  Feeling a little sad, we slapped a sold sticker on it, kissed it goodbye, and hopped in the car to brainstorm how we would get it home.  Thankfully, a friend of mine let us borrow her truck (thank you again, Allyson!) and Doc and I were able to pick it up just a few days later.  Phew!

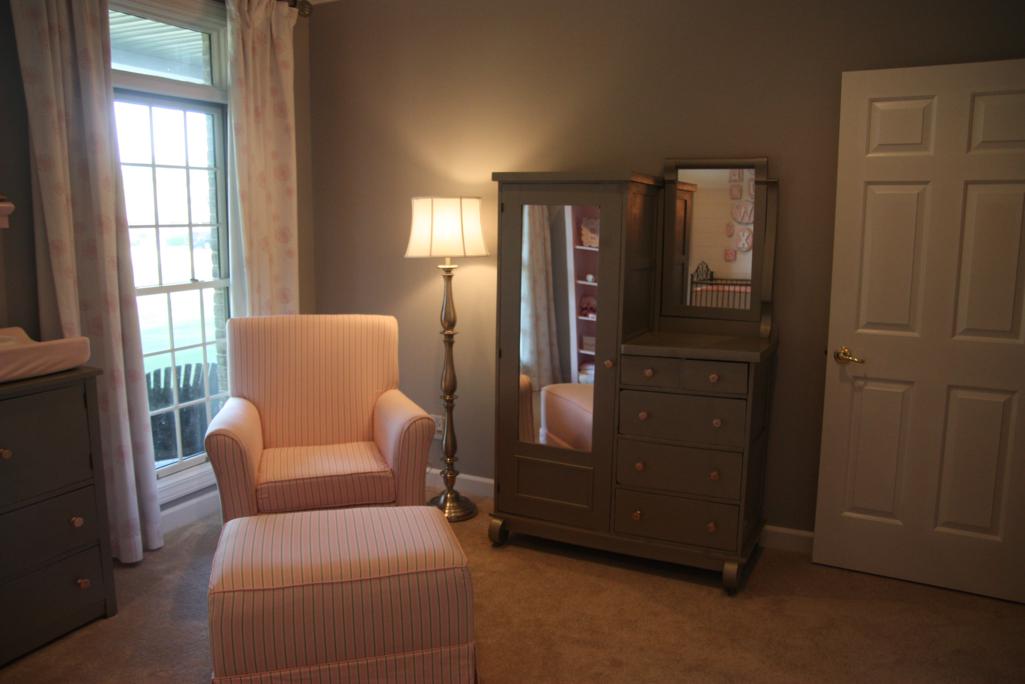
I don't know the official name of this kind of piece, but we call her the Wardrobe.  I loved her just as much when she was unloaded into our woodshop (sans small mirror).

Why did we unload her in the woodshop?  Cause you know she's not going in the nursery like that!  No ma'am, I had big plans for her.

Fast forward a couple weeks to another Saturday, and we found ourselves back at the local thrift store.  This time, they had a piece that I really liked and thought would probably work in the nursery too.  We did some negotiating and ended up bringing it home with us.

Once again, I have no idea what this type of piece would be called.  A sideboard, maybe?  I dunno.  From the holes drilled through the back of it, I'm guessing the previous owner had a tv sitting on top of it with all the other equipment - dvd player, etc - sitting inside those double doors.

I tested the size out with a changing pad my mom had at her house....

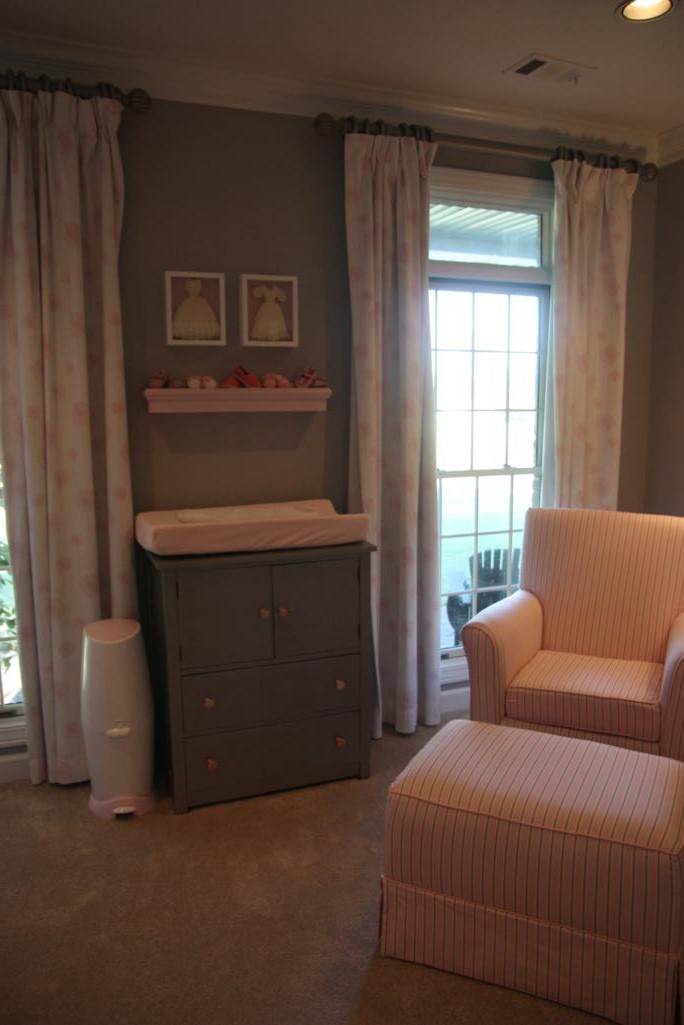
...and just as I had hoped, the size was perfect!  This would become our changing table.

Unfortunately for this piece of furniture, she had to go under the knife right away.  Those legs had to go!  Don't get me wrong, I love me some scrawny chicken legs (they're what my family's made of, afterall), but with those legs, she was way too tall for me to change a baby on.  Out came the hand saw and off went the legs!

And with that, we officially had two pieces of nursery furniture that were ready for their big makeovers.

First step in the makeover process was to prime them.  You know I'm a fan of skipping this step, but I have also learned the hard way that stain likes to seep through paint and I was not about to have that happen with these!  My parents helped me out by carrying all the pieces out into the yard one Saturday morning.

Actually, I should back up a step.  Everyone knows the first step isn't to just start priming.  You've got to prep the wood first.  My mom was sweet enough to do this for me during the week while I worked.  First she rubbed all the pieces down with TSP to degloss them, and then she hit them all with the hand sander.  After that, I spent a couple hours taping off the drawers, mirrors, and any part I didn't want painted since I knew I was planning on using the paint sprayer.

Ok, now we can move on to priming.

Sporting my new $3 Wal-Mart paint shirt, I was ready to get to work.  I remember feeling huge this day...  I'd love to go back to that size now!

For any worry-warts out there, I was using a VOC-free primer so baby should be ok.

Mom stepped in occasionally to give me a break.  She's awesome like that.

After almost a full day of spraying, we were able to call it day with two coats of primer on every piece.  Woo hoo!

Sadly, the primer accentuated a lot of flaws in the pieces.  Not awful flaws, really, just a lot of cracks that you couldn't really see before when it was just stained.  Not a big deal, we just had to spend a little bit of time caulking all the cracks so the pieces would look seamless.  Also, the primer made me 100% sure that I did not want to paint them white.  But if not white, then what color?

Feeling a little sassy, the color I chose was silver!  Martha Stewart's Precious Metals paint in Silver Leaf, to be exact.  Now, I've done a LOT of painting in my time, but after reading a few negative reviews, I decided to do my homework with this paint.  The last thing I wanted was funky looking nursery furniture.  If you google tips for applying this paint, you will find way more negative comments than positive (like, for instance, this article called "Marthat Stewart is a lying little b*tch").  Apparently, most people did not have a good outcome when they painted their walls with the Precious Metals paint.  Oy.

I was determined, though, so I did not let those bad reviews deter me.  Mostly what I read was that using a paint brush and roller on walls made the finish very streaky.  From my research, I couldn't find any results on how the finish looked on a piece of furniture when using a sprayer.  Guess I'd be the guinea pig.

With all the furniture pieces layed out once again, it was time to get to sprayin'.  This paint did not come in the no-VOC option, so I had to sit this round out.  I'm so thankful for a husband and parents that were willing to assist in my projects!

I won't lie, I was nervous the whole time.  The sunshine made the color look more gold-ish.  I started doubting my color choice - should I have gone with the Tin or Mirror instead??  I held my breath and hoped for the best.

With all that sunshine all morning long, we didn't expect for the bottom to drop out of the sky.  Just as Doc was nearing the end of the first coat, the rain drops started falling.  It was a mad dash to get everything inside, and we didn't have time to walk them around to the shop, so we ran them into the back storage unit where the lawn mower usually goes.  Thankfully, the lawn mower wasn't in there because my dad was mowing the front yard at the time.  No one expected rain!

Even with our hurried attempts, the rain still hit the furniture in quite a few spots.  I was devastated but as we took a closer look, we realized it was going to need a second coat of paint anyway.  Sigh...we would not be finishing this step up that day.

One major thing we learned with this paint is that, while spraying it on gives it a nice finish, you can NOT, under any circumstances, do any touch up painting with a paintbrush.  It would be very noticeable and not blend in with the finish at all.  If the paint gets knicked or anything, you've got to break out the sprayer again to touch it up.  This turned me into a very anal person when it came to people being around my unfinished furniture.  There were lots of "please don't touch that!"s coming from me.  I'm sure I was a joy to be around. :)

I can't remember who did the second coat of silver - Mom, maybe?  I've lost track at this point.  At any rate, one day we drug all the pieces back out and a second coat of Silver Leaf paint was sprayed on.

At this point, we decided to do a little bit of construction on the door of the wardrobe to make it look a little better.  On the front, there was a small panel below the mirror that seemed to be wavy from some water damage or something.  My dad cut a piece of scrap wood to cover the warped part and trimmed it out with some scrap trim.

The inside of the door had a piece of plywood stapled to the back to hold the mirror on.  The edges of this piece were in less-than-stellar condition, as you can see below.

So I decided to add something - I wasn't sure what, at first - to the back of the door to cover it up.  My first thought was to do a chalkboard but then decided that would get chalk dust all over any clothes hanging inside.  Then I thought about a corkboard, but didn't like the idea of push pins being in the nursery.  The final - and winning - idea was to put a piece of sheet metal on the inside of the door for a magnetic board.  We had the sheet metal cut at a local sheet metal place.

First, we had to add a small piece of scrap plywood to the bottom to make it flush with the piece holding the mirror on.  We just glued it to the bottom of the door.

Then we glued the piece of sheet metal down on top of those pieces.

To make it look prettier, I trimmed the sheet metal out in a small piece of decorative molding.

The pain of these added upgrades was that it meant the sprayer had to come back out.  If I just brushed the paint on the with a brush, the finish would've been much different from the rest of the piece of furniture.  I begrudgingly did the prep work to get it ready for another coat of sprayed paint.

My mom did the last bit of this touch-up the same day we painted the nursery window hardware.  As soon as it was dry enough, we (my mom, actually) added two coats of water-based polyurethane.  Finally, I could relax a little bit about people being too close to the furniture!

We weren't quite done yet, though!  There were still a few tweaks that needed to be made - mostly just some tightening of the drawers to sturdy them up and keep them sliding in and out smoothly.  I was also on the hunt for new hardware.  I didn't really know what I wanted, but knew as soon as I saw these at Anthropologie that they were the ones!

They're bubbled glass knobs in a light pink tint.

I also searched high and low for some cute contact paper to line the drawers with, and I found the perfect pattern!  This cute trellis pattern in pink with white and grey trim.  It would be perfect for the drawers and would match the nursery to a T!

I didn't order it.  Why?  Because it cost sixty-five bucks a roll.  SIXTY-FIVE DOLLARS for a roll of contact paper, and one roll wouldn't have even been enough.  Who in the world is spending sixty-five dollars on contact paper?!?!

I did end up buying some plain white contact paper for $3 a roll from Fred's, but it didn't stick to the bottom of the drawers very well.  I bet those $65 rolls would've stuck for life.  My mom suggested lining them with white fleece and it worked perfectly.  Plus, it's soft!

Ok, ok.  Enough chit-chat.  Ready for the final reveal?  First, here's the wardrobe again in its original state.

And, after hours of hardwork from everyone involved, here it is finally finished (and in the nursery, which you can get a sneak peek of in the mirrors!).

The lighting in these pictures doesn't always look the best, but the silver turned out really well.  It's not gold-ish like I originally feared.  And it has a nice even finish, thanks to using the paint sprayer.

Here's a soft fleece lined drawer.

This is the panel we added to the bottom of the door front to hide the water damage.  No more warped wood!

Inside is the magnetic board we added.

The color of the sheet metal actually blends in really well with the silver paint.

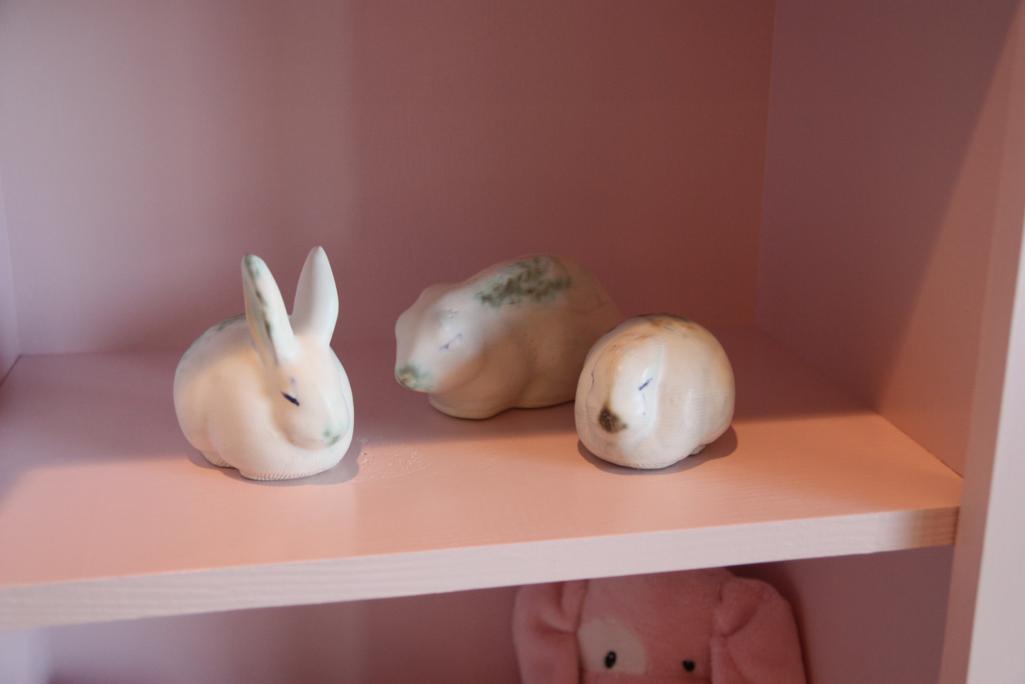
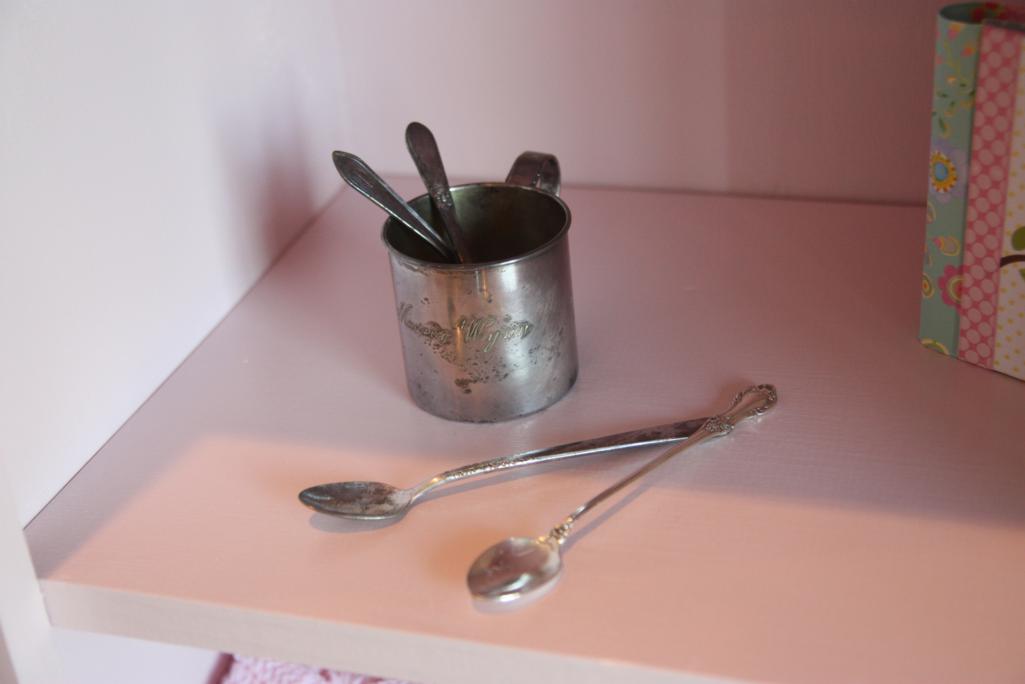
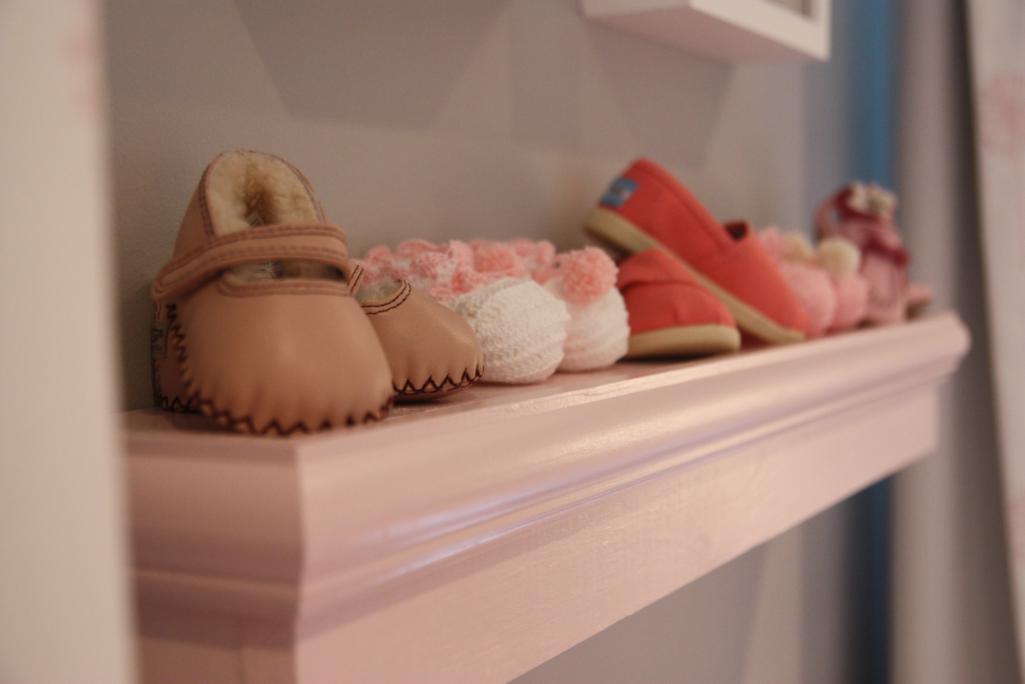
I haven't bought any cute kid-friendly magnets yet, but I had these cupcakes ones on the our fridge so I brought them in to test the magnet board out.

So that's the wardrobe!  Now let's check out the changing table.  Here it is again in its original state.
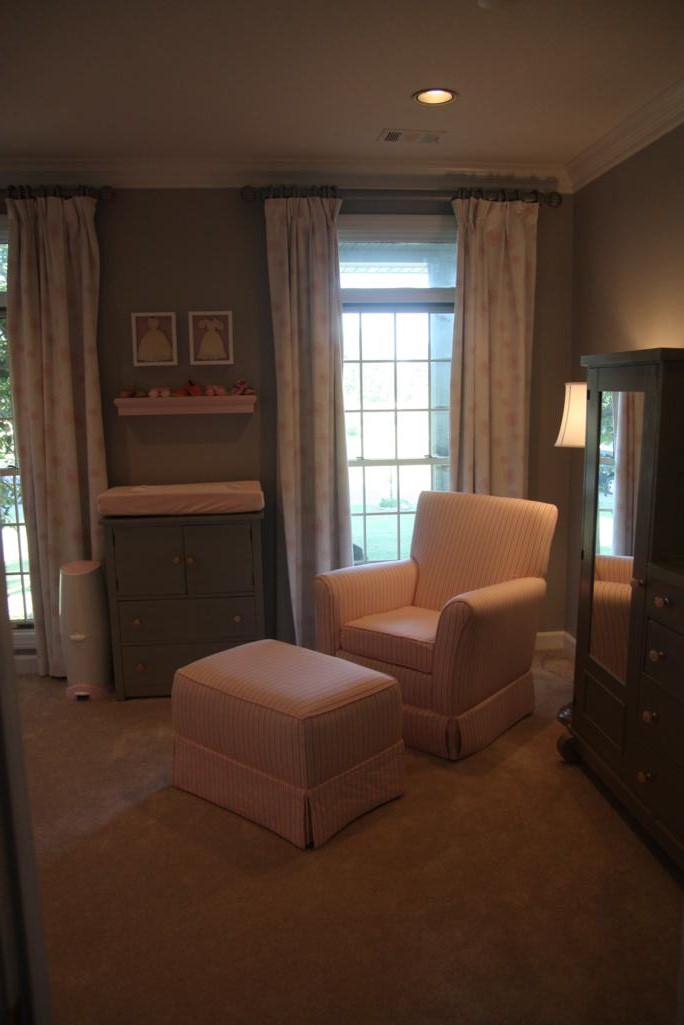
And here it is now.

Actually, here is what it really looks like because the changing pad has been added to the top.

Inside the double-doors is all the supplies necessary for changing diapers, all stored inside some cute polka-dot bins.

We ended up leaving the hole cut in the back by the previous owner, and it's already coming in handy because we can plug in our wipe warmer.  Score!

Here are side-by-side comparisons for ya.


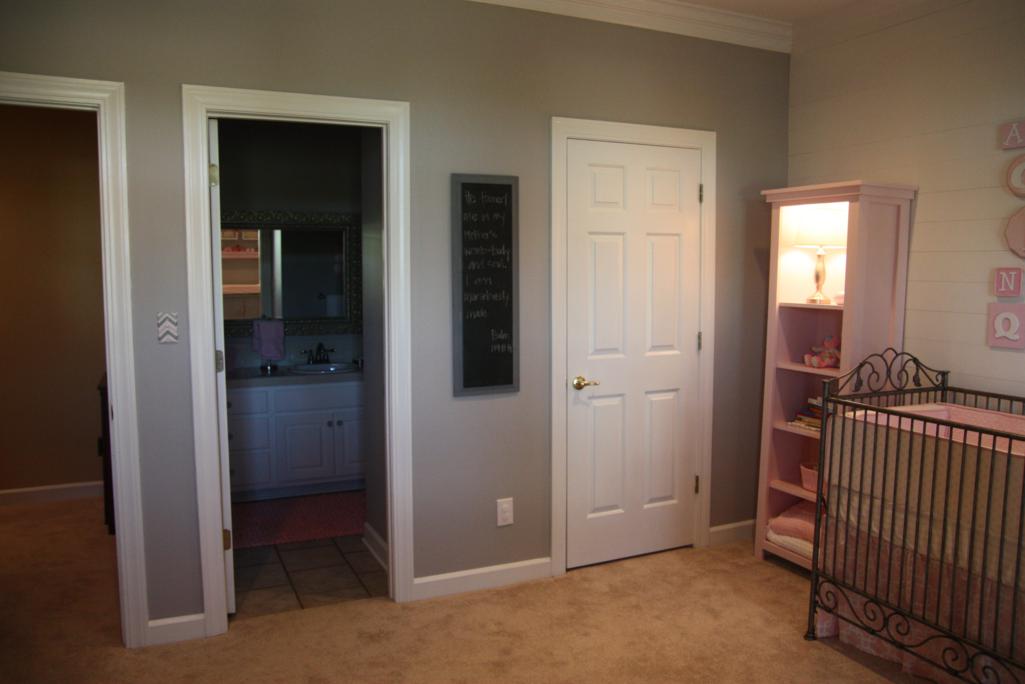
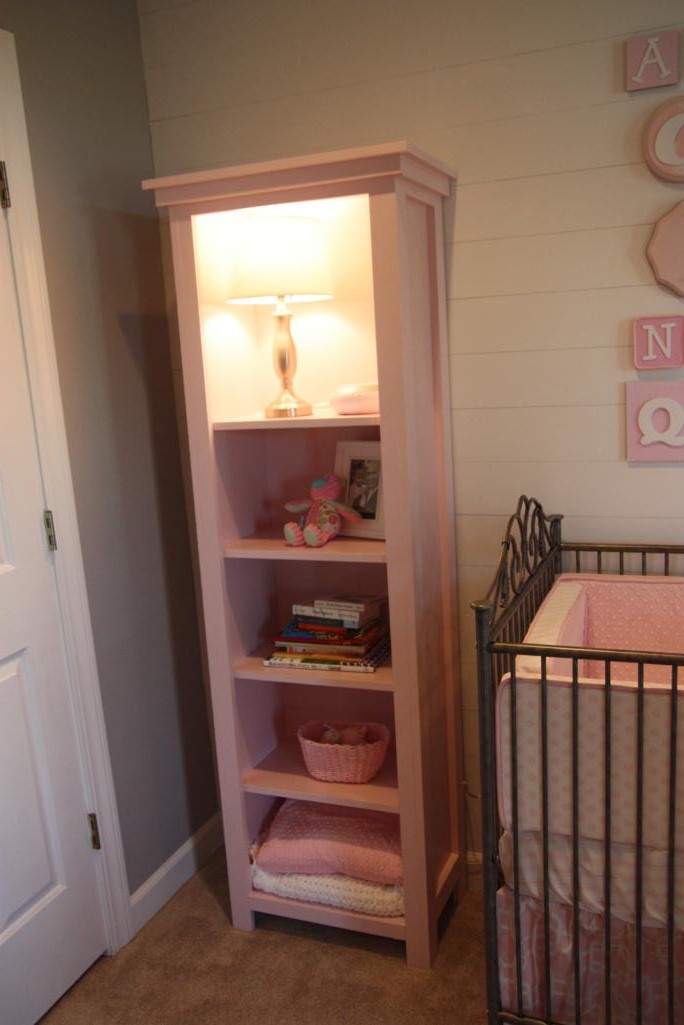
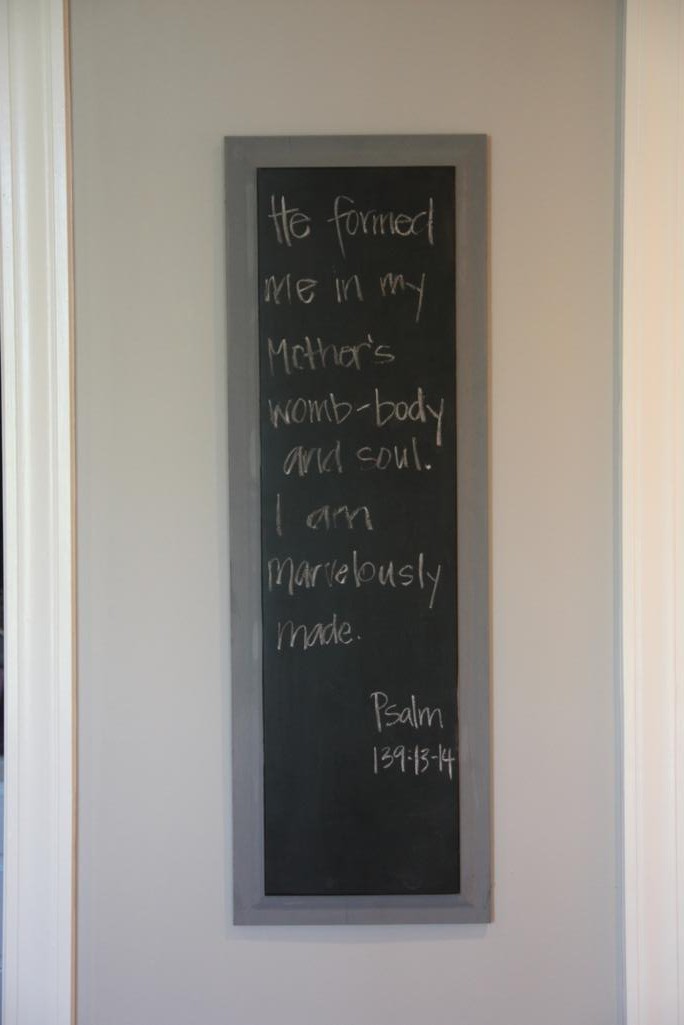
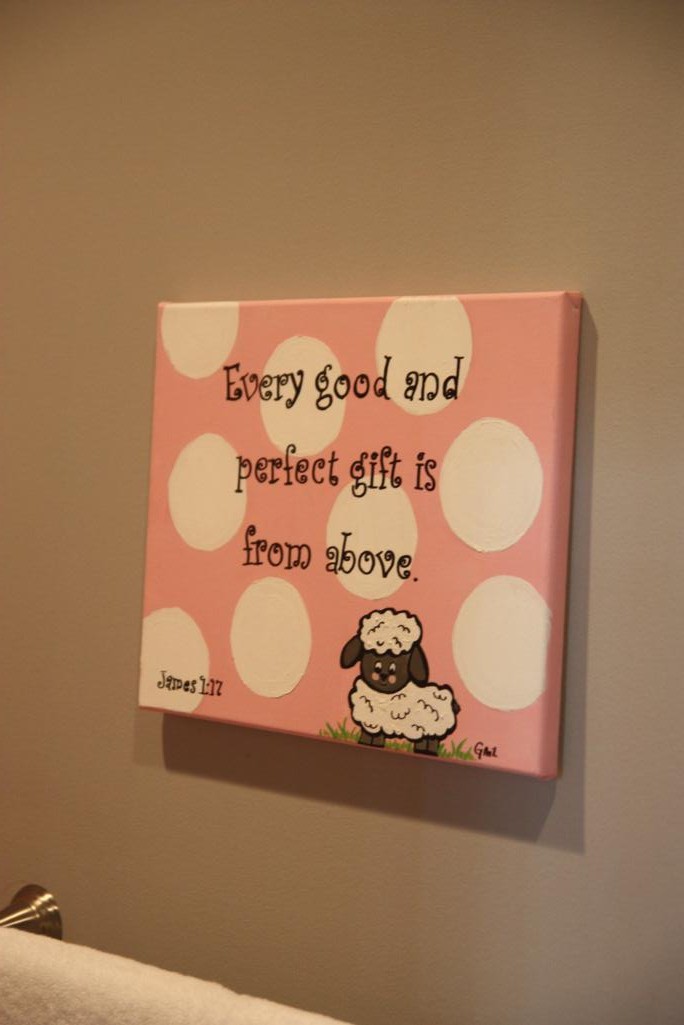
The rest of the nursery, including the two bookshelves we built at the last minute, is coming up next.  Stay tuned!

Beaded Board Letters

For my last baby shower, I had a really hard time coming up with a good idea for a hostess gift.  Obviously I wanted to give something that my lovely hostesses would like, and hopefully it'd be something they didn't already have.  I figured the easiest way to guarantee that I was giving them something they didn't already have was to give them something I made myself. With about a week to go before the shower, Operation: Homemade Hostess Gifts was launched.  The craft project I decided on was to make personalized door hangers, just like the one I made a while ago for my own door.

The first step of this process was by far the hardest: draw the templates for the letters.  I drew them out on newspaper and had a pretty hard time getting them to look right.  For some reason, the larger a drawing is, the harder it is for me to get it all proportionate and to scale.  Anyone else have that problem?

I finally got them all drawn and cut out of newspaper and was able to trace them on scrap pieces of beaded board we already had in the shop.   We used our scroll saw to cut them out, but you could also use a jigsaw if that's all you had.  Here's the G about halfway through getting cut out.

After cutting out all eight letters and sanding the edges down smooth, the next step was to paint them.  I started with a coat of dark chocolate brown on both the fronts and backs of each one.  (I didn't take a picture of this step but you can see them in the background of the picture below.)

For the colors on the front, my mom and I tried to pick the best color for each hostess's house.  We ended up doing 2 each of four different colors.  I did the two turquoise ones first (the backs stayed plain brown).  I brushed the the front color on lightly, being careful not to paint in all the beaded grooves so that they'd still show up.

After the turquoise, I moved on to a fall-ish orange.

The last two colors I used were bright green and red.

I applied a quick coat of polyurethane before the last step - adding a wire hanger.  The letter I made for my door just has a simple wire hanger, but for these I decided to dress it up a little with some colorful beads.  I also gave the wires a few twists and curly-ques.

Here are some of the finished projects.  Super easy, but I think they turned out pretty cute!

Of course, I'm sure they'd look even cuter actually hanging on a front door (or a wall!) instead of a plywood wall in a woodshop, but I don't have those pictures.

So there ya go, an easy project that makes a good personalized gift.  Perfect for those friends that already have everything!