We bought a couch.

I don't think I've ever formally introduced our master bedroom here on the blog.  That's mostly because I've never felt like it was finished.  And it still isn't.  Far from it, actually.  So I'm still not introducing it today but you will get to see a big ol' glimpse of it.

Our master is HUGE.  We had a big master in our old house so I didn't think we'd ever find another house with one as big, but low and behold we did.  This one is even bigger.  When we had the carpets shampooed this past summer, they charged us the price for two rooms for our master.  

It kinda is two rooms, really.  We have the half where we sleep - it has our bed and nightstands and dresser.  And also my wrapping armoir.  Then the other half is where we live.  It's where we watch tv at night after the kids have gone to bed and when they're awake, it's where we spend lots of time on the floor playing.  The two areas are divided by a partial wall and a big arched opening.

Up until about two (or three?) months ago, this is how it looked since we moved in.  

See why I've never given you a tour of this space?  Those chairs look so pitiful!  But, they are both the most comfortable chair ever.  I know, it's impossible for them both to earn that title, but they do.  They're comfortable in different ways.  The one on the left is soft and fluffy and you just sink right into it.  The one on the right reclines so far backwards that you could sleep all night in it.  And they were both bargains!  The white one was given to us (for free!) by some friends and the brownish one was purchased for a whopping 40 bucks.  I've had it recovered twice since it's former white pleather days.  (Yes, I'm aware those arm covers are hideous.)

So if they are both simultaneously the most comfortable chair ever, then why get rid of them?  Well, I'm glad you asked.  First off - check out that ill-fitting slipcover on the white chair.  Don't ever listen to any blogger that tells you an Ikea slipcover will fit on a Pottery Barn basic chair.  As you can clearly see, this is a lie.  (And what you can't see is that the slipcover is completely cut all the way up the back!)  But at just $30 for the slipcover, it was worth a try.  Lesson learned.  I have a big pile of swatches of fabric that I can purchase a Pottery Barn cover for this chair in, but the prices start in the $400 range.  I could get a whole new chair for that!  Secondly, my husband didn't like that we were always in our own separate chairs.  Call him a sap, but on movie nights, he wanted to be able to cuddle up on a couch.  Can't say I blame him - it'd be a heck of a lot easier for him to rub my feet if we were closer together! ;)

We initially shopped for a love seat to replace just one of the chairs with, but we never found what we wanted.  We eventually just bought a full-sized couch and I'm so glad we did.  It has a chaise too and that's something I've always wanted!  After having it for a few months, I'm surprised we ever survived without it.  There's plenty of room for all four (five plus Lolli) of us to pile on while watching Mickey Mouse Clubhouse on a Sunday afternoon.

No, it's not the fanciest couch in the world and that photo above would never show up on a design blogger's page.  But it's big and comfy and easy to clean and that's exactly what we need at this stage in our life.  It's got to be able to withstand a dog and two small, sticky kids.  Plus the drool from when I nap.  :)  

Those pillows are sad and pathetic looking but their days are numbered.  I'm currently shopping for new bedding and fabric to finally spruce up our bedroom like it deserves.  Maybe this will be the year to formally introduce it on the blog.

One of my favorite Christmas gifts was that cute little sofa table.  We had the couch for less than a week before I decided I had to have something.  My spot is in the corner with the chaise and I never had anywhere to put my drink or empty ice cream bowl.

It's wood and metal combined and came from Ballard Designs and is just the most darling little table ever.  I heart it.  It's the perfect size to hold my drink and phone and whatever I'm reading at the time.

Just for fun (seriously, no judgement please!) here's a full view of that side of the room.  It's like a daycare up in here.  I dream of the day when colorful toys won't line the walls of my bedroom, but if having the toys means my kids will stay little forever, then I'll keep 'em!

So that's our three-months-ago update.  I feel like this couch and I have been friends for much longer than that.  We've done some pretty serious Sunday afternoon bonding.

Anyone looking for a new chair?  I've got a couple just hanging out in our playroom.  Wanna play Let's Make A Deal?

Chairs for the Dining Table

We have lived in our "new" house for 18 months now, and we've just now made our dining room look like an actual dining room.  It has been the slowest room to transform, mostly because we didn't want to spend money (or time) on a room we didn't even use.  I took some pictures of it yesterday to finally show it on the blog, but first, let's talk chairs.

I fell in love with a table a few months after we moved in and after about a year of pining for it, Matt finally let me purchase it.  He did give me one condition, though: "There's no point in us buying the table if we wait another year to get chairs for it."  I promised that I would not only look for chairs immediately, but I would find chairs I could buy on the cheap.  While I would love some fancy cloth chairs for our table, they would be a silly purchase to make while we're in this toddler-with-sticky-hands phase of life.  Add them to the wish list for later.

SO.  Right after buying the table (in September, I think?), I began the hunt for chairs.  Our table sits one inch higher than a standard table (thanks a lot, China) so it was important that I found chairs with a high back so they didn't look dwarfed compared to the table.  I decided maybe Queen Anne-style chairs would work if I could find some to make over.

After lots of antique store and thrift store shopping and more than a few sets of too expensive chairs, I finally found a set of four chairs I could buy from the Habitat for Humanity Restore.  Of course, I had to buy the table too, but the whole set cost me less than $100 which was a steal of a deal compared to the antique store prices.  Only problem was that four chairs were not enough!  

So I hunted around some more until I found another table and chair set - this time at a junk store - that was similar.  Once again, I had to buy the table but it was even cheaper than the first set so that was good.  This set only had three chairs though, so my chair count is stuck at seven.  Even though the two sets were not identical, they were a pretty close match.  In the pictures below, the one on the left is from the set of four and the one on the right is the set of three.  Love those vinyl covered seats!

chairs
chairs

As for the two tables, we donated them to our church's rummage sale in October since we had zero use for them and they were just taking up space.  

We got to work right away, taking off the seats and coating them in two layers of Annie Sloan Chalk Paint in Old White.  Thank heavens for chalk paint because there was no part of me that wanted to have to sand those chairs!  

old white

This is when things stalled.  Well, sort of.  I knew I wanted to add a glaze to the chairs so my mom got to it one day and got three of them done.  Then I made her stop because I didn't like the way they were looking (not her fault, just didn't like the method we had chosen).  THAT's when things really stalled.

Fast forward about four months and we finally got around to finishing them.  So much for keeping that promise to Matt that I wouldn't drag my feet on getting chairs around the table!

We repainted all the chairs in Old White again (we had already added a clear wax to all of them and brown wax to three, so we had to paint them all again to get back to our blank slate).  Actually Mom did all of this step because she's such a rock star.  Then together, we spent an afternoon reglazing all seven of them.  I liked the method we used this time much better!

glazed chairs
glazed chairs

The next step was to recover the seats.  But, I wanted to alter them a little bit first.  Remember how I said our table sits an inch higher than a standard table?  Well, I wanted to raise the seats of our chairs an inch too so that it felt normal when we sat at the table.  (I know an inch doesn't sound like much but it was noticeably high when sitting in a normal chair.)  My solution was to cut another seat out of 1" thick plywood (technically 3/4" but whatevs) and add it to the bottom of the existing seats.  The two pics below show the new plywood piece screwed to the bottom of a seat (I did not remove the old fabric, figured it'd just be extra padding).  My cuts are really wavy but I knew they wouldn't show.
plywood seat
plywood seat

With the seats officially thicker, we could finish them off by wrapping them in a new layer of batting and the fabric I had purchased.  We pretty much wrapped them like a package, but the curved corners in the front were a little tricky to get smooth.

wrapping seat

Finally, we just had to reattach the seats to the chairs!

reattaching seats
reattaching seats

Here is one of the finished chairs sitting in our dining room (more pics of the whole room coming soon).  

finished chair

I'm really glad I hosted Henry's shower because it gave me the kick in the rear I needed to finally get these chairs finished (about five months after I bought them...).  And I'm super pleased with how they turned out!  Now we just have to have some friends over to enjoy a meal in our dining room so we can break them in!

Bren's New Bedroom

It's been two weeks since Mom and I decorated Bren's new bedroom, but I'm just now getting the pictures off my camera.  As I mentioned in this post, my brother and his family just moved into a brand new, custom-built home during the Christmas holidays and they have been working hard to get it furnished and decorated.  My sister-in-law Beth asked my mom and I early on if we would be interested in tackling Bren's room and we couldn't say yes fast enough!  You know we love a good decorating project.  :)

Aside from two art projects that I worked on, my mom really did all the hard work for this room.  We started our brainstorming by perusing Beth's Pinterest boards and actually ended up purchasing some fabric that she had pinned.  With that ordered, we were off to a good start on design ideas.  We knew Beth wanted Bren (age five) to have a girly room, but not too baby-ish.  Mom furiously sewed away and made new curtains, pillow shams, a bedskirt, throw pillow, and seat cushions.  I got off pretty easy with my jobs!

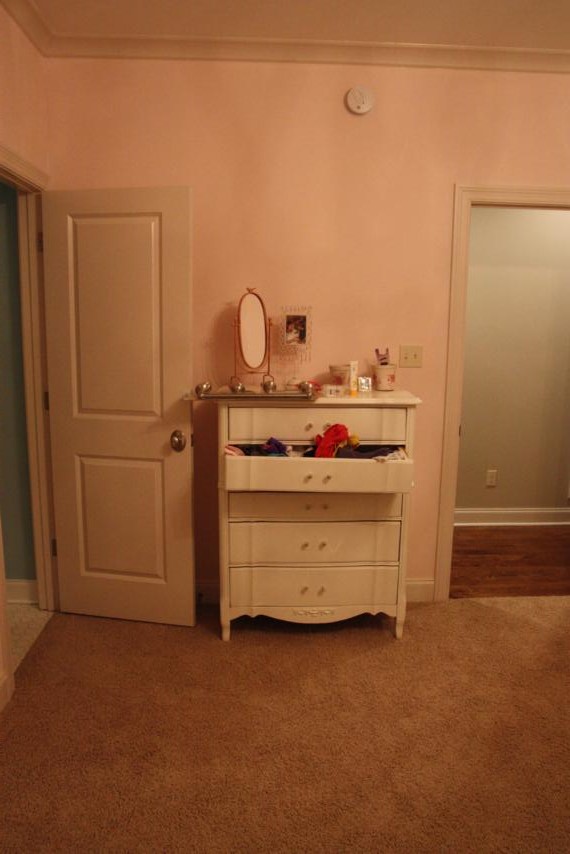
When we arrived early that Wednesday morning, I snapped a few quick pictures of the room before we got started.  I wouldn't say this is a true "before" picture since I'm pretty sure all of Bren's stuff had just been placed in the room and was waiting for us to spruce it up.  It's not like it had already been decorated or anything.  The new curtains had already been hung to give Bren some privacy from her floor-to-ceiling windows, but other than that, you can see that we were working with a pretty blank slate!

View from the door

View from the door

View from the windows

View from the windows

blank slate
blank slate

Even though Mom and I had everything ready to go when we arrived, it still probably took us about four hours to put it all together.  It was just the two of us so we didn't have any of the guys to do all of our picture hanging for us!

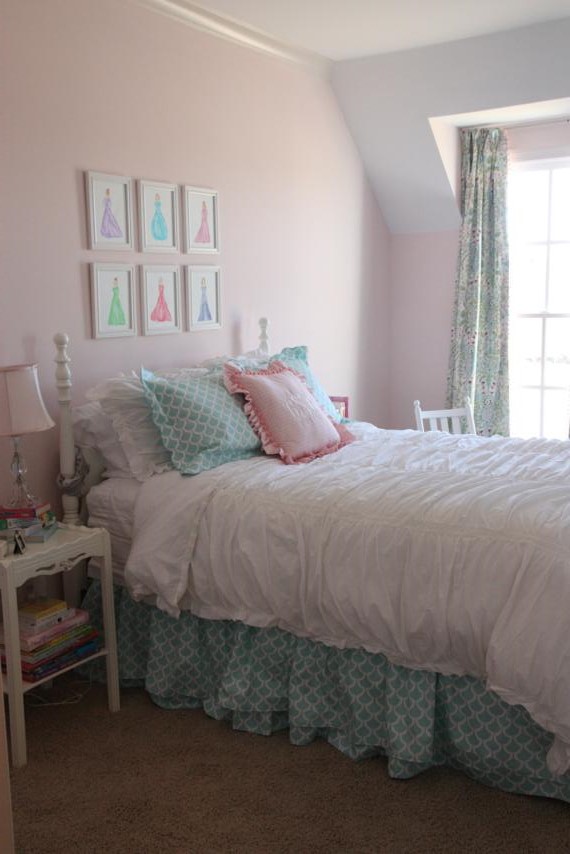
Here are some of the same views as above after we were finished working.  Noticeably missing - and this is driving me nuts! - are new bedside lamps.  We just couldn't find the perfect lamps in time to have them there on "install day."  I think a couple of bigger matching lamps will really add a lot to the room!

View from the door

View from the door

View from the windows

View from the windows

new decor
new decor

Ok, now let's take a closer look at some of the details.  :)

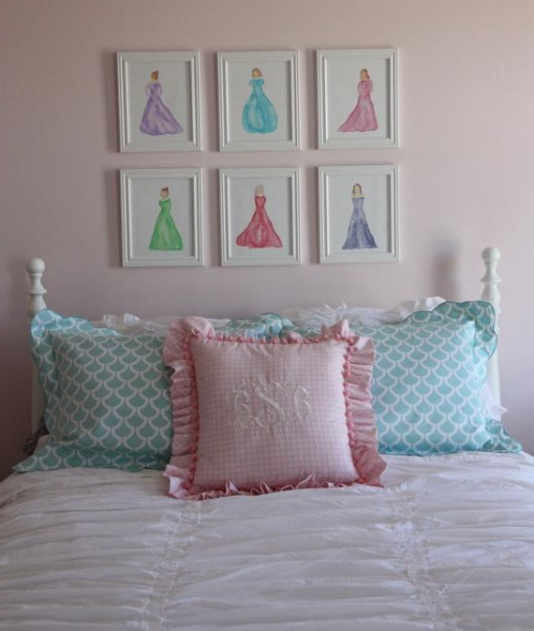
Like I said earlier, my mom made the bedskirt, pillow shams, and throw pillow.  The fluffy white comforter came from Target.  We bought the six white frames hanging above the bed at Michael's (buy one get one half off!) and I painted the watercolor "princesses" (as Bren calls them) to go in them.  My paintings are amateur at best and I've already told Beth she's welcome to replace them with much better art, but they serve their purpose for now by adding color to the wall and being cheap!

bedding and art

I wish I had taken a before picture of the little rocker, but I forgot.  We found it at a consignment shop and, while the bones of it were really good, it was U-G-L-Y.  The seat and back were both covered in a fabric straight out of the 70s.  We ripped off the fabric, cut a wooden seat for it, coated it in white paint, and added a pink little cushion (made by Mom, of course).  Bren told Mimi that it's her favorite part of the room!  I hear she likes rocking her babies to sleep.

The silhouette on the right is something we checked Bren out of school to go get.  Mom, Katie Wynn, and I picked Bren up and we had a girls' day out one afternoon.  Both girls did great sitting still for their silhouettes!  The black and white doesn't necessarily go with the color scheme of Bren's room, so I can see it finding a home somewhere else in their house.

new rocker
silhouette

We cleaned off the top of the dresser and added Bren's name in silver.  These are just those cardboard letters from Hobby Lobby (surely you've seen them before) that I spray painted with some Chrome Silver paint.  Easy peasy.

dresser
silver letters

Mom added a pink pompom trim to the edge of the curtains (another idea Beth had pinned to her Pinterest board) and I think they really take the curtains up a notch on the cuteness scale.  Love them!  

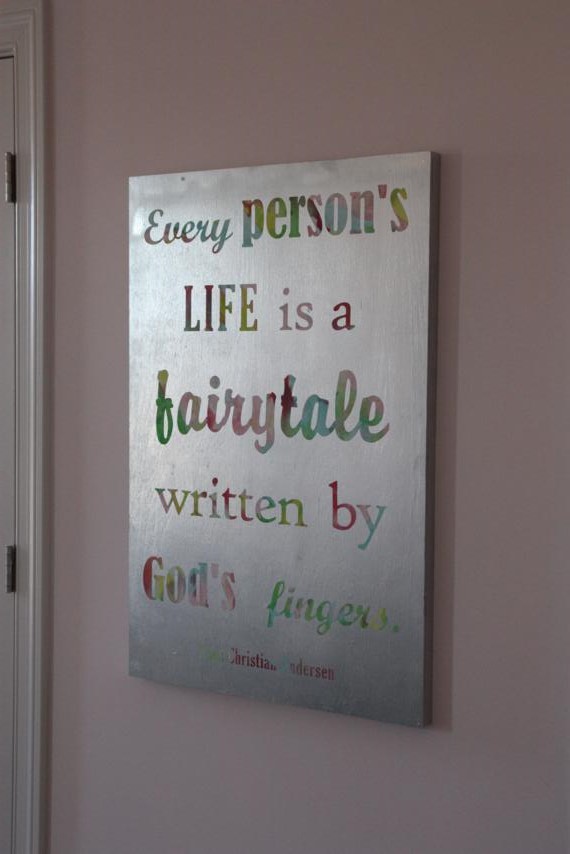
I also love how the watercolor quote art I made looked in the room.  This picture isn't great (darn glares!) but in my opinion, it looks great hanging on the pale pink walls!

curtains
quote art

Dad and I made the little bench for the foot of the bed.  It's by no means the fanciest or craftiest bench ever created, but what I really love about it is that we used all scraps to create it!  We tore the legs off an older coffee table and cut them down to be bench height and found scrap wood to use for the rest of it.  Can't beat a free bench!  Mom made the cushion to go on top of it.

bench
bench

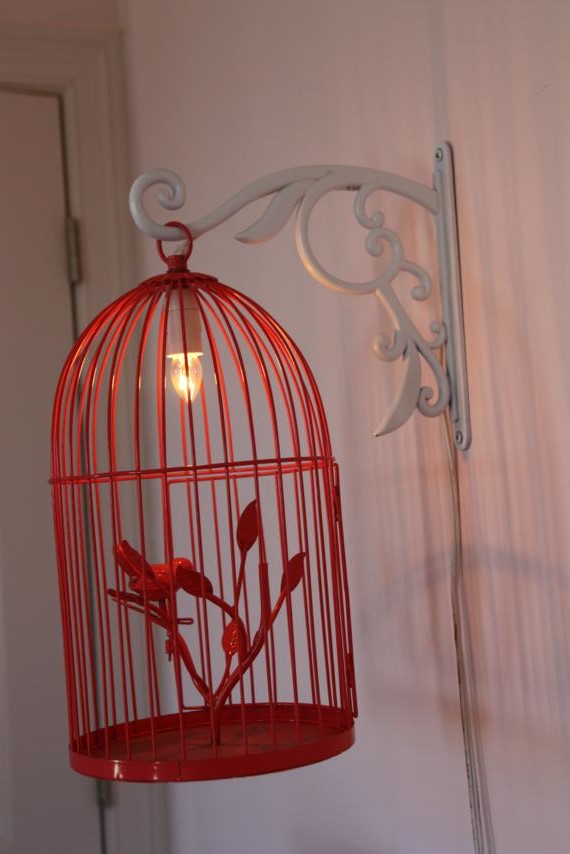
One of the first things we purchased for the room was this funky pink birdcage lamp.  It originally had a long chain so that it could be hung from the ceiling, but since Bren already had a chandelier in the center of her room, we cut off the chain and hung it from a garden hook that we had spray painted white.  Now it lives above her chest of drawers.

birdcage
birdcage

In the new house, Bren has her very own bathroom connected to her bedroom.  Just like her bedroom, it was a blank slate when we arrived.

blank slate
blank slate

We hung the shower curtain that Mom had made and added some stuff to the walls to make it look a little better.  Here are the same(ish) views as above.

new decor
new decor

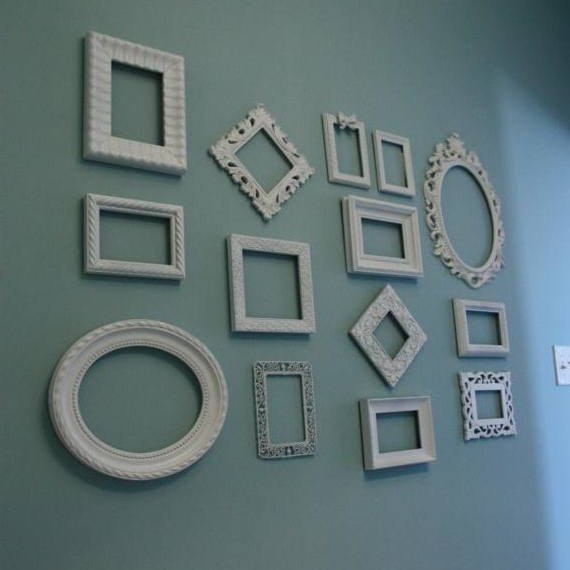
The wall of white frames is probably what took up the most amount of our time.  We didn't know the layout before hand so we had to figure that out, and then actually hanging them wasn't the easiest task.  But I do love how they turned out!  Some are new frames from Hobby Lobby and others are just ones we found in our stashes and spray painted white.

wall of frames

Can a girl in the South have her own bathroom and it not have monogrammed towels?  I don't think so.

monogrammed towel
hand towel

We hung the new shower curtain from grommets which I think is our new favorite way to make them.  It allows the shower curtain to slide so much easier on the rod.  

shower curtain
new decor

I think that just about completes the tour of Bren's new girly-girl room!  Beth sent Mom and me the cutest video of Bren getting to see it all for the first time.  I think she likes it!  I hope she likes it for a good little while because we've got to turn our attention to a certain little boy's nursery now! :)

What do you think of her room?  Got a favorite part?  Do you like the princesses above the bed like Bren?  Or, do you know where we can find the perfect bedside lamps?

Half Bath Makeover

Well, you've now seen the pallet wall we installed in the half bath and even the shelf we built to go on it, so how about some real Before and After shots now?  

This half bathroom is off the kitchen, near our back door.  It was perfectly fine when we moved in, except that it was capital P Plain.  We only did two things immediately: hang the mirror (it was just sitting on the sink leaning against the wall) and hang a hand towel holder (how did they not have one of these?).  Other than hanging a red hand towel, nothing was done to the space.

before.JPG
before.JPG

Do you see in those Before pictures how all the hardware is gold but I plopped down our silver garbage can and soap dispenser??  Drove me crazy! 

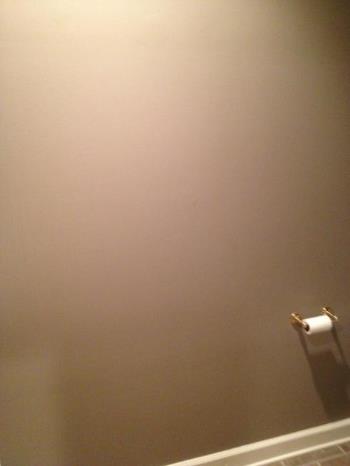
The other thing that drove me crazy was the view from the hall as you walk in from the back door.  From that angle, you get a full view of the main wall of the bathroom (across from the door) but the only thing on it was a toilet paper holder.  Nice shot for all of our guests, no? 

before.JPG

It was high time this tiny room had a makeover!  Obviously the pallet board wall was the inspiration that got the ball rolling.  If you look up at the Before picture of the toilet, you can see that I had painted some blue swatches on the wall.  I toyed with painting the walls something bright so that the pallet boards would be a big contrast, but ultimately decided to keep it about the same shade that it was.  I found leftover paint in the garage from the previous homeowners that was just a hair of a shade darker and had it painted in less than two hours.

The pallet board wall went up on July 3rd and then on the 4th of July holiday, Matt was able to switch out the gold sink fixtures, hand towel holder, and toilet paper holder for brushed nickle ones.  Then it was just left up to me to accessorize!  Take a look... 

after.JPG
after.JPG

Those of you that are really observant will notice that we hung the new towel and toilet paper holders on the opposite walls.  No more view of the toilet paper from the hall...hooray!   

The new mirror - from Home Goods - is slightly smaller than the one that was there but much  more my style.  I painted the shelf above the toilet to match it.   

after.JPG
after.JPG

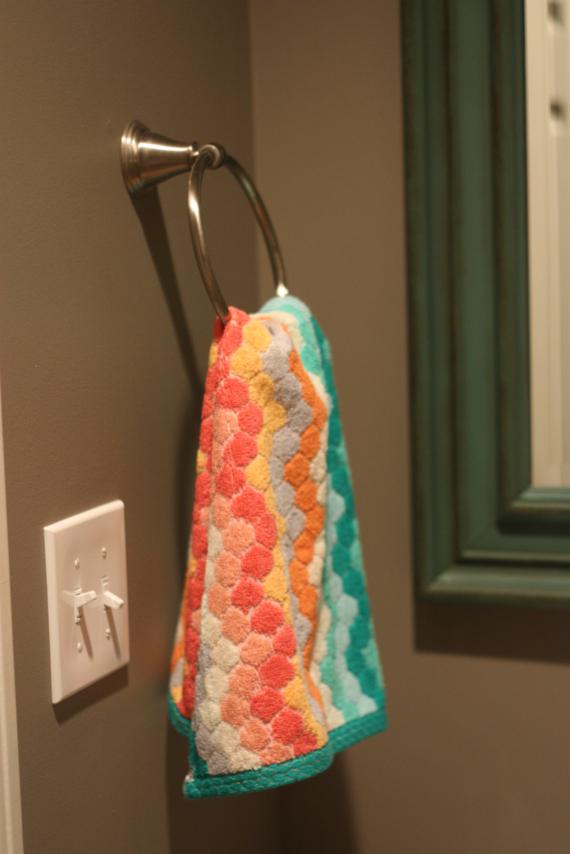
I thought the hand towels were a good way to introduce pops of more color.  The floral one is from Home Goods and the dotted chevron-ish one is from Target.  I couldn't decide which one I liked best so I got them both.  It's actually nice to be able switch it up occasionally and have a backup when I'm washing one. 

The big blank wall got decorated with a grid of six frames.  These were also found at Home Goods and I really wanted 9 instead of 6, but they didn't have enough.  If I ever find three more, I may add to the wall.  The original plan was to frame pen and ink drawings of outhouses since that seemed fitting for a bathroom.  Since I've been lazy and haven't actually obtained said drawings yet, I filled the frames with fabric scraps and called it a day.  I'm actually loving all the colors the fabric adds to the wall, though, so who knows how long these will stay.   

after.JPG
after.JPG

The view from the hallway is much better now!   No more toilet paper eyesore.  

after.JPG

I'm still struggling with what to put on the shelf.  I like the white vase (Home Goods) with the flowers (Pier One) for the touch of whimsy they add to the rustic wall.  And I like the color of the three candle holders, but I don't necessarily love that everything on the shelf is tall and skinny.  Anyone got any great ideas on what should go there?  Which should stay and what should I replace the other with? 

after.JPG

So that's how the bathroom looks today.  What does it still need?  The three more frames?  A rug on the floor?  Something better on the shelf?  I'd love your feedback!

Patio Makeover

A few weeks ago, my mom and I were out shopping and hitting up our favorite stores looking for some chairs to go with my new dining table (more on that later).  We had zero luck on finding the right dining chairs, but while we were at Garden Ridge we moseyed on over to the patio cushions and spotted some that looked like they might actually fit our old patio furniture.  A miracle! 

I say a miracle because I've been hunting for the right sized cushions for years!  We bought a set at an end-of-season JC Penny sale years ago and I've never really liked the striped fabric that was on the cushions that came with the set, but they worked fine for a while.  Then they set out in the elements and started to get a little worn looking so I started trying to replace them.  Every cushion I found, though, was sized to fit wicker or really small furniture. 

Furniture out on the patio of our old house. 

Furniture out on the patio of our old house. 

Obviously this furniture traveled with us to our new/current house and we plopped it down on our back patio.  We have big plans for this space...it has a great herringbone patterned brick floor and you can access it from three different rooms in the house.  The eventual plan will be to screen it in and then lay another brick patio out past it to extend it some.  We've already met with a contractor about it so now we're saving our pennies! 

The nice thing about this patio is that it's already covered so the furniture doesn't get rained on like it did at our other house.  Too bad the damage was already done! 

before 3.JPG
before 4.JPG

Can you say gross?  I mean, really, who wants to sit on that?  The view from the backyard really wasn't anything to write home about. 

before 2.JPG

So when we were at Garden Ridge and spotted the cushions that would actually fit this furniture, I forgot all about my dining room and started picking out a pattern.  I chose a khaki colored trellis-ish pattern that I thought would be safe a neutral.  I decided I could paint the wood part of the furniture any color I wanted and it would pop with the khaki. 

Boy was I wrong.  Matt's parents were visiting us when I came home with the new cushions.  We all decided a light blue would look good and luckily, I already had a gallon of it leftover from another project.  The next afternoon I got to work. 

Y'all, I think I chose the most humid day of the century to paint those dang pieces.  "Dripping with sweat" doesn't even accurately describe what I looked like.  More like, "jumped into a pool of smelly sweat."  It was miserable!!  Not only was it ridiculously hot outside, but the wood was soooo dry that it drank all of my paint right up!  I used almost a whole gallon on the four pieces (one loveseat, two chairs, one table) and it took for-ev-er.

The worst part?  When I was done with the first coat of paint, I could immediately tell that I hated it. 

mid 1.JPG

The light blue paint didn't pop at all and it made my neutral khaki colored cushions look yellow.  But still, I decided to sleep on it and see how it looked out on the patio the next day. 

The pale blue alone wasn't too bad on the patio.   

mid 3.JPG

Then I added the cushions and blah!  The clashing colors!  The competing patterns!  I was back to hating it. 

mid 4.JPG

I had no idea what to do.  Pick a different color of paint or find different cushions that would work with the blue?  I knew a second coat of paint was going to be necessary from the get-go, so all was not a total waste.  If I went with a different color this light blue would just be like my primer.  No biggie.  And thankfully, I had not ripped the tags off the cushions and I still had the receipt (this is rare for me!) so I could return the cushions.

In the end, I did both.  I went back to garden ridge and got different cushions and this time, found some paint that I knew would match them.  And since I was buying new paint, I went with exterior paint in a satin finish (the light blue was interior eggshell).   

Please tell me you love this new look as much as I do! 

after 3.JPG
after 5.JPG

The teal pops way more than the light blue, right??  And the cushions are really growing on me.  They weren't necessarily my favorites at the store, but I'm really starting to like how they look with the teal.  I also picked up some green throw pillows and a big green pouf that can serve as an ottoman or extra seating if we had a crowd. 

after 6.JPG
after 1.JPG

The view above on the right is what I see when I walk in from our garage door.  Sometimes I have to just stop and stare for a minute.  What a difference some paint and cushions can make!  The furniture looks brand new again.

Since I was sprucing up the patio, I also bought this cool mason jar that I found at Home Depot.  I couldn't resist!  It looks like a mercury glass jar during the day and then at night, thanks to it's solar-powered lid, it lights up like a little lantern!  LOOOOOOVE it!  I wish I could buy 28 more of them and string 'em up around our backyard.  Makes me wanna host an evening party.  :) 

after 9.JPG

Now that it looks so much better out on the patio, I really want to spend all my time out there.  But unfortunately we've recently learned that our little Katie bug is a magnet for mosquitoes so we haven't been able to spend as much time out there as I'd like.  It's got me itching to get the area screened-in as soon as possible.  If only I could figure out how to make those pennies we're saving magically multiply...