Mint Tulip

Well, I promised more info on our new business, and here it is!  

Like I said in my last post, Mom has been embroidering things for about ten years now, and I've been pretty hooked on it for the last two.  She tried to get me interested in it for years but the interest just wasn't ever there until after I had Katie Wynn.  Then I wanted to be able to make cute clothes for her all the time!  Mom taught me the basics, I googled tutorials and watched YouTube videos, and I've monogrammed everything since.  :)

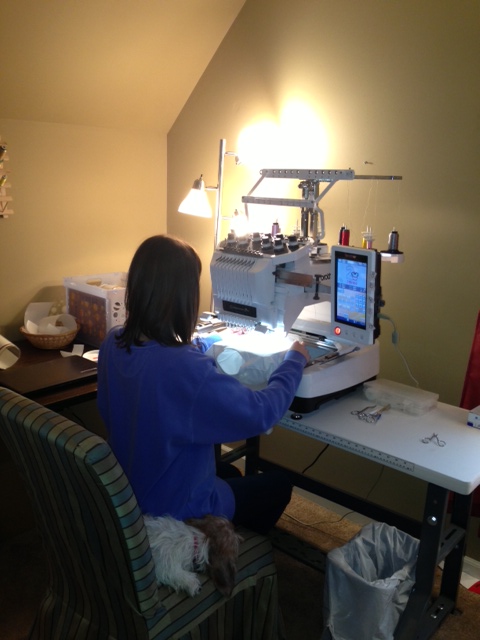
We began seriously talking about getting a bigger machine after Thomas was born.  Mom had already upgraded machines once (or twice?) over the years but now we were talking about a real upgrade - moving up from a single needle to a multi-needle, which is a pretty big deal in the embroidery world.  After lots of talking and dreaming about it, we finally pulled the trigger in late October and our new machine arrived on Halloween!  

These machines aren't exactly what I'd call cheap - there's now a monthly payment that needs to be met - so we threw around the idea of starting a business to help offset our expenses.  It was late in the year so our decision was to spend the rest of the year taking orders from friends while learning the machine and then officially open for business in the new year.  And that's where we are now!

We did a lot of brainstorming before settling on our name, Mint Tulip.  Mom was stuck on using "tulip" somehow since they're a favorite flower of both of ours.  Tulip Lane was a runner up name.  I liked Mint Tulip because of the play off Mint Julep and that it was catchy and flowed well.  We wanted a name that was generic and not embroidery specific in case our business ever grows into something bigger (I have big dreams - but that's a post for another day!).  We'll drop the "Custom Embroidery" tagline if those dreams ever come true.  :)

Our logo (above) was designed by Matt Washburn.  He's the best. 

In January, we got busy making things official - finalizing the logo, opening a bank account, registering our business.  We formed a joint partnership...I really hope Mom doesn't try to screw me.  :)

Because the machine weighs 90+ pounds (!!), we've set up shop upstairs in my old bedroom.  We used to just work in Mom's kitchen but this thing needed a permanent home - it's way too heavy to get out and put away every day!  Right now, the bed is still set up in the room but we have plans to move it to the playroom and bring all the toys into our new sewing room...the kids always want to be in the same room with us anyway so it'll work out perfectly.  Most days, if I'm not sewing with a kid in my lap, then I'm having to share my chair with the dog!

I'm happy to say that just a couple months in, we've already had quite a few orders!  Of course, we'd welcome even more business.  I have created an Instagram account to advertise and have just posted picture on my Facebook page.  I haven't created our own Facebook page yet because, to be honest, I'm kinda scared.  I'm so nervous to put myself out there for criticism.  It seems safer when I stick to just local friends and family members!  I'm sure at some point a page will be created, and maybe even a website (I know which designer I'll hit up!), but for now I'll just keep posting pictures on Instagram and hoping for more followers.  (Follow us: @mint__tulip!)

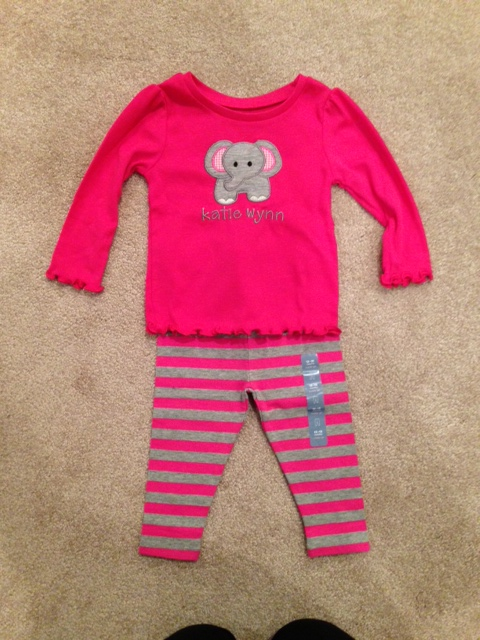
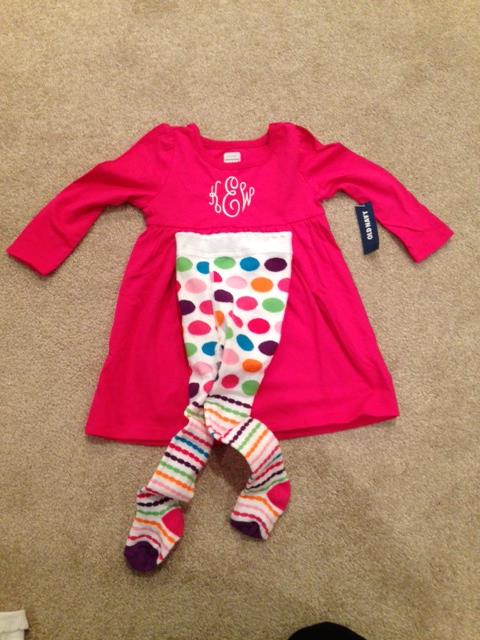
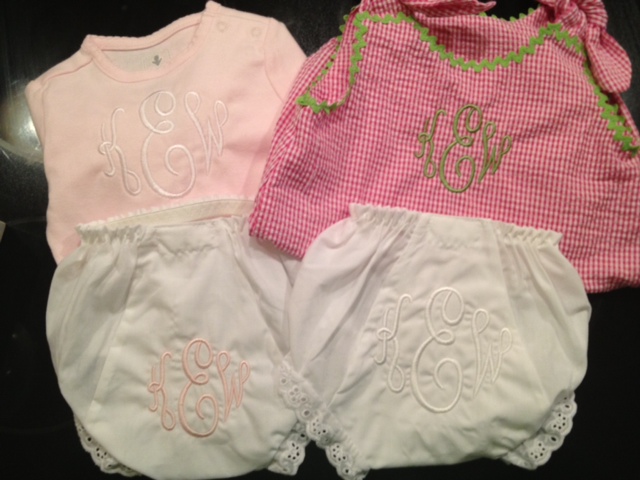
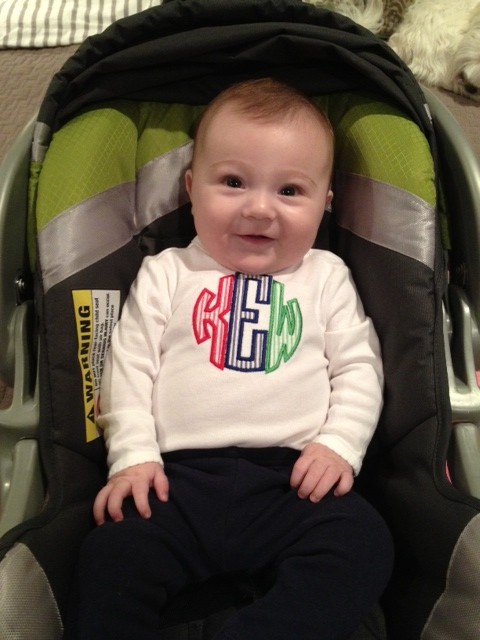
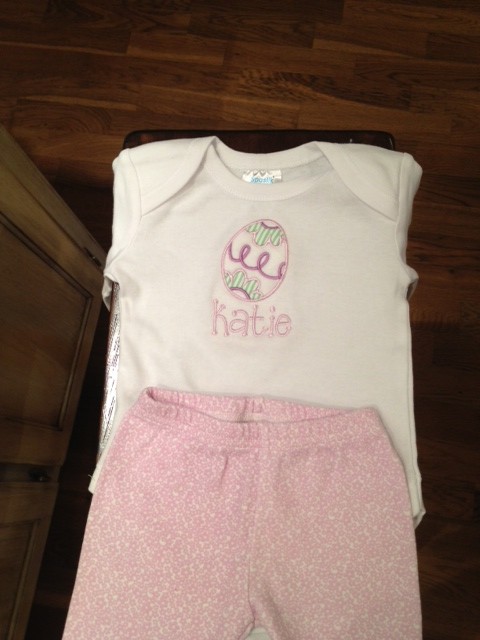
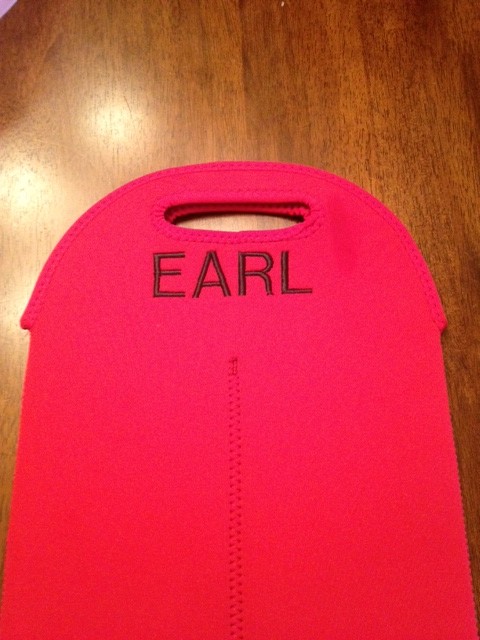
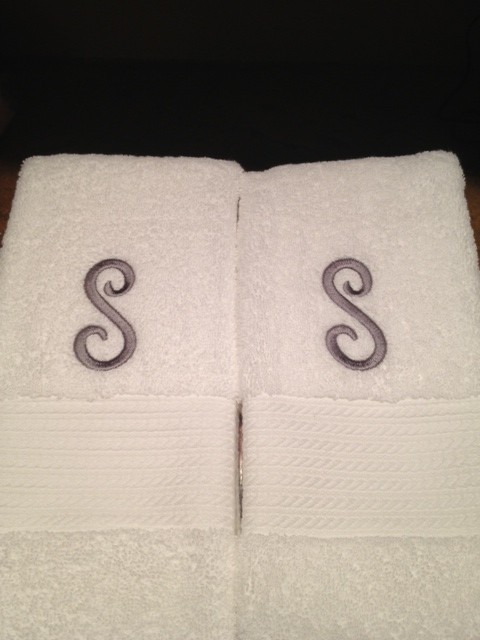
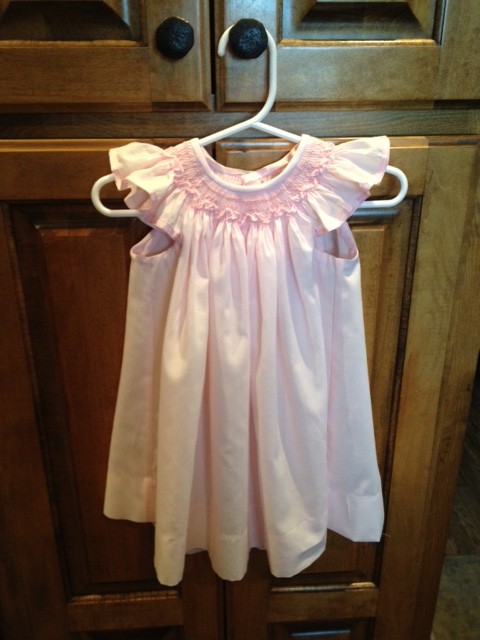
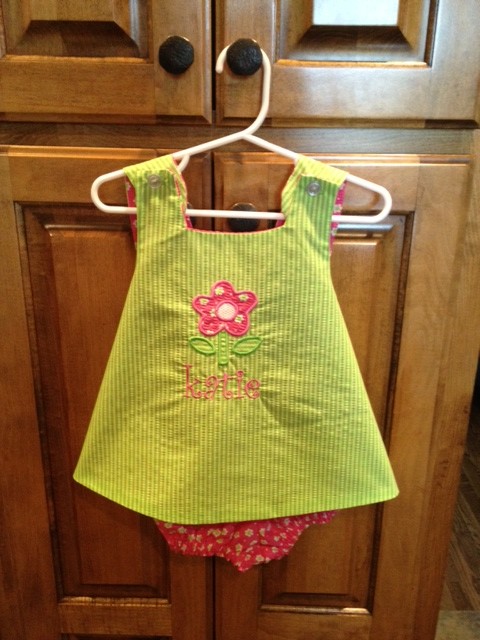
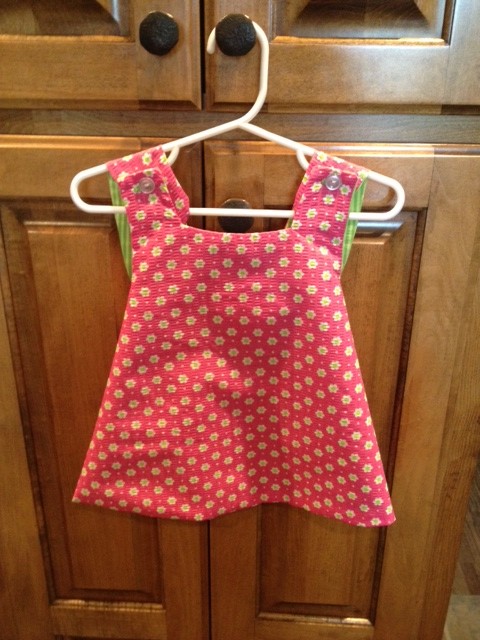
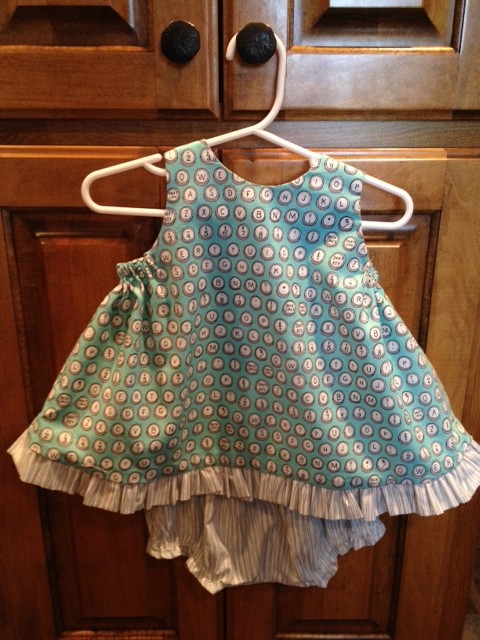
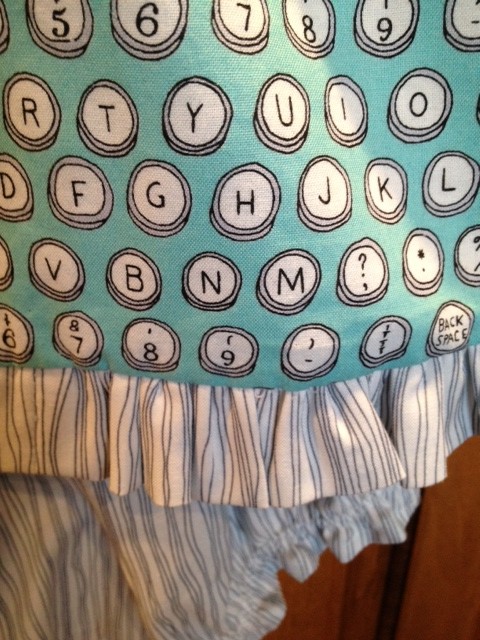
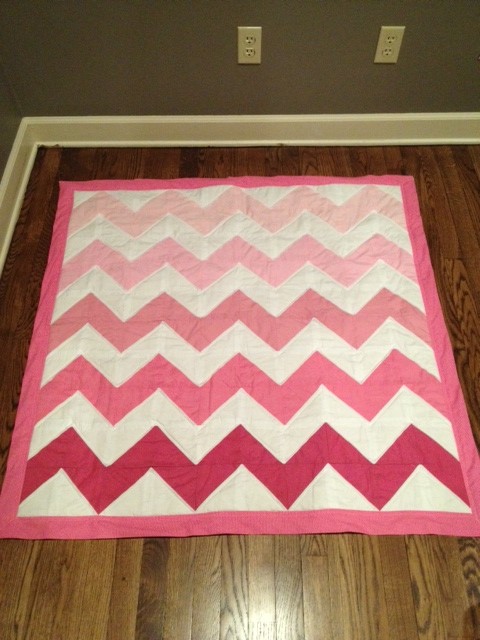
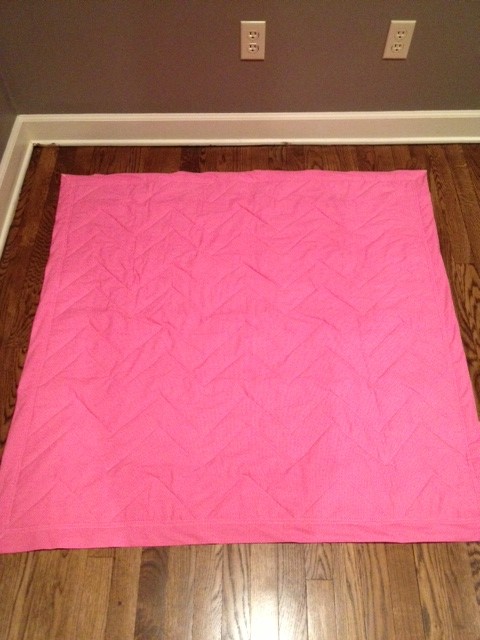
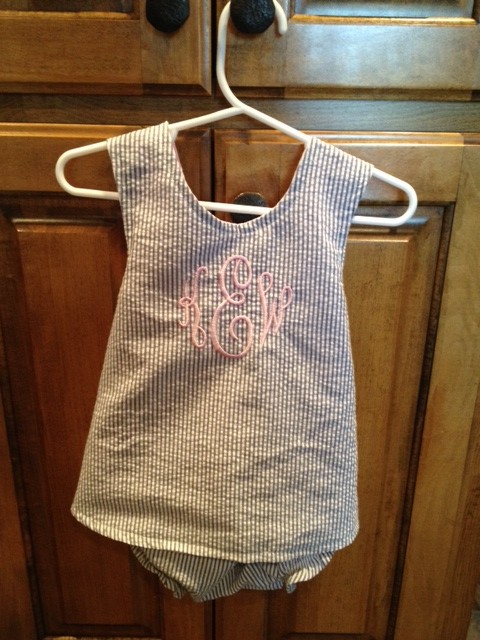
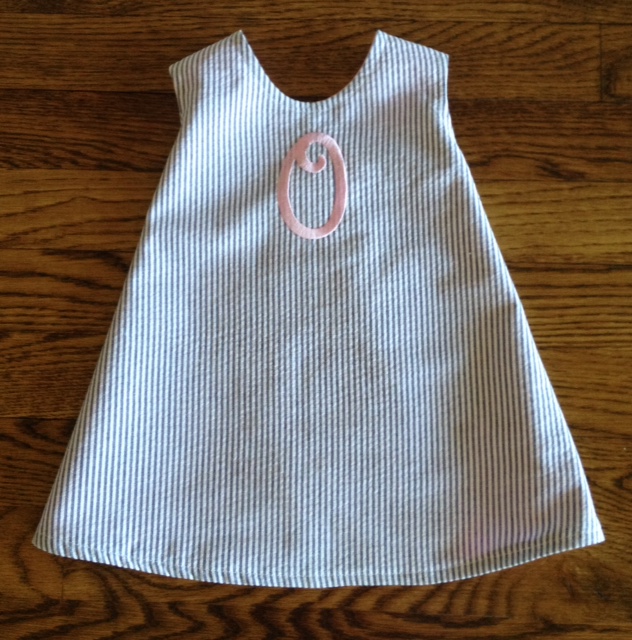
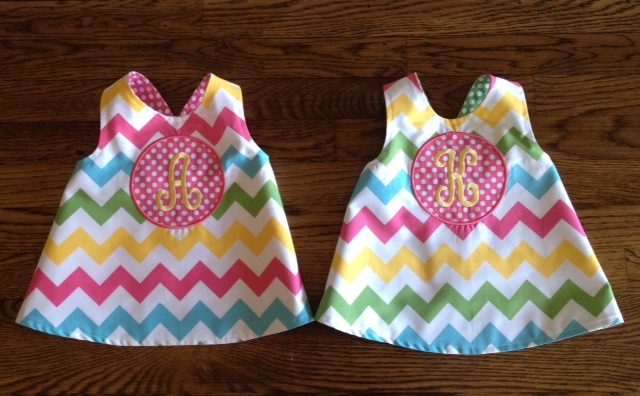
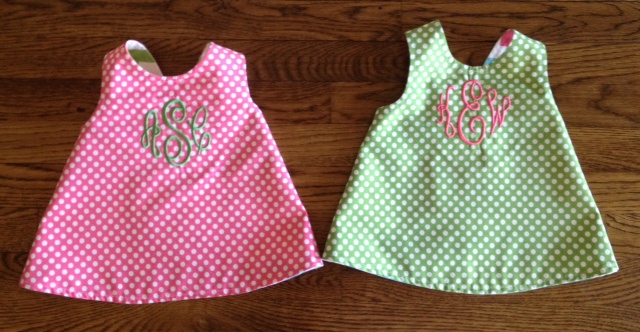
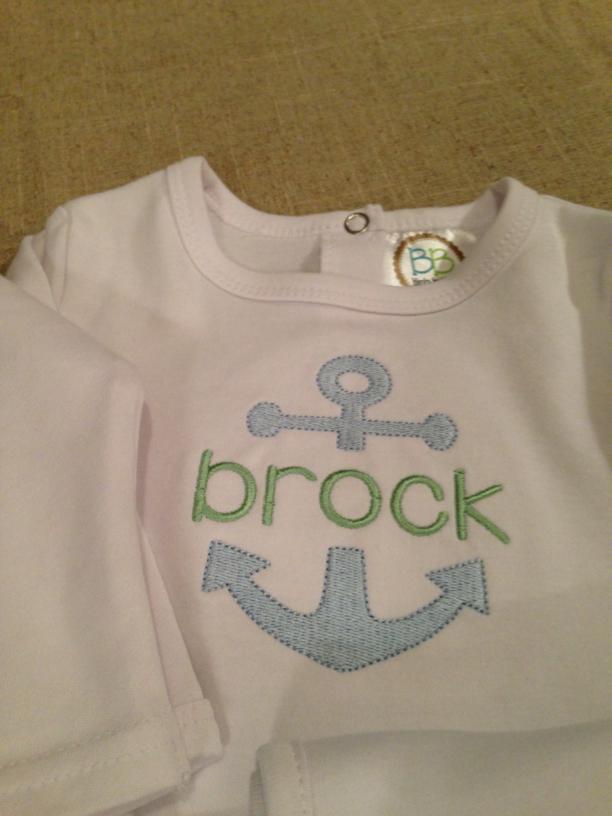
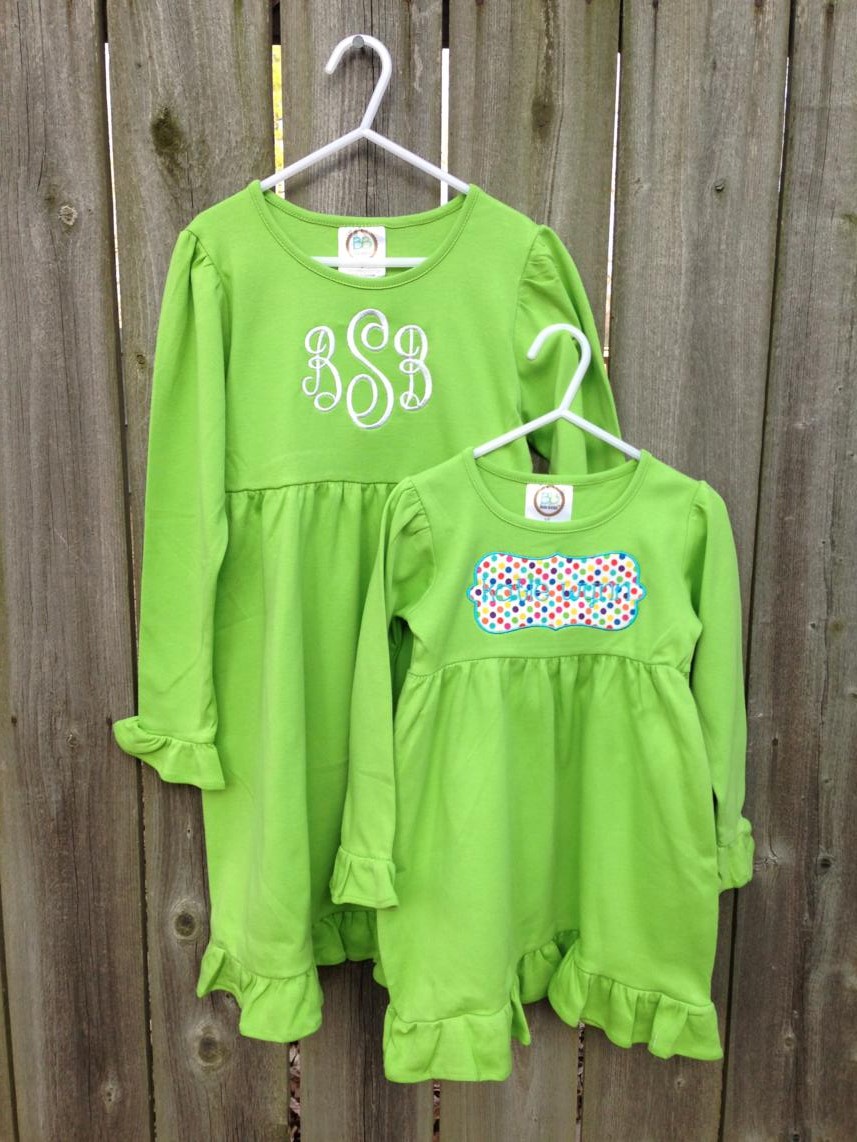
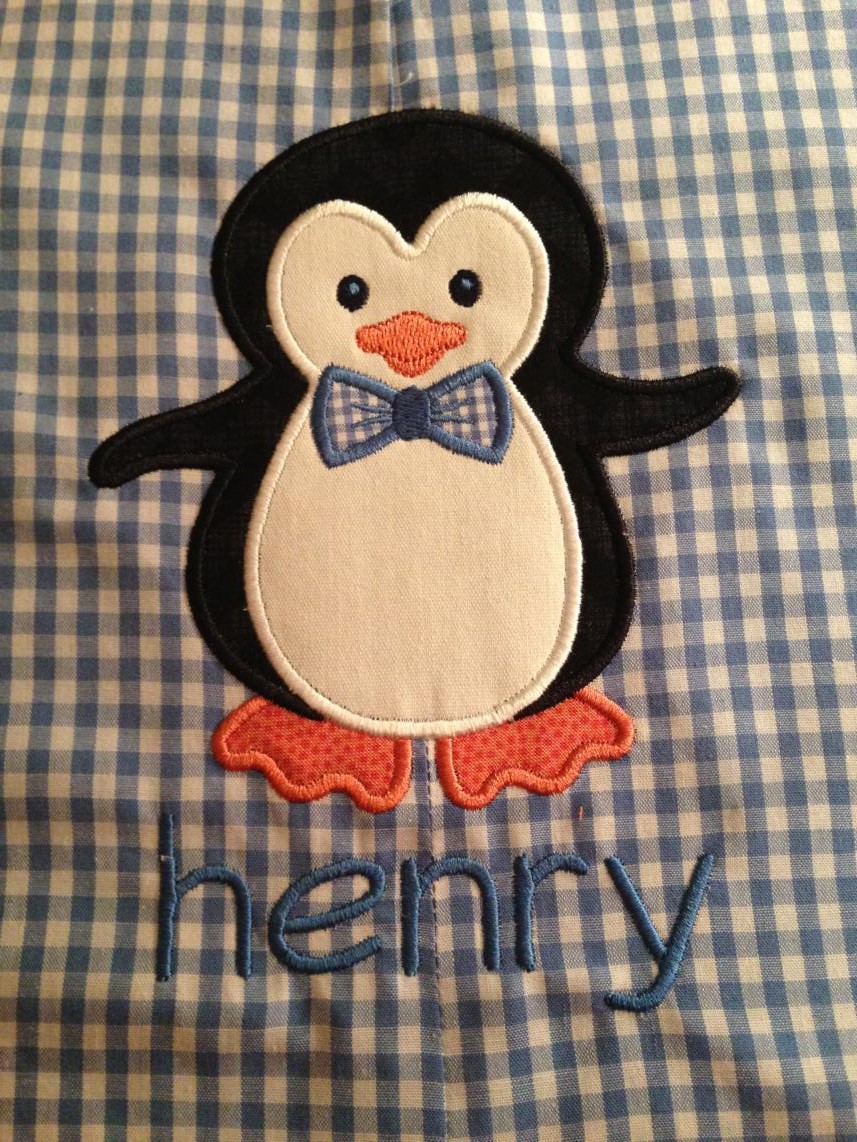
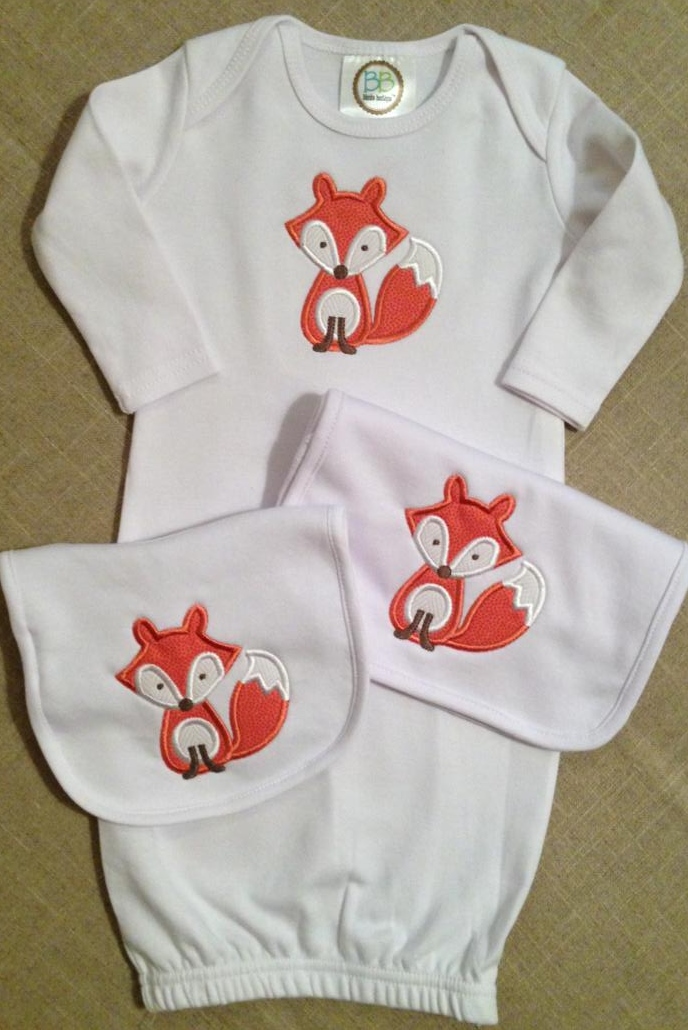
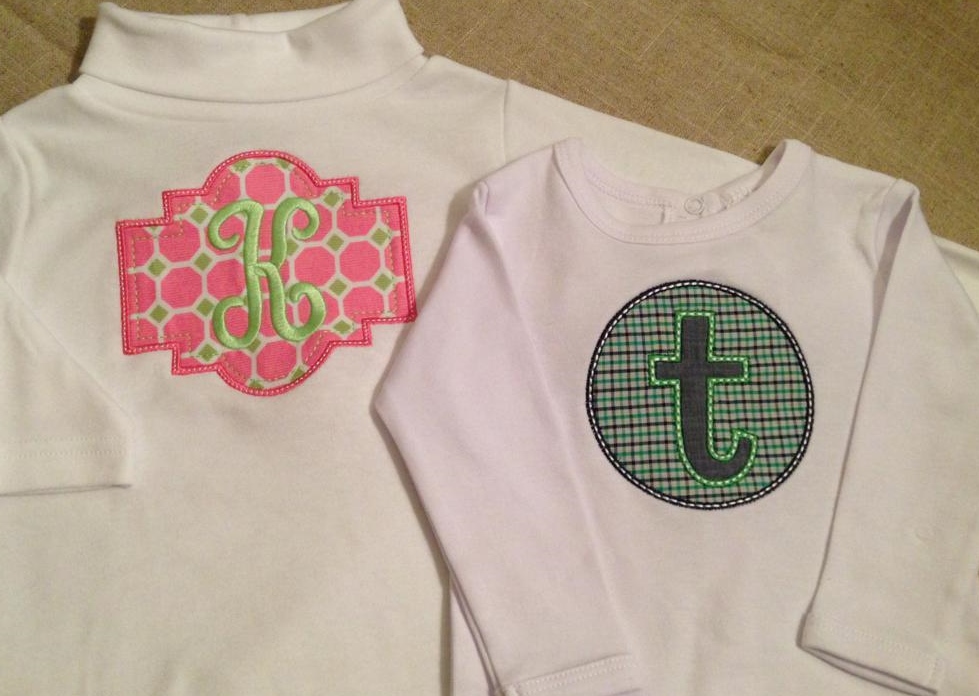
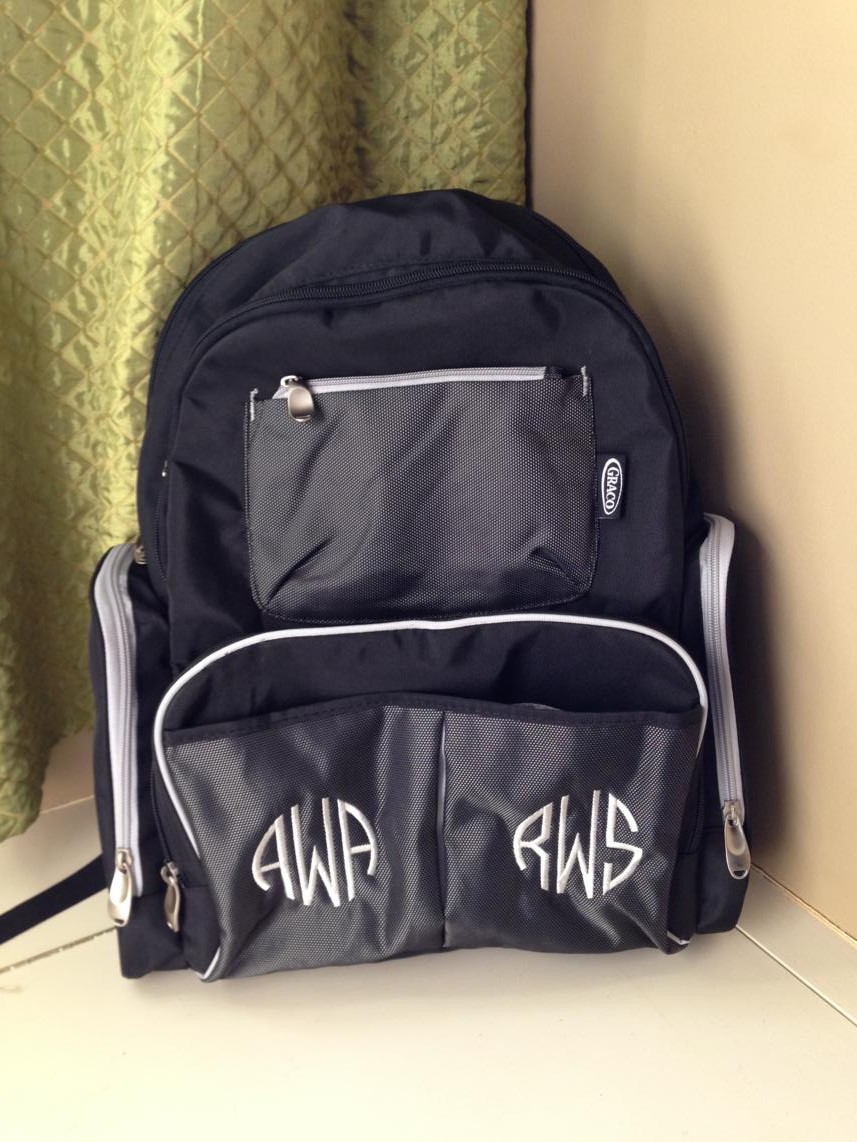
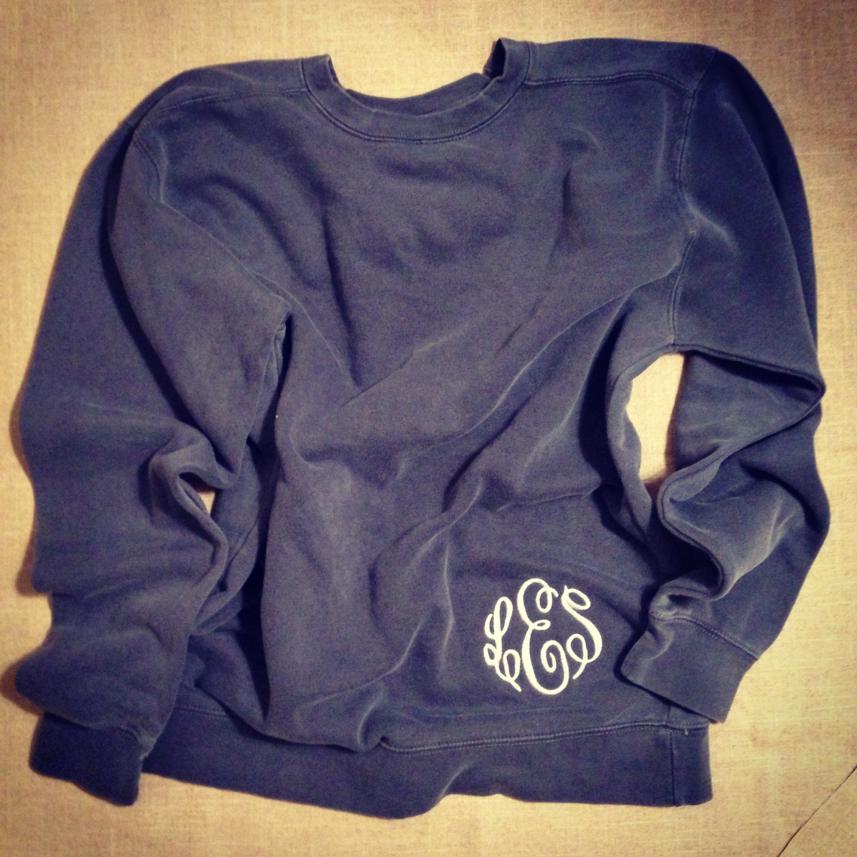
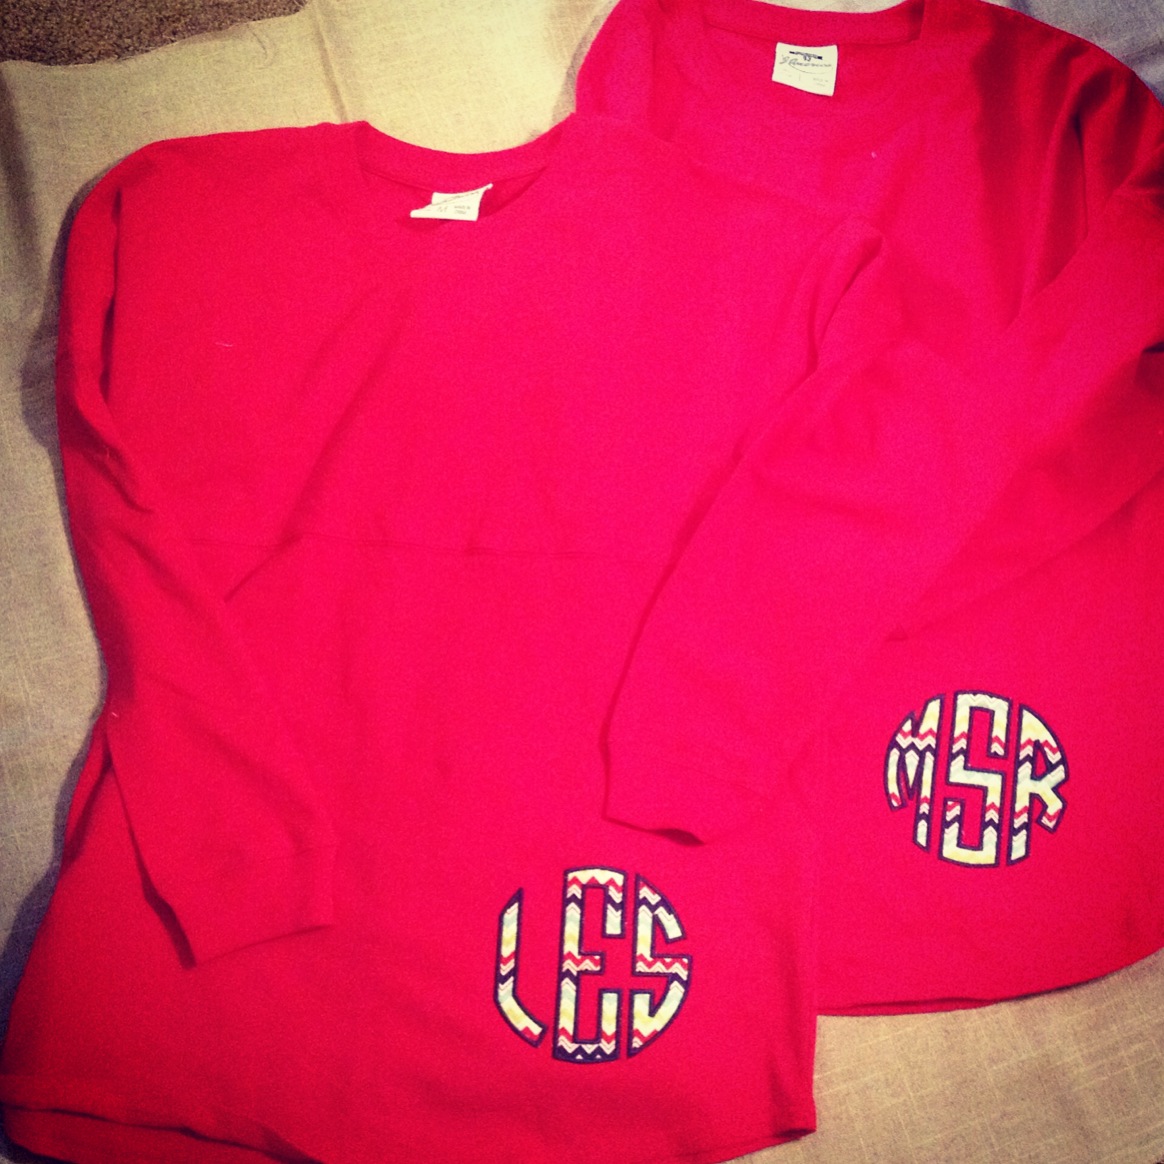
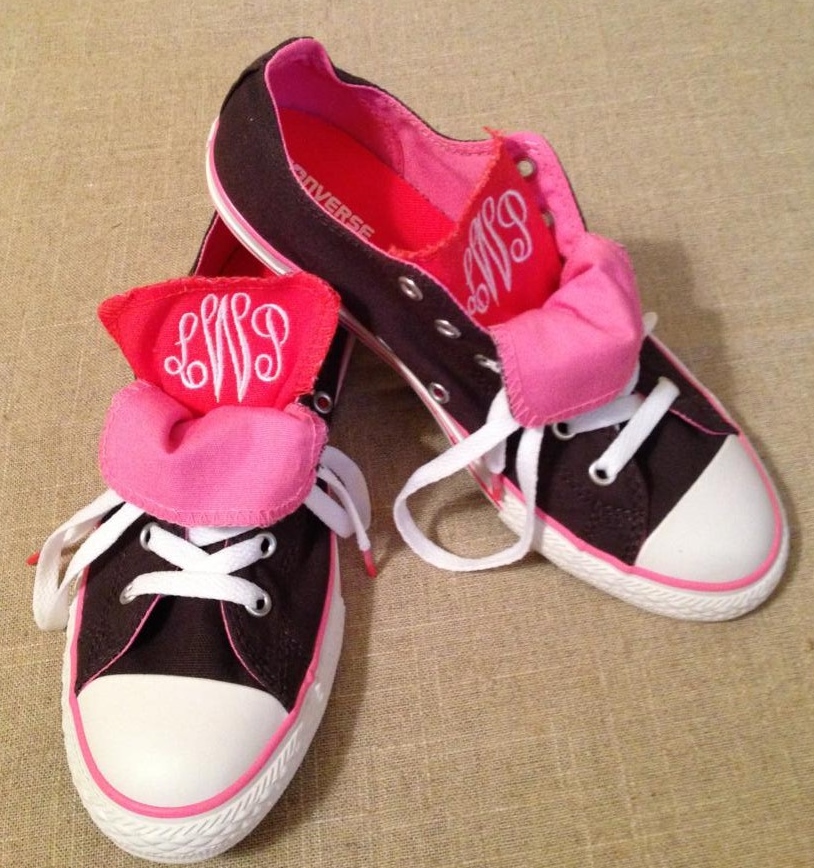
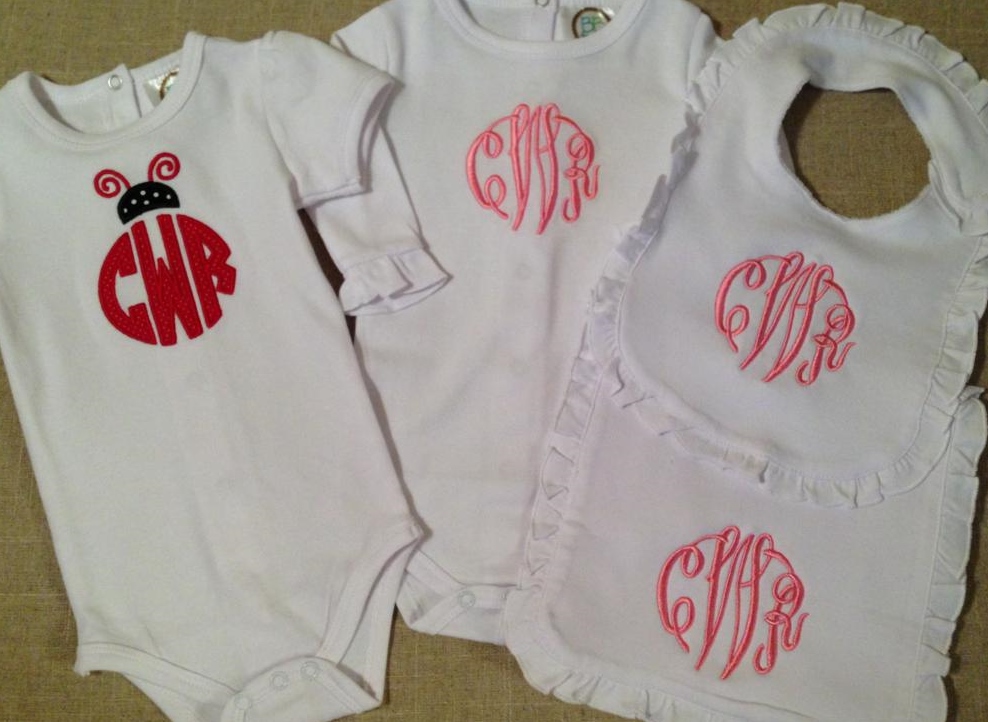
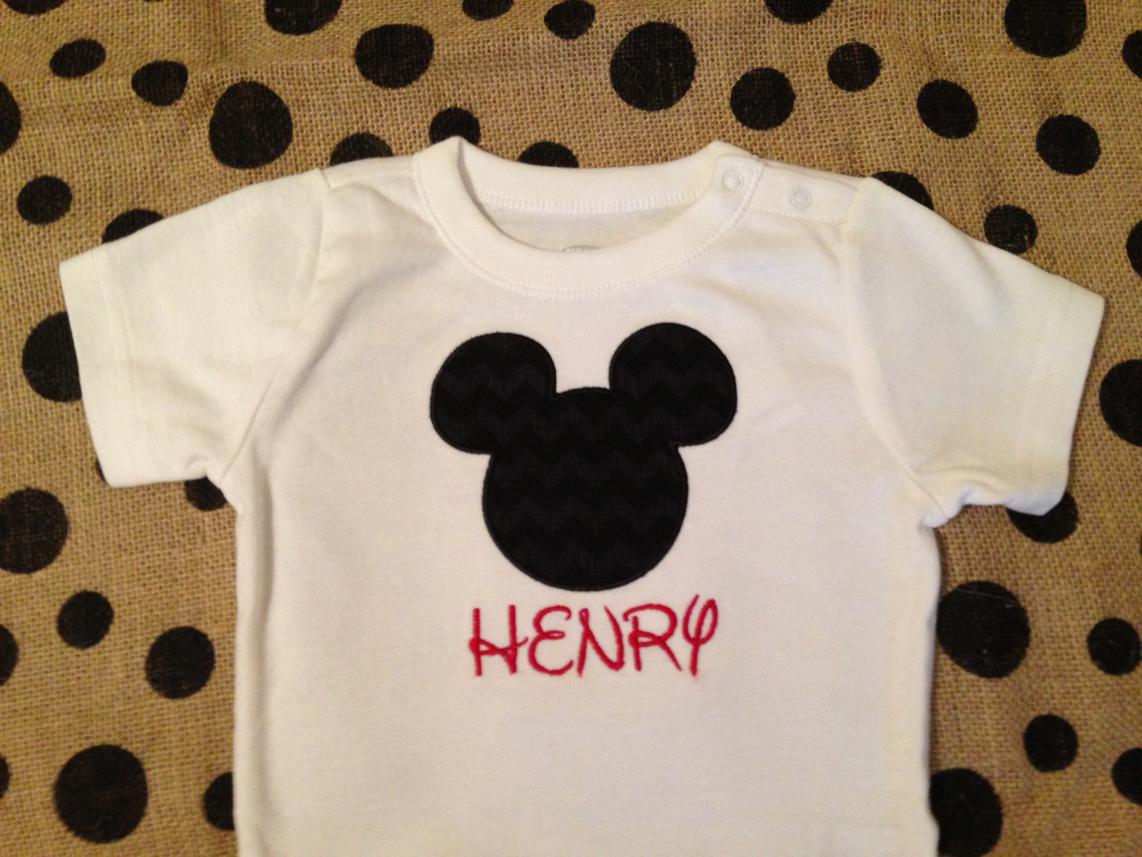
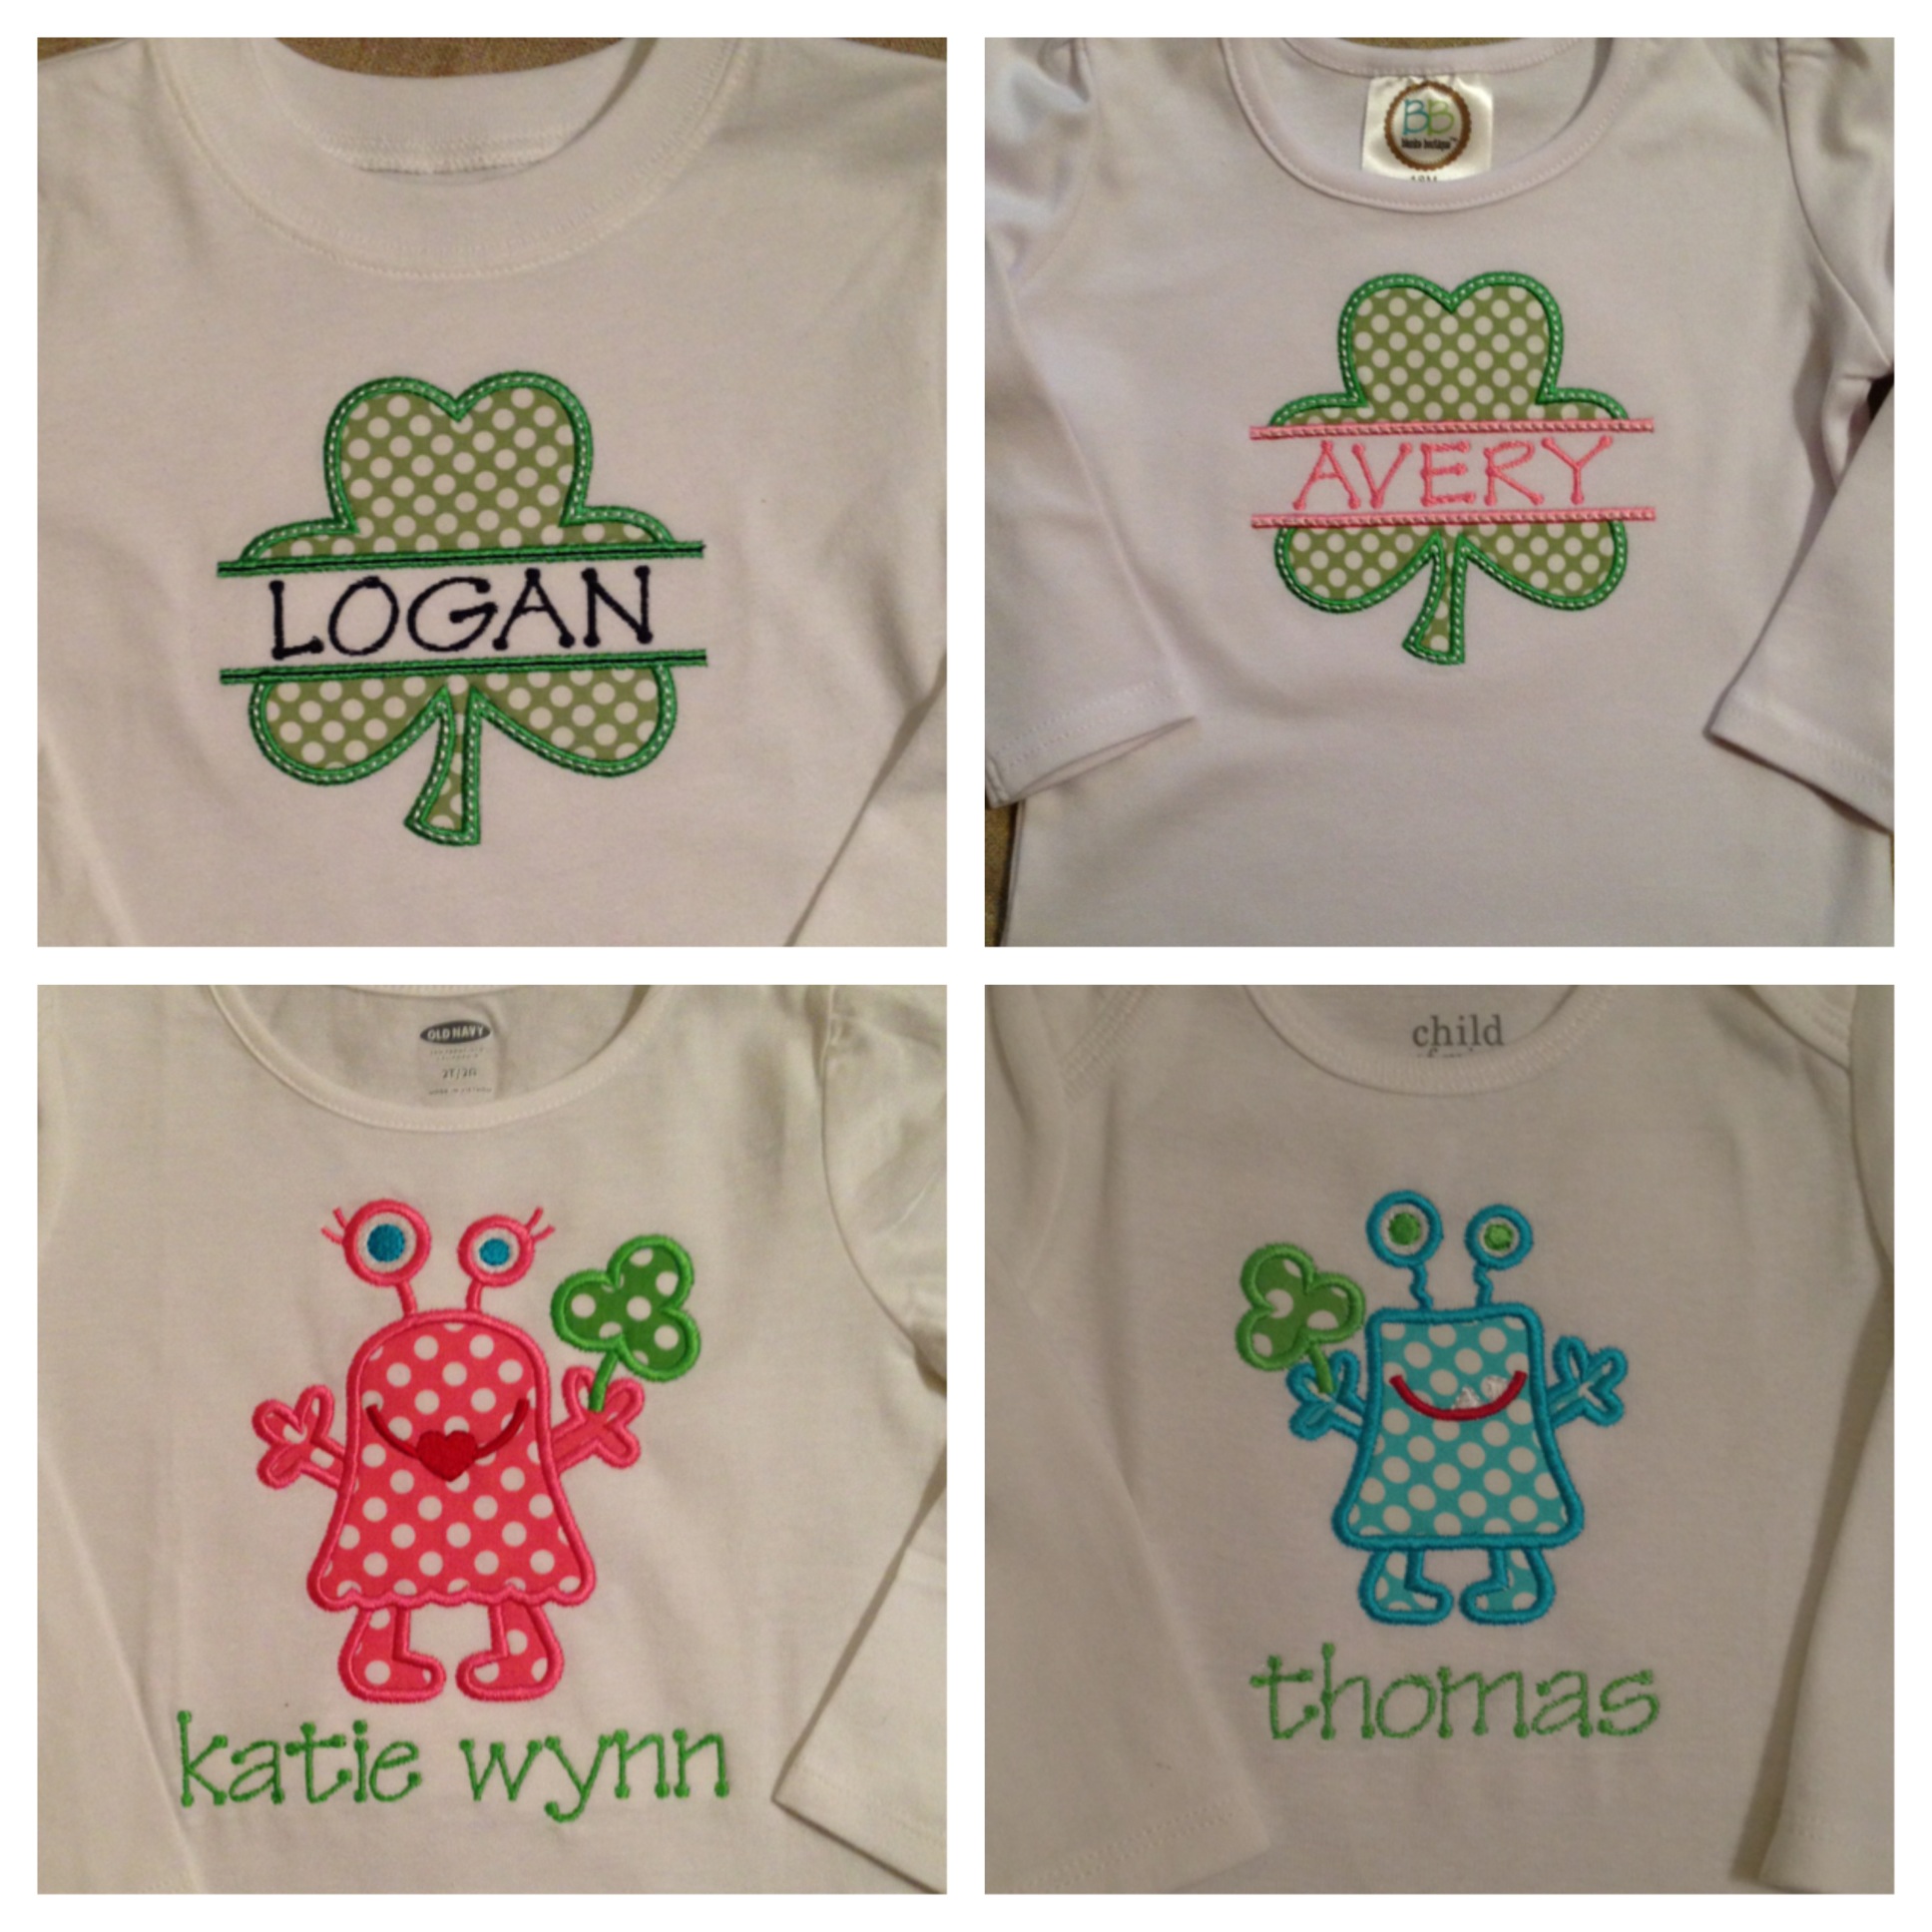
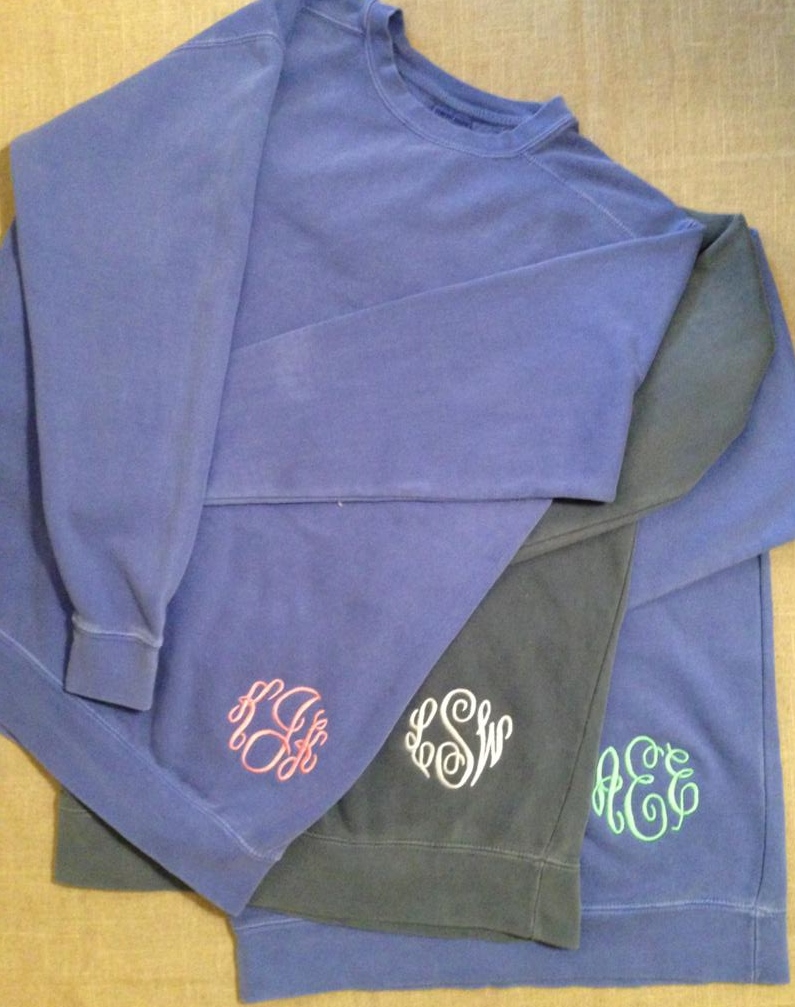
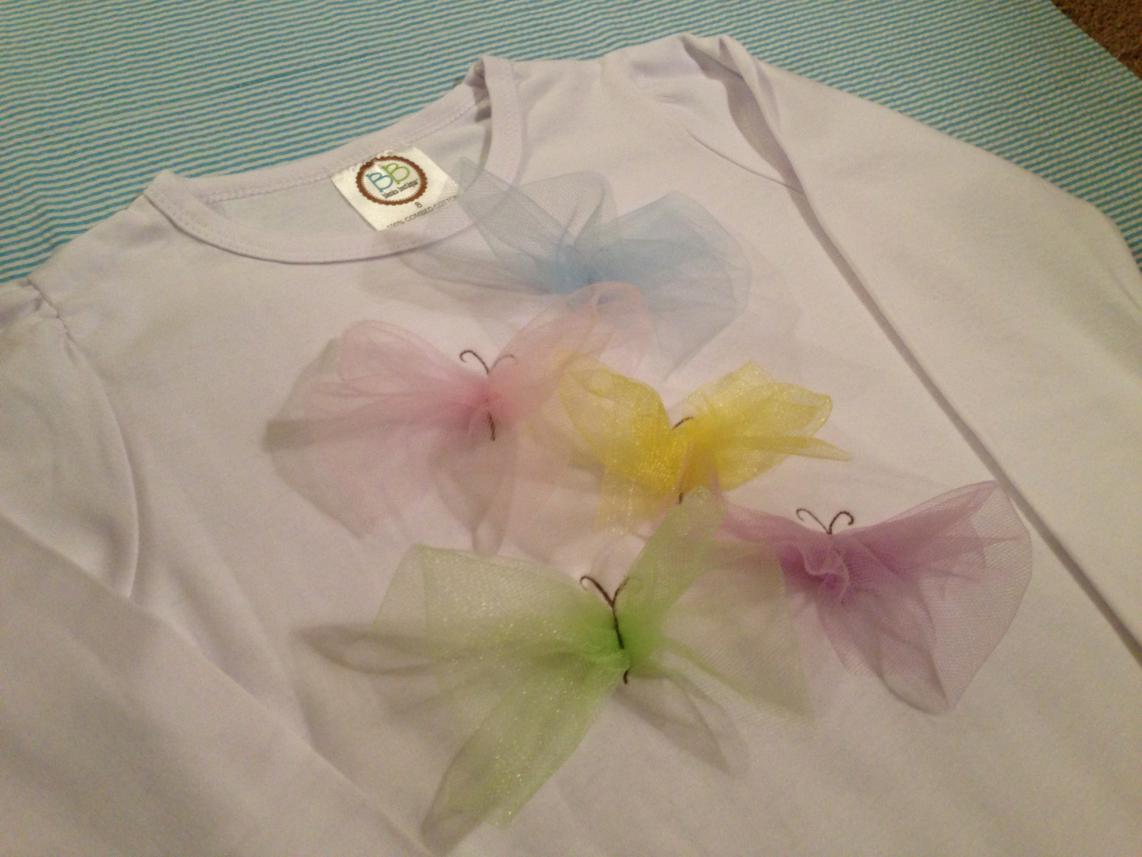
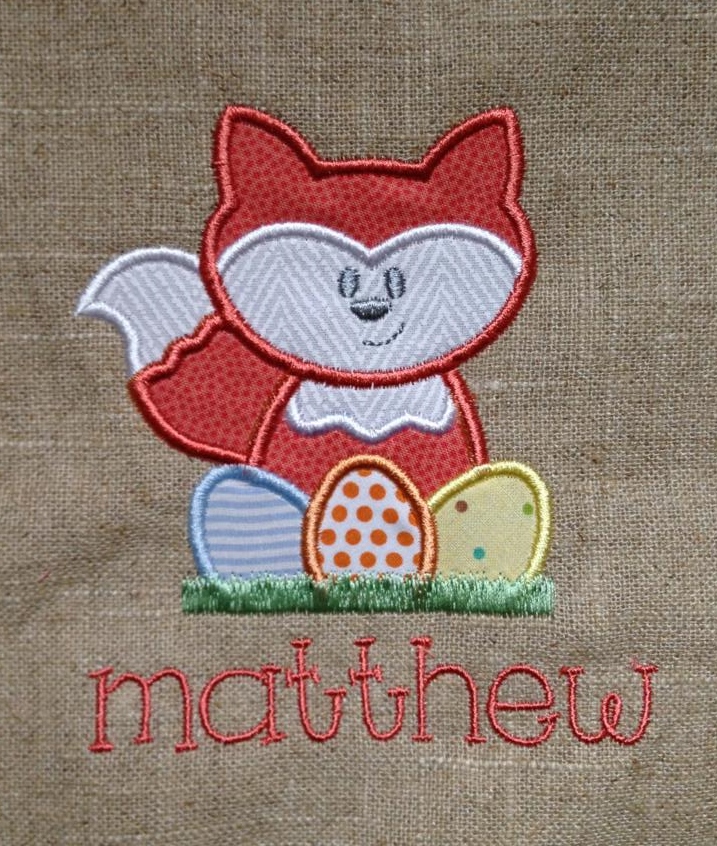
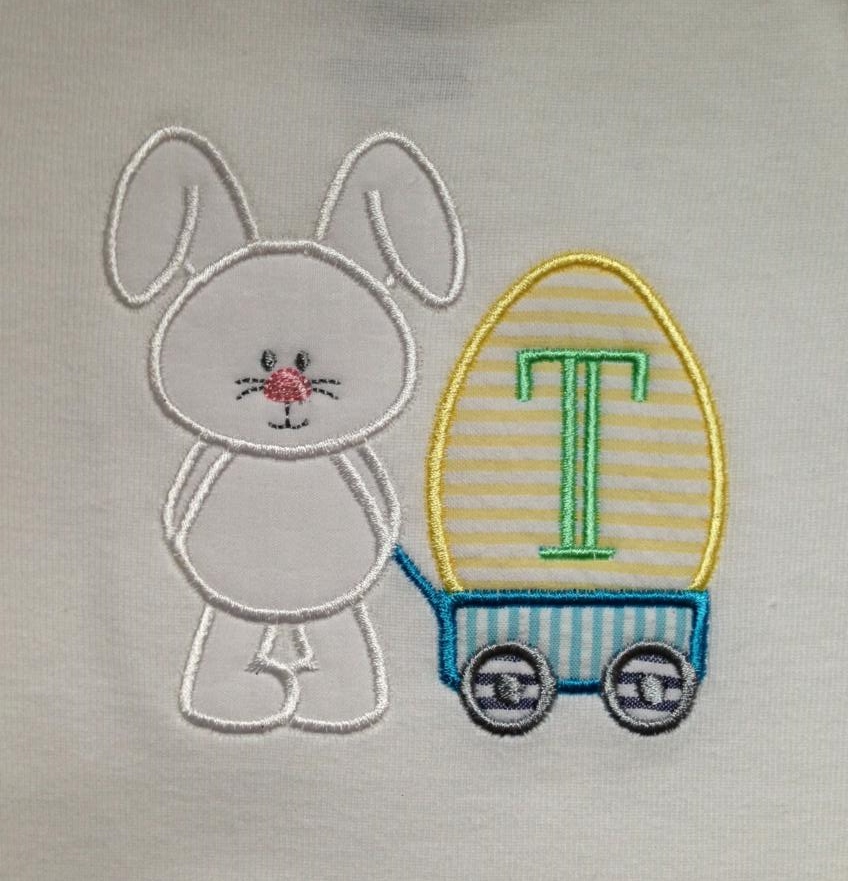
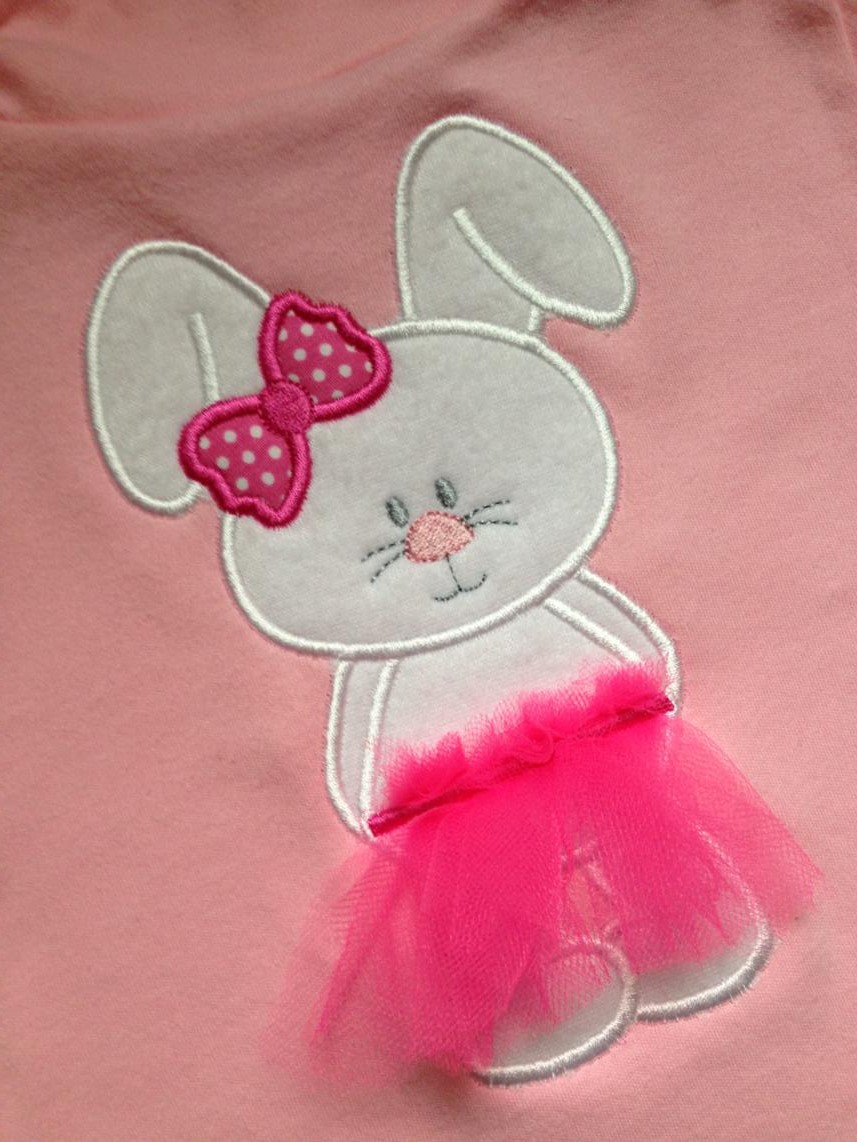
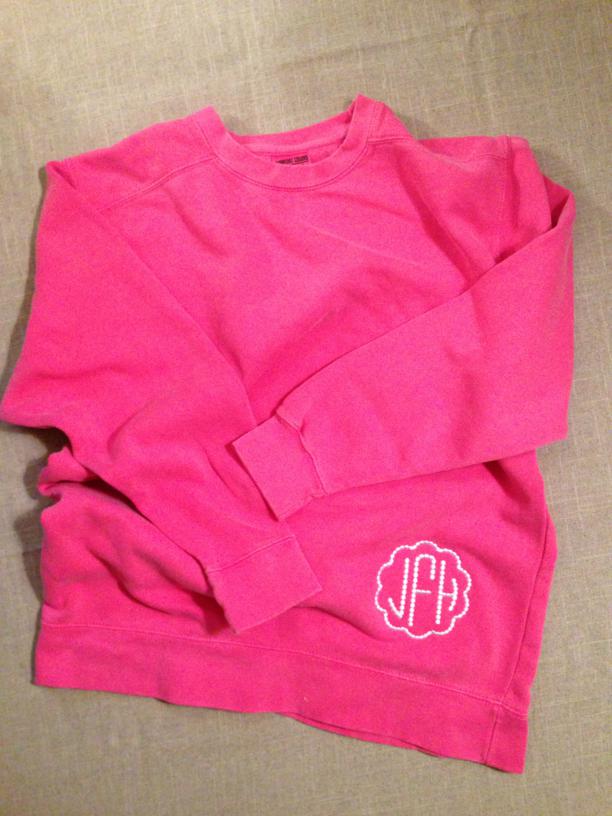
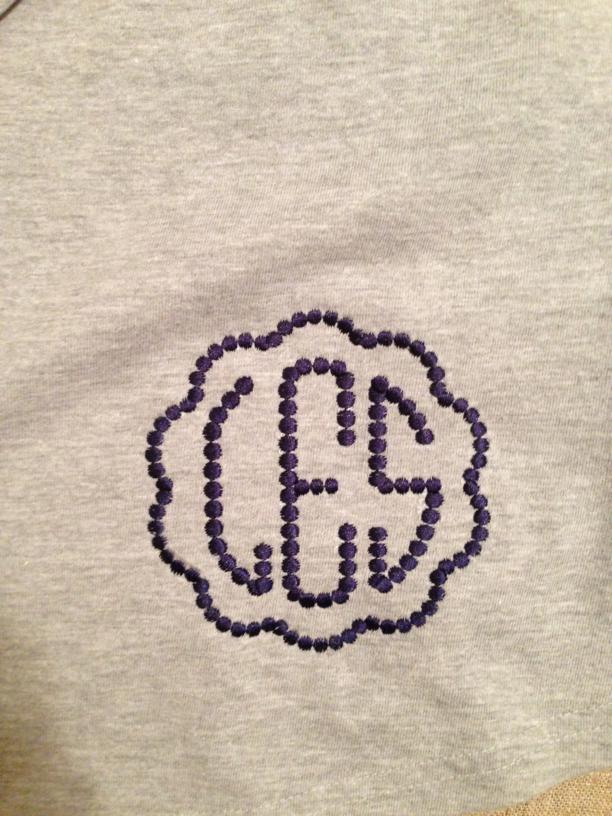
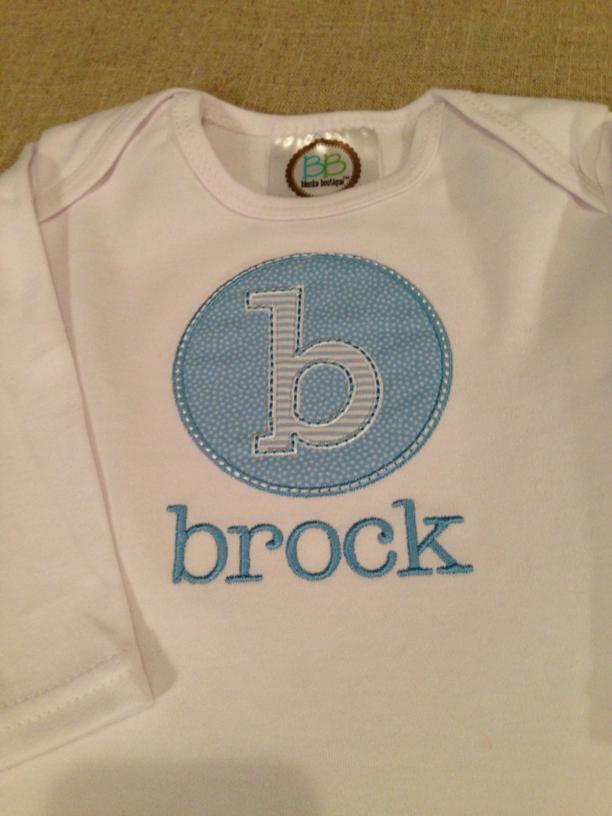
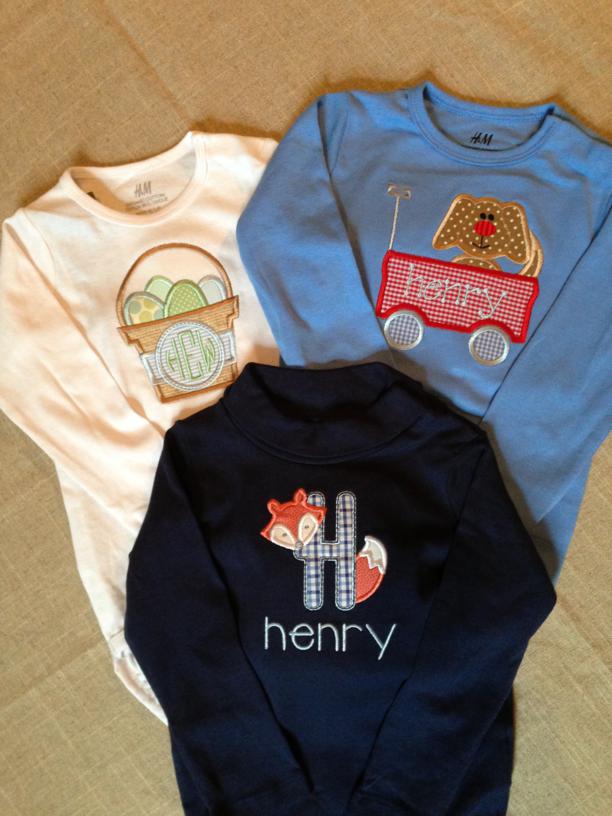
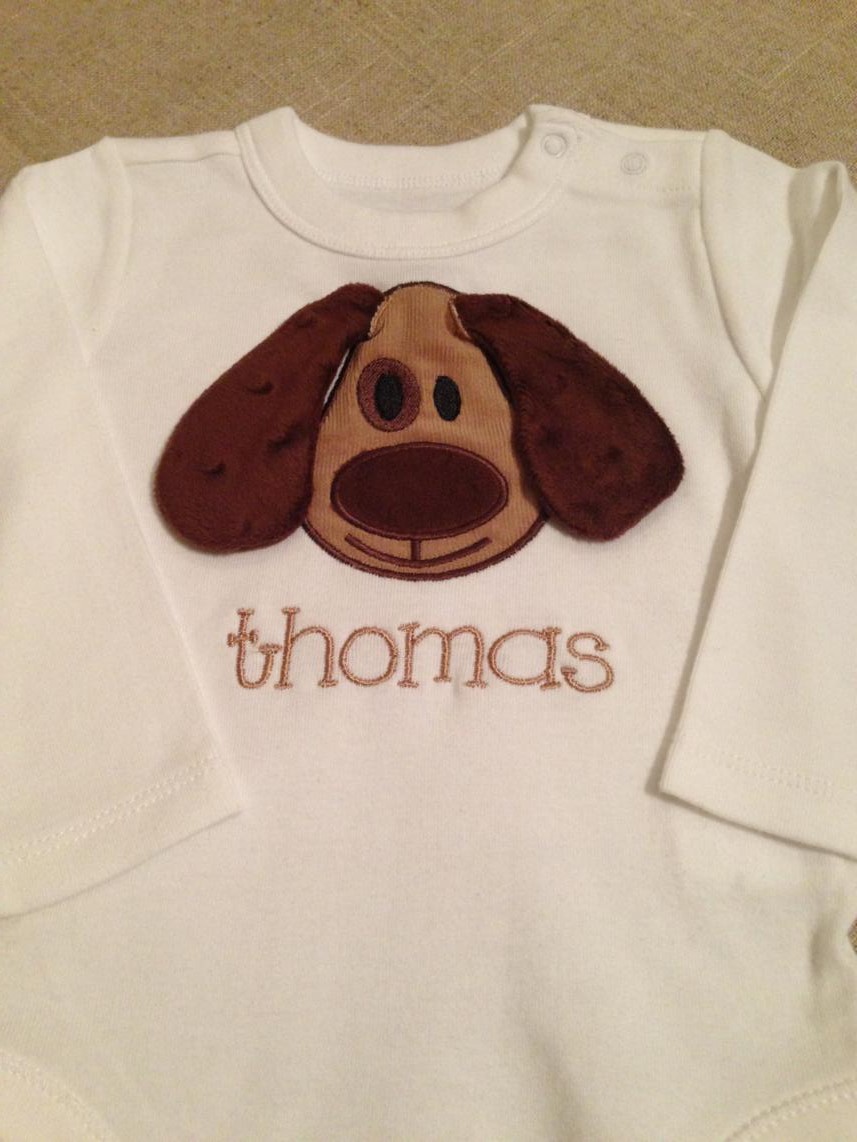
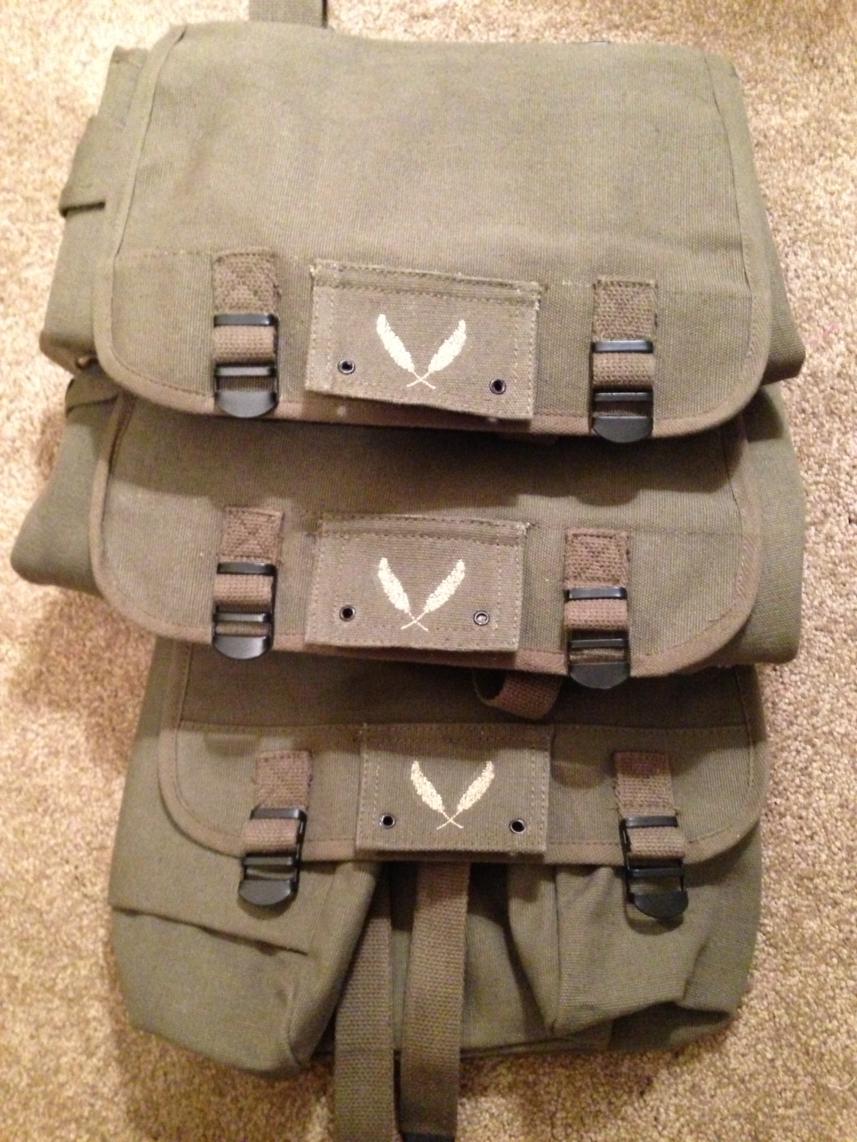
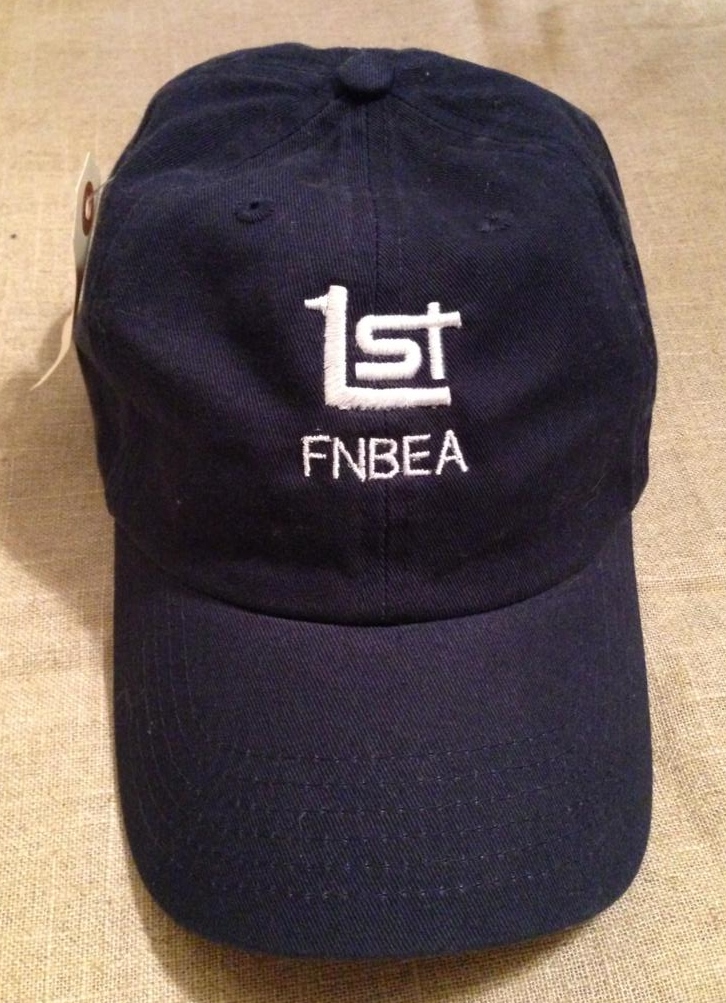
Scroll through the gallery below to see some examples of things we've already done.  We are loving our new machine and how much faster we are able to crank designs out!

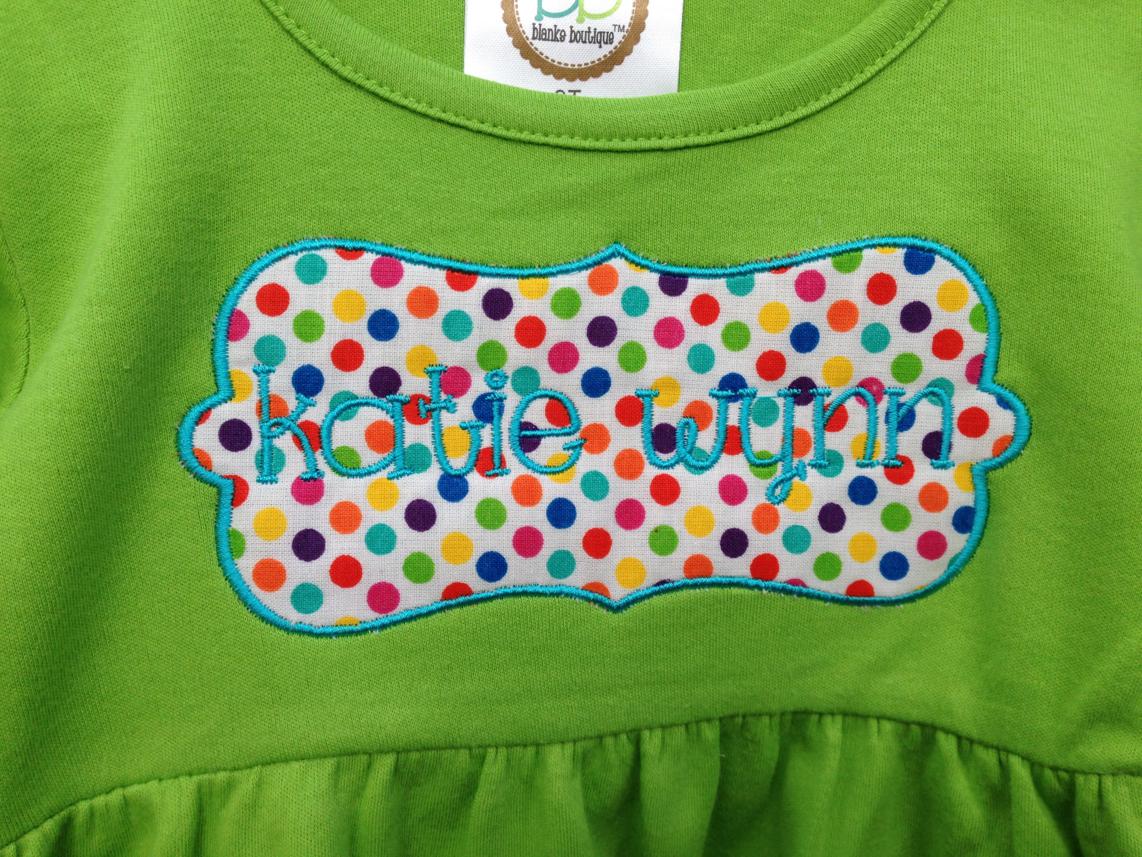
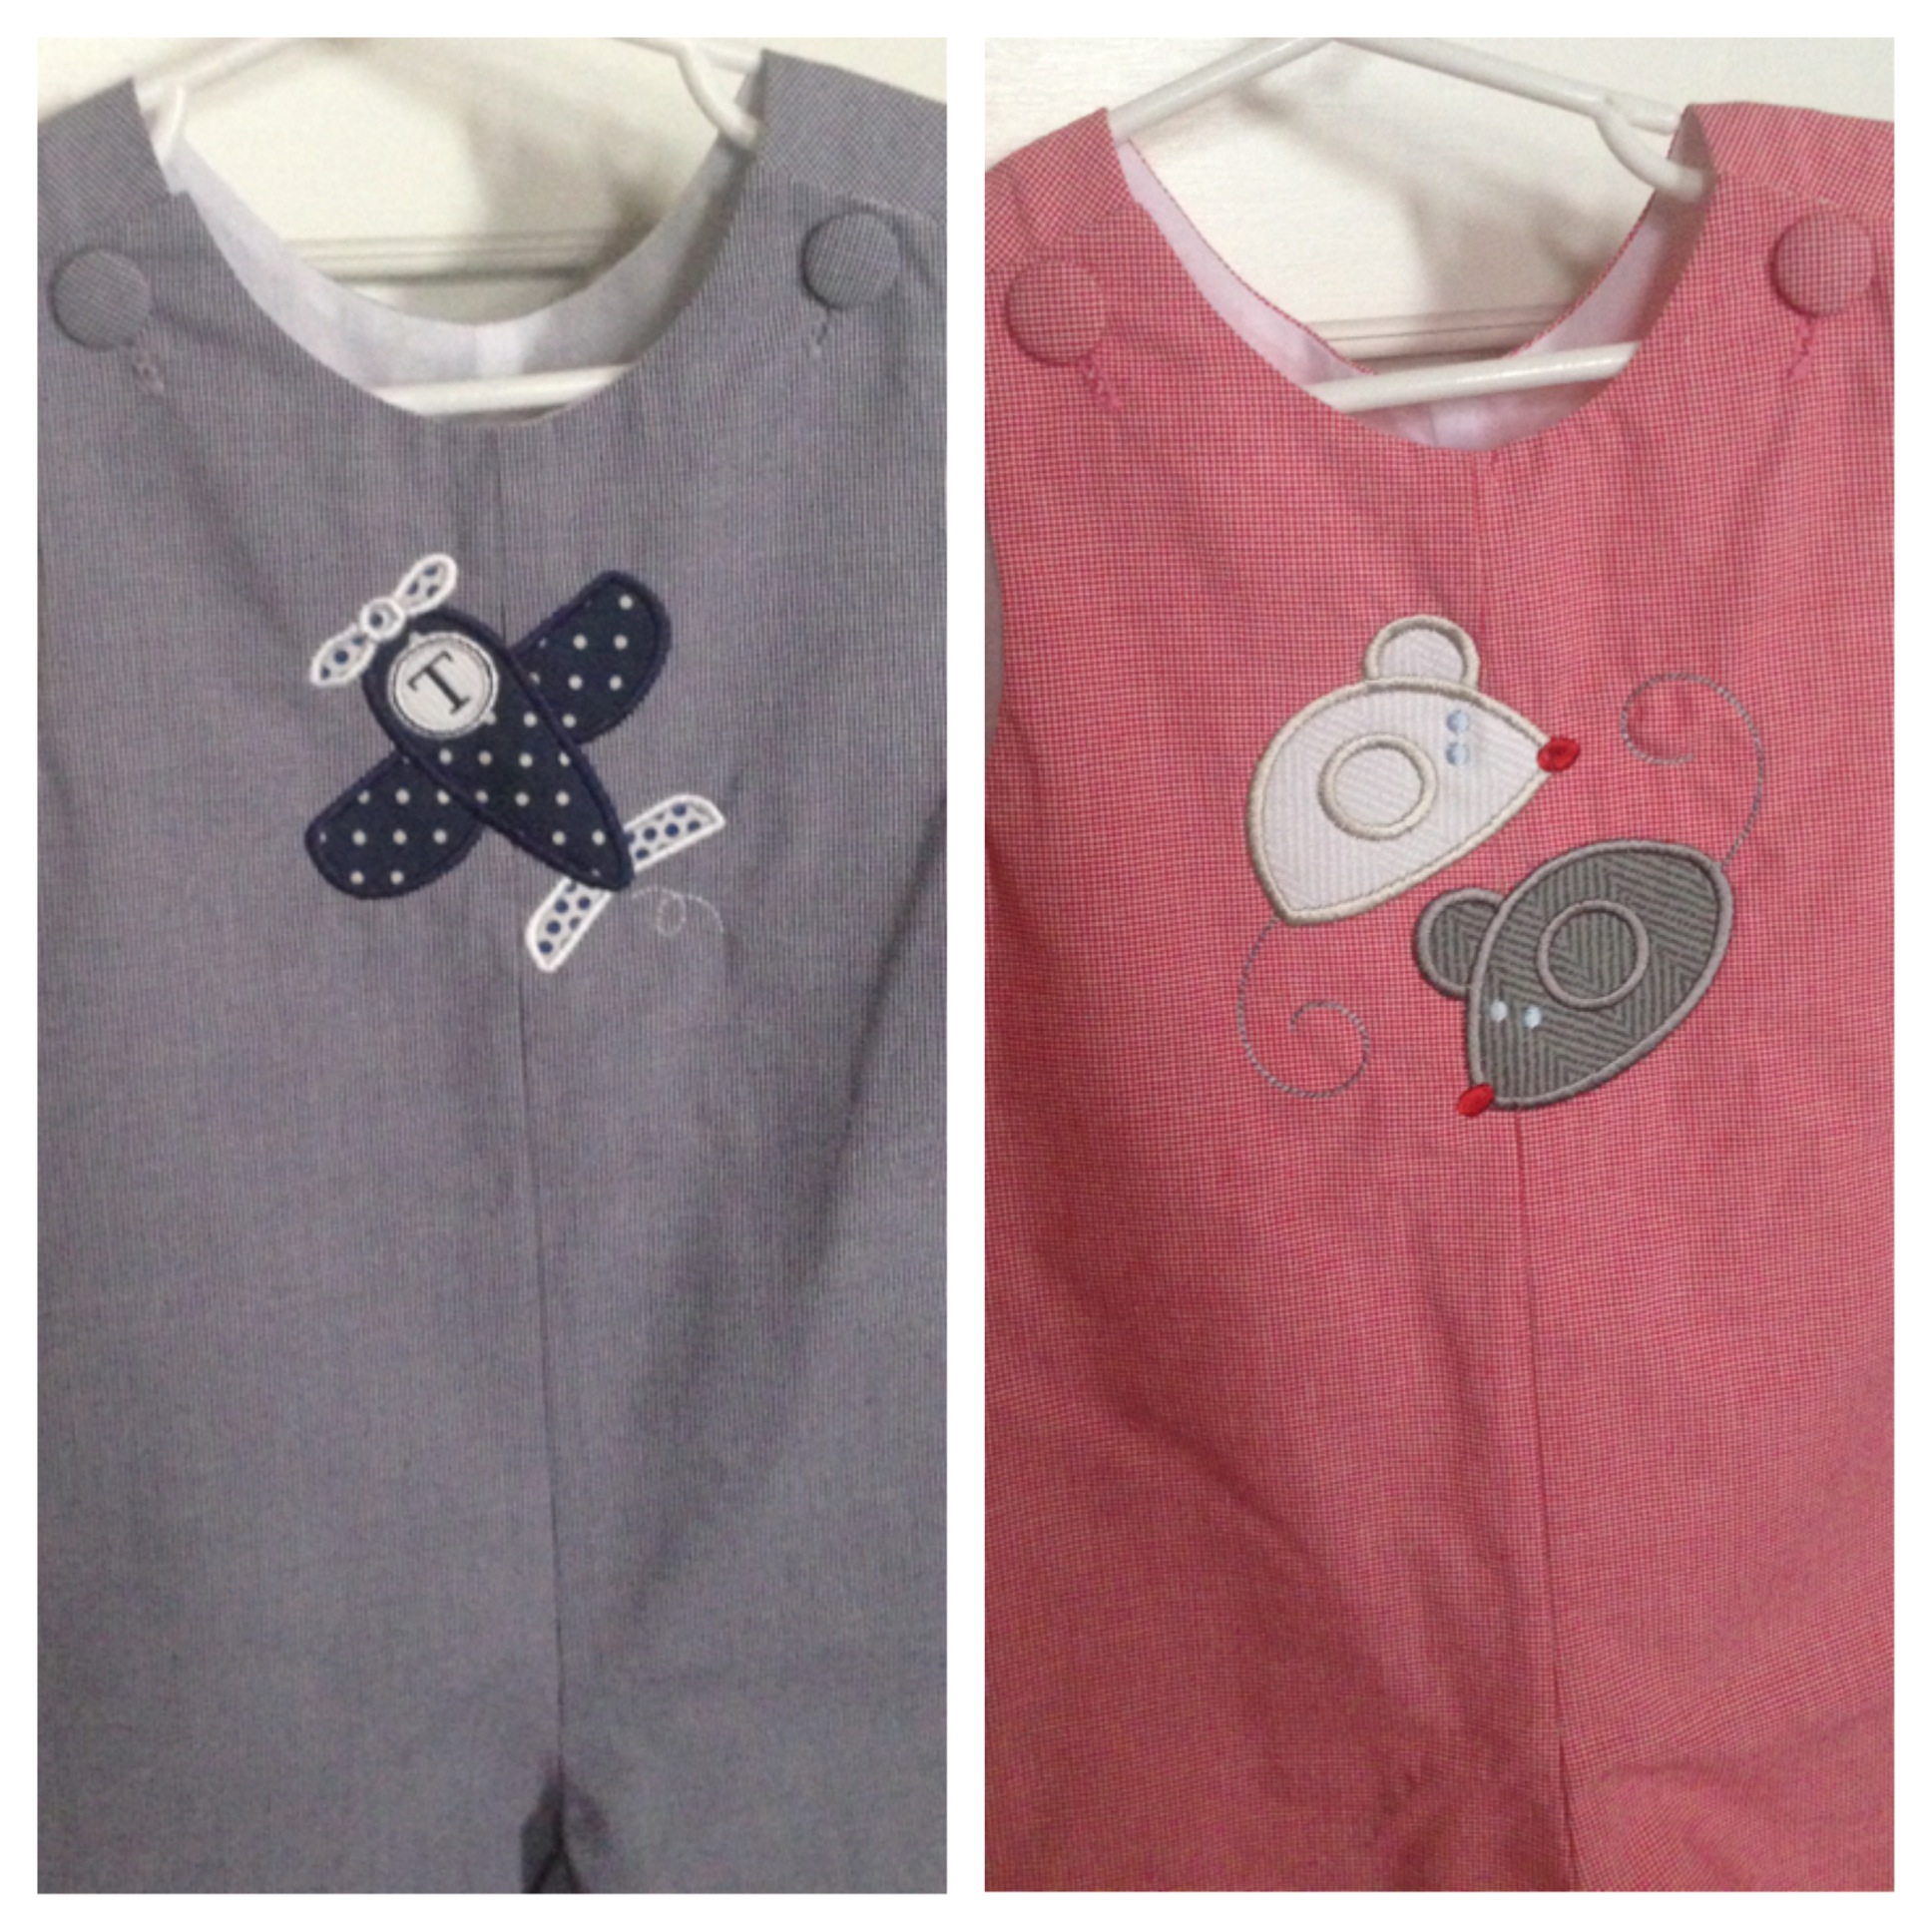
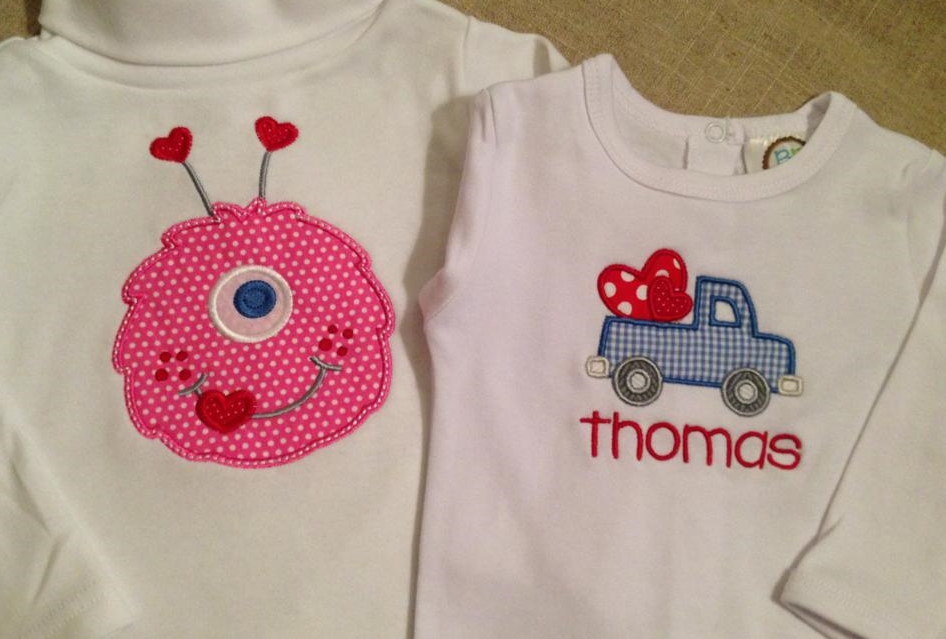
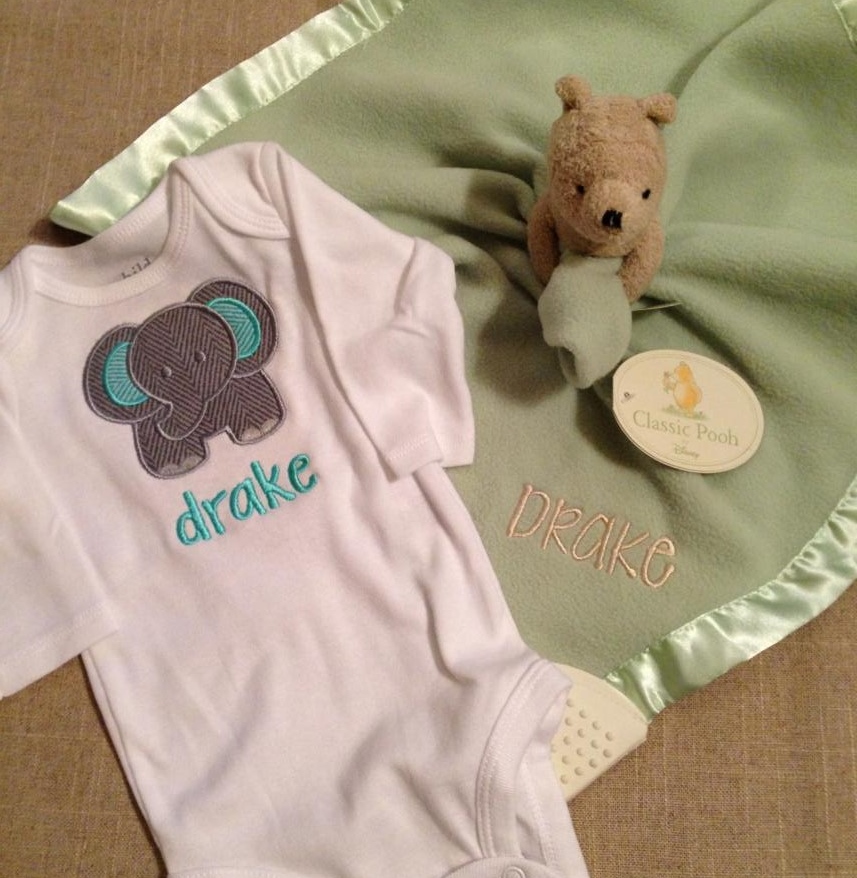
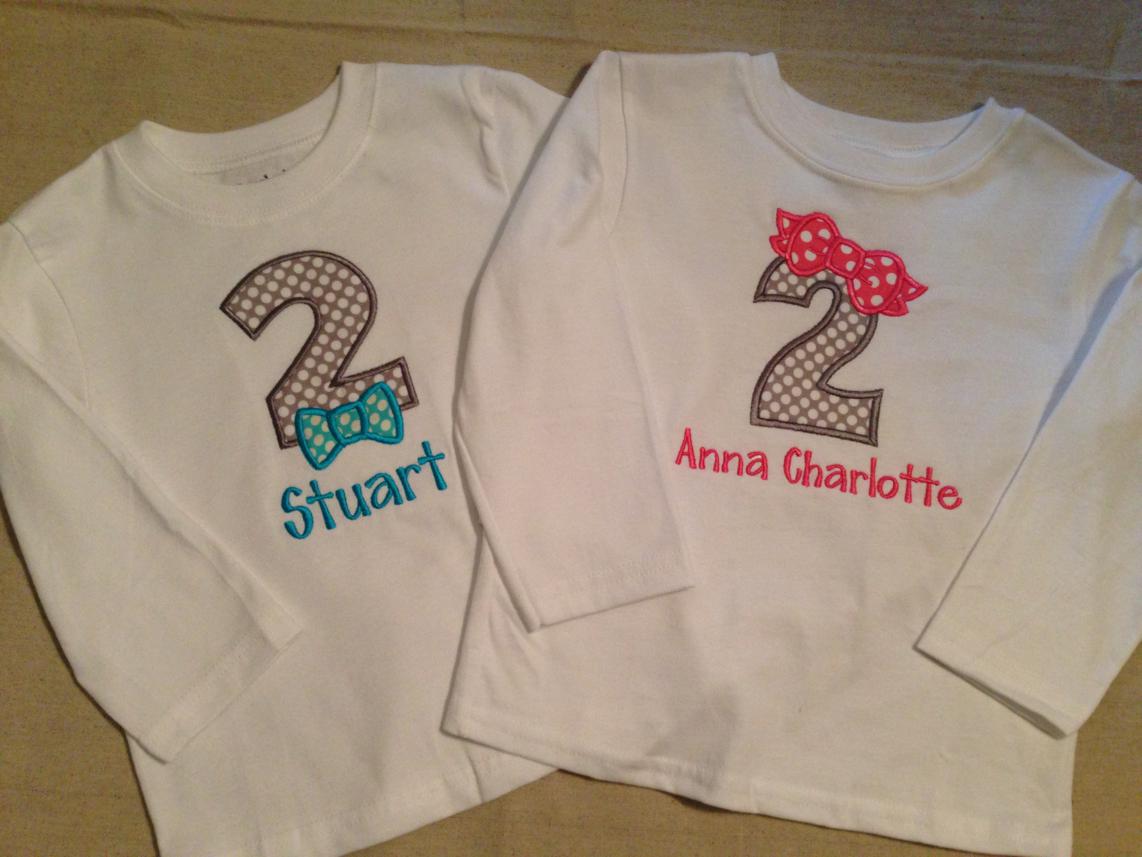
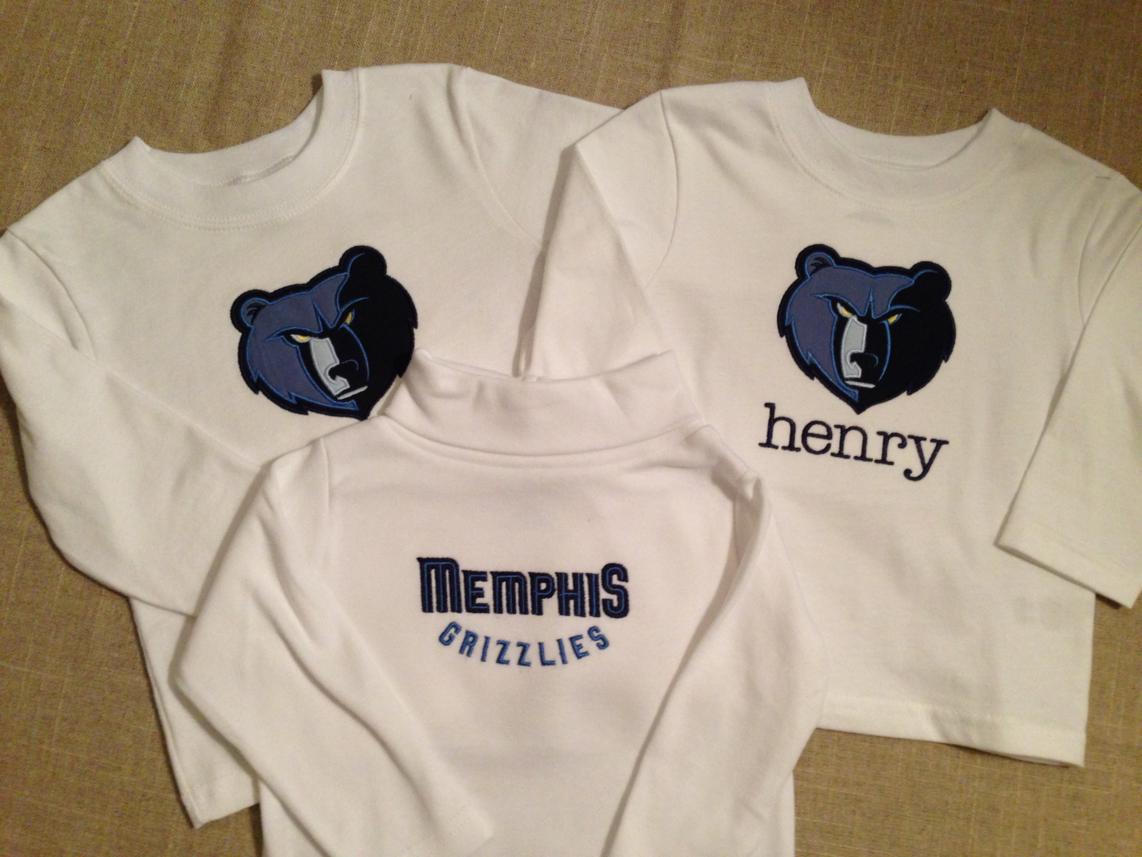
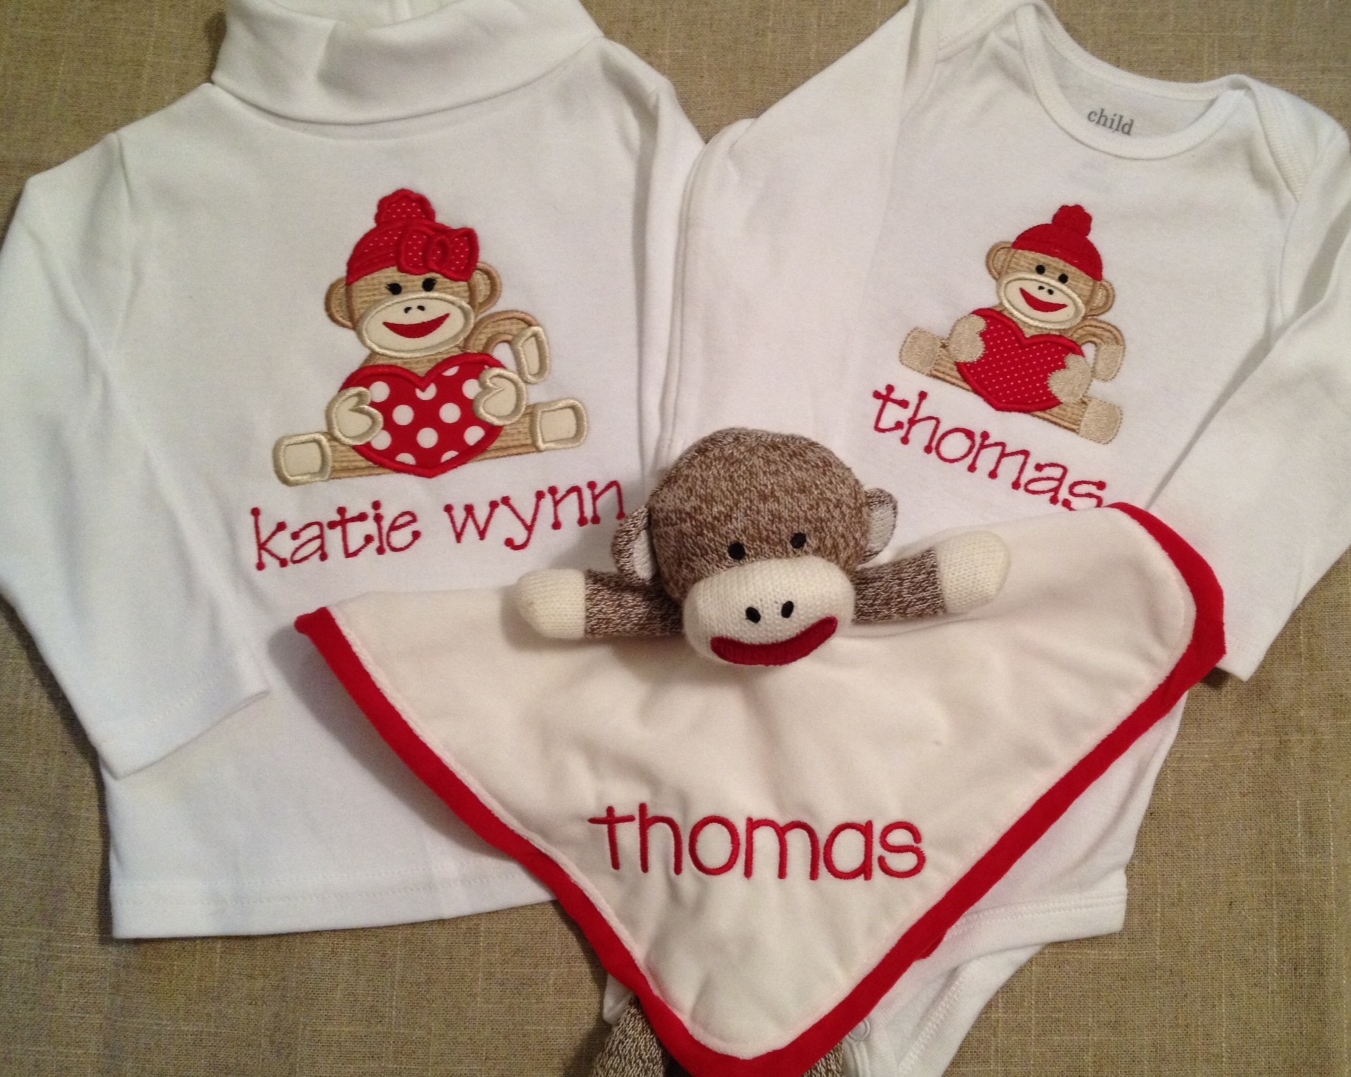
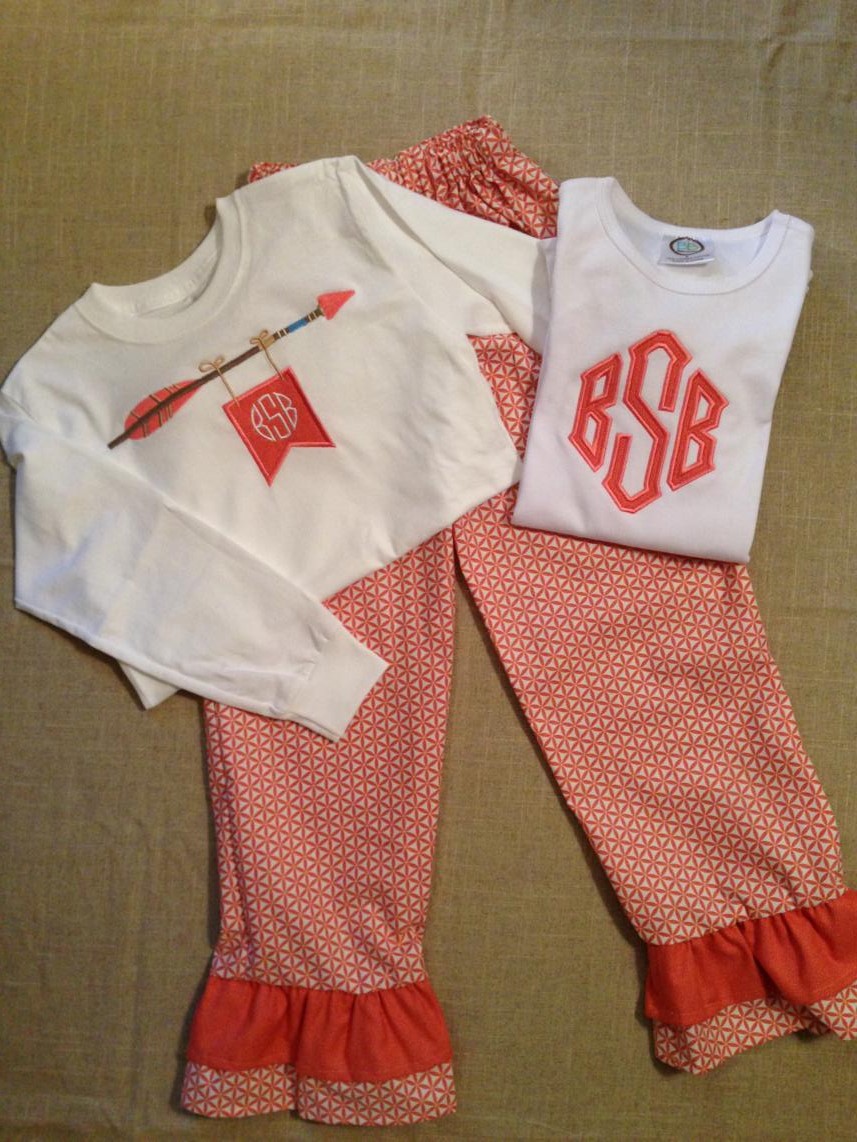
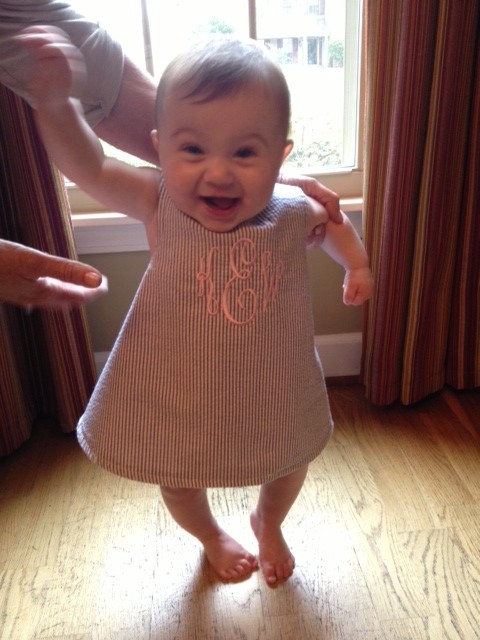
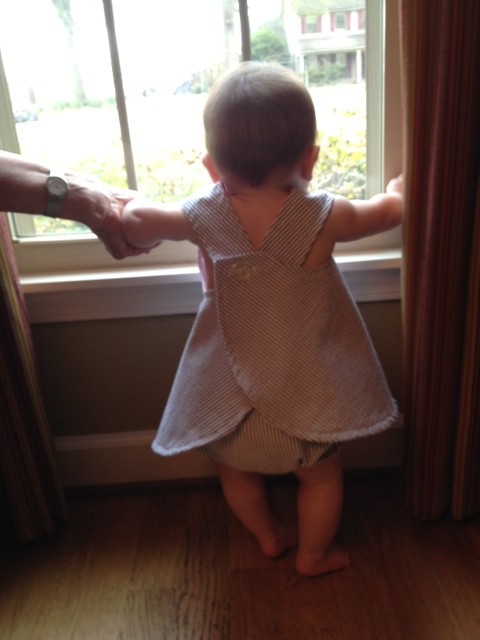
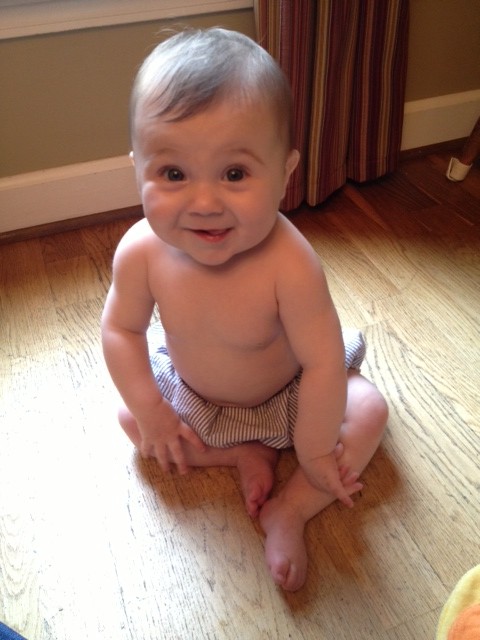
I can't decide if my kids now have more or less personalized clothing than before.  On the one hand, I don't have as much time since I'm fulfilling orders for others, but on the other hand, I like to try out new designs on them first to make sure they look ok.  It's probably safe to continue calling Katie Wynn my little "walking monogram" for a little while longer.  She loves modeling the clothes that her Mama and Mimi make for her.  :)

Two-ish months in, I'd say our biggest struggle is actually charging for our services!  We are so used to just doing things for fun for friends that it's hard create invoices.  Of course, we're business-minded enough to know that not charging our customers does not a successful business make, so we'll have to work on this.

Our timing for starting this adventure is not necessarily the best, either.  It's a pretty saturated market...everyone is getting their hands on embroidery machines of their own.  So we're trying to do what we can to set ourselves apart.  Obviously Mom's sewing skills come in handy but she's not necessarily itching to sit behind the sewing machine working for other people every day.  We're scouring the web looking for wholesale vendors we can buy from to offer unique products to our customers.  Like I said, it's all very exciting but nerve-wracking too!  

So that's the new biz.  If you need anything personalized - clothes, towels, bags, handkerchiefs, hats, koozies, swimsuits, shoes, whatever! - please let us know.  We'd be happy to do something for you! :)  

I may have gone overboard...

I have been on a pretty big pumpkin kick lately.  Not pumpkin flavor like all the pumpkin-spice-latte crazed people all over the internets, more like pumpkin images.  As in, pumpkin images that you can applique onto little bitty shirts.  :)

October officially starts next Tuesday so yesterday, on my day off, I worked like a little busy bee to make sure Katie Wynn has a closet full of pumpkin/fall outfits.  It's possible that she will have to wear orange everyday for the next two months. 

Mom and I have a pretty good system.  After we pick out cute fabric, she makes adorable little pants (with tiny ruffle hems because I'm not all about those gigantic ruffles on most little girl clothes these days...seriously, some of them are outrageous!) and I take a cheap Walmart or Old Navy shirt and put something super cute on it to go with the pants.  

Without further adieu, here's a peak at some of Katie Wynn's new fall wardrobe.  

candy corn
chevron pumpkin
split pumpkin
polka dot pumpkin
photo 5.JPG
orange tunic top

in the event that I get tired of seeing orange all the time (or heck, just get behind on laundry!), she also has some non-pumpkin clothes too.  Most of these outfits came from me and/or Mom snatching up cute little pants marked down to next-to-nothing on clearance racks and then making cute shirts to go with them.  You really can't beat a precious personalized outfit for under ten bucks, can you? 

navy polka dots
green polka dots
elephant
photo 2.JPG
coral shirt
cupcake outfit

The shirt above in the middle goes with the pants she's wearing on the right (they were in the dryer).  That shirt didn't photograph very well but it has her monogram on it, of course.   Now I can take a small break before starting Christmas clothes! :)

And just in case you think all I do is sit around and make cute outfits for Katie Wynn, here's proof that I do occasionally work on something else.  These are two towels that I did for a friend who is making over her girls' bathroom.  I think they turned out so cute! 

monogrammed towels

Sometimes my real job gets in the way of my crafting.  Maybe I should cut down to working just two days a week...

Sew Busy!

My mom and I have both been "sew" busy at our sewing machines and at her embroidery machine!  She has had an embroidery machine for years - I think she bought it when my nephew Jett was born and he's 7 now - but I never really had any interest in learning how to use it until recently.  Mom always told me I'd get the bug when I had my own little person to sew/monogram for, and she was right! I wish that I had pictures of everything that we've done recently, because we've cranked out some really cute stuff!  But a lot of it has been for gifts and I stupidly didn't take pictures of any of it before wrapping it up and giving it away.  Darn!

So that means I mostly just have pictures of everything for Katie Wynn.  I've been slapping her monogram on everything lately.  The picture below is a onesie, two pairs of bloomers and a really cute bubble that I can't wait for her to wear this summer.

Playing on the floor in a bird applique shirt I did a while back.  Onesies are really hard to do, but thanks to some YouTube videos and some pointers from our friend Lindsay, we're getting much better at them!

I love this circle monogram applique.  The shirt she's wearing below was the first time I'd done it, so the spacing is all wrong, but I've done it several more times since then and love it!

Easter egg I made exactly one week before Easter.  She wore it every other day that week. :)

Sometimes friends ask me to do monogram things for them, and I really don't mind but I have to issue a disclaimer that I could totally ruin their product.  That's the nerve-racking part of it.  This wine bottle holder didn't turn out as well as it could have, but it's ok.

These towels were for a gift for another friend.  Love this font.

Ok, switching gears from the embroidery machine and the sewing machine.   My mom has cranked out some really cute dresses lately!  (Good thing too, because Katie didn't have any church dresses that fit!)  The one below is a really pretty spring green with pink flowers.  Obviously Katie loved it. :)

This is the dress that Mom made Katie Wynn for Easter.  It has cute little ducks on it.  I had specifically asked for something not too Easter-y (bunnies and eggs) because I wanted KW to be able to wear it more than just the one time. 

Precious seer-sucker bubble that has the same circle monogram applique I mentioned above.  We have this in a boy pattern too that I'm about to attempt for some cuties I know!

 Another sweet church dress.  I love the flutter sleeves on this one.

Mom took the smocking up to the next level on this one by weaving a pink ribbon through it.  She's got mad skills, y'all.

She doesn't make just fancy dresses though!  This little number is reversible!  Green with a flower on one side...

...and just the flower print on the other side.  It has bloomers that match (you can see them in the picture above).

This dress is from a pattern that I picked out, but it's way past my skill level! 

I love this fabric that we bought.  It's typewriter keys and we thought the ruffle/bloomer fabric kinda looked like pencil lines on a piece of paper, so kinda coordinating themes.

I decided to dust off my sewing machine and get in on the sewing action.  I told Mom I was going to start with a simple quilt that was all straight lines.  (The idea came from Pinterest, of course.)  "It should be easy," I said, "since it's all straight lines."  "I think it'll be harder than you think," Mom told me.  She was right.  Not as easy as I thought it would be.  Also, in my head it was going to be gigantic.  Like, bigger than a bedspread.  This was going to be our picnic quilt or our take to the park quilt.  In reality, it's a whopping four feet by four feet.  Whomp whomp.  But still cute, no?

You can't really tell but the back is pink with white polka dots and you can see the chevron pattern since that's how I quilted it.

With the quilt turning out somewhat successful, I decided to try my hand at making something for Katie.  I found this pattern online and it's called the easiest dress ever so I figured it was a good place to start.  I made it out of seer-sucker and added a pink monogram before stitching it all together.

I love the criss cross in the back!

I upped my difficulty level and attempted a pair of matching bloomers.  Success!  And not nearly as hard as I thought they would be.

Here's the dress on a hanger for a better view.  I had to alter the pattern to fit Katie since it just came in 3-6 month size.

The best part is that it can be reversible!  I lined it in pink seer-sucker but you can see the darker one through it, so I probably won't ever reverse this particular one.

Last weekend I got stitch-happy and cranked out three  more of these dresses!  One for sweet baby Olivia...

And these two matching ones are for Katie Wynn and her friend Addi Clare.  I love this chevron!

And this time I made them reversible.  LOVE them!

And I made bloomers to complete the outfits.

I think it's official, I've got the sewing bug!  I just downloaded a bib pattern last week and spent the weekend cutting them out and monogramming them.  Now I've just got to sew them all together.  Anyone in need of a bib?  I could probably make them adult-sized...

3 Kids, 2 Rooms

Many of you know my friend Emily, and that she just recently welcomed a precious set of twins to her family.  They joined their two and half year old sister, Alice, and all three of them are just the cutest things ever!

Well, back in December before those twins made their debut, my mom and I spent a little bit of time helping Emily get rooms ready for her growing family.  At the time, Alice was still sleeping in her crib, but that crib was needed in the nursery so it was time to make the switch to a big girl bed.  Emily thought it would be a good time to give Alice's room a mini makeover and you know I jumped at the opportunity to help!  Em had already scheduled for the two rooms to be painted, and then she asked if me and/or my mom would be willing to sew some curtains to hang in them.  I'm pretty sure she was just going to leave it at that (she was busy chasing after a toddler while being very pregnant with twins, afterall) but Mom and I decided to do just a little bit more.  Not a whole lot, just a few extra touches here and there.

Emily and her husband, Andrew, were leaving to go out of town for a few days, so I told her to leave me a key so we could come in and do some work.  We brought Dad with us the first night we went over so he could hang the curtain rods.  We rounded the corner to Alice's room and were met with something like this:

Woah, boy.  We had some work to do.

I gave Dad a chair to stand on and told him to get to work on the curtain rods while Mom and I got busy organizing.  See that blue table and lamp with the yellow shade in the picture above?  Those were supposed to be Alice's bedside table and lamp.  Except that Emily had chosen a pale pink and orange color scheme, so I just couldn't in my right mind leave those the way they were.  I threw the table in the back of the car and thought at the very least that a coat of white spray paint would help.

I'll spare you the play-by-play details, but here's the gist of what we did in Alice's room: added the curtains (Emily had already purchased the fabric), made a matching bed skirt, corralled all her toys onto a book shelf, painted the bedside table and added a new lamp.  Alice also inherited a new dresser (painted by her grandmother) since the changing table was also moving to the nursery.  Her headboard was painted to match the dresser.

Now, normally I am 100% opposed to furniture blocking a window, but in Alice's room it just made the most sense.  Actually, there was a much cuter arrangement, but it left no floor space for playing.  And every toddler needs some floor space to play on, right?  So the dresser was pushed in front of the window.  Luckily, Emily said the blinds were always kept closed anyway.

Since Alice had just transitioned from the crib, the bed rails were a necessity.  I'm sure the bed will look better once she doesn't need them anymore!  And you can see the table that got spray painted white and a new lamp I added.

Like I said, Mom made a bed skirt to match the curtains.  We just couldn't let Alice have a bed frame with no skirt to hide it!

Here is where all the toys landed - on a shelf in the corner.  It'd probably look better painted white or pink like the dresser.  Maybe if I'm feeling it up for it I'll steal it from Emily one day and give it a makeover.

That was it for Alice's room.  We really didn't do much and I hate that we couldn't do more.  I know Emily has since added some cute art to the walls along with adding a cute bean bag that Santa brought Alice.  I'm always on the lookout for the perfect rug (at the perfect price!) to add; I think it could make a huge difference in the feel of the room!

Across the hall is the new nursery.  Boy/Girl twins obviously make decorating the room a little trickier, but Emily picked the perfect neutral color scheme: grey and yellow.  Like Alice, they have an oddly shaped room so furniture placement is tough.  The best layout, we decided, was to have both cribs coming out from the wall with the changing table in between them.  Hopefully this is a practical set up too!

Emily already had the cute alphabet that's hanging on the wall above the cribs.  In fact, it was hanging up at the baby shower she hosted for me.  I love the way it looks above the cribs!

Emily never decided on bedding (I probably drove her crazy bugging her about it!) so Mom and I finally just took action and bought fabric for the crib skirts.  (It's grey with white dandelions.)  Thank goodness Mom knows her way around the sewing machine!  Since the sheets were just white, we jazzed them up a little by adding the twins' monograms to them.


We were at Target one day and saw a pack of receiving blankets that were grey and yellow, and being suckers for all things that match, you know we had to buy them.

If you're wondering where the yellow in this grey-and-yellow room is, trust me...it's there.  I LOVE the chevron curtains that Emily chose.  I think they look great against the grey walls!

There was also a wooden bookshelf in this room that I stole and painted yellow.  Of course, then I couldn't find anything to actually sit on it when I brought it back over, but I'm sure Emily has since found plenty of things to put on it.  The frame above the bookshelf is one we made out of a piece of coordinating scrap fabric.  I know for sure that a picture of the twins has already been added to it.

The last thing we added to the nursery were these two white shelves.  I knew Emily had received these cute little shoes as a shower gift, and since I love Katie's shelf full of shoes so much, I thought the twins needed the same thing for their nursery.

Again, we didn't do much, but I think it at least helped take some of the stress off Emily when it came to getting everything ready for the babies.  I know several of you had asked about these pictures waaay back when we did it, so I apologize for taking so long to get them posted!!

Sew Over

Have I told you that I've been doing a lot of sewing lately? Well, I have. I can officially check the "figure out how to use my sewing machine" resolution off my list. Last spring I volunteered to help out a couple of friends by sewing table linens for their upcoming weddings. I come from a family where every female owns a sewing machine and knows how to use it, so I can't imagine not having a mom/grandma/aunt that can sew something for you. So, of course I was very happy to be able to help. Plus, I thought it'd be great practice. After all, it's just straight lines, right?

My mom and I did lots of shopping and cut lots of fabric swatches before both brides-to-be settled on colors. We ordered the appropriate yardage and when it came in, it was time to get sewing!

Except, you don't start sewing right away.

Instead, you measure. And cut. And iron. And pin. And then, after you finally get to sew one edge, you might have to iron and pin again before you can finish sewing that edge. And the math! Now, I like numbers and all but when my mom started talking about how wide things should be and seam allowance and how to get the most out of our yards and yadda yadda yadda, things just got jumbled in my head.

But, I survived all the pre-work (barely, only tried to bail out once or twice) and finally got to the major sewing part. And you know, that part really was kinda fun. Once everything was lined up and ready to go, sewing those straight lines wasn't too bad. And I loved putting the pedal to the metal, so to speak.  Except most times, when I got going and things were really on a roll, that's when I'd look back and realize that the whole seam wasn't actually sewn together because I'd run out of thread on my bobbin. That darn bobbin! Gets you every time.

And now, finally, I can report that all the sewing is done! (Well, most of it.)

Over the last couple of months (but mostly the past two weeks), I have sewn:

12 - table runners out of fall-orange fabric 6 - fall-orange bistro table overlays 16 - table runners out of green/white fabric with deep purple trim 4 - green/white/purple bistro table overlays 1 - green/white/purple groom's cake table overlay

And over the past two weeks, my mom has sewn:

12 - goldish-greenish "poofs" to sit on top of fall-orange table runners 1 - goldish-greenish cake table overlay with fall-orange trim 2 - extra fall-orange table overlays 1 - green/white cake table overlay with deep purple trim

Still to do: one ring bearer pillow out of green and white fabric.

I know what you're thinking..."Wow, your mom rocks! I can't believe she helped you that much on something that you volunteered for!"  And you know what, I couldn't agree more. I have a pretty awesome mom.

And to say thank you, I just booked us two appointments at Gould's Spa for Saturday morning on October 9.  Did you see that, Mom? While all the men in the family are off on their trip doing boy things like fishing and golfing, you and I will be getting massages! Woo hoo!

For you readers: sorry, but I did not make you a spa appointment. BUT, I will take pictures of all these linens in action for you to see. You're welcome.