Paper Dolls

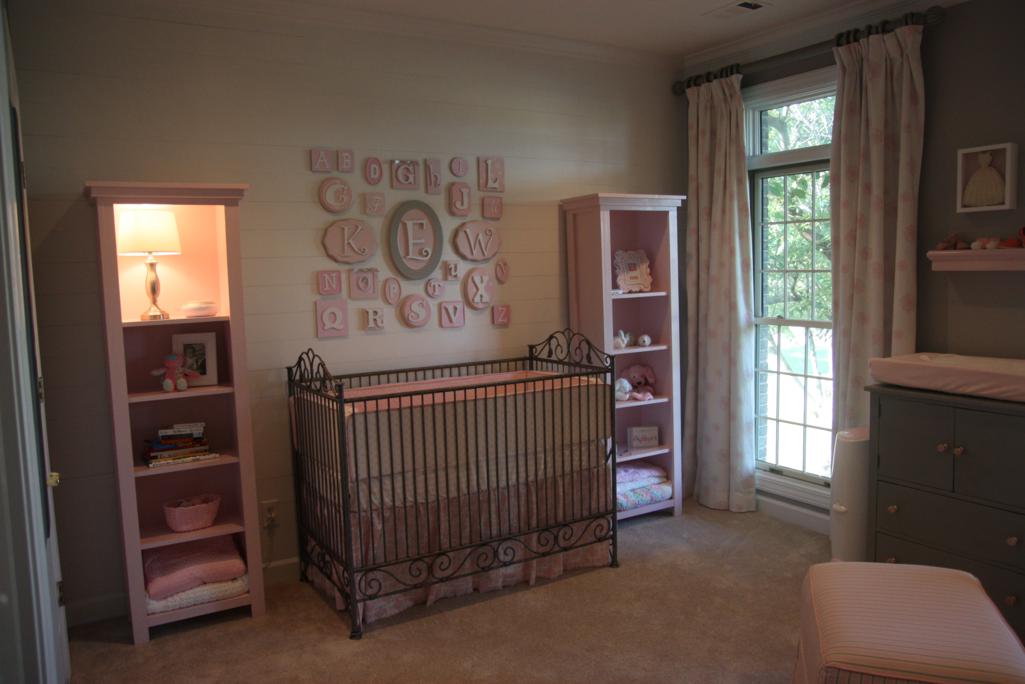
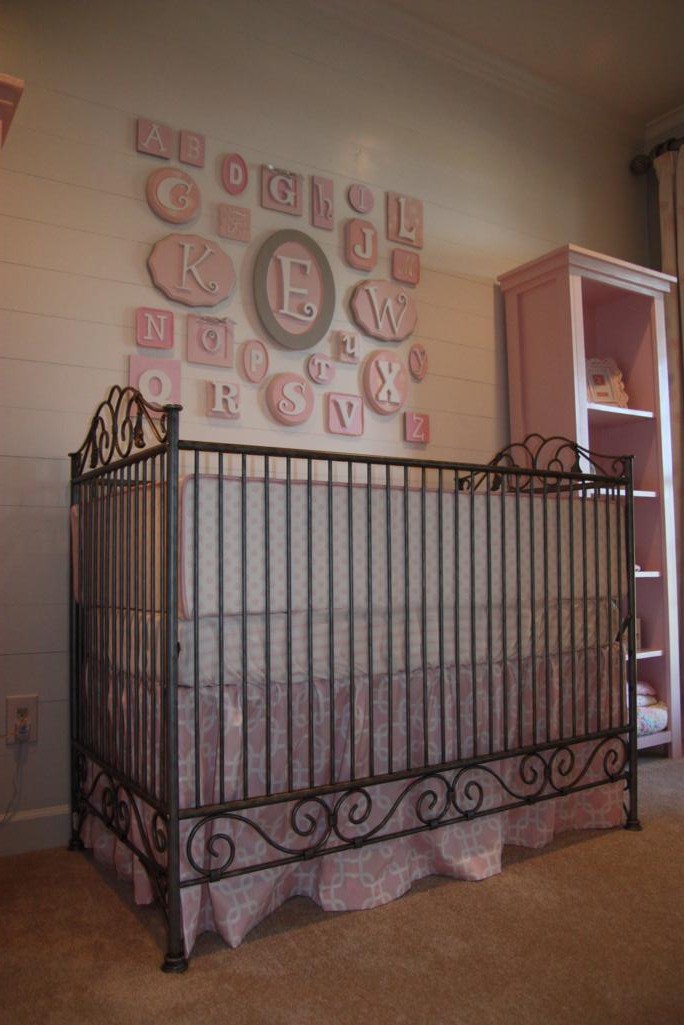
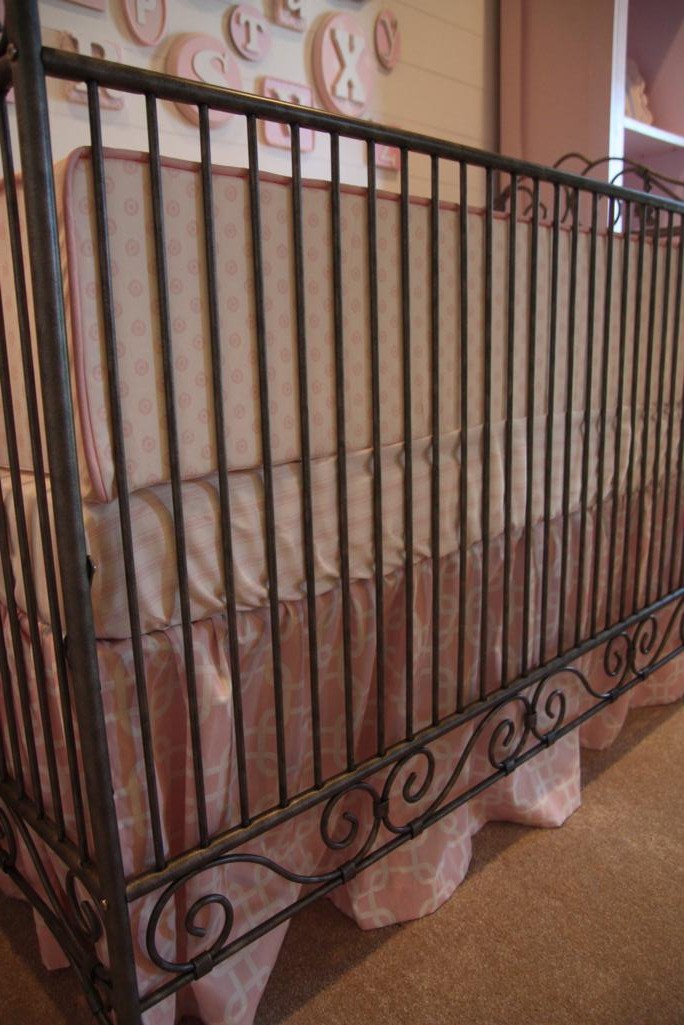
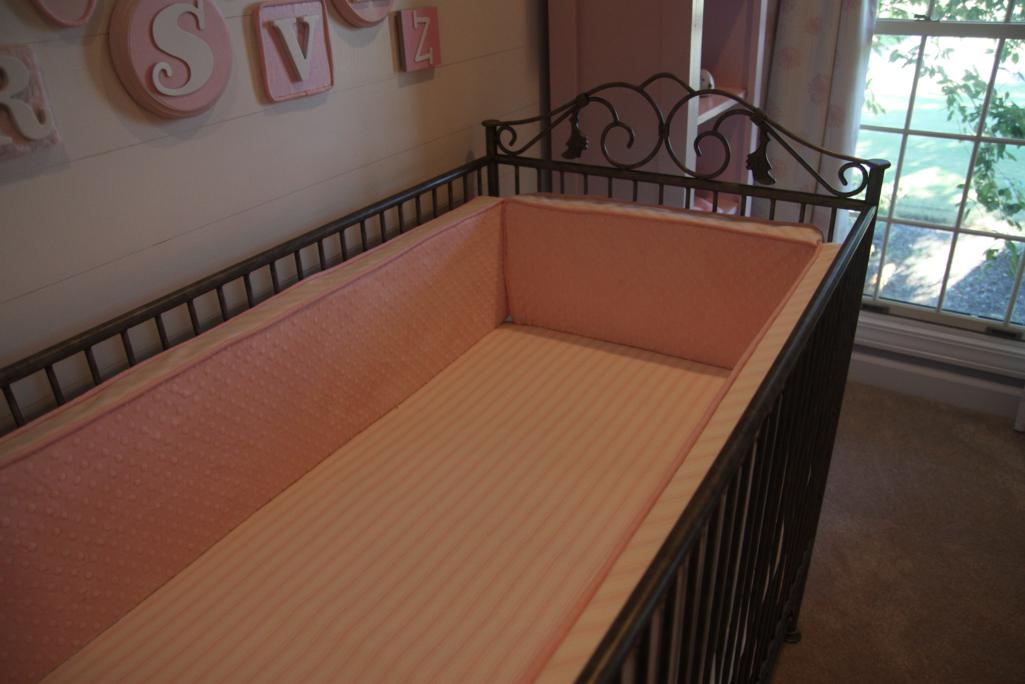
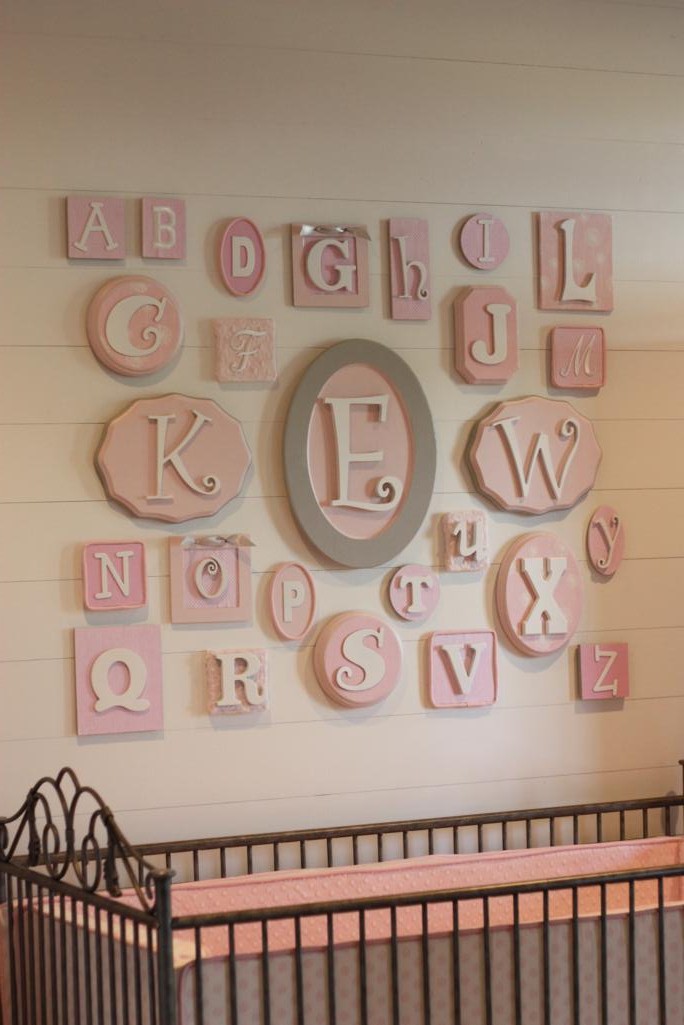
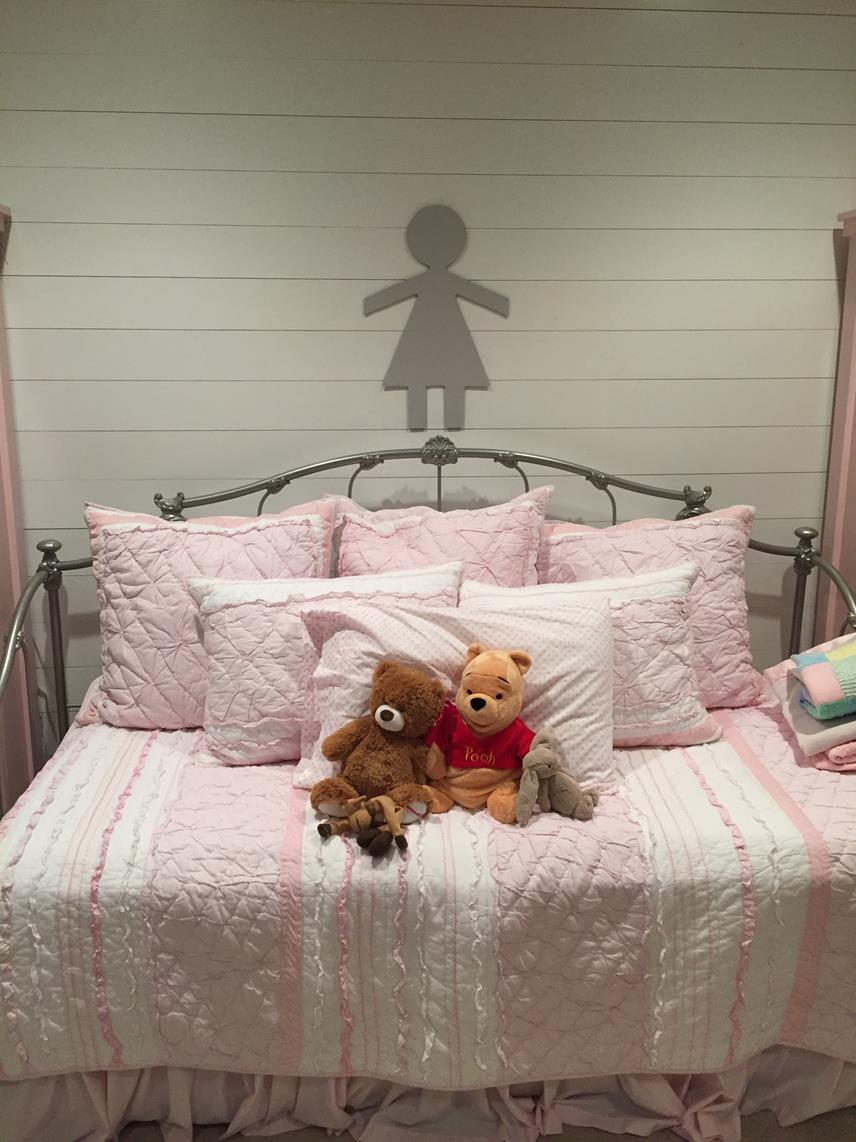
When the time came for us to transition Katie Wynn from her crib to a big girl bed (yes, over a year ago!), the hardest part of the switch was figuring out what to do above her bed!  I adored her alphabet collage but, while it was so cute above her crib, it just did not work with the lines of the new bed.  I had an idea early on that I couldn't figure out how to execute so I scrapped it.  After that, I was STUMPED.

Then, I found inspiration in these little girls that I cut out.

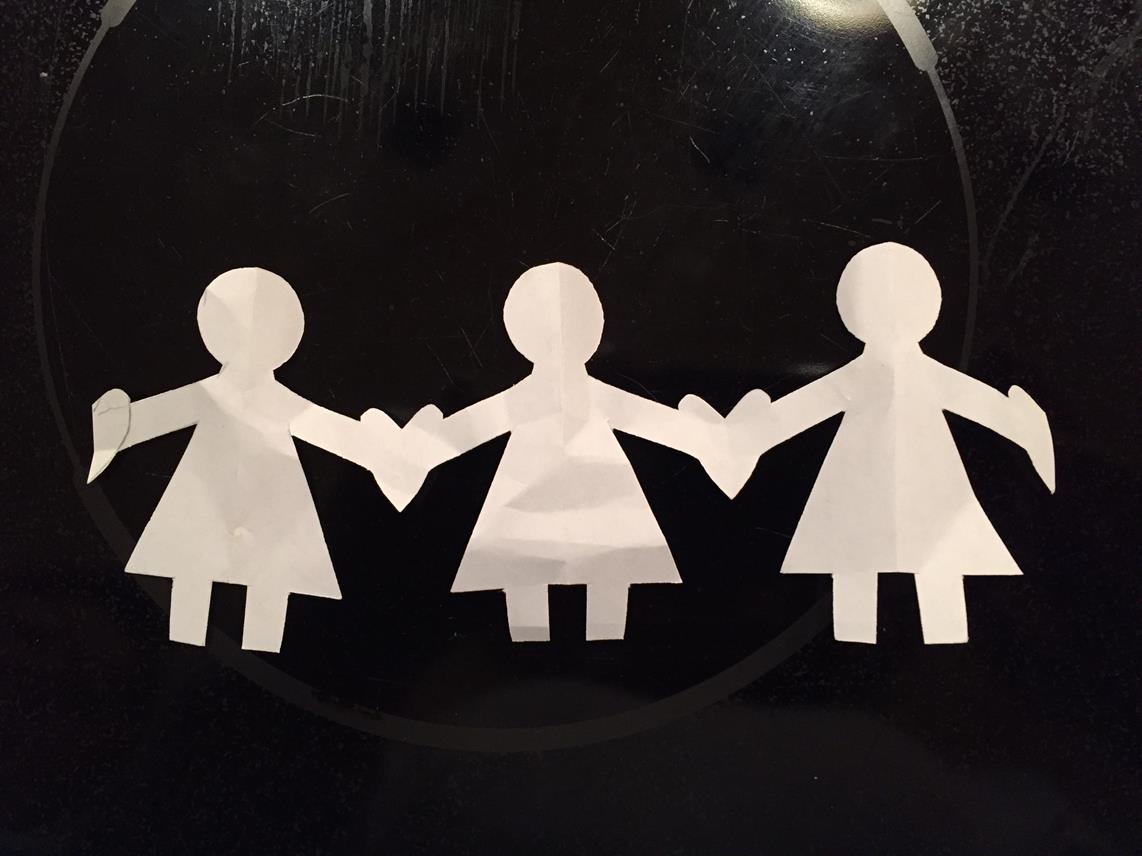
Big paper dolls on the wall would be so cute, right?!

I liked the shape and proportions of the ones I had cut out of paper so Mom and I measured and drew a larger template to use.  Then I passed it over to my Dad so he and Matt could cut them out of a thin wood.  (It's not really wood, I can't think of what the material is called.  It's what pegboard is made out of, just without the holes.)  After they had five girls cut out, I painted them the same grey as her walls (except the white plank wall that they would be going on).  The first one went on, centered above the bed...

And then the other four were lined up with her!

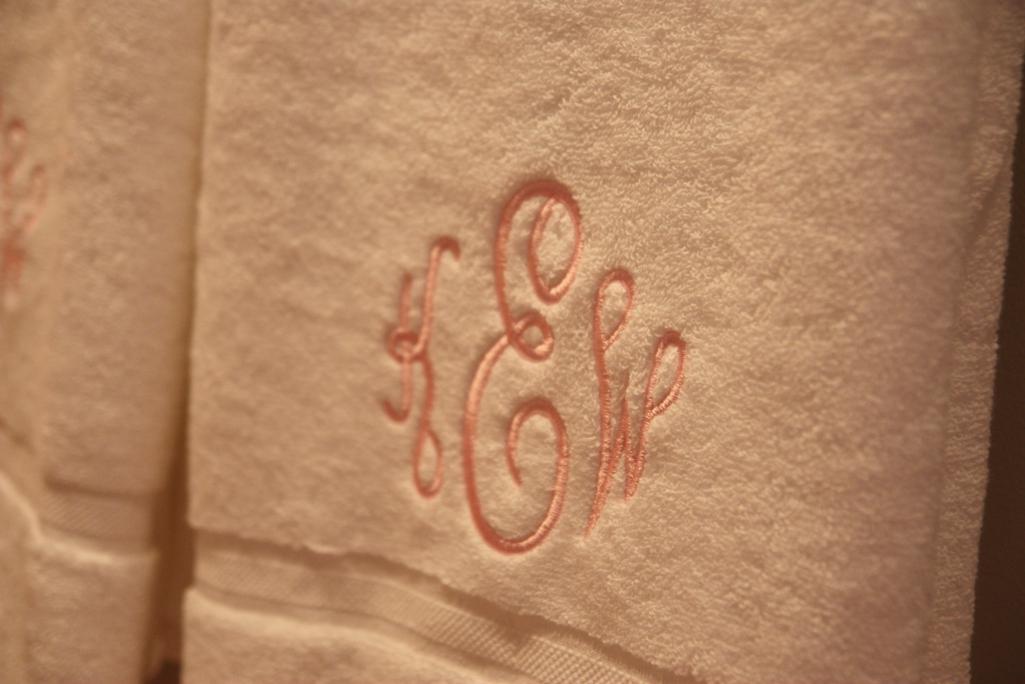
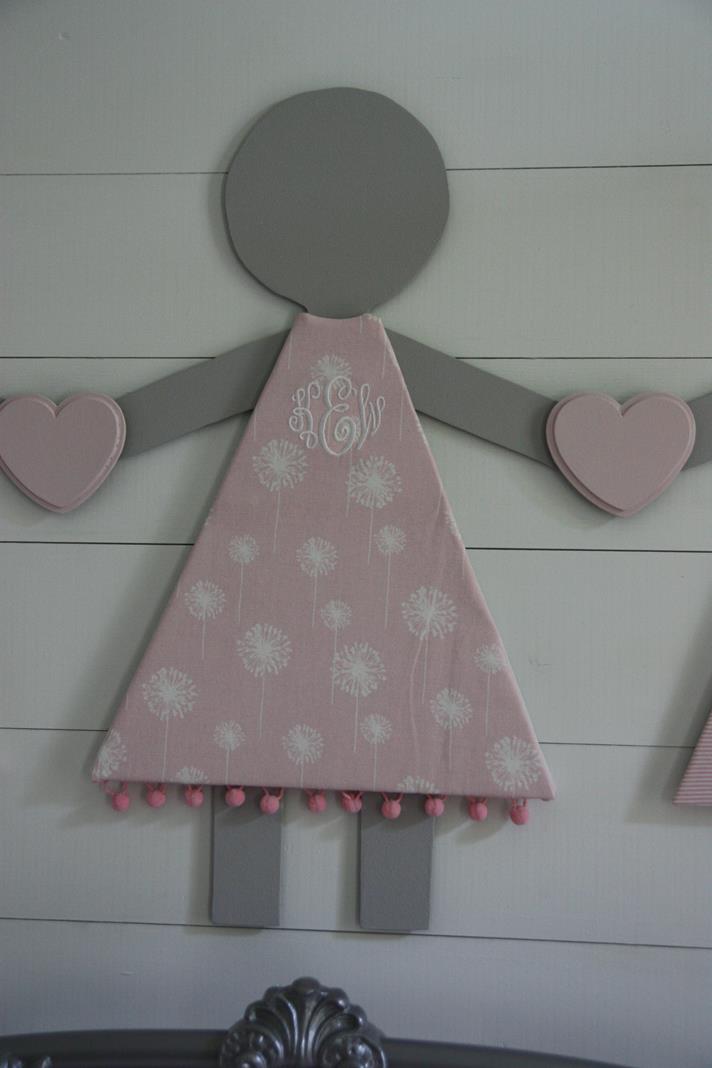
Mom's part (probably the hardest part!) was next.  We cut out triangles for the girls' dresses and picked out fabric that would match the room.  Then she fashioned them into dresses that would cover the triangle forms and attach to the girls.  Scroll through the pictures below to see the dresses she made.  I love that the middle one has KW's monogram...it's like a tiny nod to the alphabet wall that was there before it (that had her monogram in the middle).  

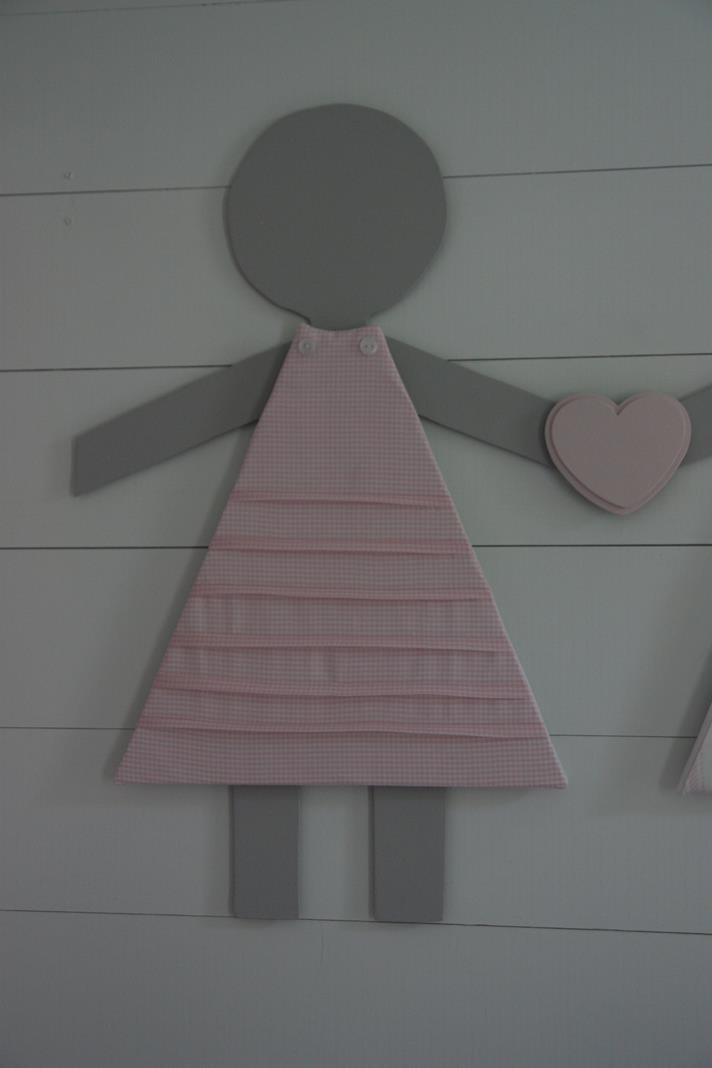
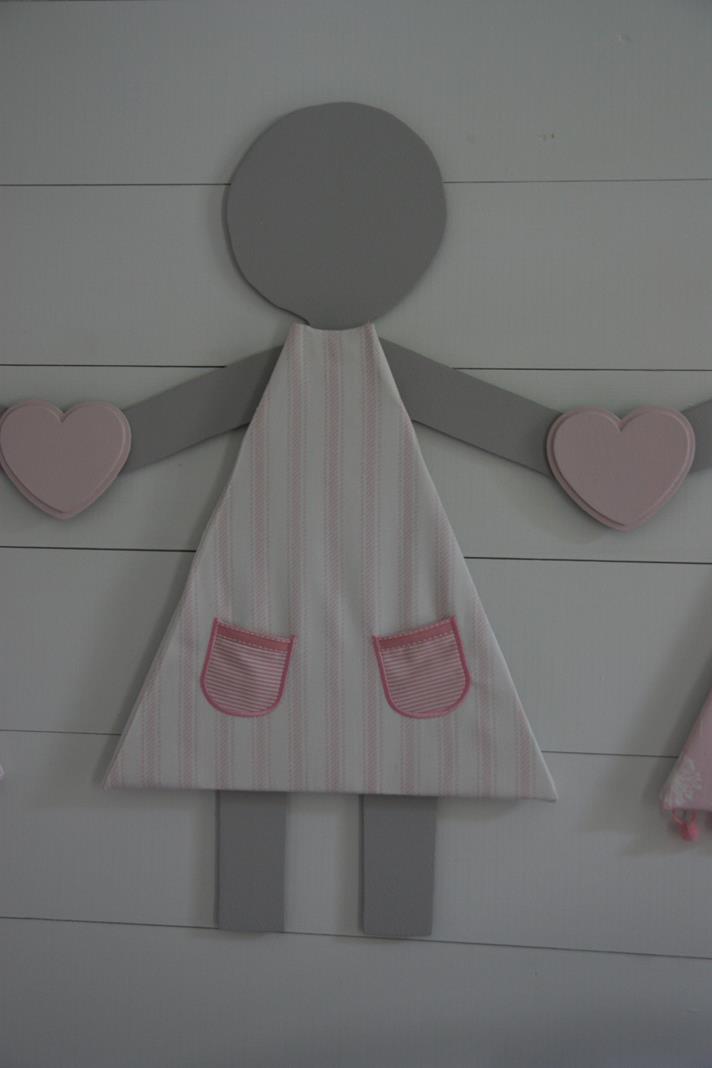
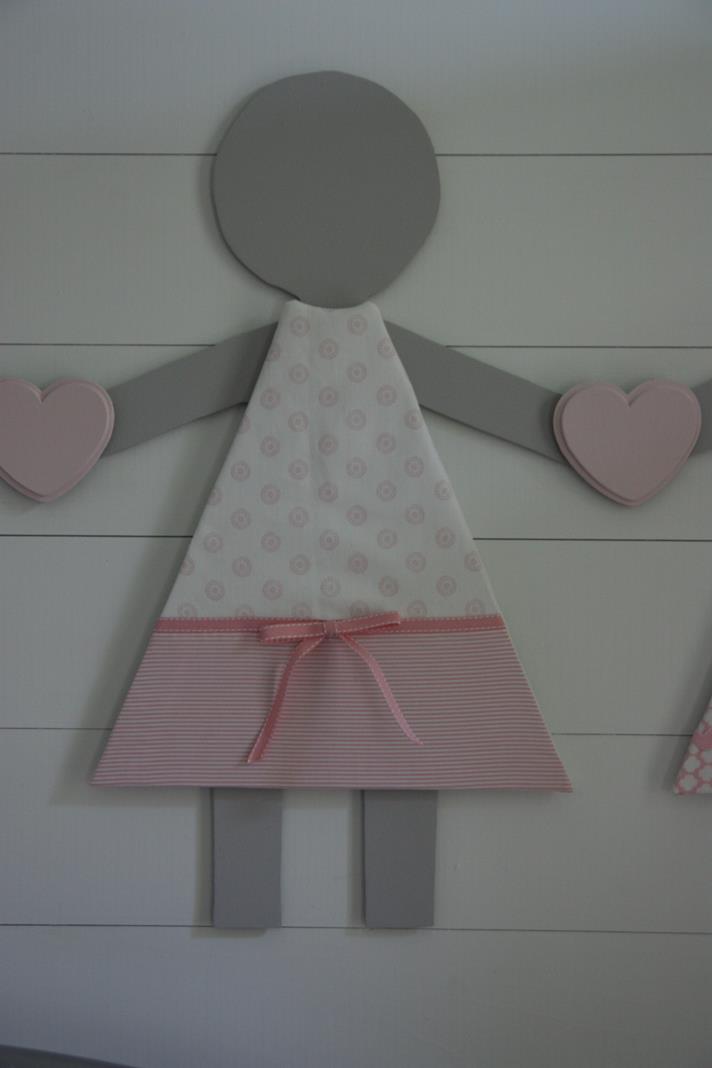
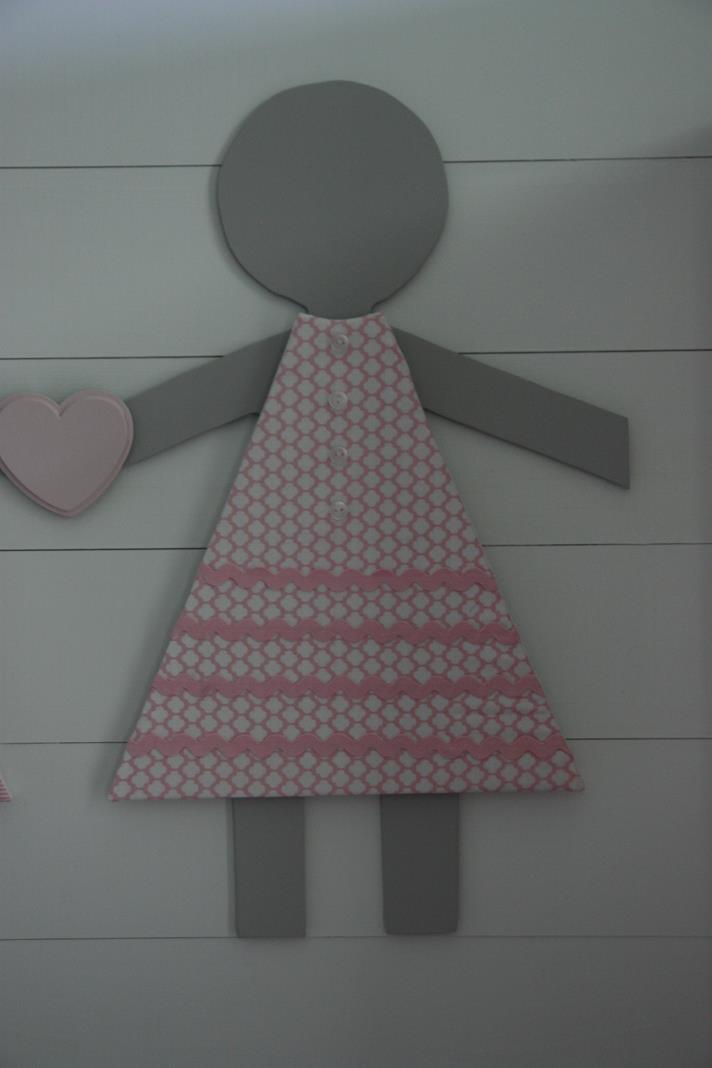
We weren't able to cut all five paper dolls out of one solid piece of wood.  And I really didn't want the seam where their arms met up to be visible.  So I purchased precut wooden hearts from Michael's and painted them pink.  They were the perfect finishing touch for our row of dolls!

Here's the complete view of all five dolls:

The dresses are just velcroed on to the doll forms.  I initially had thought it would be fun to let Katie Wynn take them off and redress them, but I still haven't told her about that idea.  Not sure I'm ready to encourage her to pull things off the wall.  And I know it would bug me if they weren't on straight or in the "right" order.  :)  Maybe one day...

I LOVE how this little project turned out and it was so easy to do.  This row of girls makes me smile every time I come into the room, especially when Katie Wynn names them all with her friends' names.  And this project just proves that sometimes you have to sit and wait and stare at an empty wall before the right idea hits you.  That's what I'm going to keep telling myself since there are still big empty walls in our house...

"Knot-ical" Nursery

In case you're having trouble figuring out that title, it's supposed to be "nautical" with "knot" inserted.  :)

Thomas is 3 and half weeks old and I've finally finished his nursery! (Update: He's four and half weeks old now.  It's taken me over a week to get this written...)  Or at least finished it for now.  I'm so pleased with how it turned out, especially since I really had no idea what I wanted or where I was going with it.  Ready for some pics?

Here is my first-ever panoramic iphone photo.  Hopefully it'll help you visualize the layout of everything.

panoramic

Ok, now let's back up a second and talk about where this room is in our house.  Our house has four bedrooms but with Matt and me in one, Katie Wynn in one, and Anna and Wyatt each having their own room, we were fresh outta rooms.  The only room left was our "office" that had held nothing but junk since we moved in.  There are some less-than-ideal things about it - like it's right at the front door, across from the dining room, and has double french doors - but I still felt like we could make it work as a bedroom.

hallway

We added curtains to the double french doors to block the view and light a little bit and to hopefully make it feel more like a bedroom inside.  As of right now, we have been leaving the door on the right closed and just using the left one, again to make it feel more like a bedroom.

IMG_7620.JPG
french doors

The door's open, so let's go on inside!  Directly across from the double french doors is the crib.  Above it is the school of fish I already told you about.  I've already caught Thomas eyeing them during his brief stints in his crib.  

fish
crib wall

The crib bedding is all out of Benartex Home's Coastal Living collection (except for the cream minky dot) and was handmade by my mom.  She did an awesome job on it!!  This fabric was probably the splurge for the room (other than the custom built-ins) but I ended up getting a great deal on it.  One piece in the collection is a patchwork of all the other pieces and sold for $53 a yard at the store I found it in.  Yikes, too rich for my blood!!  I ended up finding that same piece of patchwork fabric online at a clearance price of $9 a yard.  Awww yeah, that's more like it!  

Mom used the patchwork fabric to make an adjustable crib skirt.  It's adjustable so that it can "kiss the floor" when the crib is at any of its three levels.  She trimmed it out in the same stripe that she used on the outside of the bumper pads.  

IMG_7629.JPG

The inside of the bumper pads is a soft cream minky dot that is an exact match to the cream zip sheet on the mattress.  (If you have a child (or two) sleeping in a crib with bumpers and you aren't using zip sheets, you need to stop what you're doing and purchase some now!  They make changing the sheets SO much easier!)  We bought and cut our own foam for the bumper pads so it's two inches thick and pretty much stands up on its own.  The piping is done out of another coordinating stripe and Mom also made a small minky dot blanket out of her leftover fabric.

crib bedding

The bumper ties were the holdup on calling the nursery complete because I was dragging my feet on getting them sewn on!  I hate hand-sewing but I finally knocked it out and love the way they turned out.  I used a white cording rope and tied sailor knots (Carrick Bend, to be exact) instead of the usual bow to go along with the "knot-ical" theme.  

crib bedding

To the right of the crib is the set of hanging shelves we made.  Below them is still an empty space - this is where a toy box or small book shelf will eventually be added.  

shelves

I saw lots of different versions of rope shelves on Pinterest.  I just took the parts I liked of each one and mashed them together to make our version.  The shelves are each anchored to the wall so the rope and knots are more cosmetic than functional.  The rope is wrapped around boat cleats that are majorly secured to the wall.  (Matt said they are on there so good that if we ever have a tornado we should ditch the closet and just hang on to the boat cleats!)

shelves
shelves

The shelves are full of nautical-ish decorations.  I can't wait to get his newborn pictures back so I can fill up the empty picture frames in his room!

shelves
IMG_7641.JPG
shelves

Below is the view from standing in front of those shelves and looking back to the other side of the room.

built-ins

We have been steadily filling up the closets with little boy clothes.  I'm still adjusting to having so much blue mixed in with our pink laundry!

IMG_7673.JPG

Everything in the built-ins nook except for the wooden fish was a Homegoods find.  I LOVE the mirror and how it looks hanging there!  It does a good job of bouncing the natural light from the windows around the room so it's always nice and bright in here.  

mirror

Now, here's the view of the other side of the room from standing right in front of that mirror.

other half of room

The changing table that I found at Bargain Hunt for a whopping $25 sits in between the two windows.  I love how much it cost but I still don't love the way it looks.  I added four Homegoods baskets but it seems like no matter how organized I keep the baskets, it always looks messy to me.  Oh well, it's just til he's potty trained, right?!  

But right above the changing table is one of my very favorite things in the room - the shadowbox of knots!  Matt and I looked up different boating knots and tied all of these ourselves.  I had a friend frame it and she included small plaques with the names of each knot underneath it.  It was really hard to get a good picture of it because of the glares so you'll just have to come see it in person.  

I think what I love most about this is that nothing about it screams little boy.  I can see this hanging in Thomas's office someday when he's big and grown!

changing table
knots
knots

To the right of the changing table is this cozy corner where I've already fed my boy bottles and rocked him to sleep.  The chair is one that we already had that we had recovered and added a swivel glider base to the bottom of so that it would rock.  The ottoman is a storage cube that we had too.  

The floor lamp is one that we already had; it's from Target and used to live in the living room.  

Mom made the throw pillow that sits in the chair and it's reversible.  Gotta love having options!  One side is the patchwork fabric like the crib skirt and the other side is the stripe on the bumper pads.  

IMG_7657.JPG
pillow
IMG_7660.JPG

I love the wicker whale shelf that we found at Homegoods but I'll admit, I've had a hard time finding things small enough to fit in the uniquely shaped openings!  I'm sure these will all change as Thomas acquires more things.

whale shelf
IMG_7662.JPG

Here's another view of that side of the room where you can see the french doors.  Above them hangs an oar!

french doors
IMG_7670.JPG

You may have already noticed but on both the window treatments and the french door coverings, we used industrial piping instead of traditional curtain rods and hardware.  We pieced together galvanized pipes, elbows, and phalanges to make rods for the curtains to hang on.

curtains
IMG_7650.JPG
curtains

On the french doors, we added a "belt" to the middle of the curtains so we can still peek through the windows.  I'm sure as he gets older we'll end up removing these so he can have more privacy, but for now I like being able to see in.  

And you know we had to tie those "belts" in with the theme of the room, so we added sailor knots to them too. 

french door
IMG_7666.JPG

Our cleaning lady got to watch the room come together when she came by every other week.  She surprised us the week Thomas was born with this little sailor outfit that she had made for him.  Can you believe she made that!?  She's got skills.

Sailor outfit

So that's the grand tour of our knot-ical nursery.  I hope you enjoyed it!  I'll keep you posted when our little sailor actually starts sleeping in it.  :)

School Of Fish

I'm embarrassed to admit that this project took me forever to complete even though it was really fairly easy, but I guess that's the way it goes when you're big and pregnant and chasing a toddler.  I am waiting for one final piece to be completed next week before I reveal the full nursery for our baby boy, but this is what I made to hang above his bed.

His crib is centered on a really big wall, so I knew early on that I wanted more of a grouping to hang above it rather than one big piece since there's a good chance something else would hang to the sides of it.  Didn't want it all competing, ya know?  It took me a while to come up with an idea, but I eventually settled on fish.  Lots of fish!  

When I started, I didn't know exactly where I was going with it.  I just kinda worked out the details and ideas as I went.  I started by drawing out a fish shape that I liked (I actually drew three and let my Mom and Matt vote) and then cut it out of paper to use as a stencil.  Then, I cut several of them out of a scrap piece of 1/4" thick wood using my Dad's scroll saw.  

IMG_7952.JPG
IMG_7954.JPG

After cutting out a few of those, I searched around the woodshop for more scrap pieces so that I could have more fish of different thicknesses and textures.  I used some beaded board (and cut fish out with the stripes both horizontal and vertical), some peg board, and a piece of 3/4" thick wood.

I was ok with  how things were going, but had no idea how many fish I needed!  I took a break from cutting them out of wood and started cutting them out of paper so I could play around with them on the wall.  On the left is 25 fish which is how many I had cut out of wood at that point.  I didn't think the school looked "full" enough (maybe enrollment was down?) so I kept cutting them out and adding them to the wall until I was happy with it.  Thirty-six (I think!) ended up being the magic number.

Random arrangements are so incredibly hard for me.  I tend to make things symmetrical without even realizing it.  But I knew I wanted the school of fish to be random so I tried really hard not to put too much thought into it.  I texted pics to my mom occasionally to get her opinion.  We debated between having a straggler (on the left) or a slight leader of the pack (on the right).  The leader formation won out as we decided it would send a better message to our little guy.  :)

Eventually, I made my way back to the woodshop to cut out an extra 11 fish.  I had some thin metal that I was able to cut with scissors so I added some out of that.  In the end, I had 6 different "species" of fish.

IMG_8037.JPG

Then I had to figure out what to do next!  Paint them all the same color?  Paint them all different?  Pick a few colors and divide into even numbers of each color?  After some debate, my mom and I decided that each "species" should be its own color, so we picked out five different colors of paint (the metal ones weren't getting painted).  We landed on two shades of blue, white, cream, and a dark brown.  My mom was super kind (as usual) and painted them for me while I was at work.

Then what?  I thought maybe distressing them would highlight the textures and give them more character, so I hit them with our hand sander.  I'll be honest, there was a big part of me that thought this was not going to turn out very well and I was just wasting my time since I hadn't really thought through it from the beginning, but I kept going anyway.

After the fish were sanded, my mom finished them off with a quick coat of matte polyurethane.  

Finally, I could start putting them on the wall!  I had left my paper fish up which ended up making it really easy to hang up the wooden ones.  Anna and my mom both helped me and we hung up a species at a time.  It was easy to just pull down a paper fish and replace it with a painted wooden one.  Just one velcro command strip on the back of each fish was enough to hold them up.  (The fish are really light weight and should be ok when little hands eventually start grabbing for them.  Katie Wynn pulls her alphabet letters off occasionally and with the velcro, they're really easy to pop back up on the wall.  We did intentionally hang the metal ones a little higher since they could potentially hurt little fingers.)

Oh, and yes, I climbed into the crib to work.  I think my Dad did a good job putting it together because it didn't fall apart with me (and the baby) in it.  Or when my other little helper climbed in with me!

This was another one of those times when I struggled to be random with the placement, but between me, Mom, and Anna, we got them all up on the wall in an arrangement we all liked.  They are mostly random with a couple of the same species swimming together here and there.  And thankfully, I really liked how it turned out so it was not a big waste of time!

(Sorry for the poor quality phone pic, I plan to take better pics with the real camera when I photograph the whole room.)

school of fish

So that's the school of fish we created to swim above our sleeping little boy!

Here are some bonus pictures of another project we knocked out this week.  I didn't take in-progress photos but Matt took these with his phone when we finished with it.  These are shelves we hung on the wall - to the right of the crib and school of fish - that we dressed up with some rope and dock cleats.  I saw several different versions of this on Pinterest so we just whipped up our own version.  The shelves themselves are anchored to the wall since they're slightly heavy, so the rope is mostly cosmetic.  

shelves
shelves
cleats

I've already had fun filling up the three shelves with fun stuff for his nursery.  I'll show you what made the cut to go on it in the full nursery reveal!

Henry's Nursery

Before we dive into these pictures, there are two things you need to note: baby Henry is not the baby boy in my belly, and this nursery is not at our house.  Instead, baby Henry and this nursery both belong to one of my best friends, Jenny, who has a due date of April 1st (no joke!).  I am stoked that my little boy will have a little buddy so close in age to play with.  I hope he and Henry become the best of friends!

Ok, onto some nursery pictures.  Last Friday my mom and I got to go over to Henry's nursery and add some things that we had worked on.  Mom made all of Henry's crib bedding and I mostly made his curtains (Mom helped...).  We were glad Jenny let us in on the fun!  

Before we arrived with all the textiles for the room, Jenny and her husband, Darrin, had already been hard at work.  They repainted several pieces of furniture in red and navy and also painted the walls a nice neutral khaki color.  They had already purchased super cute artwork for the walls, assembled some storage bins, and found the cutest light switch I've ever seen.  

I think the navy and red airplane nursery turned out SUPER cute, but I'll let the pictures do the talking...

This is the view from the door to the room.  My mom made the (reversible) throw pillow and patchwork quilt out of leftover fabric.  Those storage bins came from Costco (I think) and Jenny added paint samples to the label holders to make th…

This is the view from the door to the room.  My mom made the (reversible) throw pillow and patchwork quilt out of leftover fabric.  Those storage bins came from Costco (I think) and Jenny added paint samples to the label holders to make them coordinate with the room.  Great idea!  The curtains are a red pillow ticking stripe.

There are so many things I love about this wall.  Is that little airplane rocking chair not the cutest thing you've ever seen!?!?  Jenny found it in a thrift-ish shop while on vacation and it was part of the inspiration for the theme of th…

There are so many things I love about this wall.  Is that little airplane rocking chair not the cutest thing you've ever seen!?!?  Jenny found it in a thrift-ish shop while on vacation and it was part of the inspiration for the theme of the room.  It's a perfect fit since they are also world travelers.  The crib skirt came from Pottery Barn and was a perfect match for the airplane fabric we had already found (should've requested a close-up pic of it, oops).  Mom made the bumpers - airplanes on the outside and minky dot on the inside - and also the crib sheet that matches the curtains.  The map above the crib shows animals from different countries, and I LOVE the propeller they found to hang on the wall!  The navy table in the corner will eventually be Henry's bedside table and they added the cutest little airplane pull to the drawer.

Maybe you can see the airplane fabric better here?

Maybe you can see the airplane fabric better here?

The reverse side of the throw pillow!

The reverse side of the throw pillow!

The navy dresser will also serve as a changing table as soon as they add the changing mat to the top of it.  The airplane pictures work perfectly in the room!

The navy dresser will also serve as a changing table as soon as they add the changing mat to the top of it.  The airplane pictures work perfectly in the room!

henry's room
henry's room

On the opposite wall is a red desk/hutch combo that is already housing several gifts for Henry.  He needs to hurry and get here so they can fill up those cute picture frames! Oh, and the cute vintage planes on top came from Hobby Lobby.

Hope you enjoyed the tour!  While I am more than ready to meet the little guy, I do hope he holds out for that April Fool's Day due date.  That could be a fun birthday to have!

Nursery Reveal

I am finally ready to reveal the nursery pictures!  Hallelujah! Of course, it's not 100% finished.  I mean, really, what room is?  They're always a work in progress, right?  This one is no different.  But it's as finished as it's gonna be before our sweet little girl arrives, so let's get to it!

Disclaimer: I am not a good photographer.  The lighting in these pictures is sometimes a little wonky.  I don't know how all those nurseries on Pinterest get photographed with no shadows or anything.

Without further adieu, here's the view of the crib wall from the door to Little Miss's room.

Behind the crib is the plank wall that Doc and my dad helped put up.  It's painted Pure White - same as all the trim in the room that got a fresh coat of paint.  The other three walls are painted Essential Grey by Sherwin Williams.

From that view, if you turned to the right, you would see this side of the room.

The fabric on the glider and curtains are both Premier Prints, specifically the Bella/Twill collection.  I ordered the glider and ottoman directly from Premier Fabric, and my super awesome mom made the curtains.  They're lined with black-out fabric since there are no blinds on the windows.

The other side of the room has the main door, the bathroom door, and the closet.

That's a quick 360 of the room.  Let's go back to where we started: the crib wall.  The crib was our splurge.  It's the Casablanca crib in Pewter by Bratt Decor.

Like the glider and curtains, the crib bedding is all Premier Prints.  It was hard to get a good shot of the different fabrics, but they're all pink and white.

The bumpers are still missing their ties - those should go on this weekend.  The inside of the bumper pads is a soft pink minky dot.  And yes, the bumpers will come off for a while until she's old enough to have them on her bed.

Above the crib is the alphabet.  Most of the materials for this project (that seemed to take forever!) came from either Hobby Lobby or Michael's.  I bought all the wooden plaques and covered them in either paint, fabric, or scrapbook paper.  It's hard to tell in the picture, but several plaques are painted grey on the sides.  The alphabet is mostly in order except for her monogram that's in the middle.  Hopefully this won't confuse her when she gets older and is learning her ABC's!

The crib is flanked by two pink bookshelves.  These were a last minute addition to the room when, after bringing in the furniture that we had, I decided there was too much room left on the plank wall and something needed to fill in the space.  Doc and I used these plans from Ana White's website and cranked them out over Labor Day weekend.  We labored hard that weekend and completed them from start to finish in a little over 24 hours!  I took some of the pink fabric to Home Depot and had it color-matched, so the bookshelves match the bedding pretty perfectly!

Everything on the shelves is just randomly sitting wherever right now.  I haven't really "styled" them yet.

RIght now, sitting on this bookshelf are these three bunnies.  They're McCarty Pottery and were gifted to us by my mom and two of her best friends (thank you, Mom, Jenny, and Leslie!!).  My whole life, anytime I've seen things like this grouped in threes, I've always thought of them as being me and my two brothers.  Weird, I know, but its' immediately what I thought when I opened these.  It's me, Nick, and Ben!  Of course now, it can be our three children - Wyatt, Anna, and baby girl.

Also on this bookshelf is my mom's old silver cup and spoons.  I opened a sweet silver spoon at one of my baby showers that I've added to them (it's the shinier one!).  I still need to polish these up a little.  I love the little silver cup - it's got my mom's name engraved on it.  Part of our little nugget's name!

I decided to place a lamp on the bookshelf to the left.  That required us to drill a hole in the back of our newly built and freshly painted bookshelf for the cords to go through.  It was hard to do so soon after completing them!  The lamp is just a simple silver one with a white shade from Lowe's and matches the floor lamp beside the glider.  I had a really hard time finding lamps I liked and ended up just going with these so I could call it done.  I think they work fine, though!

The changing table that we refinished sits between the two windows.

It's stocked with all our diaper changing necessities.

Above the changing table is a pink shelf we made while building the bigger bookshelves.  It holds all of the little pink shoes we received as gifts. :)

And above her shoes are two shadowboxes that hold Barbie doll gowns handmade by my grandmother.  When my dad's sisters were little, they played with Barbies all the time and my grandmother made all of their playclothes.  The Barbies got a new wardrobe every year for Christmas!  When I was little, I played with all their Barbies any time I was at my grandmother's house.  I would play for hours!  So, at my last shower, I opened a gift from my grandmother and inside it was our little girl's first Barbie doll and a whole box of handmade Barbie clothes!  What a perfect gift!  Most of the clothes are made out of scrap fabric my grandmother had on hand - which I love because they all look a little vintage.  These two gowns she crocheted and felt much more special.  I thought they deserved to be displayed until our baby girl is old enough to actually play with (and appreciate!) them.

The wardrobe you've seen from this post.  I'm slowly filling it up with all her cute tiny pink clothes!

This chalkboard hangs between the bathroom and closet doors.  It was a gift from my friend, Dana, and is the insert to a cabinet door that she painted.  Cool, huh?

I had a small swatch of pink and grey chevron fabric that I loved, but never could figure out how to work it into the room.  I was afraid it would be too busy to do anything big in.  When we switched out all the outlets from cream to white (this resulted in two days of no electricity in the nursery....electricians we are not), I decided to mod podge the fabric onto one of the old light switch plates just to see if it would work.  It did!  And so I hung it up on the main light switch for the room.

Here's a peek into the bathroom from the nursery.  We did a little mini-reno in here.  The walls and trim both got painted (Pure White and Essential Grey, both Sherwin Williams) and we also had the painters paint the cabinet.  It was a medium shade of brown and they painted it the same as the trim.  The toilet got a new seat and all the hardware and fixtures were switched out.  They were shiny gold but are now a nice brushed nickel.  (Except for all the doorknobs - those are all still shiny gold right now.  They're on the list.)

I forgot to take a closeup of the new knobs on the cabinets, but they're from Anthropologie and are just like the ones on the wardrobe and changing table, except they're clear instead of pink.

The bathroom didn't have a hand towel holder, so I bought a freestanding one from Lowe's.  Pottery Barn Outlet had hand towels in the perfect shade of pink, so I picked up two of them and hung them on the holder.  The pink basket is from Babies R Us and holds all of our baby shampoos and whatnot.  I'm sure they won't stay there for long.

I bought these two birds at a craft fair last weekend.  They are a little brighter than everything else in the nursery, but I loved them enough to hang them anyway.

This is the wall opposite of the sink and toilet.

I didn't get a great shot of the shower curtain, but it was also made by my mom and is another Primier Print.  The curtains in the nursery are white with big pink dandelions; this fabric is pink with small white dandelions.

This painting was another baby shower gift.  It was handpainted by one of my mom's friends and matches the nursery colors perfectly.  And of course, I love this bible verse.

My mom monogrammed a couple towels for us to hang on the towel bar.  I love the girly font.

And that's it!  I hope you enjoyed the tour of our sweet little girl's room.

Right now, this little girl thinks it's her room.

She has no idea who this "Sister" is we keep talking about.

All she knows is someone is coming, and we're all just waiting...

Any day now.  We're officially ready for her!!