Closet Makeover

Last week, we finally finished a closet makeover that was started the week we moved into this house!  It was a very loooooong, drawn out makeover, but I am so glad to have it all done now.  It was more than worth the time (and money, ugh) that it took to get it the way it is now. It's funny that we've spent so much time and energy making over our closet when we still have a completely empty dining room, but considering we use our closet every single day and would probably have only had maybe 2 meals in our dining room by now, it just made sense to focus on the closet first.

Phase One of the closet makeover was very unexpected.  We knew when we closed on the house that we would maybe add some shelving, but we didn't realize we would be doing renovations on it during our first week in the house.  Here's what happened...

Our hanging clothes were the very last things to be moved from our old house to this one.  I wanted to keep them all on hangers and I didn't want the movers messing with them and throwing them in a truck.  So after all the big stuff was unloaded and in the house, Doc loaded up all our clothes in his car and brought them over.  With my brother helping him unload them, it became very obvious very quickly that there was not going to be enough room for all of our clothes.

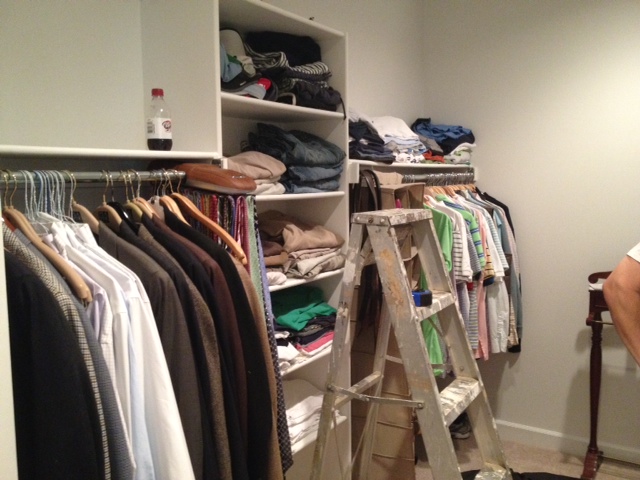
We'll call the left side of the closet "Doc's" side.  See those two hanging bars?  They were about, oh I dunno, shoulder level, maybe?  And above them?  Nothing but wasted space!

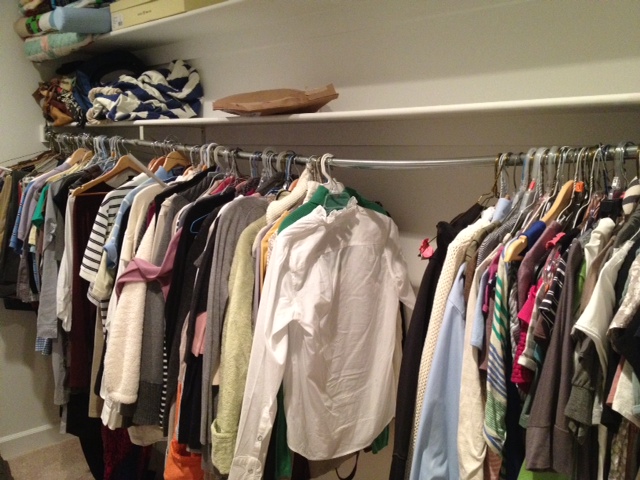
And check out what's going on on my side...that hanging bar's about to snap in two from the weight of my clothes, and they weren't even all on there yet!

So at about 4:00 one Sunday afternoon, we decided we needed to work on the closet ASAP.  We loaded into the car and headed to Home Depot - an hour round trip without counting our shopping time.  By dinner time, we had all of our supplies, had already stopped by my Dad's shop to cut and route the edges of all the boards, and had a coat of primer and paint on them.  We were rolling!

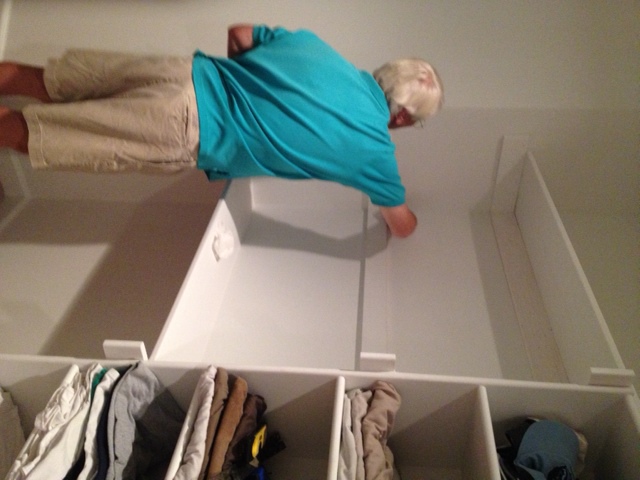
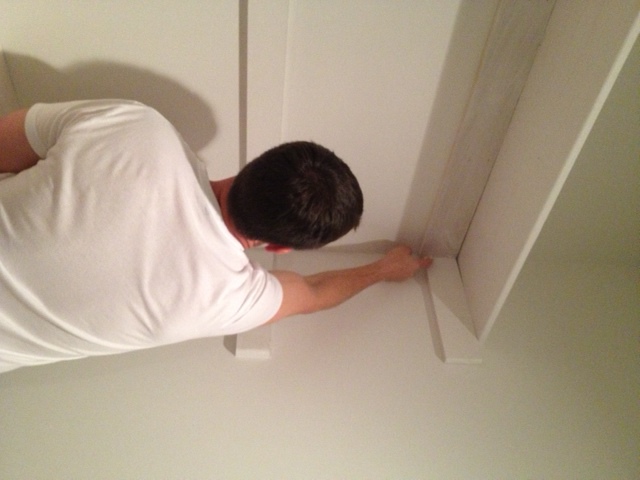
My side of the closet was easy.  We just added more supports to hold up the bar with the weight of all the clothes.  Doc's side was a lot more involved.  See how there are kinda three shelf levels in the picture below?  The middle one that my Dad is scraping glue off of is where the one hanging bar originally was.  We couldn't rip those support boards off the wall without tearing the sheetrock, so they stayed put.  The shelves below and above it are the two new ones we added.  This way, there would be two levels of hanging clothes instead of just one.

I think I frustrated the guys by making them caulk and paint.  They argued that once clothes were added they'd never be seen.  But, I was 8 months pregnant at the time and they knew what was best for them and did it my way. :)

Apparently I did not feel the need to take an after picture of this phase, but just imagine all of our clothes finally up off of our bedroom floor and hanging in the closet where they belong.  We were thrilled with our new additional hanging bars.

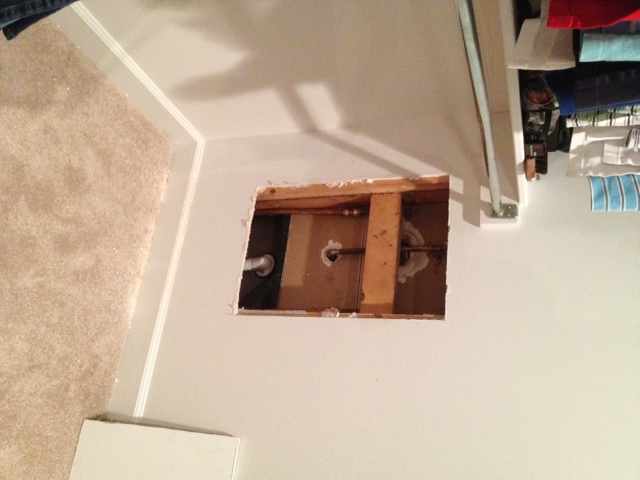
About a month passed, we welcomed our baby girl, and I decided we needed to finish changing out the fixtures in her bathroom.  They were all gold when we moved in, and I wanted them silver.  Doc and Dad had already switched out everything except for the shower fixtures.  This is where things got tricky because we had an outdated piece.  I won't bore you with the details, but I will say that I know way more about push-button diverters then I ever imagined I would.  Anyway, the solution was that we needed to have some plumbing work done if we wanted to switch to silver.  And rather than letting the plumber go to town busting up the tile in her shower, I requested that they go through the back.  That meant our closet got partially emptied out again so that this hole could be cut out of the wall.

Thankfully the hubs was able to patch the hole up in a way that will still allow us access to the plumbing in the future should we ever need it.

With Katie Wynn's bathroom done and me still on maternity leave, I was ready to move on to the next project.  Enter Shoe Shrine, Take One.  The back wall of the closet was the perfect spot to put some custom shoe shelving, so we drew up a plan and got to work.  I ordered some MDF and had it delivered and we got to cutting, priming, and painting.  It was so huge that it had be to assembled inside the closet.

I can't even tell you how sad it was for me right when I took this picture.  As much as we talked about the plan beforehand, we still didn't think through some key parts.  We were excited to get it up and because of that, cut some critical corners.  It was designed to be two pieces - a wider part at the bottom that created a bench to sit on and a skinnier part on top for regular shoe storage.  The shelves in the bottom section were also removable to my boots could slide in in the winter.  The problem was that it was extremely heavy and very unsturdy.  Even with it being bolted to the wall, it felt like it'd probably just pull the sheetrock down with it.  So, while I really, really wanted to be excited about it, all I could think about was my baby girl trying to climb up it one day and it crashing down on top of her.  In tears, I told the boys to take it down.

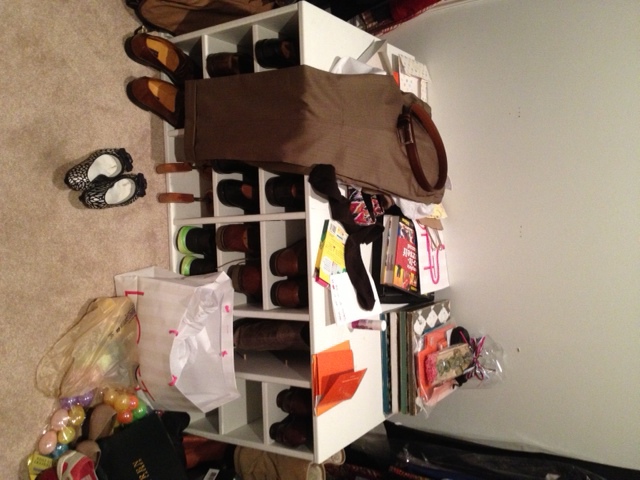
We felt really defeated at that point.  We'd just wasted a whole lot of time (and a lot of money) on something that was now sitting unassembled in our garage.  Except for the bottom portion.  We never got around to taking it apart so it continued to sit in our closet and became a flat surface where we piled everything.  (Doc did actually use it to hold his shoes, though.)

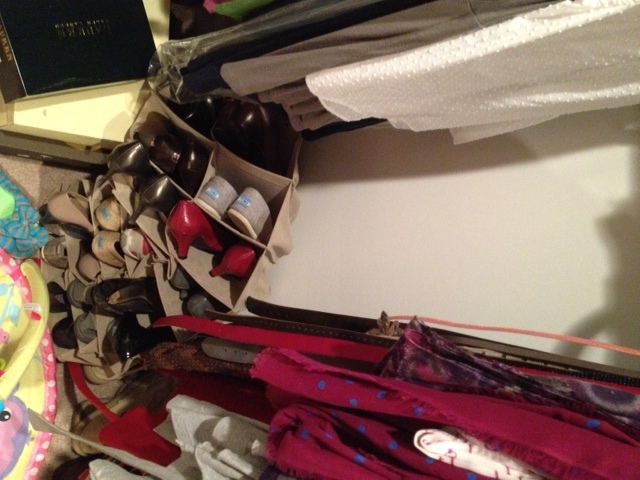
I returned to work and life went on.  And then about a month ago I walked into the closet one morning and saw that my hanging shoe rack had finally given up and torn apart.  My shoes were in a heap on the floor.

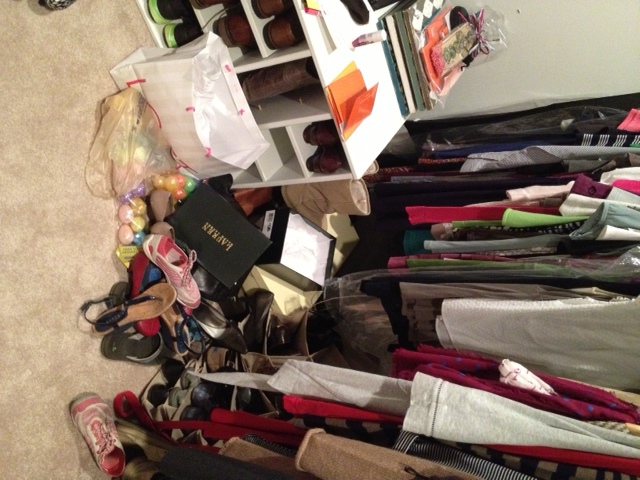
The closet was becoming a huge mess.

We knew this meant it was time to revisit the shoe shrine.  This time, though, we'd really, really think through everything and do it the right way.  Thankfully, Ana White had already drawn up some plans for a shoe shrine that we could adapt for our closet.

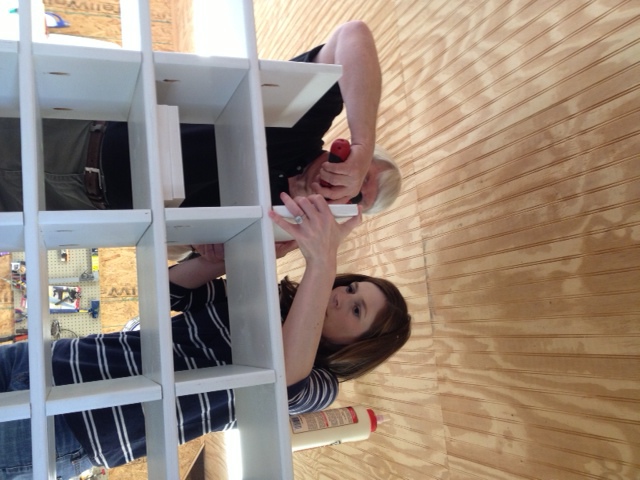
Doc and my dad spent a Saturday morning cutting and routing all the pieces we would use.  I spent one of my days off work priming and painting every side of every board.  And then the following Saturday, my dad and I got busy assembling.

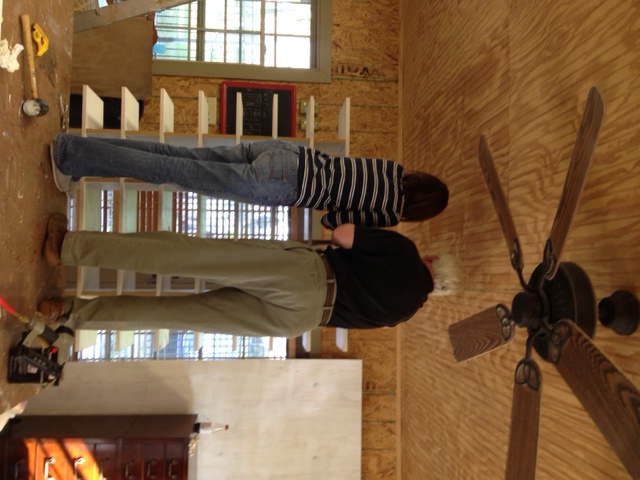
This time the Shoe Shrine would be one big piece, instead of two separate pieces.  At eight feet tall, we had to climb up on the table to finish putting the top of it together!

What I don't have a picture of is the hour or so that we worked while I was wearing Katie Wynn in the Baby Ergo.  You gotta do what you gotta do when there's no sitter around.

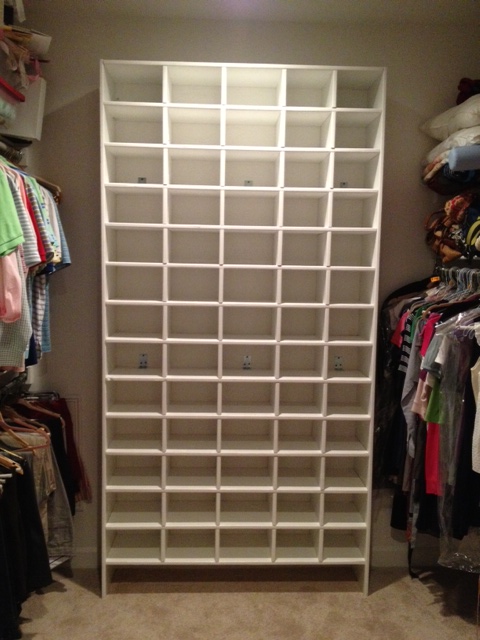
The Ana White plan was for a unit that was three shelves wide.  We made ours five shelves wide instead.  We also adjusted the size of the cubbies to fit our shoes better.  There are three columns that are wider to accomodate for Doc's bigger shoes and two columns that are smaller for mine. (Don't worry ladies, this does not mean I get less storage.  My shoes fit in the bigger cubbies too.)

It was tricky to transport and get into the house, but my two favorite guys were able to get it in there!  For Shoe Shrine, Take Two we didn't cut any corners.  We even went above and beyond and glued and screwed every single piece of wood multiple times.  Then we bolted it to the wall in nine different places.  This thing is not going anywhere!

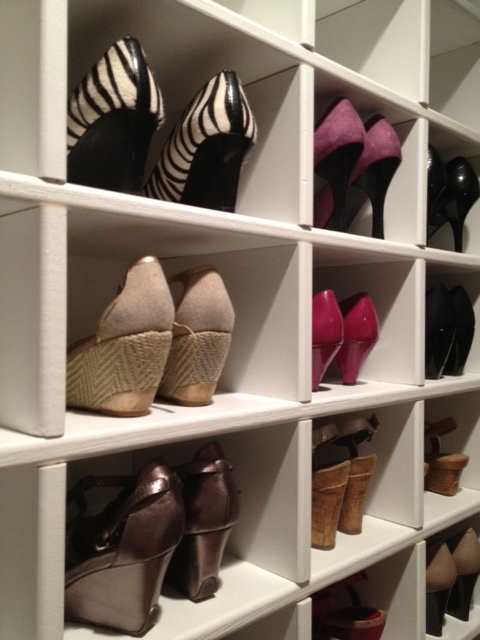
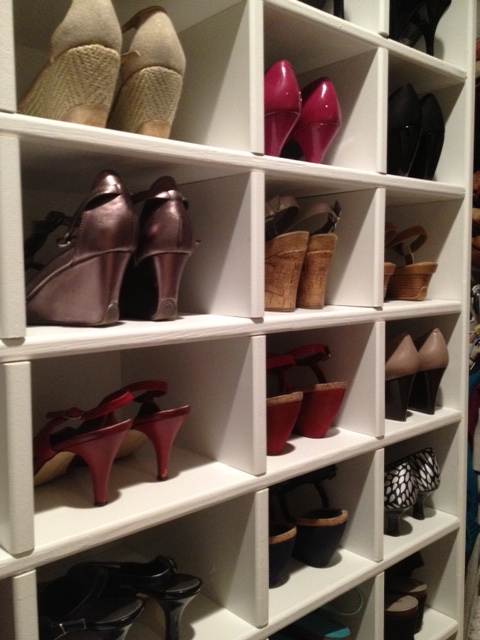
That's sixty-five cubbies just waiting to be filled with shoes.  Awww, yeah!!  This girl was happy, happy, happy!

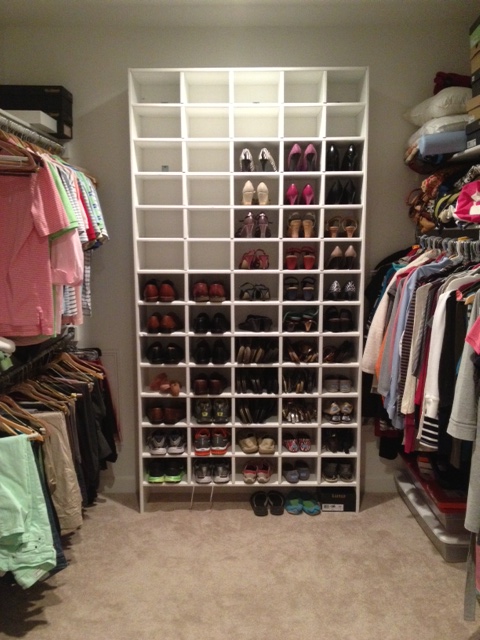
Oh look, after all the summer shoes have been put in, there are still empty cubbies.  Sounds like I need to do some shopping! :)

Sometimes I go in the closet just so I can look at it.  It makes me really happy.

It's come a long way since the day we moved in.  I'm so glad our clothes finally fit on all the hanging racks, there are no holes in the sheetrock, and our shoes are up off the floor.  It feels huge now too!  Which is a good thing since Katie Wynn spends a lot of time playing on the floor in there (we put her there while we're getting ready so we can watch her from the bathroom). 

Now I'm on the hunt for a cute bench that I can redo to set in front of the Shoe Shrine.  Doc wants somewhere he can sit to put on his shoes and I'd like to be able to use it to reach the higher cubbies.  And I guess at somepoint I need to clean out all the shelves at the top that are overflowing with stuff but, ugh, that can wait for another day.  For now, I'm just gonna keep drooling over my shoe storage!

Living Room Progress

The living room has come a loooong way since we moved in, and I'm about to walk you through everything we've done.  Warning: this is gonna be another loooong post. Just for fun, here's a picture of the living room from when we toured the house.  This is all of the previous owners' stuff (except for my mom and Doc, they belong to me).

I liked their setup fine, even if most of their stuff was a little more contemporary than my style.  It actually looked like they never used this room.  I'm pretty sure the kids were never allowed to sit on these couches.  Heck, I don't even think the adults were allowed to sit on them!

Anyway.  So we moved in and just plopped down all of our living room furniture that we already had.

All of a sudden, our 8x11 rug looked tiny and our furniture just didn't fit right.  But, when we moved in I was fat and pregnant and fixing this room was the last thing on my list.  I had no idea what I wanted to do with it and just didn't have the energy to even think about it.

Check it out from this angle.  It looks like a lodge with those wood built-ins!

It was a tidge better in the daylight.  Maybe?

Here are views from different spots in the room.  Those bare windows!

Like I said, I hadn't planned on this room being one of my first projects.  But once the baby was born and we started having visitors and hanging out in this room more, it started really bugging me.  Like, really, really bugging me.  So I switched gears and started thinking about what needed to happen in here.

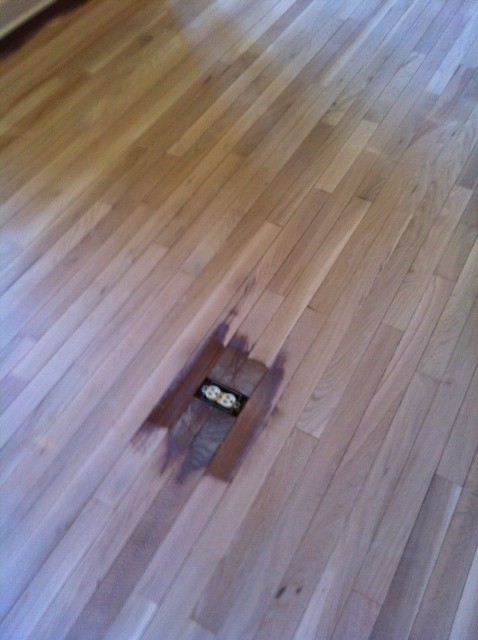
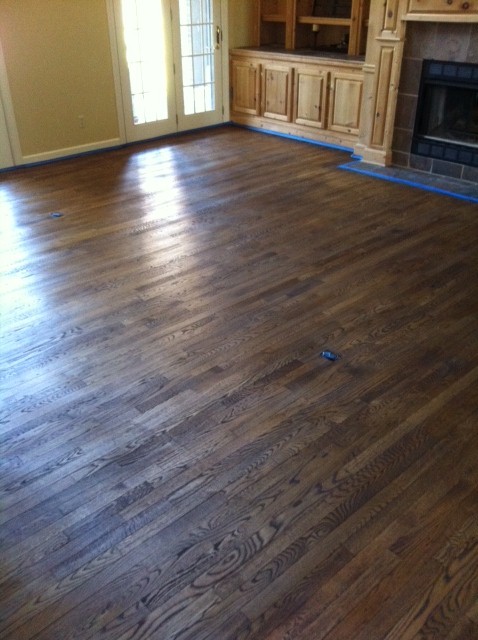
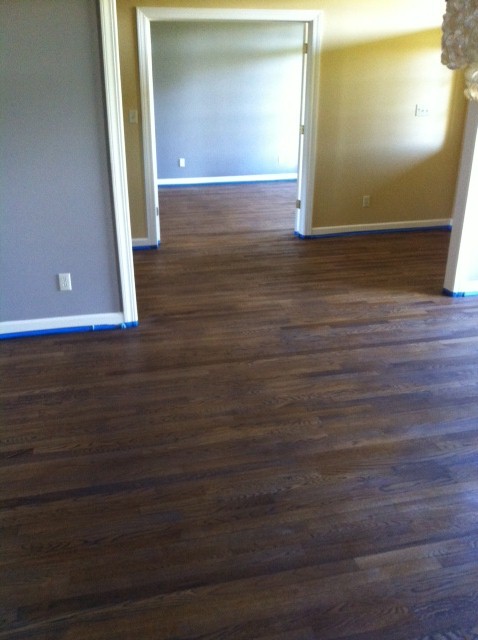
As you already know, the first step was getting the hardwood floors refinished.  This was also something that we figured we'd do much later down the line, but after thinking about it, it seemed to make more sense to do it early when there was minimal furniture to move out of the room and we hadn't painted yet.  So, during our first trip to the beach, the floors got sanded down, stained a medium-dark brown color, and then re-sealed.

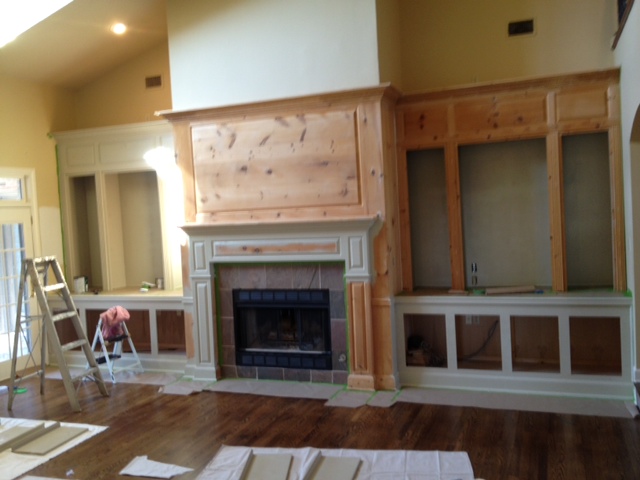
Of course, the pretty new floors only made the wooden built-ins look awful.  So I spent a week or so finishing them up and then painting them.

I think other than our Christmas decorations that went up, that's the last I'd showed you of our living room.  So let's pick up from there.

Shortly after I wrapped up my work on the built-ins, we hit the road for Beach Trip Take Two.  We once again decided to take advantage of the room still being empty of furniture and us being out of the house, and lined up some painters to come in and take care of those yellow-khaki walls.

The walls weren't the only things being painted - they were also going to paint all of the trim work and the treads of the stairs.  Also, see this little decorative wooden piece on the side of the stairs?  It got re-stained along with the hardwood floors, but I was pretty sure it would look better painted the same white color as the trim, so I had them do it too.  (The photo below is probably the best depiction of the original wall colors; it wasn't quite as yellow as it looks in the two pictures above.)

Well, here is where I would show you an after picture of the room after the walls, trim, and stair treads had been painted, but apparently I didn't think it was important enough to take a picture of.  You'll be able to see it in the background of the rest of the pics, though.  In case anyone is curious, the wall color is Behr's Castle Path (color-matched by Sherwin Williams) and the trim is Sherwin William's Pure White.

Let's talk about where I was going with this room.  While I loved our old living room furniture in our old house, I wanted pretty much the opposite of it for this house.  I wanted all the big pieces in the room (read: the pricier items) to be neutral colors (as opposed to our red and colorful furniture from before) so that they could work with multiple accent colors, should I choose to swap things out from time to time.  I also wanted everything to be more casual and comfy.  Unlike the way it looked when the previous owners had our house, I wanted this to be a room that we could all really live in.

By the time the painters were done, I had picked out new furniture and a new rug, and they had all been ordered.  I was so eager for them to come in so I could see them in the room!  The two chairs and ottomans actually arrived the day we were outside taking family pictures, but since the room still hadn't been painted at that time, they hung out in the office for a couple weeks.

It was only a couple of days after the paint job finished that our rug arrived.  Have you ever ordered a rug online?  This was a first for me, and I was a nervous wreck about it.  I had done my research, though, and knew that I had 45 days to return it and get my money back if I didn't like it.  I purposely timed the rug order to be close to when the furniture would arrive so that I could see them together and still be in my 45 day window.  The rug I chose was the Vintage Area Rug II from Home Decorators in its biggest size.  Thank goodness I caught it on sale!  It was everything I was looking for - big, not too expensive, soft but not too plush, and had both greys and khakis and wasn't too light in color to show a lot of dirt.

I loved it the minute we rolled it out on the hardwood floors.

We debated between buying two large couches to place across from each other, or buying one couch and two chairs and ottomans.  We ended up deciding on the chairs + couch combo because we thought it would work the best for our family.  Plus, the chairs were really comfy in the store.  They are slipcovered chairs in "Smoke" purchased from Stash Furniture.

Since the chairs and ottomans were in, we carried them into the room.  We also brought in the coffee table and entertainment center we already had.

That's my little helper you see sitting in the chair on the right.  She agrees that the chairs are really soft and comfy.

I had to wait another week before the couch arrived - longest week ever!  Katie and I were chilling in the chair together when the delivery guys carried it in.  I snapped this pic with my phone and sent it to Doc so he'd know it arrived ok.  (You can see that decorative piece on the stairs painted white now.)

Our twelve-foot Christmas tree arrived the very next day, so we shuffled all the furniture around to make room for it.  That's one of the reasons I've put off showing you the living room for so long.  I wanted to take pictures after all the Christmas decorations were put away.  (They've been gone for 3 weeks now, I have no other excuses for the delay.)

So let's fast-forward to today when I finally took some pictures of the room so you can see it in it's current state.  We're calling it "done" for now, but only because we need to give our bank account a little break.  There's still a lot I want to do!

I picked out some Premier Prints fabric that I thought went well with the furniture and rug.   My mom made the curtains out of the Carnival print in Village Blue / Natural.

For the two chairs, she made throw pillows out of a coordinating print - Seesaw in the same colors.

I scored the fabric for the couch's throw pillows off the remnants table.  They're in the same colors - one is Towers and one is Rio.

I also found more of the curtain fabric on the remnants table too, so I bought enough of it to cover these two storage cubes.  They're currently sitting in front of the fire place, but they tend to move around the room.  I haven't decided where their permanent home will be yet.

We've also added a few new lamps to the room.  I love the mercury glass trend that's popular right now, so my mom bought me this lamp to go between the two chairs.  She found it at Hancock Fabrics, of all places.

I had this floor lamp on my Christmas wish list and my in-laws were sweet enough to get it for me.  It came from Target.

Pat, my mother-in-law, had requested it be wrapped when she ordered it since it was being shipped to our house.  Well, Target forgot to wrap it.  They did, however, accidentally package two lamps in the box instead of one.  Score!  Who needs gift wrap when you can get a whole extra lamp?!  (Just so you know, we did discuss doing the right thing and sending it back to Target, but decided it would be a lot more work on our end and they probably didn't even notice their mistake anyway, so.... yeah.  I like free lamps is what I'm sayin'.)

Right now, this one is just hanging out next to the entertainment center.  Not sure if it'll stay in this room or end up somewhere else.

We have not had a Home Goods in our area for very long, and I've just recently started going there.  Um, it's quickly becoming one of my favorite stores.  Especially for lamps!!  I practically squealed when I saw this mercury glass one...I was looking for one to coordinate with the one between the two chairs without being identical.  Love the burlap shade on it!  (As you can see, I'm also big on drum shades right now, except I feel like every time I walk into the living room, at least one of them is slightly tilted to the side and it drives me bonkers.)

Also at Home Goods I found these two vases that match the lamp.  I couldn't resist getting them for the built-ins.

And this hour glass!  Don't worry, I am not allowing myself to buy anything else that's mercury glass.  Can't go overboard.

So, the built-ins.  They're somewhat decorated, but everything is subject to change.  In fact, a lot of things are just placeholders until I find something I like better.  I didn't want to rush out and buy things just to fill it up, though, so the majority is stuff we already had.  I plan on taking my time finding meaningful things to go on these shelves.

That's pretty much all the progress we've made so far.  It's not complete, but we've definitely come a long way, no?

I mentioned still having lots of things to do.  Let's talk about those things; I'd love to hear your thoughts.  First up, the mantel.  I'm really stuck here.  I can't decide what I want.  The space above the mantel is really wide but not too quite three feet tall.  The paintings I've seen so far that I thought could work have all been three feet tall.  We're working with about 34 inches.

I just bought this vase and sticks off the clearance rack at Target yesterday.  Now that I have it home, I realize I should have bought another package of sticks.  These don't fill up the vase.  I could probably go with some that are darker too.

The actual mantel itself is really high - about six feet up - and the ledge is pretty narrow.  It's really hard to find something to sit on it that's skinny enough to fit on the ledge but also big enough to not look piddly up there.  In fact, I bought the vase above because it was nice and tall but also looked skinny enough to fit.  It's just a smidge wider than the ledge, but it's close enough to work.

I really want something unique to go there...but what?  Maybe something architectural?  I think an antique door turned sideways or maybe some shutters could be cool if done right, but something like that could take forever to find.  Anyone got any good ideas?

The other big problem area is this vast expanse of wall.  It's a lot of space to fill up and our entertainment center just looks tiny on it!

I wouldn't mind eventually getting rid of the entertainment center since it's so small on the wall and limits the size TV we can get anyway.  But I think a lot of big entertainment centers would look silly because they would be up against the world's largest built-in bookshelves on the opposite wall.  Maybe something like this from Crate and Barrel could work?  (After we save our pennies for a long, long time!)

I dunno.  And what do I do in the meantime?  Hanging pictures on the wall would be a huge help.  I guess I should love for some, but they'd need to be big.  Or I could do a gallery wall.  I'm gonna have to think on it.

This table could also use some accessories.

I'd love to get a new coffee table one day too, but the one we have is fine for now.  I think something not quite as deep would create a little more space in the middle of the floor.  I have a feeling a certain little girl is going to want to have some room to play sometime soon!

Now that we've done so much, it's hard to look back and think that I was ok with leaving the living room like this for a while.  So glad I changed my mind!

Did I mentioned we sold all of our old stuff?  Yep, it was nice to recoup some cash for all the new purchases, and it all went to a friend too so I can visit it if I ever miss it. :)

Let's end on a better picture.  Recap: refinished floors, painted built-ins, painted walls, new chairs and sofa, new rug, new lamps, hung curtains and added throw pillows, and we now have a living room that looks like this.

Would love your feedback and suggestions for my problem areas!

Entry Hall

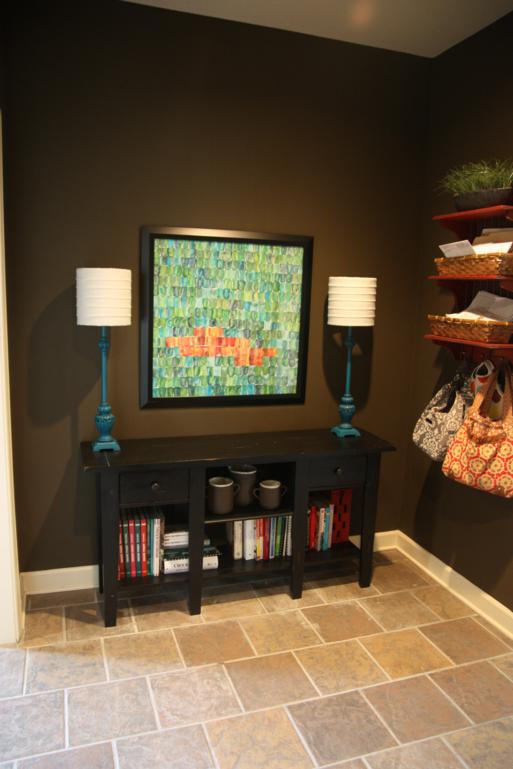
The first place I actually hung anything on the wall in our new house was in the back entry hall.  It's this little area off our garage door that we pass through every time we come in the house.  The walls were already painted a dark chocolate brown and though they will probably eventually get changed, for now they're staying as-is for a little bit.  That means it's a dark little space. As we moved in, we plopped down a black table that we had in our previous house.  The black table didn't really do anything to brighten up the dark chocolate walls.  So I tried propping an old picture up to add some brightness.  Coupled with a pair of old buffet lamps, the entry way was looking something like this.

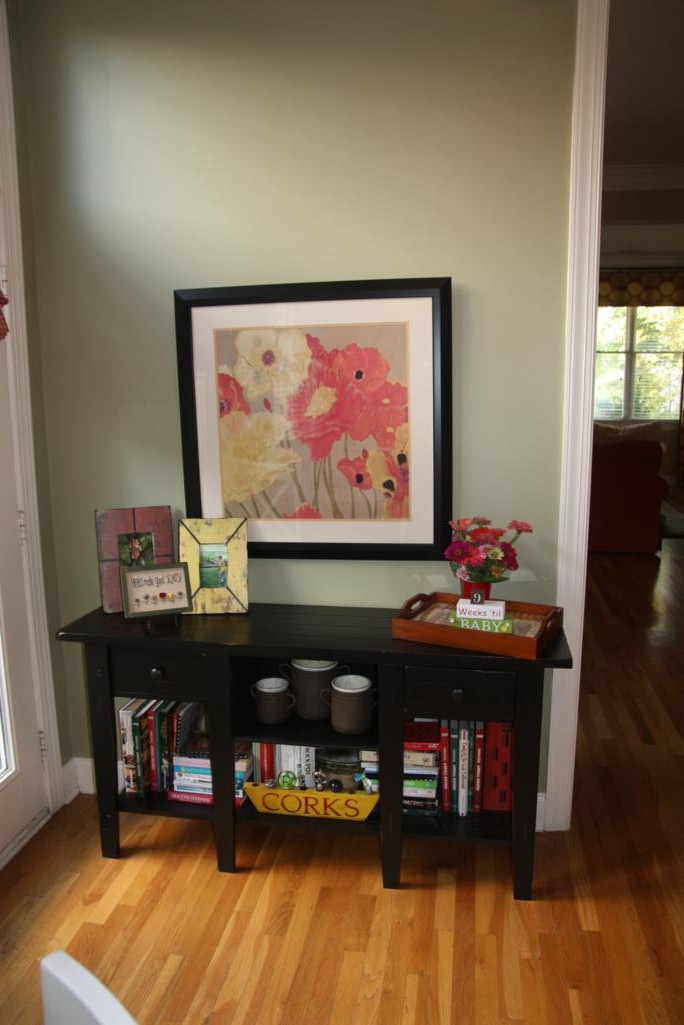
Pretty blah, right?  You may recognize the table and picture - they were in the kitchen of our old house, like this.

You can see that I had also stuck all my cookbooks back on the black table.  I was in the mood to unpack some boxes one day and those were the lucky ones chosen.  They at least helped add some color to the otherwise very dark table.

So I liked the idea of the lamps and a bright picture, but I was so over the ones I had sitting there.  The lamps were way too formal...and gold...for the look I was going for.  I wanted it to be bright and fun and casual when you walked in.  Also, while there's nothing wrong with the picture, I was so tired of looking at it and ready to replace it.  I had bought that back when I lived in an apartment by myself and then rehung it in our house after we got married, so it had been around for a while.  Time to go.

But because I wasn't ready yet to really tackle this space - like with paint and stuff - I wanted this mini makeover to be C-H-E-A-P.  I really didn't want to spend any money.

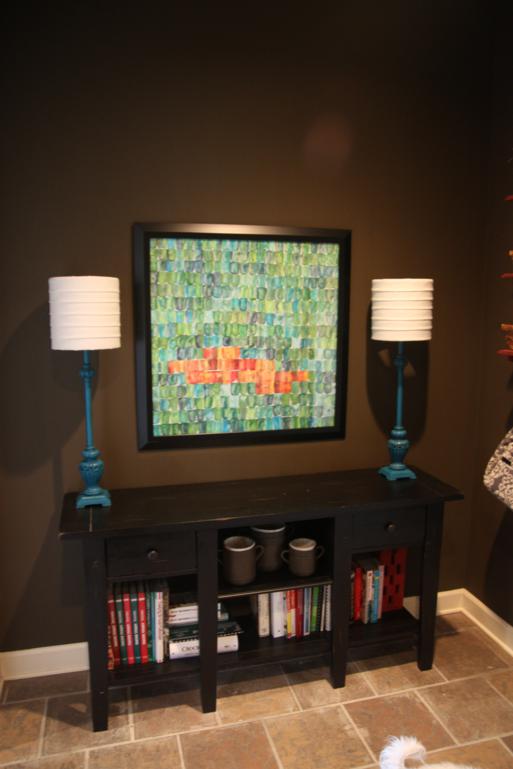
You've already seen how I made over the lamps here.  A quick coat of turquoise spray paint and a made-over lamp shade gave them some new life.  They probably aren't forever lamps, but they'll do for right now.

You've also already seen how I made some quick art using a putty knife here.  I popped that piece of artwork into that black frame that I already had and hung it over the table.

So, with very little money spent, my entry hall now looks like this.

It's not perfect, but I think it's a lot better than what I started with!


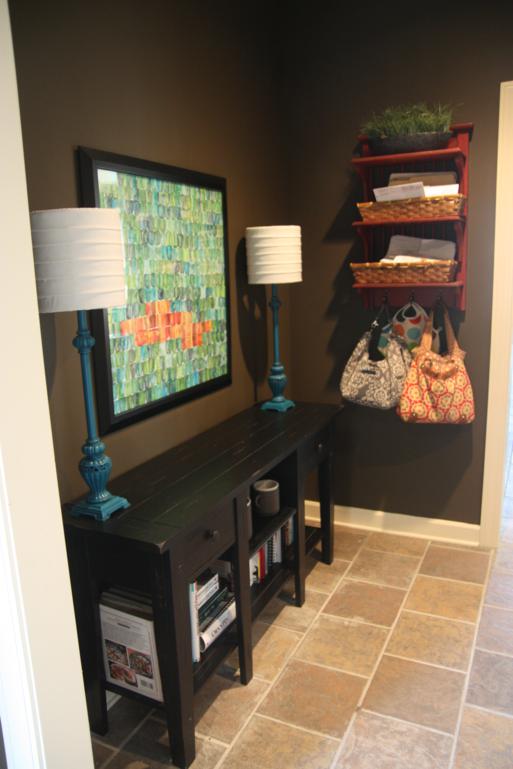
Here's a wider shot where you can see that I also hung a red shelf we already had.  This is my drop-spot when I come in the house - it's where my purse and the diaper bag both get hung.  I admit that it makes it look a little junky, but we have big plans for a mudroom someday so this is just temporary.

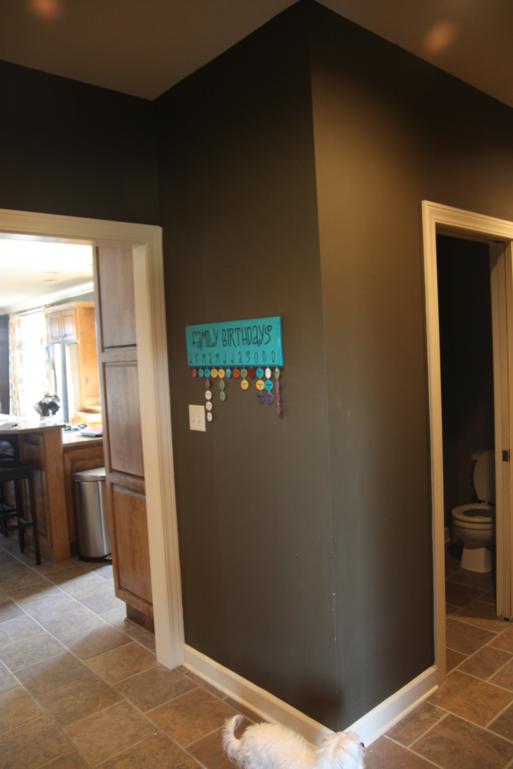
In keeping with the turquoise and red scheme, I also hung our colorful Family Birthdays sign on the opposite wall in this entry hall.  (Please excuse the smudged walls and toilet seat up...)

And that's a quick story of how three projects - putty knife art, lamp revamp, and the Family Birthdays sign - came together to make over my entry hall.  Who knows when we'll get around to really tackling this area, but you know I'll keep you posted and show you pics when we do!

Painted Built-Ins

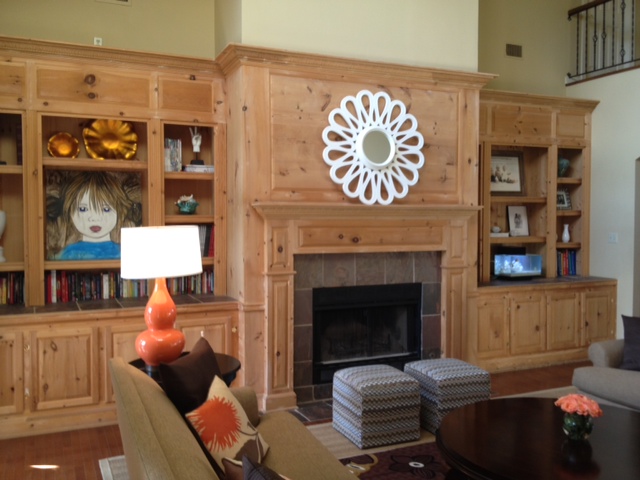
So, we bought this house that has the world's largest built-ins in the living room.  Seriously, they are huge.  I don't think this picture does them justice at all.

When we toured the house, they were decorated (obviously) and looked really nice.  Here is a picture I snapped that day.  This is not our stuff!

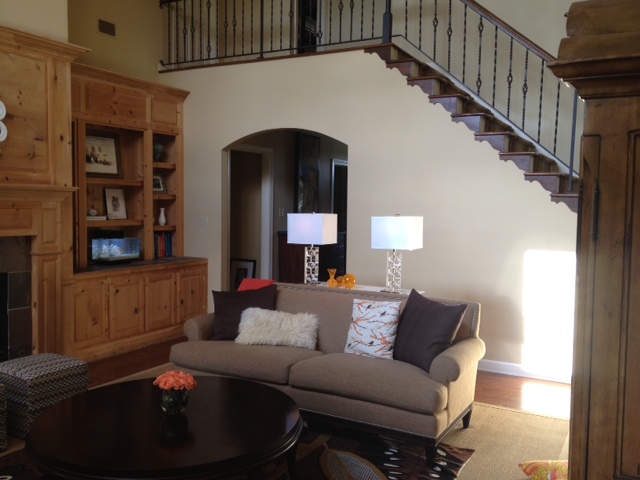
And here's another one that wasn't really focused on the built-ins, but you can still see them.  This picture also shows how the stairs to Anna's and Wyatt's bedrooms are in the living room and have a small balcony overlooking the room.  You can also see how the top of the built-ins goes past the height of the door frame and is almost all the way up to the bottom of the second story floor.  Again, for the slow people in the back, this is not our stuff in the room!

We loved the built-ins when we first saw them.  They looked so nice!  And we learned that the previous homeowner actually built them himself.  Who doesn't love having something custom made for their home?

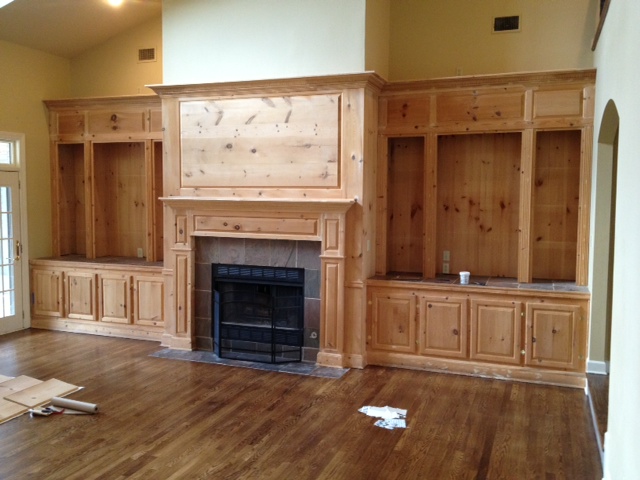
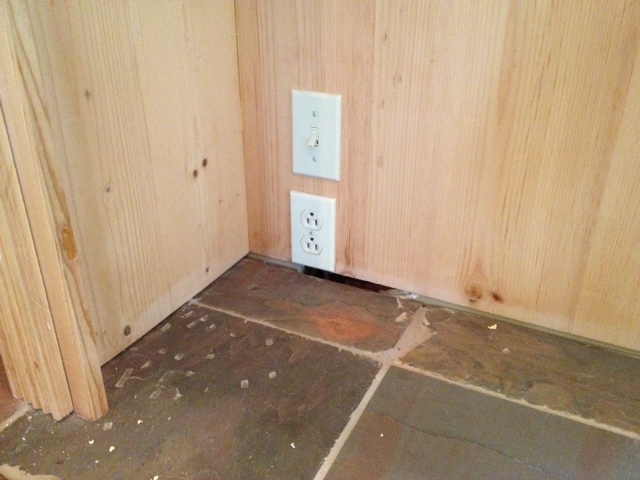
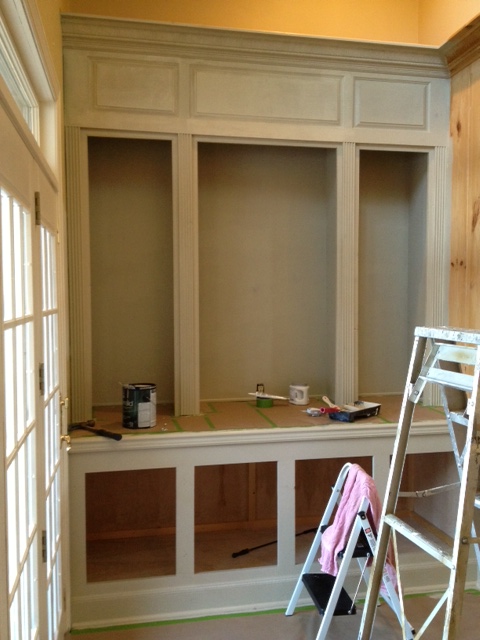
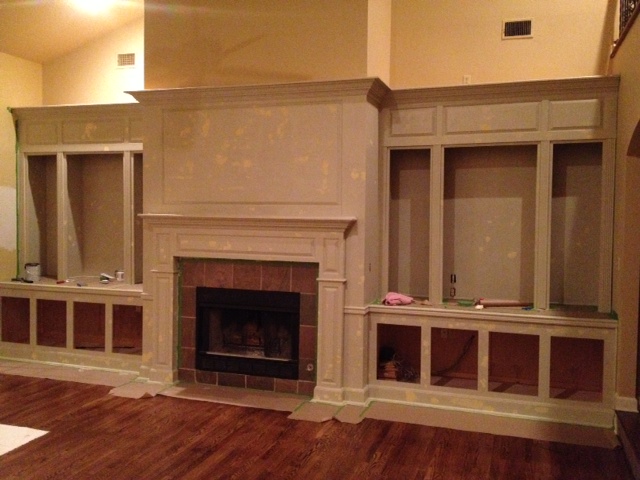
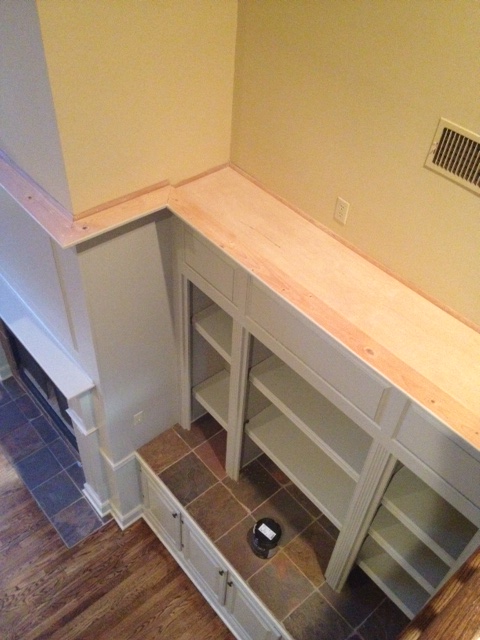
When we finally moved in and they built-ins were all cleaned off and empty, we realized they were actually just raw wood.  No stain.  No polyurethane.  Just the raw wood, complete with all the pencil markings from the previous owner's measurements when building.  And the millions of tiny nail holes?  Not filled in at all.  Oh, and where the top part - the hutch, if you will - met the tile counter top, there were huge gaps like he hadn't finished trimming it out.  See?

This was all good news and bad news.  I mean, hooray for having a completely blank slate and getting to do whatever I want to it, but ugh for having to do so much work!  I knew pretty much immediately that I'd eventually have them painted, but we were in no hurry.  I ruled out the option to stain them because a) I hate working with stain, b) that would make it harder to do all the wood-puttying, and c) the wood was really knotty and probably wouldn't look pretty stained anyway.

Like I said, we weren't really in any hurry to tackle these.  That is, until we had our hardwood floors restained.  The nice, shiny, freshly stained floors made the raw-wood-no-finish built-ins look terrible!  Ugh.

So I decided to paint them.  Yes, me.  Not professional painters.  Nope, I figured I could do it myself.  How hard could it be to paint a couple of bookshelves?

Since we were home from the beach early (after our first trip) but had plans to go back pretty soon after, I gave myself a very strict one-week deadline to get this project done.  I thought that was plenty of time.  The week got here and Monday and Tuesday both flew by without me even starting work on this beast of a project.  This was not looking good for my week deadline!

On Wednesday, I finally got started.  It took me so long to finally make the first move because I knew before any painting could happen, a LOT of pre-work had to be done.  Like, for instance, finishing trimming out the hutch to cover up those huge gaps I showed you above.  That was my first step and I just used a small piece of trim from Home Depot.  I cut them to size and then just glued them to the bottom of the hutch (I didn't have a nail gun at my house but really didn't want even more nail holes to fill anyway).

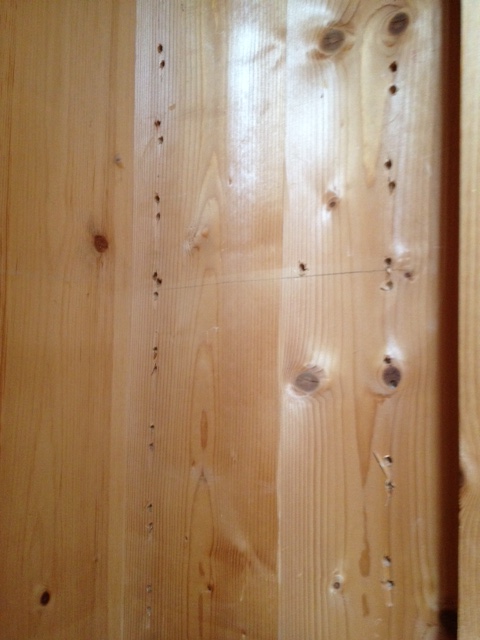
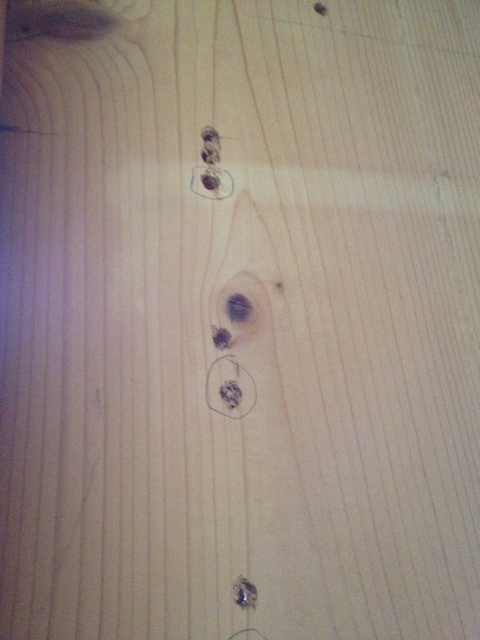
With the trim added, I could start filling in all those nail holes.  I'm pretty sure there were 9,264 of them.  Not that I counted.  There were other things that needed wood putty too.  The sides of the hutch compartments had multiple holes up and down the sides so that the shelves could be adjustable.  That's nice, except that when the previous owner was making those holes, he apparently got off on his measurements on a couple sides and made lots of extra holes.  I'm not sure if you can really tell what you're looking at in the picture below, but all of those little dots are holes (you can also see one of his pencil lines!).

They weren't too terribly noticeable in the raw wood since the wood was so knotty, but I knew once they were painted a solid color, those holes would stick out like a sore thumb.  I needed to fill in the ones that weren't needed.  This required me to get out my ruler and try to figure out which ones were spaced correctly and should stay, and which ones could go.  I circled the ones that I thought were correct.

Filling in holes with putty took the better part of a day to do.  It was exhausting and I hated every minute of it.  I also did just a little bit of caulking on a few seams that had really big gaps.

With all that done, it was time to finally clean the built-ins to get them ready for paint.  My mom was a huge help during this whole process - both with helping me work on the built-ins and watching Katie while I worked away.  She helped me with all the cleaning - one of vacuumed up dust while the other wiped things down with a wet rag.

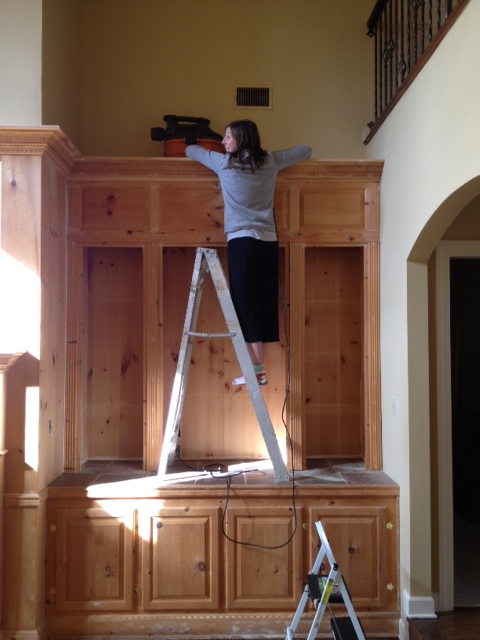
We fought over who would have to climb up on the ladder to vacuum all the dust off the top of the built-ins.  (You may be thinking "Why bother?"  But remember how the upstairs has a little balcony that overlooks the living room?  That means you can also see the top of the built-ins when you're standing upstairs.)  She didn't want me to climb up and I didn't want her doing it.  I eventually won the battle and said I was doing it.

I'm not sure that this picture makes it look as scary and as hard as it was to do.  That's a six foot ladder that we placed on top of the counter tops that I then climbed up.  The trim at the top of the built-ins sticks out so I had to wrap my body around it to see over it.  Oh, and I had to hoist the shop vac up there too since I couldn't just hold it while I was on the ladder.  I was sweating bullets by the time I finished cleaning the top.

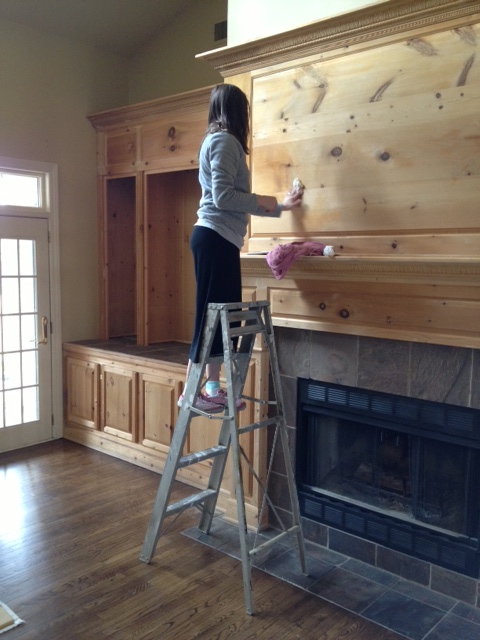
The mantel is in the middle and it is equally as huge as the bookshelves.  I'm guessing the actual mantel is at about six-ish feet tall - much higher than most mantels.  I had to climb back up on the ladder to wipe down the wood above it.  You'd think it would be way less scary to climb the ladder on the ground after climbing it up on the counter, but the tile it was sitting on was not level at all, so it wobbled the whole time I was on it.  More sweating.

And yes, I was wearing blue socks with my pink tennis shoes.  That's how I roll.

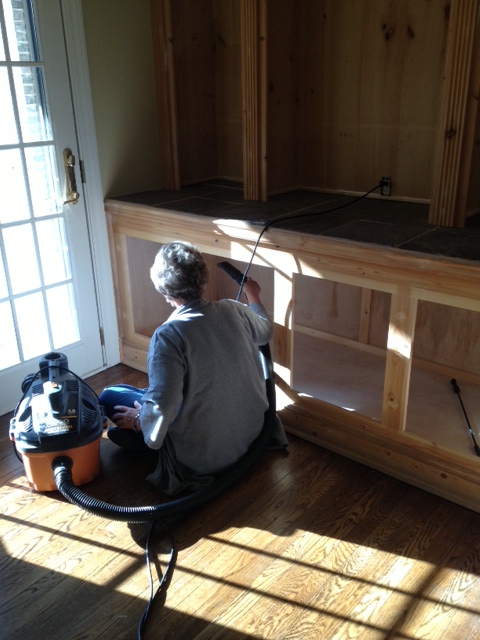
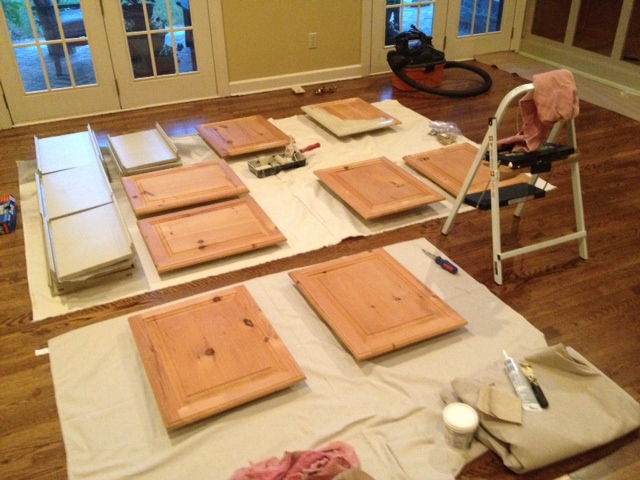
Taking the doors off was one of the last things we did.  Here is Mom vacuuming out the inside of the cabinets.

I can't remember now, but I think it was probably about a day and a half of pre-work before I ever even got to start painting.  After getting them cleaned up, we taped everything off.  I normally don't use tape when I paint, but I thought it would be best to do here to protect the tile countertops and my freshly stained hardwood floors.  We also taped down lots of paper to cover everything up.  Because the room was still empty from having the floors done, I was able to spread out several drop cloths to lay all the shelves out on.

I made 3 trips to Sherwin Williams before finally settling on the right paint color.  I had picked up several paint swatches from Home Depot a couple weeks earlier.  My goal was to find a neutral color that would work with both greys and khakis.  I planned on using greys in the room now, but knew that if I ever decided to change it up and go with browns or khakis, I didn't want to have to repaint these built-ins.  After lots of debate and flipping through every paint sample I had, I finally chose a Behr color that I liked.  I had chosen the darkest color on the card for the built-ins and figured I'd use the lighter shade above it for the walls (when they eventually got painted).  After bringing home those two colors, though, I decided they were WAY too light.  They practically looked white.  Back to the paint store I went.  Long story short, I ended up choosing the darkest color on the card tinted at 175% for the built-ins.  (It's Behr's Castle Path at 175% color-matched by Sherwin Williams, for anyone interested.)

Finally!  Time to paint!

I knew the shelves would be a pain to do because they'd require at least two coats of paint on both the top and bottom of each one.  I started with a coat on the tops so that they could be drying.

With the first coat drying on the shelves, I finally made my way to the actual built-ins.  I started on the bottom of the left side and worked my way up.  I was able to knock out this whole side while my mom watched Katie.

Katie eventually went down for a nap so my mom picked up a paintbrush and helped.  She tackled the mantel while I moved on to the right side.  By the time my mom had to leave and I had to quit to tend to the baby, we'd made it this far.

I hated having to stop after finally starting to see progress being made, but mommy duty called.  I counted down til Doc would be home from work so I could pass off the baby and pick the paintbrush back up.  I was determined to finish the first coat before going to bed!

It was later than I wanted it to be, but I did get it finished before calling it a night.

The next day was Saturday.  My original deadline had been Friday.  I was way behind schedule already.

The first coat brought good news and bad news.  The good news was that I could kinda tell how it was going to eventually look, and I could tell I was going to like it.  The bad news was that I could now see all the millions of cracks from the millions of knots in the wood, and I could also see the many, many places that needed calk.  Sigh...more work to do before putting the second coat on.

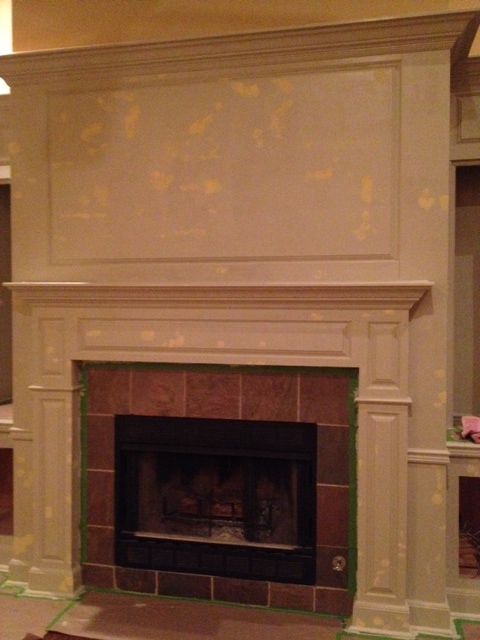
I got up early that Saturday and went to town with the wood putty.  I started out with the mindset that I'd only worry with filling in the big noticeable knots, but then, once I started going, I ended up filling in every little crack I saw.  I put so much wood putty on those built-ins that they soon resembled a kid with chicken pox slathered in calamine lotion.

I so wanted to keep working, but I had to take a break to jump in the shower and get cleaned up.  My family would be showing up soon so that we could take family pictures, so this project was put on hold for the rest of the day.

Late that night, I was back at it.  I grabbed my sanding block and started smoothing out all those spots with wood putty.  That part wasn't too hard, but it created lots of dust which meant I had to get the shop vac out again and vacuum it all up.  Then I had to wipe it all down again to get any remaining dust particles.  And THEN I had to caulk all the many, many seams.  I knew these would show up once I put on the first coat of paint, I just didn't realize it'd take so long to caulk them.  And caulk is so messy!

By the time I went to bed Saturday night, the built-ins were ready for their second coat.  Thank goodness!  I was able to knock that second coat out Sunday afternoon after church.  By the time Sunday evening rolled around, I was down to my last step: painting the doors.  I had already finished painting both sides of all 20 shelves and put them away.  Now I had to do both sides of all eight doors.

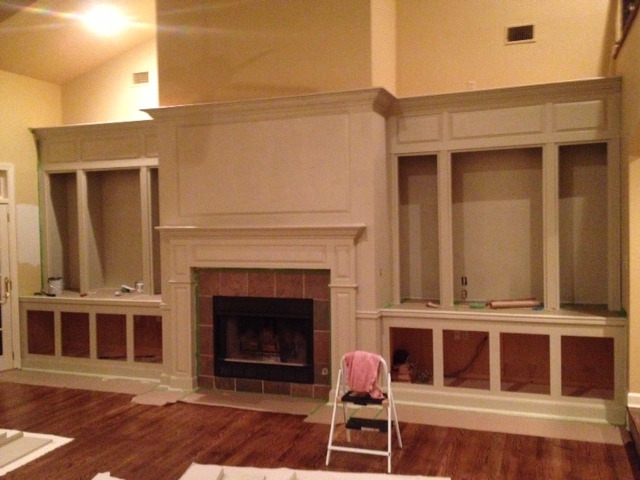
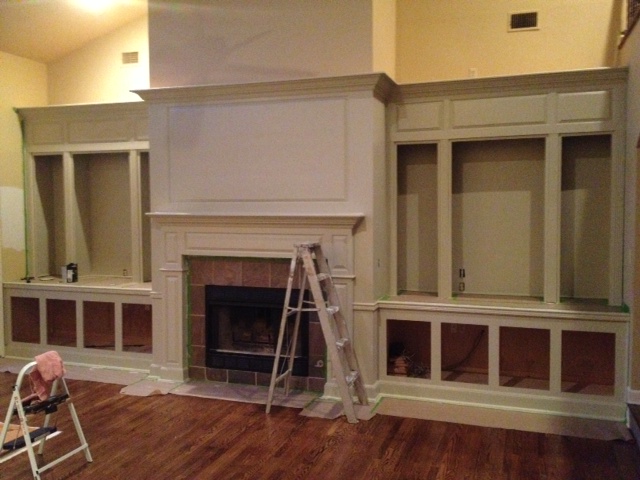
Here's a pic of the built-ins after the second coat.  See that ladder?  Can you tell how I had to climb all the way up it to paint the top part of the trim?  Scary.  Very, very scary.  I tried to play it cool because Doc didn't want me climbing up there in the first place, but now that it's over, I can say this: I was terrified.  The ladder wobbled with every breath I took, and I was painting so it's not like I was standing still up there.  It was also a pretty good workout.  I was so tense that every muscle in my body hurt by the time I was done.  I could barely walk the next day.

Let's see...I think it was Monday at this point.  My Friday deadline was long gone and we were leaving for Beach Trip Round Two in two days.  I needed to get this wrapped up!

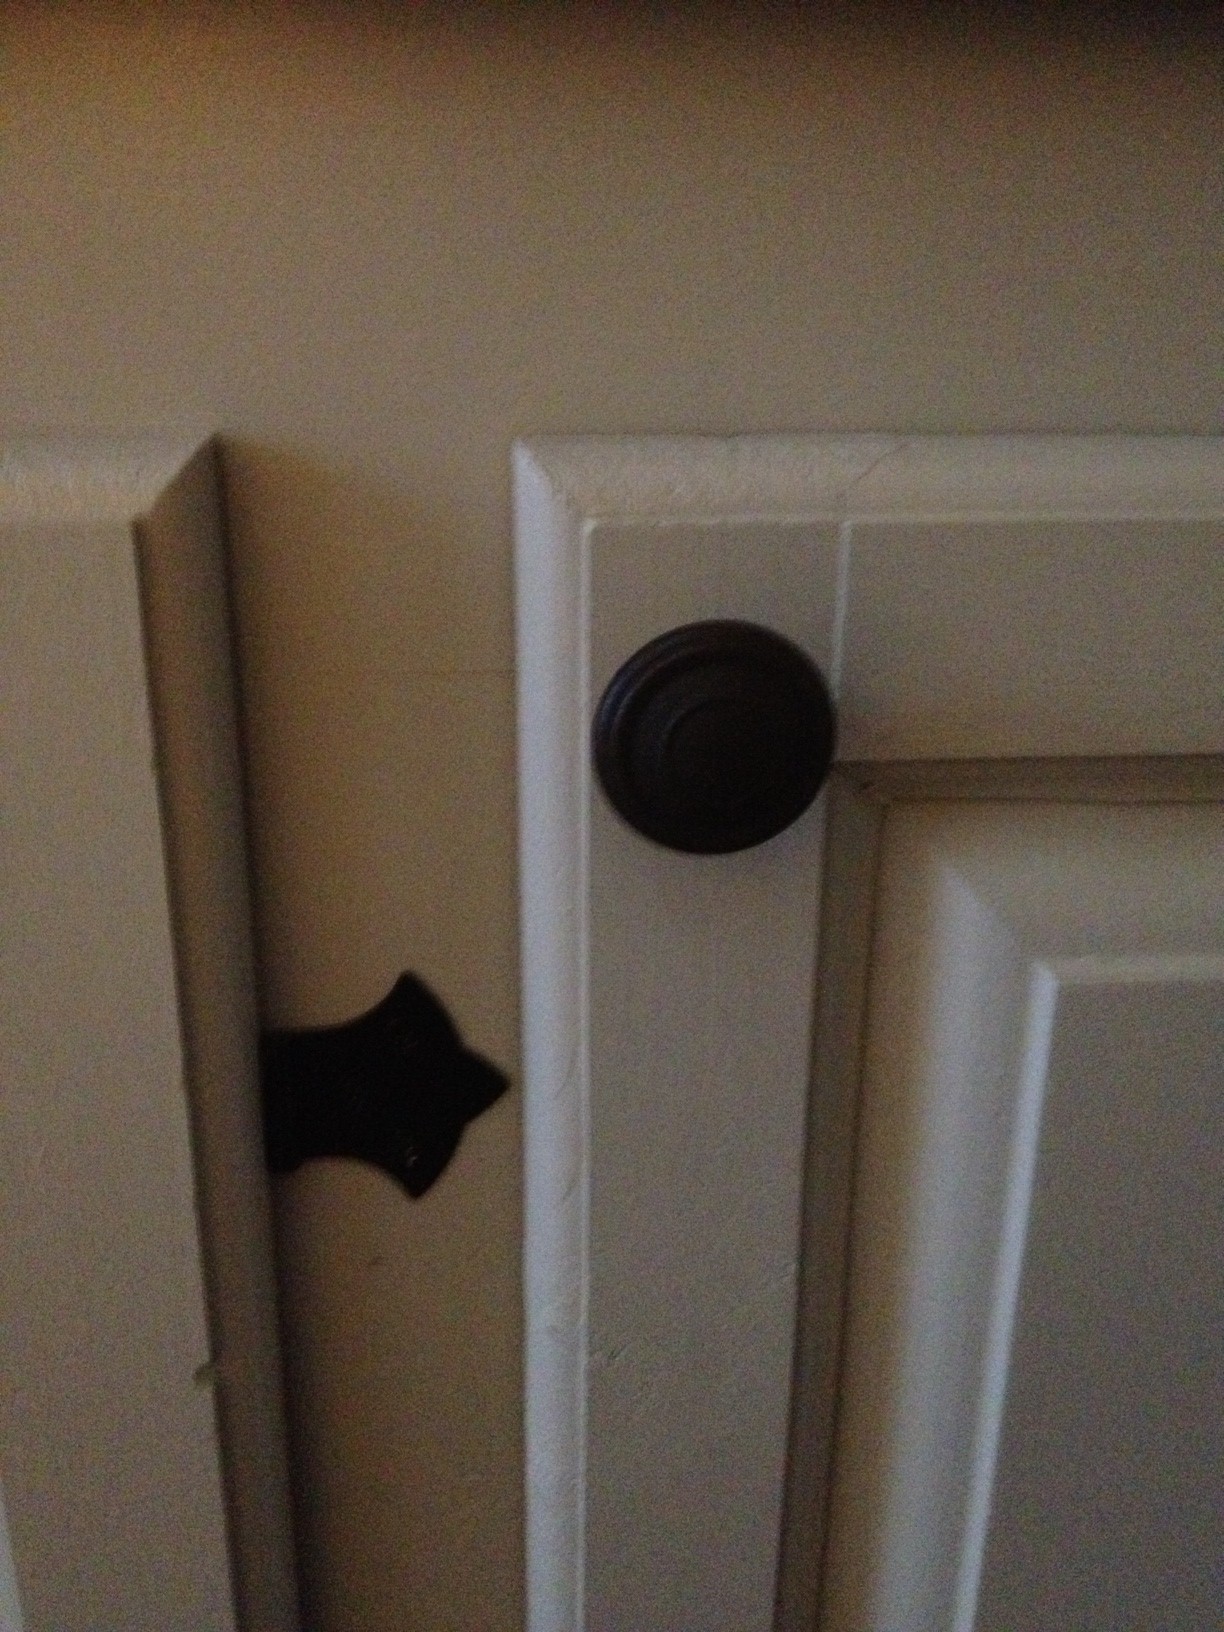
When I removed all the doors, I chose not to fill all the holes from the hinges.  In my opinion, doors are really hard to get lined up when hanging them, and since the previous owner had already done that part for me, I wanted to re-use the holes and his hinges.  No need to do it all over again.  The only problem was that the hinges he used were shiny gold.  Blah.  I searched at Home Depot and Lowe's but couldn't find the same hinges in a different finish, so I had to spray paint them.  I chose Oil Rubbed Bronze spray paint and painted the hinges and the screws needed to put hang them.

The previous owners of our house had never put knobs on the doors.  Fine by me because they probably would've been gold too (everything in our house is gold).  I was happy to pick out new knobs (also in oil rubbed bronze) but it did mean that I had to figure the spacing and drill the holes for the knobs myself.  No big deal, just something else that took a little time.

Here's a terrible quality picture of a new knob and a freshly painted hinge.  They're a perfect match!

With the doors rehung, the only thing left to do was put the shelves back in and call this project done!  Are you ready to see them?!  First, remember this is what we started with.

And now, after several days and too many hours of my hard work, sweat, and tears, they look like this!

Ok, that's a HUGE improvement but all I can notice in that picture is how awful the yellow-khaki walls look with them.  But here's the awesome news: after spending so much time painting the built-ins, Doc told me we could go ahead and have the walls in the room painted.  Woohoo!!  This is a two-story room so there was no way I could paint them myself, and I figured we'd have to wait a while before having them professionally done.  As soon as he told me that, I made the call and had the painters there on Tuesday to give us a quote.  They were going to start the very next day and by the time we made it home from the beach, the walls would be done too.  Aww, yeah!

In full disclosure, there is one part of the built-ins I didn't end up painting myself: the very tip top.  That was going to require me to climb up on a leaning ladder and I wasn't sure I had it in me!  Once Doc told me we could hire the painters to do the walls, I decided to ask them if they could just paint the tip top while they were up there doing the walls.  I'm so glad I didn't have to get on another ladder!

So much has already happened in our living room.  I've shown you the new floors and now the newly painted built-ins.  Hopefully I'll be back soon to show you the painted walls and our new furniture!

New Floors

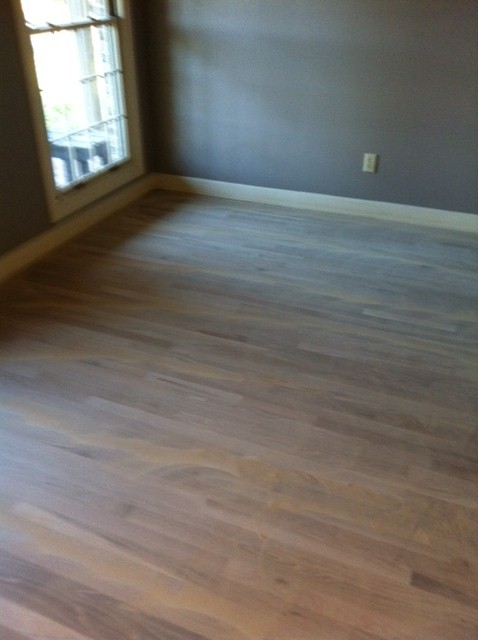
When we first toured our current home, it's safe to say that the hardwood floors were not its selling point.  Don't get me wrong - they weren't bad.  They just weren't as nice as some of the other fixtures in the house.  Obviously, they weren't bad enough to keep us from putting in an offer and eventually moving in. The entry way, dining room, office, and living room floors are all covered in red oak hardwood.  They were a pre-finished floor when the previous owners installed them, stained a color that very much brought out the red in the wood.  The sealer on them was very shiny.  Sometimes, if I squinted, it looked like we had red plastic floors.  Also, each wood slat had a beveled edge which meant as you walked across them barefoot, it didn't feel like one flat surface.  Instead, you could feel a small ridge between each board.

So yeah, not really our favorite part of the house but also something we weren't in a huge rush to replace.  Until it hit us that maybe instead of replacing them, we could try having them refinished.  I think I had someone over here giving us a quote within two days of us brainstorming this idea.  Yes! Please refinish our floors!

The good news was that they could definitely be done and the salesman waxed poetic about how beautiful they'd be afterwards.  The bad news was that it'd take three days to do and we wouldn't be able to sleep in the house during the process.  Too fumy.  More brainstorming...and then it hit me that we'd be out of town two weeks later at the beach, so why not have them done then?  Genius!  And so that's what we did.

Of course, before they could work on the floors, we had to completely empty the rooms.  Our office had been the dumping of all the miscellaneous and decorative items when we first moved in.  All of that stuff got carried upstairs to the bonus room.  The dining room didn't have much in it, so it was pretty easy to clear out, and all the living room furniture made its way into the eat-in kitchen.  No more meals at the kitchen table...

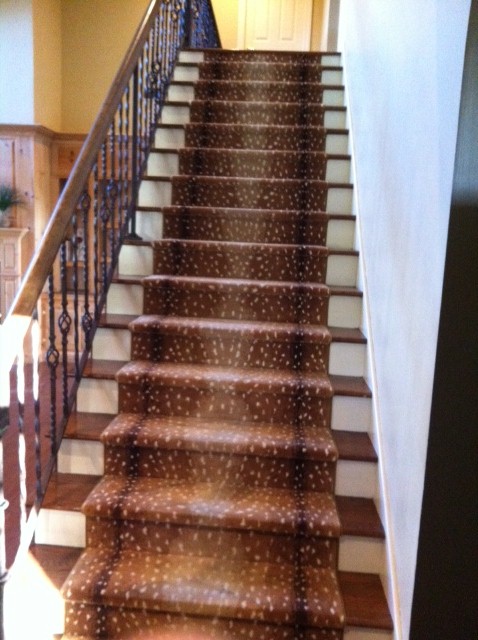
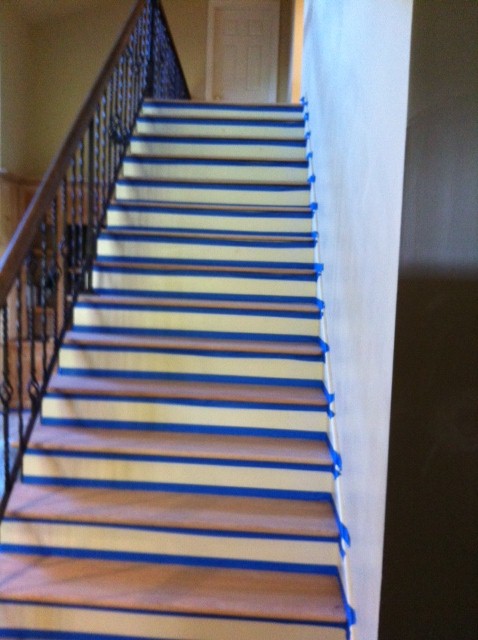
Mom, Katie, and I hit the road for Florida bright and early on a Monday morning.  Doc wouldn't be joining us until later in the week, so he was going to oversee the floor refinishing process and sleep at my parents' house.  A couple hours have we pulled out of the driveway, the floor crew arrived.  I don't know why I didn't think to take "before" pictures of the floors.  How stupid of me.  I did have Doc send me a pic of the stairs before they got to work.  The stairs had a carpet runner on them that, to me, resembled deer print.  In fact, I called them Bambi.  I've heard of leapord print and zebra print carpet, but I had no idea deer was an option.

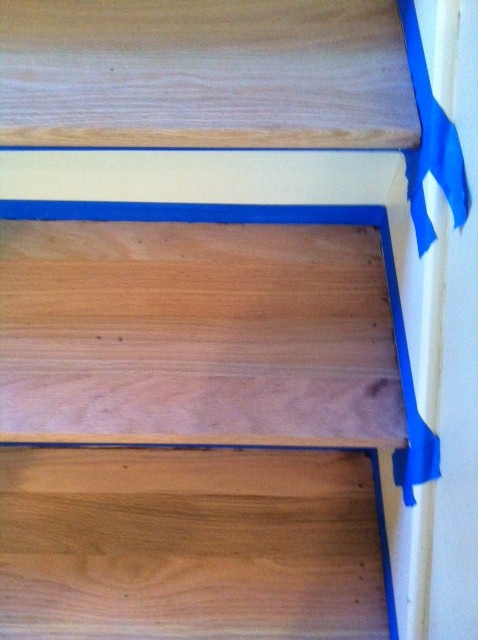
The floor crew would be pulling up the runner and refinishing the stairs too, thank goodness.

Here is a picture I found from when we first toured the home.  It really doesn't show off the floors very well since that wasn't what I was focused on at the time.  They don't look very red or shiny here, but maybe you can tell how there was a beveled edge between each slat.

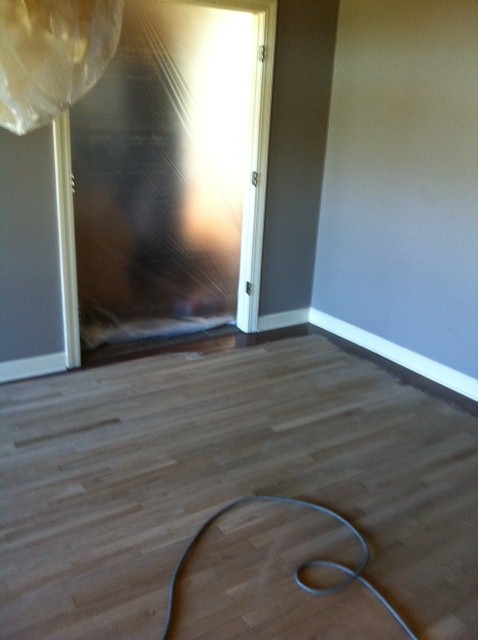
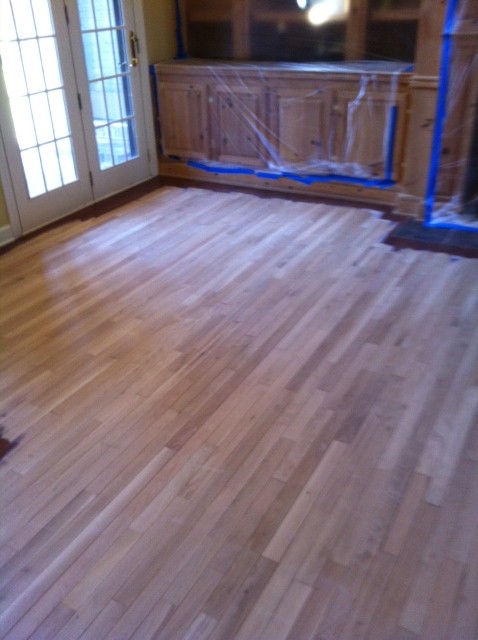
The crew from day one got to work sanding all the floors.  They would get them sanded down to the bare wood and apply the stain all on the first day.  Thanks to Sandy and the stock markets closing, Doc was actually able to leave work early for the day and come monitor their progress.  Here are the pics he sent me during the sanding process.

Bye-bye Bambi!

You can see in these pics that they hadn't done around the edges yet.  It's amazing to me how quickly they were able to get it sanded down to the bare wood.  And the sanding process removed the beveled edge from the slats.  Hooray!

Part of me wishes I could've been there to see how they did it, but part of me is glad I wasn't there to see how much dust it created.  Doc said they had tons of garbage bags that were full of nothing but sawdust!

Doc didn't hang out at the house all day, and by the time he made it back that evening, they had applied the coat of stain.  We chose a medium-dark color.  With the wood being red oak, we knew they could still have a red undertone, but we hoped this color would mask it a little bit more than what they originally were.

They were already looking so much better!

Days two and three were just for applying the coats of polyurethane.  We chose a satin finish - much less shinier than before.  This was the fumy part and the reason we couldn't stay there.  Each coat needed a day to dry, so even though they were done working on them early Wednesday, we couldn't walk on the floors until Thursday.  (Full disclosure: it's over a week later and we still haven't moved our furniture back in!)

Pretty new floors!

We aren't sure yet if we'll add another carpet runner on the stairs or just put down some trim to finish them out.  Only time will tell.

I love them.  It was not something we had originally planned on doing so soon, but we both thought it made sense to go ahead and do it while the rooms were still fairly empty.  I'm so, so glad we pulled the trigger and did it!  It makes a huge difference and of course, now it's kick-started some other projects.  With the floors looking so good, I want the rest of the rooms to look good too!  I'm tackling a huge living room project right now and can't wait to show  you the pics.  I'm about two days away from being done with it and I already think it makes a huge difference.  Pics soon!