Mudroom Renovation, Finale

Part One of this renovation was all about how we hired someone to come rip out our old mudroom cubbies and build us something much better looking and more functional for our family.

Part Two was about our marathon days of painting every single surface in the entry hall, from the new built-ins to the walls and ceiling to the bright red doors.

And now, I'm back to show you the complete After pictures of this little renovation.  We have lived with it now for about three months and completely love it!  It is so nice to have a spot to throw our coats and bags as we walk in the door, and we still have room to store more stuff in the cabinets.

mudroom
mudroom

It was ridiculously hard trying to get a straight-on shot of the new built-ins in such a tight space.  I actually had to stand outside on the patio to try to get one.

mudroom

When I originally designed the layout of the cabinets, I intended to put baskets up in that open space to throw things like hats and mittens in.  We don't need the additional storage yet so for now I just added some knick-knacks to decorate it.  I'm sure what's up there will change as I acquire things I like better. 

Mom was kind enough to cover a cushion for me and sew a couple throw pillows.  She really is the best.  The top of the bench hinges open for more storage.  It's still empty right now but I have a feeling it will corral outdoor toys in a few years.

mudroom

My dad and husband updated the hardware on the two exterior doors (one goes to the garage, the other to our back patio).  Out with the gold and in with the oil rubbed bronze!  And so far I'm still loving the bright red doors.  But the fresh paint on the insides of them make the dirty outsides look horrible.  I think painting the other sides will be a good spring project.

I was super glad to move all of our beach towels out of my laundry room cabinets.  They were taking up way too much room!  This spot makes much better sense for them so that we can grab them on our way out the door to the pool.  Each cabinet has removable shelves like you can see in this one.

mudroom door
mudroom

Look at the difference between these Before and After pictures.  Can we all agree that this is a HUGE improvement?

before
after

With this project complete, we're already scheming up the next one.  We may be calling Cesar the trim guy to come back sooner rather than later!

Mudroom Renovation, Part Two

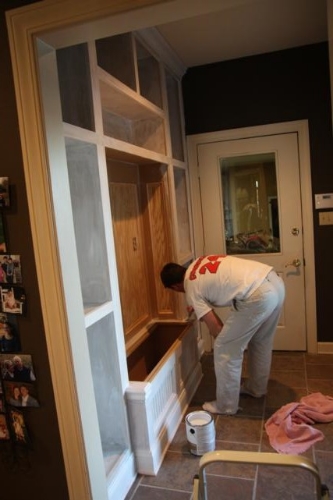
Ok, I'm finally back to continue the tale of our Mudroom makeover.  In Part One, I shared how we decided to hire out the actual construction work and our guy, Cesar, was able to build a masterpiece in just one day.  We planned to do all the finish work, though, so when his job was finished, we were left with this:

construction finished

Nice handiwork, but still a LOT left to do!  

We couldn't just pull out the paintbrushes and get to painting, though.  First, we had to do a bit of clean up.  The demolition process left a few bruises on our walls that needed to be smoothed over.

torn walls
torn walls
torn walls

The day before Thanksgiving, I broke out the hand sander and sanded the walls down as smooth as I could get them.  Then, I used spackling to smooth over the rough spots on the walls.  I also used wood putty to fill in all of Cesar's nail holes and LOTS of caulk to seal the seams.

wood putty

Thank goodness I had help with all the caulking!

helper
helper
helper

By day's end, it was ready for primer!  And get this: Thanksgiving morning I slept in.  When I finally woke up, I found my husband up and at it, already almost through with the coat of primer!  Isn't he the best?

primer

Now, we decided to tackle a lot more with this mudroom renovation than just the new built-ins.  One reason is because we wanted to paint the new built-ins white-white - the same color we're slowly updating all the trim in the house too - but that wasn't going to look good with the cream trim and cream doors that were in this little entryway.  So it made sense to go ahead and paint them white-white, too.

In all the other rooms we've tackled, we've also painted the ceiling white when we updated the trim, so we added the ceiling to the list.  And, why not put a fresh coat of paint on the walls while we were at it?  

While he finished up the primer, I took a good look at the doors and decided they needed a little bit of cleaning up before we could paint them.  I mean, just look at this horrible caulk!  I'm pretty sure the only rule in Caulking 101 other than seal whatever it is you're sealing is not to let it look like crap.  This is a big fat fail.

caulk fail
caulk fail

I went through about four razor blades scraping it all off, but I finally got a big portion of the sticky crap off.

As far as paint on the built-ins goes, I think we had to put two solid coats on it and then a little more for touch-ups.  In the pictures below, the trim also has fresh paint but the door has only been primed.  The nice thing about also painting the walls is that we didn't have to be careful while painting the trim.

paint
trim painted

Since our ceiling paint was not VOC-free and ladders don't jive well with pregnancy, Matt had ceiling duty by himself.  

ceiling

The reason I didn't paint the doors when I painted the trim is because I wanted to add a splash of color to the room by painting the doors something fun.  I ended up going BOLD with Posh Red.  Here they are after one coat of red (and fresh paint on the walls).  

red door
red doors

It felt like we painted nonstop for days.  Probably because we did.  In addition to every single surface in the entryway, we also had 8 doors and 12 shelves that had to be primed and painted (twice!) on both sides and all four edges.  It was quite the task!  We had them laid out all over our front entryway and office floors.  (This is an area where we haven't updated the trim yet.  See how much brighter white these look compared to the trim and french doors in the background?)

doors and shelves
doors and shelves

We made HUGE progress over our Thanksgiving break, but it seemed to take us forever to knock out the last final steps.  I didn't want to do the touch-ups on the red doors until after we switched out the hinges and hardware and, thanks to a wave of cold weather, we had to wait a while for a warm enough day to do it.  

As time-consuming as it was, I'm so glad we saved money by finishing it all off ourselves.  And I'm SO pleased with how it all turned out.  Stay tuned, I'll be back soon with the finished pictures so you can see it for yourself!

Henry's Nursery

Before we dive into these pictures, there are two things you need to note: baby Henry is not the baby boy in my belly, and this nursery is not at our house.  Instead, baby Henry and this nursery both belong to one of my best friends, Jenny, who has a due date of April 1st (no joke!).  I am stoked that my little boy will have a little buddy so close in age to play with.  I hope he and Henry become the best of friends!

Ok, onto some nursery pictures.  Last Friday my mom and I got to go over to Henry's nursery and add some things that we had worked on.  Mom made all of Henry's crib bedding and I mostly made his curtains (Mom helped...).  We were glad Jenny let us in on the fun!  

Before we arrived with all the textiles for the room, Jenny and her husband, Darrin, had already been hard at work.  They repainted several pieces of furniture in red and navy and also painted the walls a nice neutral khaki color.  They had already purchased super cute artwork for the walls, assembled some storage bins, and found the cutest light switch I've ever seen.  

I think the navy and red airplane nursery turned out SUPER cute, but I'll let the pictures do the talking...

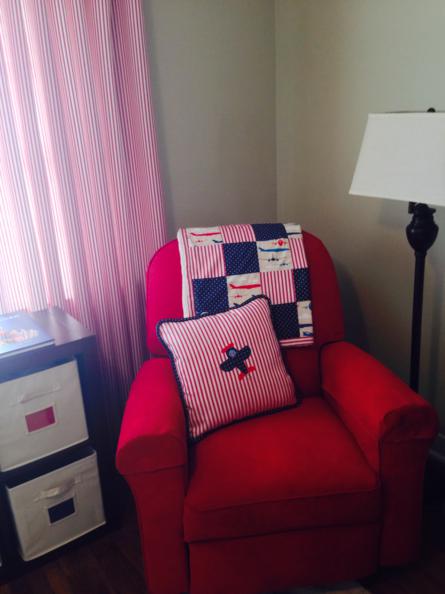
This is the view from the door to the room.  My mom made the (reversible) throw pillow and patchwork quilt out of leftover fabric.  Those storage bins came from Costco (I think) and Jenny added paint samples to the label holders to make th…

This is the view from the door to the room.  My mom made the (reversible) throw pillow and patchwork quilt out of leftover fabric.  Those storage bins came from Costco (I think) and Jenny added paint samples to the label holders to make them coordinate with the room.  Great idea!  The curtains are a red pillow ticking stripe.

There are so many things I love about this wall.  Is that little airplane rocking chair not the cutest thing you've ever seen!?!?  Jenny found it in a thrift-ish shop while on vacation and it was part of the inspiration for the theme of th…

There are so many things I love about this wall.  Is that little airplane rocking chair not the cutest thing you've ever seen!?!?  Jenny found it in a thrift-ish shop while on vacation and it was part of the inspiration for the theme of the room.  It's a perfect fit since they are also world travelers.  The crib skirt came from Pottery Barn and was a perfect match for the airplane fabric we had already found (should've requested a close-up pic of it, oops).  Mom made the bumpers - airplanes on the outside and minky dot on the inside - and also the crib sheet that matches the curtains.  The map above the crib shows animals from different countries, and I LOVE the propeller they found to hang on the wall!  The navy table in the corner will eventually be Henry's bedside table and they added the cutest little airplane pull to the drawer.

Maybe you can see the airplane fabric better here?

Maybe you can see the airplane fabric better here?

The reverse side of the throw pillow!

The reverse side of the throw pillow!

The navy dresser will also serve as a changing table as soon as they add the changing mat to the top of it.  The airplane pictures work perfectly in the room!

The navy dresser will also serve as a changing table as soon as they add the changing mat to the top of it.  The airplane pictures work perfectly in the room!

henry's room
henry's room

On the opposite wall is a red desk/hutch combo that is already housing several gifts for Henry.  He needs to hurry and get here so they can fill up those cute picture frames! Oh, and the cute vintage planes on top came from Hobby Lobby.

Hope you enjoyed the tour!  While I am more than ready to meet the little guy, I do hope he holds out for that April Fool's Day due date.  That could be a fun birthday to have!

Valentine's Day

Do you guys go out for Valentine's Day?  Matt and I have made it a tradition to stay in for dinner each year...partly because he loves to cook and partly because I have zero desire to cram into a crowded restaurant with the rest of the city only to get to choose from a limited menu.  

This year was no exception.  After Katie Wynn went to bed, we had a delicious meal just the two of us.  It wasn't really anything hard or fancy, just crab legs because we haven't had them in a long time.  And the most important things on the plate with those crab legs are the little lemon wedge and dish full of butter.  Mmmmmmm!  Matt did whip up a citrus salad to go with it that was quite tasty and a great compliment to the seafood.

crab legs
salad

So that's how our Valentine's Day ended.  Now let me back up to earlier in the week when I assembled our Valentines.  For Katie Wynn's class of 6 one-year-olds, I bought heart-shaped glasses and added a tag that said, "I only have eyes for you, Valentine!"  For my coworkers, I made little bags of candy but also stuck in a heart straw so that I could include a tag that said, "Sip, sip, hooray!  It's Valentine's Day!"  Thanks, Pinterest, for that idea.

glasses
sip sip hooray

I'm pretty sure my coworkers liked their treats.  I have no idea if Katie Wynn's friends liked theirs or not but she loved getting to carry them in so that's all I care about!

One of the best parts of Valentine's Day was getting to spend my morning with this cutie.  We were in no rush to get to daycare so we got to play for a few minutes.  She loves to rock in her little rocking chair!

valentine
valentine
valentine

When she got home from "school," we went through her bag of goodies to see what all she got.  Some moms went WAY out and had bags full of stuff for each child, while others just sent the store-bought cards.  I'm glad we fell somewhere in the middle.

Katie Wynn got to play with stickers for the first time ever!  Moments after I helped (er, guided?) her into sticking them onto these little bags, I turned my back for a second and she peeled them off and stuck them to the table!  Maybe we'll dodge buying stickers for a while?

stickers
stickers

I don't know for sure, but if I had to guess I'd say the best part of Katie Wynn's day was after dinner when she got to have her first-ever homemade rice krispie treat!  I'd been fighting a week-long craving for them and finally gave in and bought the ingredients.  And then I ate the whole dang pan of them.  That might explain why, on Sunday morning, I woke up and looked like my thighs had exploded.  No more homemade rice krispie treats for a while...  :)

Bren's New Bedroom

It's been two weeks since Mom and I decorated Bren's new bedroom, but I'm just now getting the pictures off my camera.  As I mentioned in this post, my brother and his family just moved into a brand new, custom-built home during the Christmas holidays and they have been working hard to get it furnished and decorated.  My sister-in-law Beth asked my mom and I early on if we would be interested in tackling Bren's room and we couldn't say yes fast enough!  You know we love a good decorating project.  :)

Aside from two art projects that I worked on, my mom really did all the hard work for this room.  We started our brainstorming by perusing Beth's Pinterest boards and actually ended up purchasing some fabric that she had pinned.  With that ordered, we were off to a good start on design ideas.  We knew Beth wanted Bren (age five) to have a girly room, but not too baby-ish.  Mom furiously sewed away and made new curtains, pillow shams, a bedskirt, throw pillow, and seat cushions.  I got off pretty easy with my jobs!

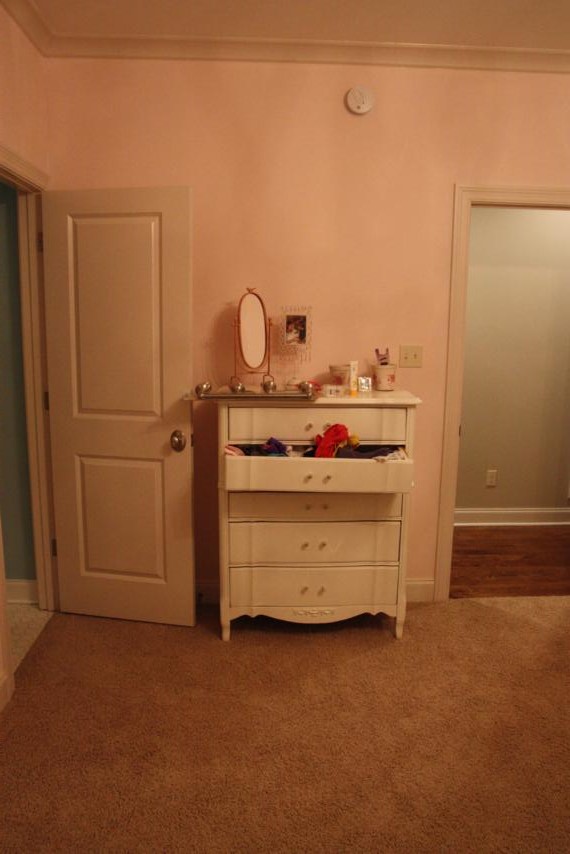
When we arrived early that Wednesday morning, I snapped a few quick pictures of the room before we got started.  I wouldn't say this is a true "before" picture since I'm pretty sure all of Bren's stuff had just been placed in the room and was waiting for us to spruce it up.  It's not like it had already been decorated or anything.  The new curtains had already been hung to give Bren some privacy from her floor-to-ceiling windows, but other than that, you can see that we were working with a pretty blank slate!

View from the door

View from the door

View from the windows

View from the windows

blank slate
blank slate

Even though Mom and I had everything ready to go when we arrived, it still probably took us about four hours to put it all together.  It was just the two of us so we didn't have any of the guys to do all of our picture hanging for us!

Here are some of the same views as above after we were finished working.  Noticeably missing - and this is driving me nuts! - are new bedside lamps.  We just couldn't find the perfect lamps in time to have them there on "install day."  I think a couple of bigger matching lamps will really add a lot to the room!

View from the door

View from the door

View from the windows

View from the windows

new decor
new decor

Ok, now let's take a closer look at some of the details.  :)

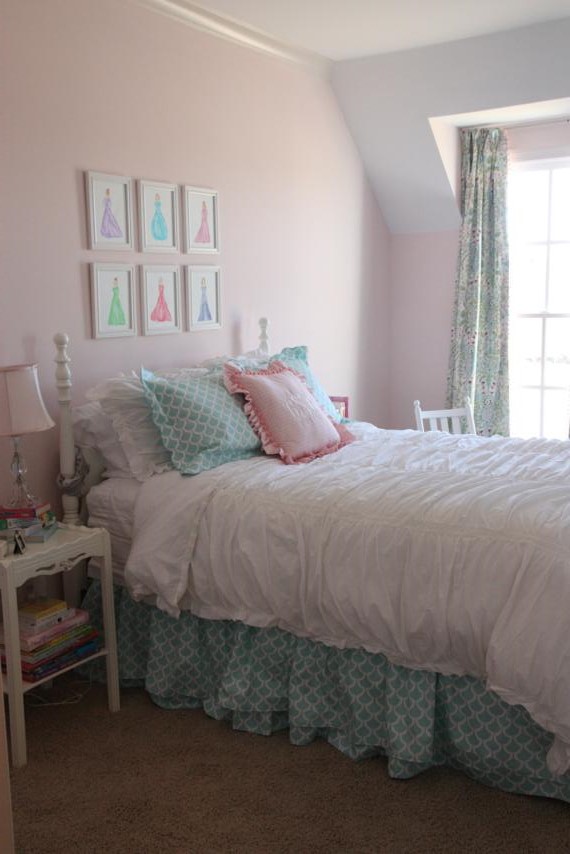
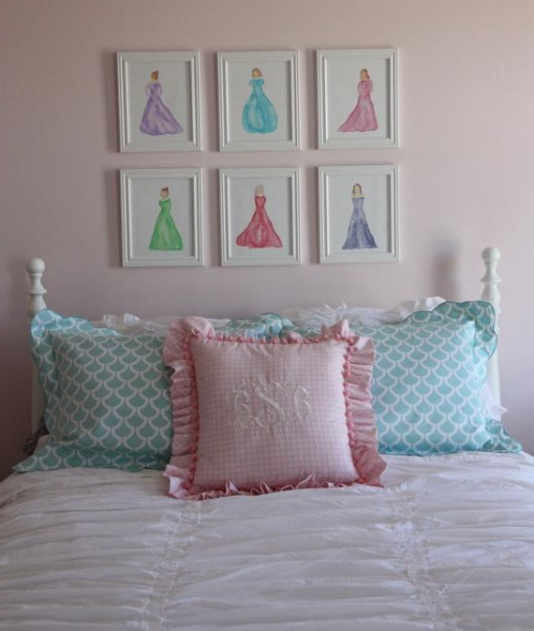
Like I said earlier, my mom made the bedskirt, pillow shams, and throw pillow.  The fluffy white comforter came from Target.  We bought the six white frames hanging above the bed at Michael's (buy one get one half off!) and I painted the watercolor "princesses" (as Bren calls them) to go in them.  My paintings are amateur at best and I've already told Beth she's welcome to replace them with much better art, but they serve their purpose for now by adding color to the wall and being cheap!

bedding and art

I wish I had taken a before picture of the little rocker, but I forgot.  We found it at a consignment shop and, while the bones of it were really good, it was U-G-L-Y.  The seat and back were both covered in a fabric straight out of the 70s.  We ripped off the fabric, cut a wooden seat for it, coated it in white paint, and added a pink little cushion (made by Mom, of course).  Bren told Mimi that it's her favorite part of the room!  I hear she likes rocking her babies to sleep.

The silhouette on the right is something we checked Bren out of school to go get.  Mom, Katie Wynn, and I picked Bren up and we had a girls' day out one afternoon.  Both girls did great sitting still for their silhouettes!  The black and white doesn't necessarily go with the color scheme of Bren's room, so I can see it finding a home somewhere else in their house.

new rocker
silhouette

We cleaned off the top of the dresser and added Bren's name in silver.  These are just those cardboard letters from Hobby Lobby (surely you've seen them before) that I spray painted with some Chrome Silver paint.  Easy peasy.

dresser
silver letters

Mom added a pink pompom trim to the edge of the curtains (another idea Beth had pinned to her Pinterest board) and I think they really take the curtains up a notch on the cuteness scale.  Love them!  

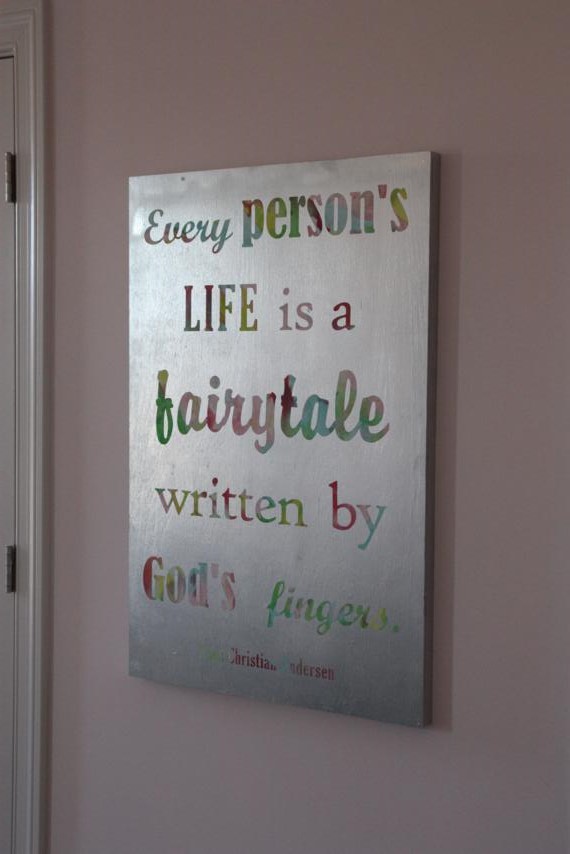
I also love how the watercolor quote art I made looked in the room.  This picture isn't great (darn glares!) but in my opinion, it looks great hanging on the pale pink walls!

curtains
quote art

Dad and I made the little bench for the foot of the bed.  It's by no means the fanciest or craftiest bench ever created, but what I really love about it is that we used all scraps to create it!  We tore the legs off an older coffee table and cut them down to be bench height and found scrap wood to use for the rest of it.  Can't beat a free bench!  Mom made the cushion to go on top of it.

bench
bench

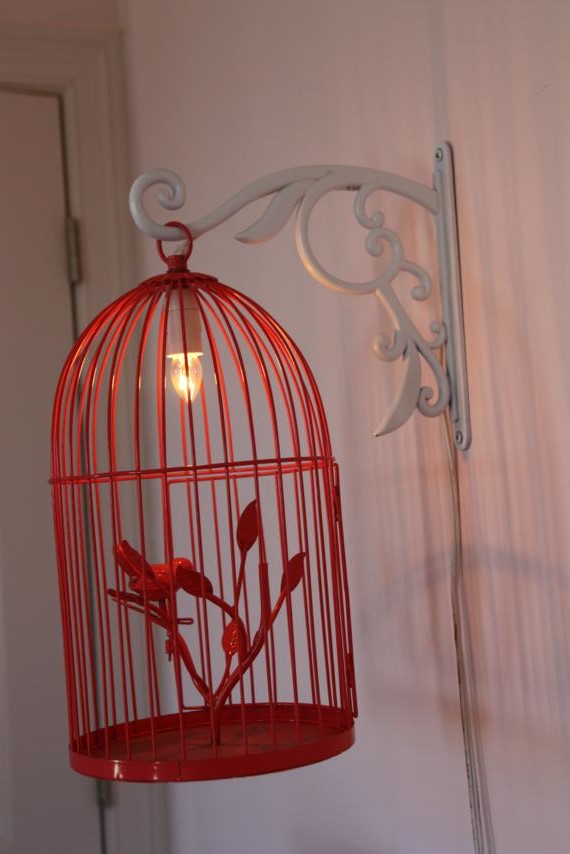
One of the first things we purchased for the room was this funky pink birdcage lamp.  It originally had a long chain so that it could be hung from the ceiling, but since Bren already had a chandelier in the center of her room, we cut off the chain and hung it from a garden hook that we had spray painted white.  Now it lives above her chest of drawers.

birdcage
birdcage

In the new house, Bren has her very own bathroom connected to her bedroom.  Just like her bedroom, it was a blank slate when we arrived.

blank slate
blank slate

We hung the shower curtain that Mom had made and added some stuff to the walls to make it look a little better.  Here are the same(ish) views as above.

new decor
new decor

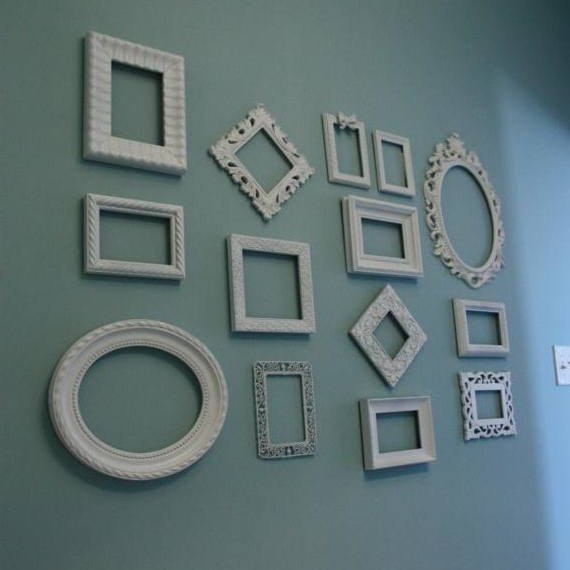
The wall of white frames is probably what took up the most amount of our time.  We didn't know the layout before hand so we had to figure that out, and then actually hanging them wasn't the easiest task.  But I do love how they turned out!  Some are new frames from Hobby Lobby and others are just ones we found in our stashes and spray painted white.

wall of frames

Can a girl in the South have her own bathroom and it not have monogrammed towels?  I don't think so.

monogrammed towel
hand towel

We hung the new shower curtain from grommets which I think is our new favorite way to make them.  It allows the shower curtain to slide so much easier on the rod.  

shower curtain
new decor

I think that just about completes the tour of Bren's new girly-girl room!  Beth sent Mom and me the cutest video of Bren getting to see it all for the first time.  I think she likes it!  I hope she likes it for a good little while because we've got to turn our attention to a certain little boy's nursery now! :)

What do you think of her room?  Got a favorite part?  Do you like the princesses above the bed like Bren?  Or, do you know where we can find the perfect bedside lamps?