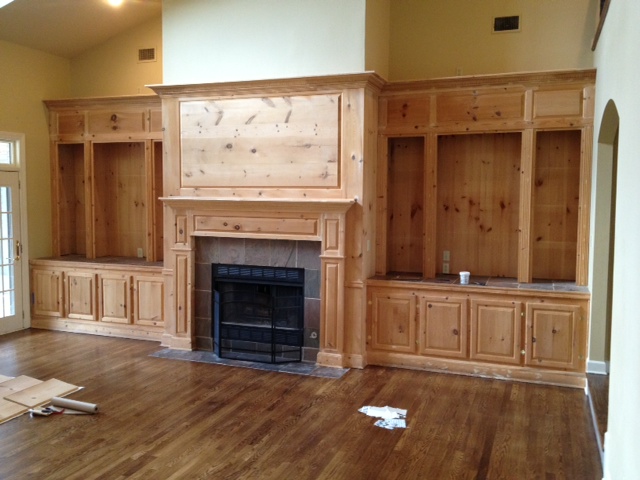
So, we bought this house that has the world's largest built-ins in the living room. Seriously, they are huge. I don't think this picture does them justice at all.
When we toured the house, they were decorated (obviously) and looked really nice. Here is a picture I snapped that day. This is not our stuff!
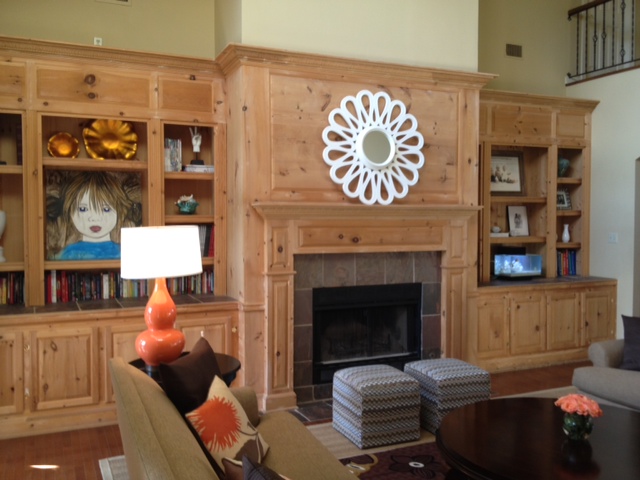
And here's another one that wasn't really focused on the built-ins, but you can still see them. This picture also shows how the stairs to Anna's and Wyatt's bedrooms are in the living room and have a small balcony overlooking the room. You can also see how the top of the built-ins goes past the height of the door frame and is almost all the way up to the bottom of the second story floor. Again, for the slow people in the back, this is not our stuff in the room!
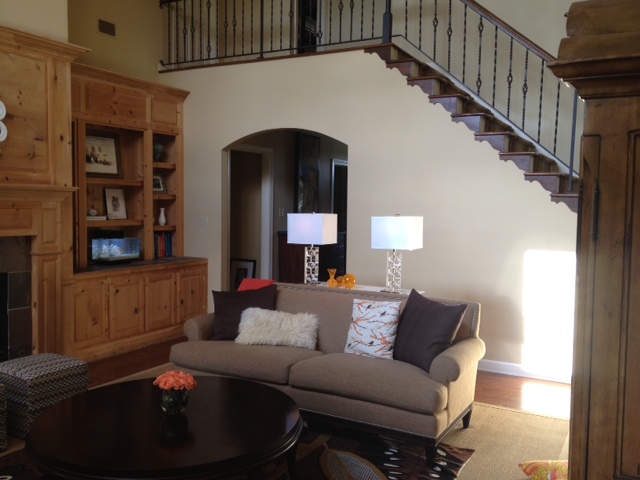
We loved the built-ins when we first saw them. They looked so nice! And we learned that the previous homeowner actually built them himself. Who doesn't love having something custom made for their home?
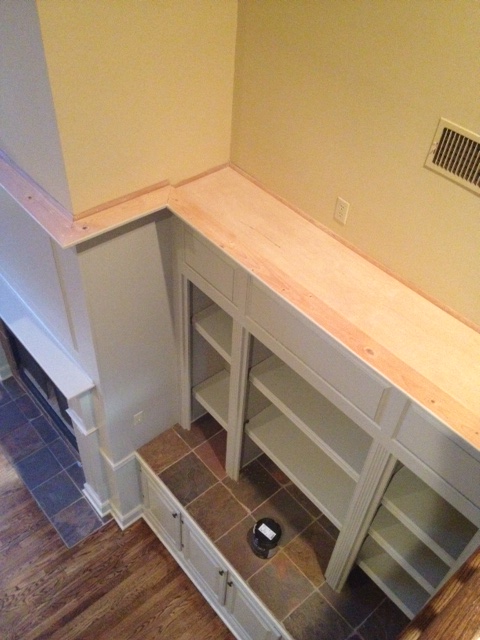
When we finally moved in and they built-ins were all cleaned off and empty, we realized they were actually just raw wood. No stain. No polyurethane. Just the raw wood, complete with all the pencil markings from the previous owner's measurements when building. And the millions of tiny nail holes? Not filled in at all. Oh, and where the top part - the hutch, if you will - met the tile counter top, there were huge gaps like he hadn't finished trimming it out. See?
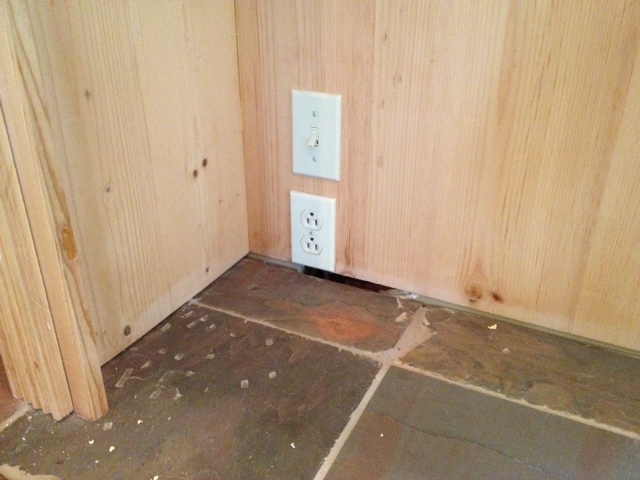
This was all good news and bad news. I mean, hooray for having a completely blank slate and getting to do whatever I want to it, but ugh for having to do so much work! I knew pretty much immediately that I'd eventually have them painted, but we were in no hurry. I ruled out the option to stain them because a) I hate working with stain, b) that would make it harder to do all the wood-puttying, and c) the wood was really knotty and probably wouldn't look pretty stained anyway.
Like I said, we weren't really in any hurry to tackle these. That is, until we had our hardwood floors restained. The nice, shiny, freshly stained floors made the raw-wood-no-finish built-ins look terrible! Ugh.
So I decided to paint them. Yes, me. Not professional painters. Nope, I figured I could do it myself. How hard could it be to paint a couple of bookshelves?
Since we were home from the beach early (after our first trip) but had plans to go back pretty soon after, I gave myself a very strict one-week deadline to get this project done. I thought that was plenty of time. The week got here and Monday and Tuesday both flew by without me even starting work on this beast of a project. This was not looking good for my week deadline!
On Wednesday, I finally got started. It took me so long to finally make the first move because I knew before any painting could happen, a LOT of pre-work had to be done. Like, for instance, finishing trimming out the hutch to cover up those huge gaps I showed you above. That was my first step and I just used a small piece of trim from Home Depot. I cut them to size and then just glued them to the bottom of the hutch (I didn't have a nail gun at my house but really didn't want even more nail holes to fill anyway).
With the trim added, I could start filling in all those nail holes. I'm pretty sure there were 9,264 of them. Not that I counted. There were other things that needed wood putty too. The sides of the hutch compartments had multiple holes up and down the sides so that the shelves could be adjustable. That's nice, except that when the previous owner was making those holes, he apparently got off on his measurements on a couple sides and made lots of extra holes. I'm not sure if you can really tell what you're looking at in the picture below, but all of those little dots are holes (you can also see one of his pencil lines!).
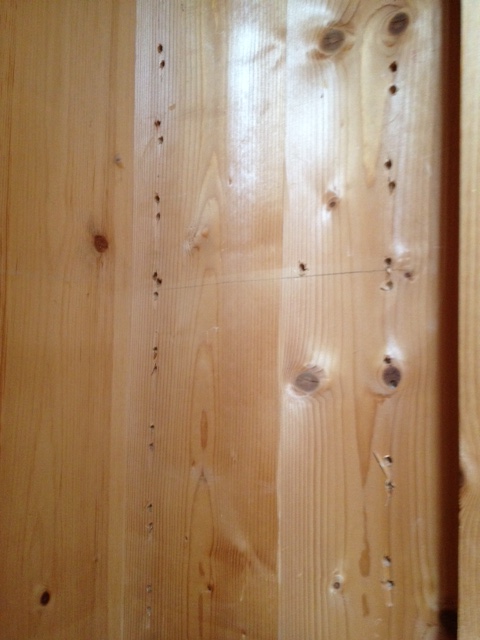
They weren't too terribly noticeable in the raw wood since the wood was so knotty, but I knew once they were painted a solid color, those holes would stick out like a sore thumb. I needed to fill in the ones that weren't needed. This required me to get out my ruler and try to figure out which ones were spaced correctly and should stay, and which ones could go. I circled the ones that I thought were correct.
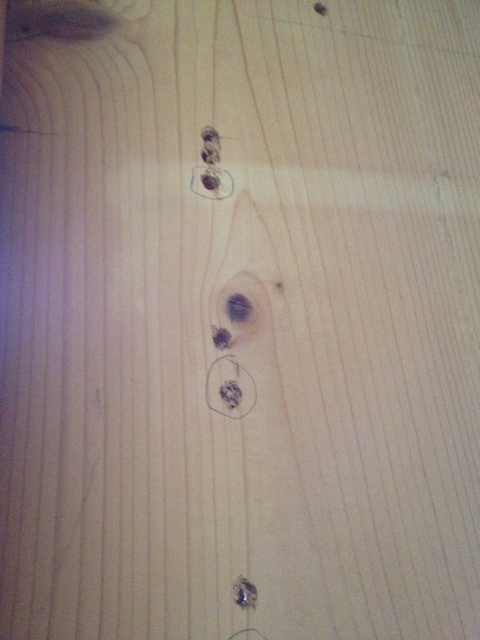
Filling in holes with putty took the better part of a day to do. It was exhausting and I hated every minute of it. I also did just a little bit of caulking on a few seams that had really big gaps.
With all that done, it was time to finally clean the built-ins to get them ready for paint. My mom was a huge help during this whole process - both with helping me work on the built-ins and watching Katie while I worked away. She helped me with all the cleaning - one of vacuumed up dust while the other wiped things down with a wet rag.
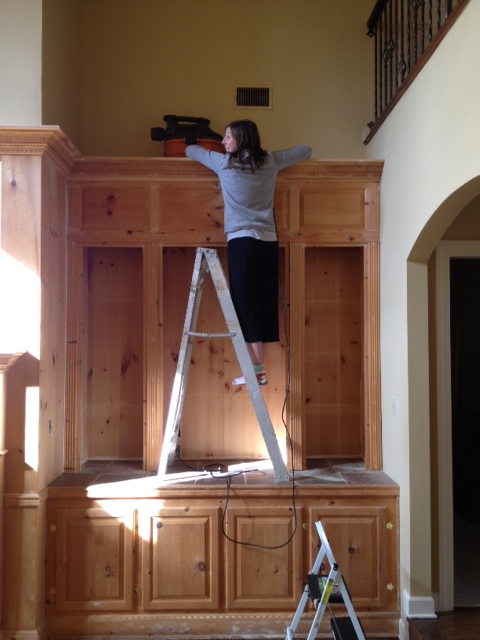
We fought over who would have to climb up on the ladder to vacuum all the dust off the top of the built-ins. (You may be thinking "Why bother?" But remember how the upstairs has a little balcony that overlooks the living room? That means you can also see the top of the built-ins when you're standing upstairs.) She didn't want me to climb up and I didn't want her doing it. I eventually won the battle and said I was doing it.
I'm not sure that this picture makes it look as scary and as hard as it was to do. That's a six foot ladder that we placed on top of the counter tops that I then climbed up. The trim at the top of the built-ins sticks out so I had to wrap my body around it to see over it. Oh, and I had to hoist the shop vac up there too since I couldn't just hold it while I was on the ladder. I was sweating bullets by the time I finished cleaning the top.
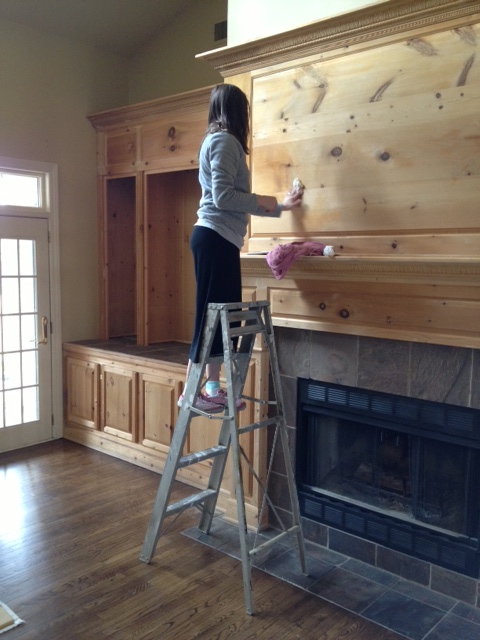
The mantel is in the middle and it is equally as huge as the bookshelves. I'm guessing the actual mantel is at about six-ish feet tall - much higher than most mantels. I had to climb back up on the ladder to wipe down the wood above it. You'd think it would be way less scary to climb the ladder on the ground after climbing it up on the counter, but the tile it was sitting on was not level at all, so it wobbled the whole time I was on it. More sweating.
And yes, I was wearing blue socks with my pink tennis shoes. That's how I roll.
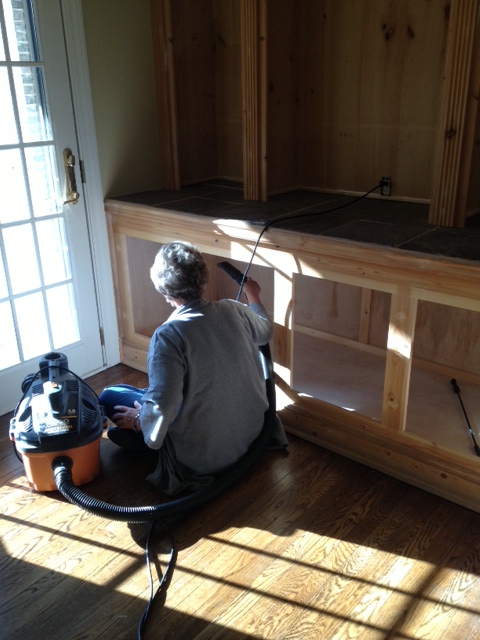
Taking the doors off was one of the last things we did. Here is Mom vacuuming out the inside of the cabinets.
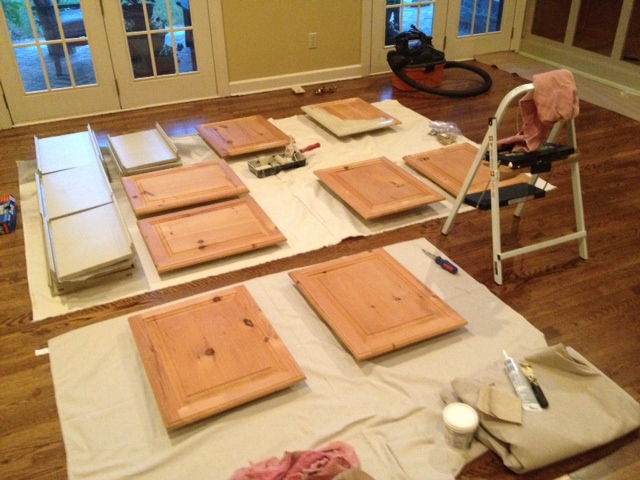
I can't remember now, but I think it was probably about a day and a half of pre-work before I ever even got to start painting. After getting them cleaned up, we taped everything off. I normally don't use tape when I paint, but I thought it would be best to do here to protect the tile countertops and my freshly stained hardwood floors. We also taped down lots of paper to cover everything up. Because the room was still empty from having the floors done, I was able to spread out several drop cloths to lay all the shelves out on.
I made 3 trips to Sherwin Williams before finally settling on the right paint color. I had picked up several paint swatches from Home Depot a couple weeks earlier. My goal was to find a neutral color that would work with both greys and khakis. I planned on using greys in the room now, but knew that if I ever decided to change it up and go with browns or khakis, I didn't want to have to repaint these built-ins. After lots of debate and flipping through every paint sample I had, I finally chose a Behr color that I liked. I had chosen the darkest color on the card for the built-ins and figured I'd use the lighter shade above it for the walls (when they eventually got painted). After bringing home those two colors, though, I decided they were WAY too light. They practically looked white. Back to the paint store I went. Long story short, I ended up choosing the darkest color on the card tinted at 175% for the built-ins. (It's Behr's Castle Path at 175% color-matched by Sherwin Williams, for anyone interested.)
Finally! Time to paint!
I knew the shelves would be a pain to do because they'd require at least two coats of paint on both the top and bottom of each one. I started with a coat on the tops so that they could be drying.
With the first coat drying on the shelves, I finally made my way to the actual built-ins. I started on the bottom of the left side and worked my way up. I was able to knock out this whole side while my mom watched Katie.
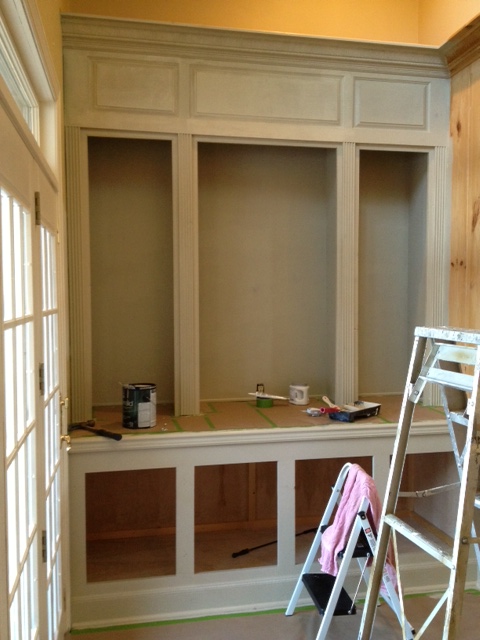
Katie eventually went down for a nap so my mom picked up a paintbrush and helped. She tackled the mantel while I moved on to the right side. By the time my mom had to leave and I had to quit to tend to the baby, we'd made it this far.
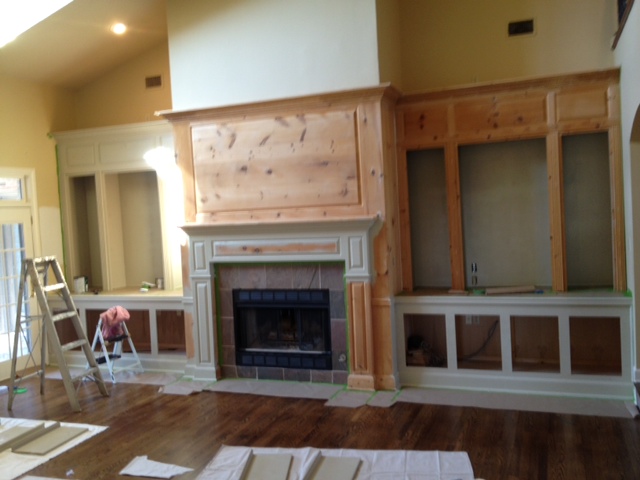
I hated having to stop after finally starting to see progress being made, but mommy duty called. I counted down til Doc would be home from work so I could pass off the baby and pick the paintbrush back up. I was determined to finish the first coat before going to bed!
It was later than I wanted it to be, but I did get it finished before calling it a night.
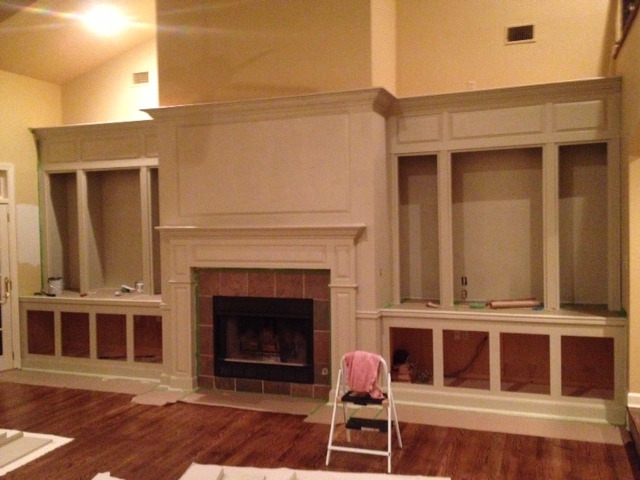
The next day was Saturday. My original deadline had been Friday. I was way behind schedule already.
The first coat brought good news and bad news. The good news was that I could kinda tell how it was going to eventually look, and I could tell I was going to like it. The bad news was that I could now see all the millions of cracks from the millions of knots in the wood, and I could also see the many, many places that needed calk. Sigh...more work to do before putting the second coat on.
I got up early that Saturday and went to town with the wood putty. I started out with the mindset that I'd only worry with filling in the big noticeable knots, but then, once I started going, I ended up filling in every little crack I saw. I put so much wood putty on those built-ins that they soon resembled a kid with chicken pox slathered in calamine lotion.
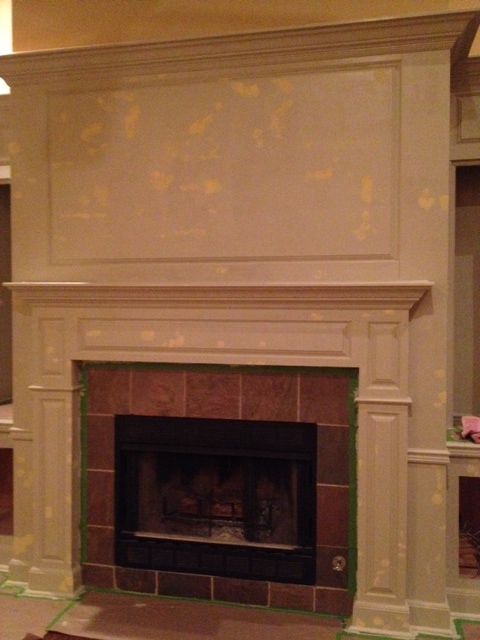
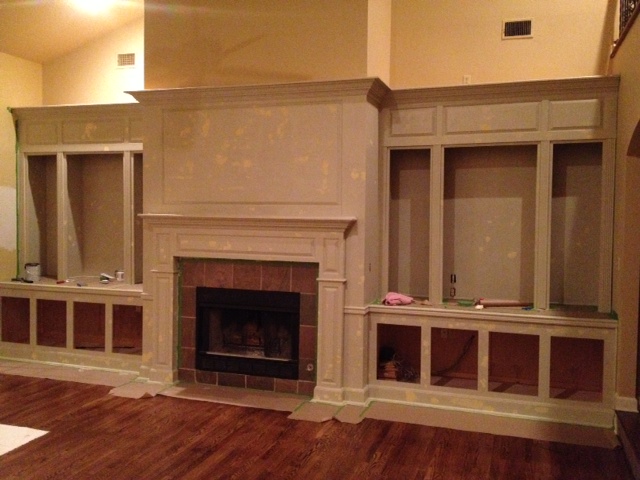
I so wanted to keep working, but I had to take a break to jump in the shower and get cleaned up. My family would be showing up soon so that we could take family pictures, so this project was put on hold for the rest of the day.
Late that night, I was back at it. I grabbed my sanding block and started smoothing out all those spots with wood putty. That part wasn't too hard, but it created lots of dust which meant I had to get the shop vac out again and vacuum it all up. Then I had to wipe it all down again to get any remaining dust particles. And THEN I had to caulk all the many, many seams. I knew these would show up once I put on the first coat of paint, I just didn't realize it'd take so long to caulk them. And caulk is so messy!
By the time I went to bed Saturday night, the built-ins were ready for their second coat. Thank goodness! I was able to knock that second coat out Sunday afternoon after church. By the time Sunday evening rolled around, I was down to my last step: painting the doors. I had already finished painting both sides of all 20 shelves and put them away. Now I had to do both sides of all eight doors.
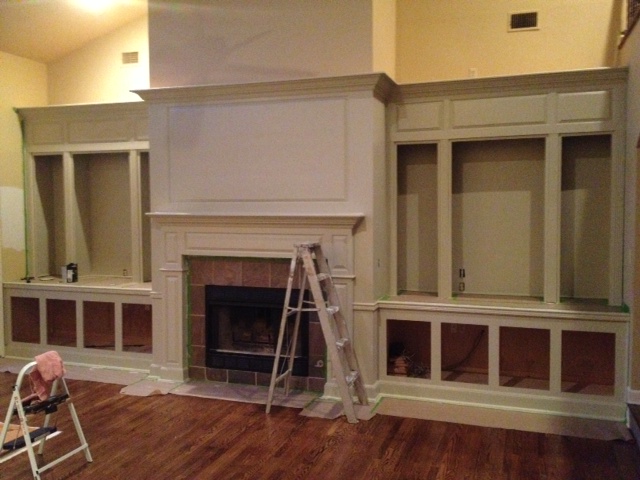
Here's a pic of the built-ins after the second coat. See that ladder? Can you tell how I had to climb all the way up it to paint the top part of the trim? Scary. Very, very scary. I tried to play it cool because Doc didn't want me climbing up there in the first place, but now that it's over, I can say this: I was terrified. The ladder wobbled with every breath I took, and I was painting so it's not like I was standing still up there. It was also a pretty good workout. I was so tense that every muscle in my body hurt by the time I was done. I could barely walk the next day.
Let's see...I think it was Monday at this point. My Friday deadline was long gone and we were leaving for Beach Trip Round Two in two days. I needed to get this wrapped up!
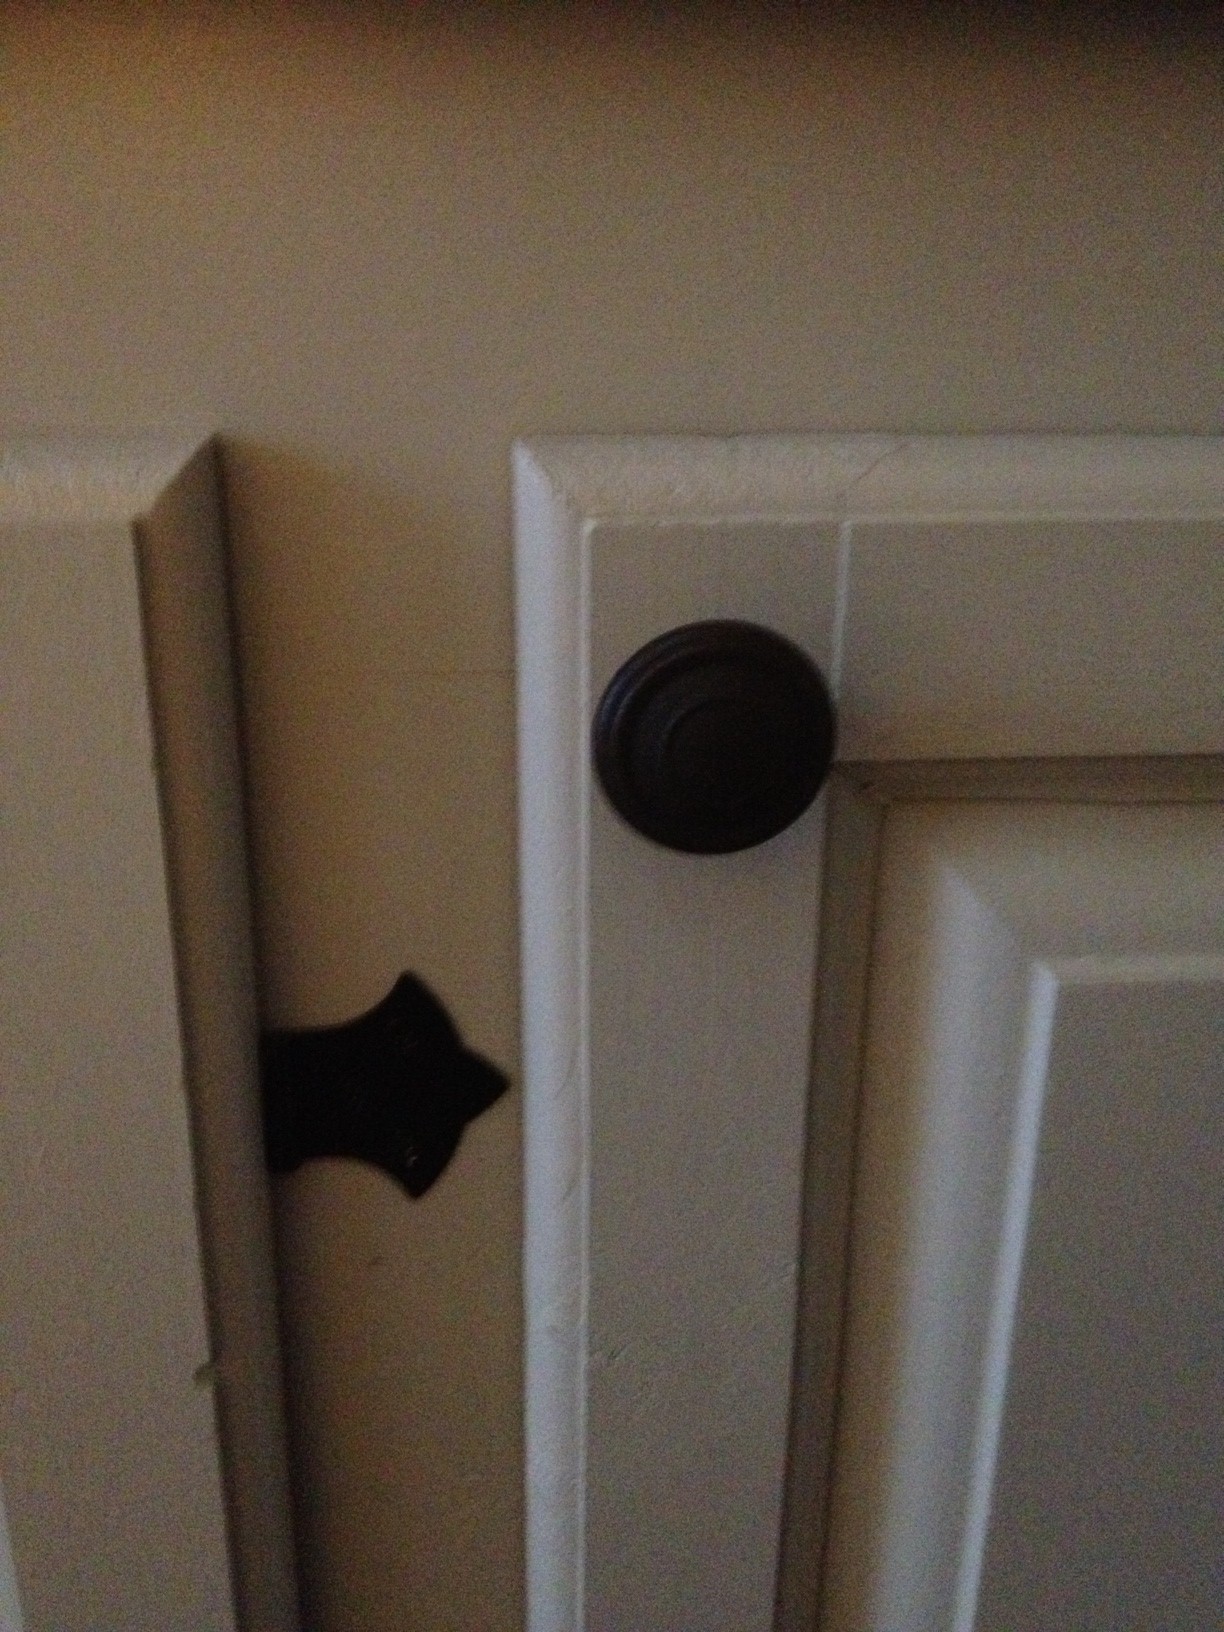
When I removed all the doors, I chose not to fill all the holes from the hinges. In my opinion, doors are really hard to get lined up when hanging them, and since the previous owner had already done that part for me, I wanted to re-use the holes and his hinges. No need to do it all over again. The only problem was that the hinges he used were shiny gold. Blah. I searched at Home Depot and Lowe's but couldn't find the same hinges in a different finish, so I had to spray paint them. I chose Oil Rubbed Bronze spray paint and painted the hinges and the screws needed to put hang them.
The previous owners of our house had never put knobs on the doors. Fine by me because they probably would've been gold too (everything in our house is gold). I was happy to pick out new knobs (also in oil rubbed bronze) but it did mean that I had to figure the spacing and drill the holes for the knobs myself. No big deal, just something else that took a little time.
Here's a terrible quality picture of a new knob and a freshly painted hinge. They're a perfect match!
With the doors rehung, the only thing left to do was put the shelves back in and call this project done! Are you ready to see them?! First, remember this is what we started with.

And now, after several days and too many hours of my hard work, sweat, and tears, they look like this!

Ok, that's a HUGE improvement but all I can notice in that picture is how awful the yellow-khaki walls look with them. But here's the awesome news: after spending so much time painting the built-ins, Doc told me we could go ahead and have the walls in the room painted. Woohoo!! This is a two-story room so there was no way I could paint them myself, and I figured we'd have to wait a while before having them professionally done. As soon as he told me that, I made the call and had the painters there on Tuesday to give us a quote. They were going to start the very next day and by the time we made it home from the beach, the walls would be done too. Aww, yeah!
In full disclosure, there is one part of the built-ins I didn't end up painting myself: the very tip top. That was going to require me to climb up on a leaning ladder and I wasn't sure I had it in me! Once Doc told me we could hire the painters to do the walls, I decided to ask them if they could just paint the tip top while they were up there doing the walls. I'm so glad I didn't have to get on another ladder!
So much has already happened in our living room. I've shown you the new floors and now the newly painted built-ins. Hopefully I'll be back soon to show you the painted walls and our new furniture!

