A Cake to Make

I have a yummy delicious cake to share with you - one that you absolutely should make because it is so delicious!  The idea of it is really simple: buy these two items....  

...mix the cake just like the box says, then stir in the can of frosting, bake and....voila!  A yummy cake!

Or, in the case of my first two attempts, a colossal fail.  But man, did I want to figure it out!  Cause that cake up there?  It might look atrocious, but it tastes soooo good!  Like, so good that I ate about a third of that one out of the pan while making the next one.  And then kinda felt like I was going to be sick from eating so much of it but it was so worth it.

Determined to make the delicious cake AND have it look decent, I did some googling to figure out my mistakes.  Here's what I learned so that you can make a perfect one on the first try (and you really want to make this cake).  

  • Duncan Hines calls this an Icing-in-the-Cake Cake for obvious reasons.  Other sites, though, call it a  Crawling Cake because, if not done properly, it will quite literally, crawl right out of your bundt pan and splatter all over your oven.  (Ask me how I know...)  (See photo above.)
  • Do NOT use a mixer for the cake mix.  Apparently, this adds air to the batter and you don't want that.
  • Do NOT use the whole can of icing.  Two-thirds of the can are all you really need, and the rest of the can is perfect to drizzle over the top at the end.
  • Do NOT open the oven while it's baking.  You've never seen a cake deflate quite like this one can if you open the door!  Just be patient and wait for the timer to go off.

So let me tell you about my successful cake, cause it was a hit.  I used a Duncan Hines Butter Cake the first time (really the second time, but my real first time was a month or so earlier).  When that flopped, I was nervous the butter had something to do with it (was it not room temperature enough?) so I went with just a yellow cake the next time.  This worked well, but I do think the Butter Cake one tasted better so I might go back to it when I do it again.  You choose for yourself.  

Aside from the box of cake mix and can of icing, you also need 4 eggs, 1 cup of milk, and 3/4 cup of oil.  

Since you aren't using a mixer, add the eggs to your bowl first and beat them by hand.  Then add everything else except for the icing.  Mix it by hand as well as you can.  This won't be the prettiest cake mix ever.  After mixing well, fold in the 2/3 of the can of icing.  For comparison, below on the left is my first batter that I used my mixer on, and the other is the one I mixed by hand.  The first one looks much fluffier and smoother and prettier, but don't be fooled - the flatter batter is better. 

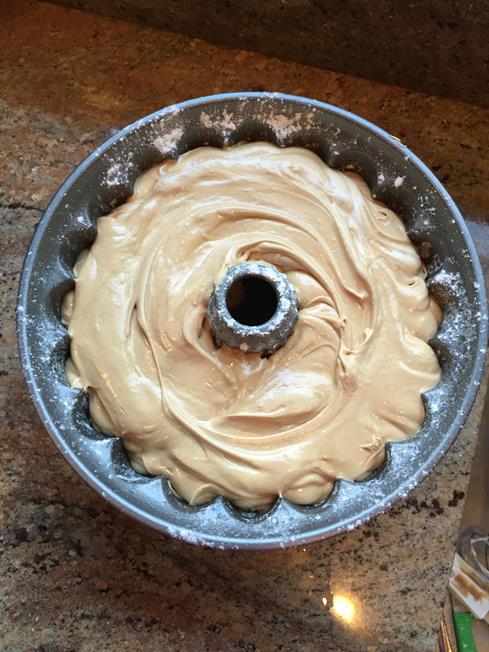
Before pouring it into your bundt pan, make sure you spray that bad boy down with so much Pam it's pooling up at the bottom.  And then sprinkle on some flour.  You don't want this deliciousness to stick to the pan.

Now, here is another important part: ignore the baking instructions on the box!  Cook it at 350* for a minimum of ONE HOUR.  I know the box says 35-40 minutes, but we don't care.  The icing being added in means it needs to cook much longer.  An hour will probably get it cooked but you may need to an a few extra minutes.  Just remember the less you have to open that oven door, the better.  Open it, stick in that toothpick, and close it back quickly!  :)

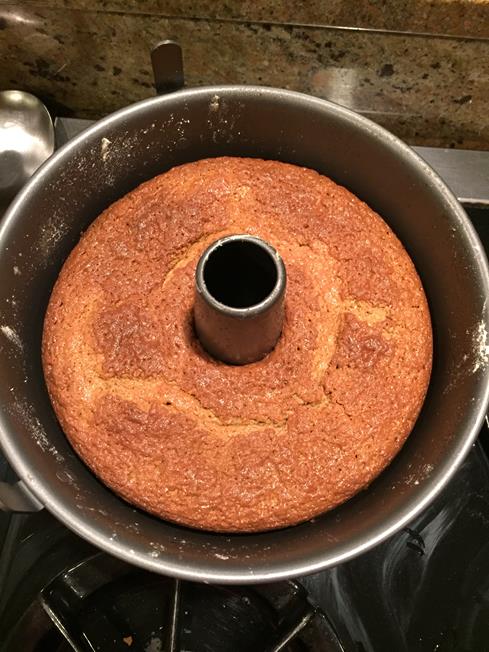
If you need to hold your breath and say a little prayer before dumping it over, I understand.  Let it cool in the pan for about ten minutes before attempting it, but if you greased and floured enough, it should come right out.  

Now, you could stop there and it would be just fine, but why not take it up a notch?  Take that third of a can of icing that you have left over, add just a little bit of milk to the can, and microwave it for a few seconds.  Once you've got it thin enough, drizzle that yumminess over the top of your cake.

Fantastic! Now, once again, you could stop here and the friends you're sharing your cake with would be just fine.  BUT, slicing that pretty cake and adding a scoop of vanilla ice cream and then drizzling it even more with caramel (oh my gah!) would have them singing your praises for days.  Warning: you will become the official Birthday Cake Maker.

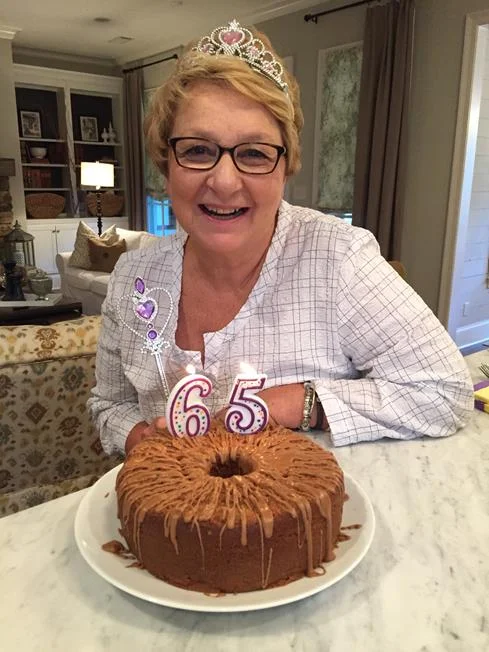
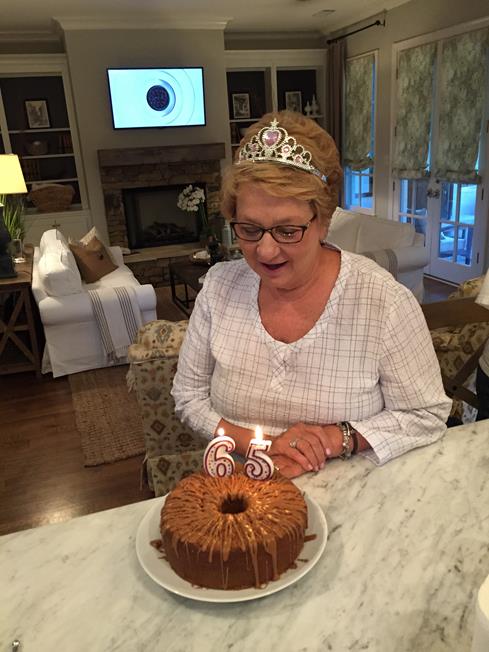
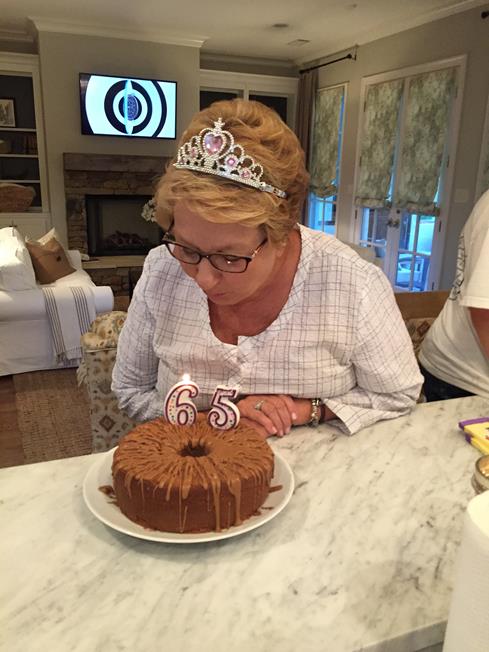
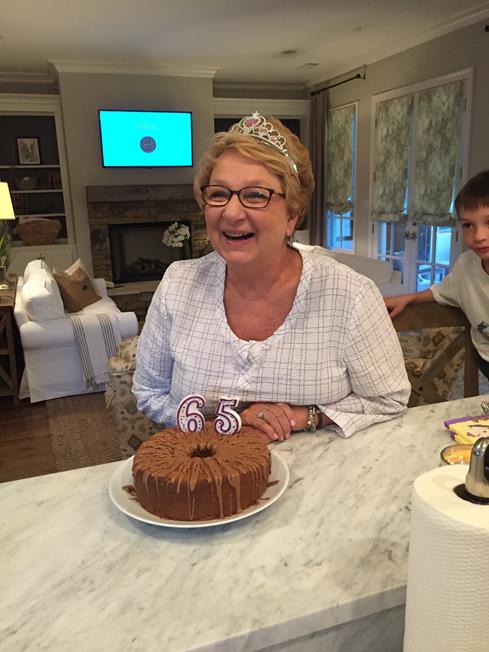
I made my caramel cake for one of my very favorite people in the whole world - my Mama - for her 65th birthday.  My niece made sure she was properly accessorized with a crown and wand before she could blow out candles.  

The super fun thing about this cake is that the flavor combinations are endless!  I did yellow cake with caramel icing, but you could do lemon cake with lemon icing.  Or spice cake with cream cheese icing, butter pecan with coconut, strawberry with strawberry.  Oh, the possibilities!  Let me know what combo you try! :)


And now, the super fun thing about this post is that I have a bonus recipe for you!  This is so easy it can hardly be called a recipe, but it's so tasty and is another crowd-pleaser.

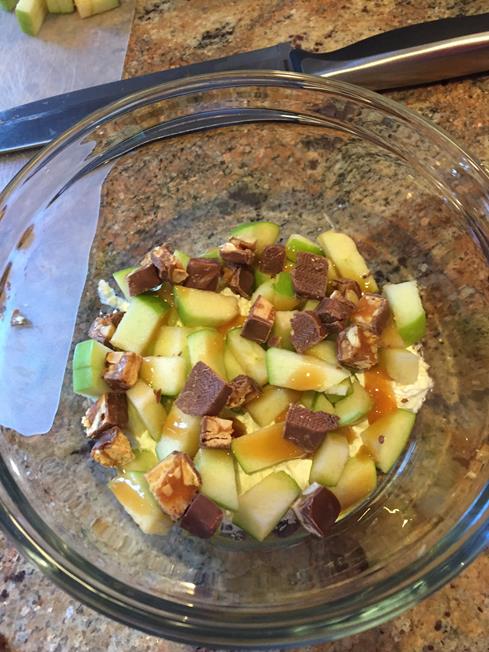
You need five things: apples (I used 3 or 4), snickers, cool whip, vanilla instant pudding, caramel sauce.  I made a small batch so I only needed a small tub of cool whip and half-ish of the instant pudding package.

First, chop up your apples and snickers candy.  Try not to eat too many.

Fold the dry vanilla pudding into your cool whip.  I just did it to taste - add as little or as much as you like.

Now, from here you could just mix everything together, but I layered it up like a trifle.  Looks prettier that way and I was taking it to some friends.  :)  Here's my first full layer: cool whip + pudding mix, then apples and snickers, topped with a drizzle of caramel.  

Then do it again...

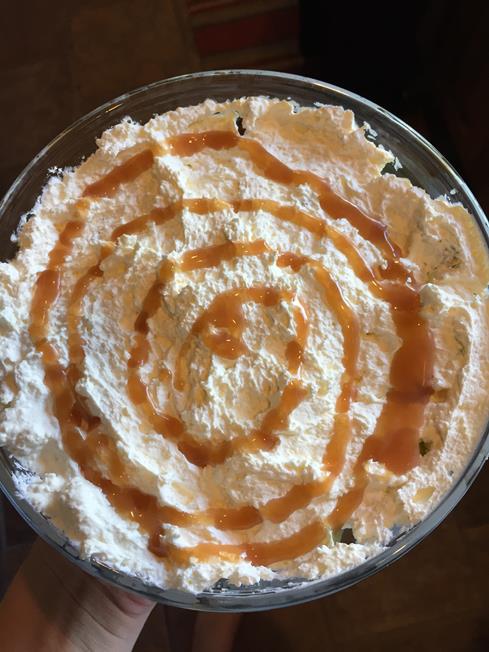
Finish it off with one more layer of cool whip + pudding and a swirl of caramel.  Stick it in the fridge to set up a little bit.  Then enjoy!  

It tastes kinda like a caramel apple coated in peanuts, but even better!  I just had a bowl of some that I made two days ago and it was still delicious.  So easy and a perfect cool treat for summer!

S'more Bites

Here's a quick recipe you're sure to love.  It's quick, easy, and tastes delicious!   I can't for the life of me find where the original recipe was posted.  Someone shared it on Facebook and now it's not on their page anymore.  Doesn't really matter, though, because I changed it just a tad.  Here goes!  (Full recipe at bottom of post.)

1.JPG
2.JPG
3.JPG
4.JPG
5.JPG
6.JPG
7.JPG
8.JPG
9.JPG

S'more Bites

  • 1 heaping cup graham cracker crumbs
  • 1/4 cup powdered sugar
  • 1 stick butter, melted
  • 12 large marshmallows
  • 3 chocolate bars

Mix cracker crums, powdered sugar, and butter.  Press crust into 2 greased mini muffin pans.  Bake crusts at 350 degrees for 4-5 minutes, or until bubbly.  While that's baking, break apart chocolate bar and slice marshmallows in half.  Remove crusts from oven and add chocolate (I break my pieces in half) and top with marshmallow half, sticky side down.  Return to oven for another 1 to 2 minutes, just allowing marshmallows to start melting.  Remove from oven and place on cooling rack.  Cool completely.  Melt remaining chocolate bar and dip bites into chocolate.  Allow to cool and enjoy!  Yields about 24 bites.

10.JPG
By far one of my most favorite desserts!
— Doc

Pink Punch For One

My favorite food group?  Party food. I know, maybe that doesn't exist on your pyramid of food groups, but it does on mine!  What can I say, I really like bite-sized foods.  And it doesn't hurt to wash them down with a glass of punch, amiright?

It's the delicious punch that I'm here to talk about right now.  Specificially, how I recently made it in individual serving sizes.  And served it in cute little mason jars to boot!

The first step is obvious: gather up a bunch of mason jars and make sure they're clean.

The next step was a little trickier.  I really wanted a cute lid that a straw could go through...you know, like these that are all over Pinterest?

Small problem: where the heck do you buy those?  Especially when you're in a time crunch?

So I had to improvise.  When I purchased my jars, the lids they came with had printing on them.  No problem, I just picked up an extra box of canning lids.  Except I realized after opening the box that the extras had printing on them, too.  Grrr.

While I sulked about the printing on the lids, I went ahead and started making my straw holes.  This was super easy - just drill a hole through each lid.  Don't cheat and try to stack them all up and do them together at one time.  It won't work out well...trust me on this.  But don't worry, it takes hardly no time at all to do them individually.

My mom is a genius and suggested spray painting the lids to cover up the printing.  How in the world had I not already thought of that?  Duh!  My color scheme for the shower was pink and green, and I already had green spray paint on hand so that's what I used.  After a quick 30 minutes of drilling holes and then spray painting, my lids looked like this.

That was the hardest part, so if you make it this far (or if you're lucky enough to find the cute pre-cut lids), the rest is easy breezy.

The shower was on a Sunday afternoon, so before church that morning I started preparing my punch.  First up was the pink ingredient: raspberry sherbert.  It was really hard, but some how I managed to refrain from having sherbert for breakfast.

I scooped at least two spoonfuls into each jar.

And then topped them with the green lids and metal rings.

My sherbert got pretty melty during scooping, so I popped the jars back in the freezer.  I wouldn't need to do the next step until after church anyway.  Oh, I wouldn't suggest doing this way, way in advance and then putting them in the freezer with these lids.  The holes might make the sherbert a little frosty and freezer-tasting.  Mine were only in the freezer a couple hours though so they were fine.

I, of course, forgot to take pictures of the final step, but I think you'll be able to handle it.  A few minutes before the shower started, I pulled the jars out of the freezer and took the lids off.  In a pitcher, I had mixed together equal parts pineapple juice and ginger ale.  I poured the liquid over the punch until the jar was full, and then put the lid back on.

Done!

To keep them cool, I filled a punch bowl full of ice and plopped them down in it.

(I forgot to take a picture of them until near the end of the shower.  They are pretty melted in the pic above.)

Next to the punch bowl I had another jar full of pink straws.  Here's a melty version of the final look.

Who says you have to use a crystal bowl and sip punch out of little glass with your pinky out?  Mason jars + straws are way more fun!

I won't lie, if I hadn't used every last bit of the sherbert up, I probably would've served these to myself all week long...

Freezer Cooking

I've been meaning to share this with you all for a while now.  A month or so ago, a coworker of mine shared this website about making freezer meals to cook in the crockpot.  She had made a few of the meals and was bringing delicious smelling leftovers everyday for lunch.  So we had her share her secret... Jaima over at Ring Around The Rosies has created a list of meals that can be made way in advance and then stored in the freezer until ready to be eaten.  The best part is that you just take everything from the gallon-sized ziploc bag, dump it into a crockpot, and hours later dinner is served.  Y'all, this is my kind of cooking.

Doc and I had a few friends that we'd been meaning to prepare a meal or two for, and it certainly didn't seem like a bad idea to stock up our own freezer, so we decided to spend an evening making Jaima's creations.  Each recipe listed on her blog makes 2 gallon-sized ziploc bag meals, so we decided to pick a few recipes and double them so we'd make 4 batches of each one.  I let Doc choose which ones and he went to the store for the ingredients.

For our 5 meals, we made Savory Chicken, Teriyaki Chicken, Sausage & Peppers, Mexican Taco Meat, and Meatballs.  We started with the chicken dishes and Doc got to work dividing the chicken breasts up between the ziploc bags.

While he did that, I used a red sharpie to label all the bags.

The Mexican Taco Meat is the only meal that required us to do any pre-cooking.  We just had to brown the ground beef.  For all the others, we just measured and dumped in the ingredients.  As we filled the bags, I realized the red sharpie was a bad idea.  You could no longer read the cooking instructions.  Rats.  You can also see in the picture below that on the bag in the upper right I tried to add a label.  By that time, the bags were too cold/wet for the labels to stick.  Double rats.

The next day I happened to be at Michael's and found these cute tags in their Dollar Bins.

With a hole punch through the top of the bag and a little curling ribbon, boom! Cooking instructions problem solved.

Here are all five meals for one recipient.  Admittedly not the cutest things ever, but what frozen food is pretty?

For the Savory Chicken, you don't add the broccoli until the last 30 minutes, so we put it in a separate bag and attached it with the card.

And because we wanted to do complete meals, we had a few more items to pack into the box.  We added taco shells and cheese for the Mexican Taco Meat, pasta for the Sausage & Peppers, and rice for the other meals.

And with that, our box of 5 meals was complete!

Why you should jump on the freezer cooking train: We spent about $200 and were able to make twenty meals in under two hours.  You can't beat $10 a meal!  And really, I use the figure 20 meals loosely...we filled 20 gallon-sized ziploc bags full but, depending on how many people you're feeding, one bag could be enough for more than one meal.  Who knows how far they could stretch?  Doc and I recently ate the Savory Chicken over rice and there was more than plenty for the two of us and he was able to take a generous portion of leftovers to work the next day for lunch.  Did I even mention that the recipes are good?  The Savory Chicken was quite tasty and we've had a couple friends say the Meatballs are good too.  One called them, and I quote, "slap your momma good."  Might not want to invite your mom over for dinner that night; I'd hate for anyone to get hurt.

So what are you waiting for?  Get to cooking freezing!

Family Visitors

This past week we had some visitors from out of town: Doc's sister Jill and her family.  Jill's kids were on spring break for the week and decided to spend a few days down in our neck of the woods.  Unfortunately, we just don't have enough room in our house so we could host them, but we were still able to meet up and spend a fair amount of time with them.

We met Jill and her family out for dinner Thursday night, but the bulk of our hang out time was on Good Friday.  Our kids were out of school and Doc was able to work just a half day (I was stuck at work all day, boo).  After loading up on ribs at the Rendezvous, their plan was to spend the afternoon at the zoo.  Turns out, that was the rest of the city's plan too.  Since it was so crowded, they opted for a park in our neighborhood.  Doc was sweet and took my camera along.

(Just so I'll remember:  Anna is 11, Wyatt is 12, Nathan is 8, and Henry is 6 in this pic.)

Looks like Anna climbed as high as she could to get away from the boys.

We sat outside while Doc cooked our dinner on the grill.  I gave Henry and Nathan a piece of cheese to feed Lolli so she'd love them.  I think it worked.

Lolli had extra kisses for Uncle Chad too.

Love this sweet face.

I had a long list of things to get done in the kitchen.  By the time I went to bed that night, I had baked a chocolate cake, a white cake, a yellow cake, and 3 batches of lemon cupcakes.  Luckily I had some helpers along the way!

Anna is always excited to be a kitchen helper!

All the baking was for a couples' shower my mom was hosting the next night.  I volunteered to make cupcakes in a jar (like I did a while back) and cake pops.  It was a huge undertaking but I figure I probably owed it to my mom, she does a lot for me.

The first batch of lemon cupcakes were a bit of a flop.  I used this recipe that's just a cake mix and Sierra Mist.  I accidentally poured in the whole 20 oz. bottle of Sierra Mist instead of just 12 oz.  Oops.  They still tasted good, they were just a little sticky.  It was a good thing I had a house full of willing taste testers!  We needed an appetizer anyway...

The second two batches went well but they didn't rise like most cupcakes.  Taste wise they were great, but that meant that it took one and half cupcakes to fill up each mason jar.  Gah!  We finally got 'em done before bed though.

But then there were the cake pops.  Oh, the cake pops.  It was my idea to do 3 different cakes so they'd be different flavors.  Sounds like a good idea, right?  The problem is that one sheet cake alone makes about 3,000 cake balls so that means three cakes makes roughly...quick math...9,000 cake balls.*  I would've taken a picture of all the fun** we were having rolling the thousands of cake balls, but my hands were too messy to pick up the camera.

We called it a night around 10:00.  I didn't sleep a wink because I couldn't stop thinking about all the unfinished balls in the fridge.  By 7:00am I was up and at 'em and back in the kitchen.  I'm new at the whole cake pop thing and had no idea how long it would take.

I pulled out the first cookie sheets and decided to start with chocolate.

I dipped my sticks in melted chocolate before sticking them in the cake balls.  I read that this was a good idea to keep the balls from falling off; it sounded legit.

Then it was just a matter of dipping them into melted chocolate.  Of course, I had to take it up a notch and do each flavor with a design.  My first batch got dyed blue.

Then I got fancy and drizzled white stripes on them.

With 9,000 cake balls in the fridge, I totally underestimated how much styrofoam and sticks I'd need.  I had to send Doc out to the store to fetch me some more.  By 10:00, I had an assortment of cake pops.

Obviously that's not how they were displayed for the shower, but we'll get to that in another post.

I had enough time to take a quick shower before Jill and her crew were back over for the afternoon.  We attempted to get a few shot of the kids, even though they weren't that interested in it.

This one cracks me up.  Ha!  I can't remember what Doc said to Nathan to make him perk up...

We got one of the boys with their sister Jessie too.  Lolli kept trying to photobomb this pose so getting a decent shot was tricky.

While we were outside, I got out some cascarones that I'd bought for Easter.  These are confetti-filled eggs that you smash on your head for good luck.  Wyatt was the first to go and smashed his hard!

Nathan got covered with confetti while Henry managed to stay clean.

I think Anna was nervous that it would hurt!

Wyatt got another egg so he should be extra lucky this year.

Unfortunately, after our confetti party I had to leave to deliver my goodies and help my mom set up for her party.  I gave my farewell hugs to our visitors since they were gone by the time I made it back.  It was a good to see them all and I'm glad they were able to visit!

*Slight exagerration.  But only slight.
**Sarcasm.  Nothing is fun with that many balls.