Pinterest Challenge: FAIL

Last Tuesday, the lovely ladies of both Young House Love and Bower Power announced that they were holding a little Pinterest Challenge.  In short, the challenge was to take inspiration from something you found on Pinterest, put your own spin on it, and then post about it today (Tuesday).  After writing the post, you could then add a link to one of their sites so that others could come visit and get inspired.  Simple, no?  They explained the challenge on their blogs using a lot more words than that, and even created a fun little video that included an HGTV celebrity whom I do not know, so feel free to click on those links to get more details. Pinterest, for those of you not in the know, is a fun site where you can pin things that interest you.  Get it?  Pin + Interest = Pinterest.  And by "pin" I mean it's a place where you can create your own folders to place things you find online that you like and don't want to forget.  Similar to saving things in your Favorites Folder, only you can see pictures instead of just names of websites.  Oh, and just like every other social media platform, people can follow your pins and you can follow others.  Or you can just search for things on the main page and look at things that people you don't know have pinned.  What I'm saying is that there's lots of cool stuff on there to look at, and it's really, really easy to get sucked in and then realize you've blown a few hours on the site.  I've noticed that when I log on my productivity levels majorly plummet, so I save it for a little treat for myself when I know I've got some time to kill.

So, back to the challenge.  I follow both Sherry and Katie on a regular basis and I have my own account on Pinterest, so when I read about the challenge I immediately thought it sounded fun.  Only problem?  I didn't have a project on Pinterest lined up to do.  They both announced the kind of projects they would be working on - Sherry's would be a light fixture for her laundry room, Katie's something for above the bed in her guest bedroom.  Those types of projects called for a lot of supplies I didn't already have on hand, like light kits.  Since I didn't already have a project in mind, nor did I have time to shop for a whole bunch of supplies, I figured this would be a challenge that I'd just have to watch from afar.  No participating for me.

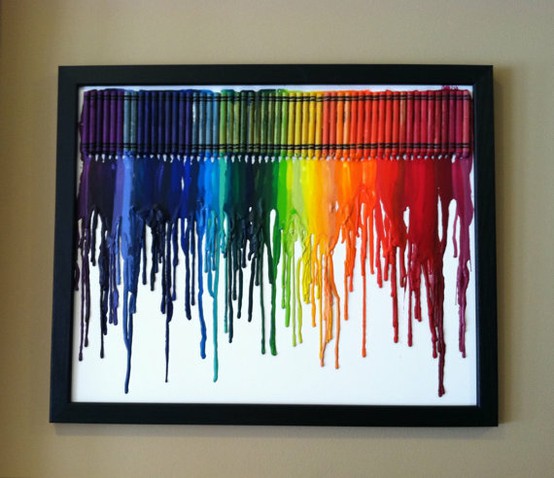
Fast forward to late Wednesday afternoon when I found this fun piece of artwork on Pinterest.

(via)

Pretty awesome, right?  And no, I wasn't on there looking for a project to do so I could participate in the challenge.  I quickly logged on to pull up something I had pinned a few days earlier, and this immediately caught my attention on the home page.  Super cute, super creative, and super easy.

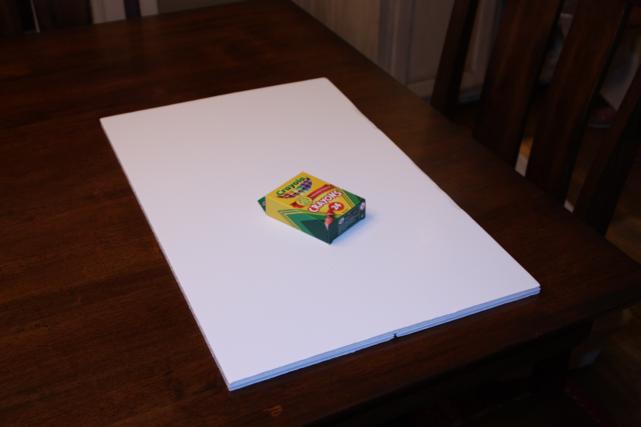
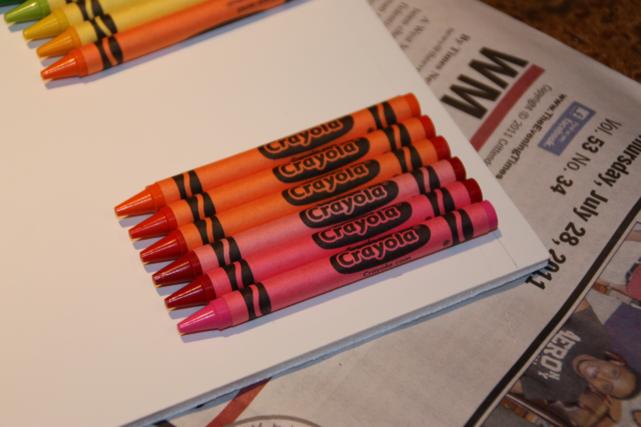
Did I mention that the supply list would be a cinch to get my hands on?  I mean, I can grab a foam board and a pack of crayons practically anywhere.  And that's just what I did.

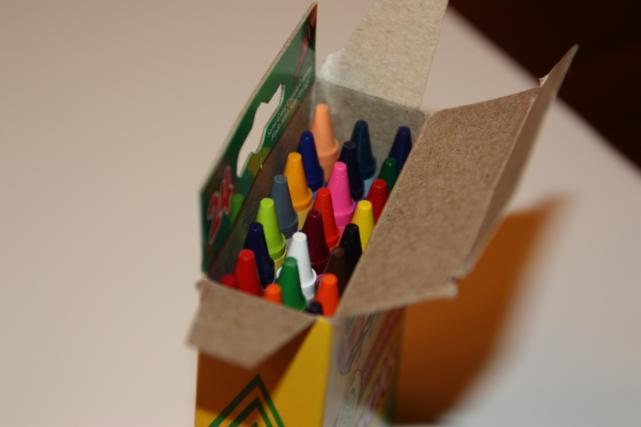
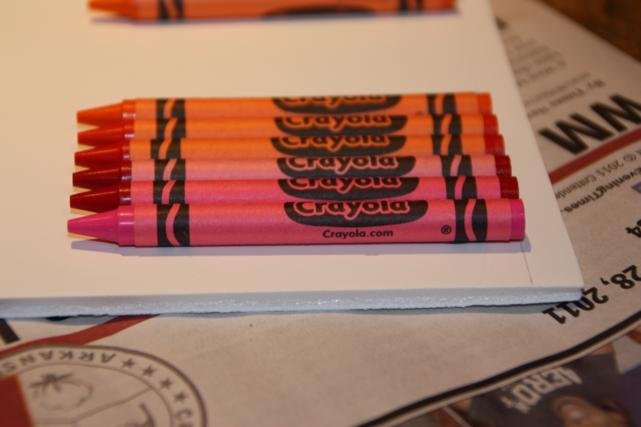
What is it about a brand new pack of crayons that makes me so giddy?  It's gotta be their perfectly sharp tips and the newness of them.  They're just screaming to be colored with!

My foam board was actually one of those tri-fold boards that are used for science fair projects, so my first step was to cut off the two sides.  I was originally going to use the bigger center piece for this project, but since I only got the 24 pack of crayons (as opposed to the 64 pack), one of the smaller side pieces was plenty big enough.

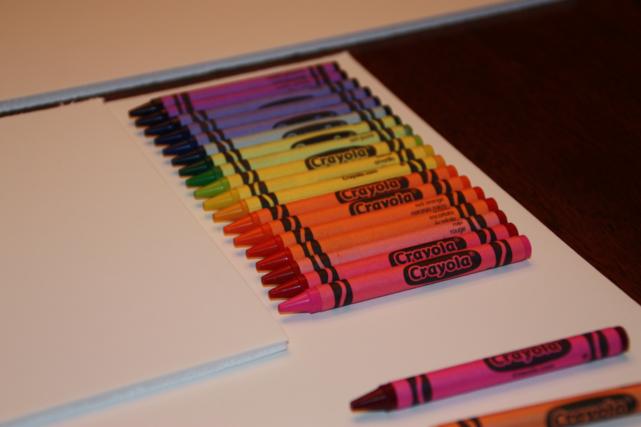
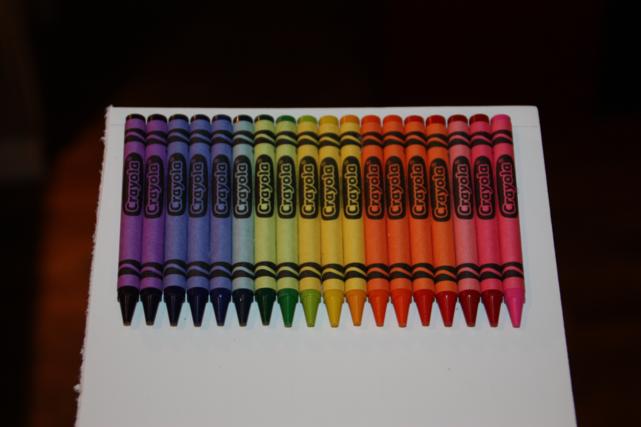
While my hot glue gun heated up, I arranged my crayons in the perfect rainbow order.  Roy G Biv, y'all!

Now, I tend to err on the side of being a perfectionist, so before slapping on some hot glue and sticking the crayons down, I drew myself a line across the top so that everything would be perfectly straight.  Then I could get to gluin'.

I left a little bit of space at the top and the sides so that I could easily frame it after the crayons were melted.  What can I say, I'm a thinker.

I debated between having the Crayola logo be on top or the names of the colors, but in the end, the logo won.  My OCD came out and I decided I liked it better with them all looking the same.  Besides, what's the fun in colors that have practically the same names, like Yellow Green vs Green Yellow and Red Violet vs Violet Red.  How are kids ever supposed to learn their colors with names like those?

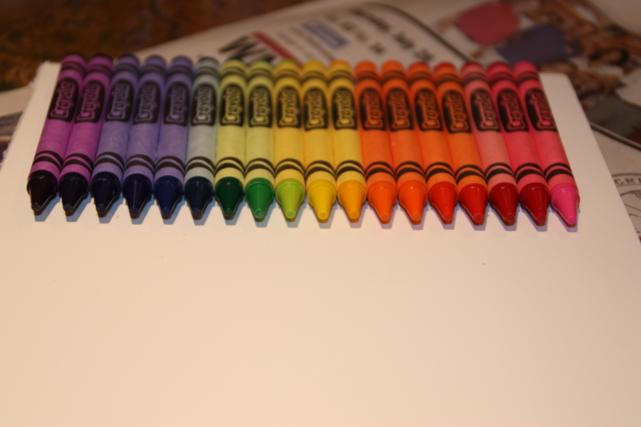
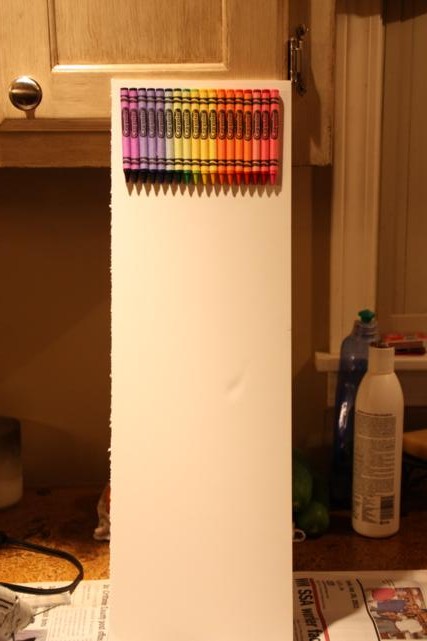
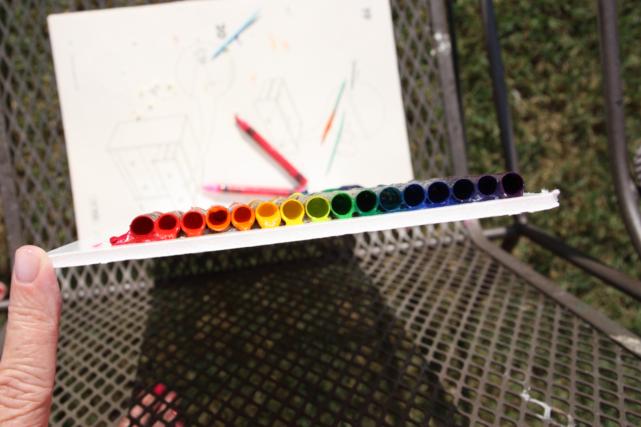
Approximately, oh I don't know, 48 seconds of hot-gluing later, I had my rainbow completely stuck down.

And all of my perfectly pointed tips were still in tact.  I resisted the urge to give them a good scribbling.

Here's the full view of my canvas.  Sure, my edges aren't perfectly smooth, but I was banking on a frame covering those up, so I didn't care.  See that little dent about midway down on the right?  Yea, that's where I rested on my elbow while gluing on the crayons.  Lesson learned: my body weight will leave an impression on foam board.

The next day was kinda overcast and rainy so I didn't get to set my board-o-crayons out in the sun.  I actually had to wait until Sunday to set them out to bake.

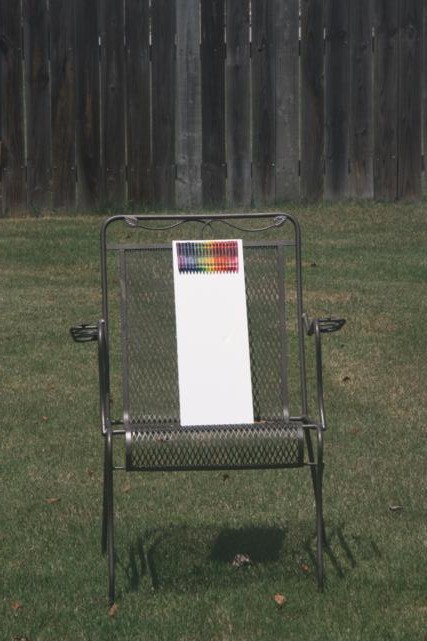
I moved a chair out into the yard where I thought they would get some full-on sun.  After a little bit of positioning and re-positioning, I left the board propped up with a slight incline.  I figured if it was straight up and down my crayon wax could drip straight down and miss the board all together.

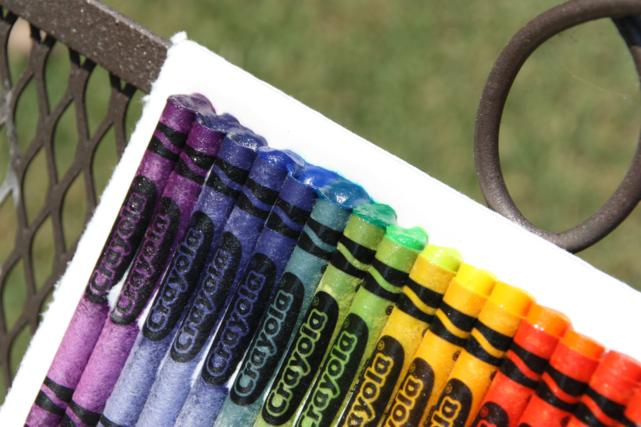
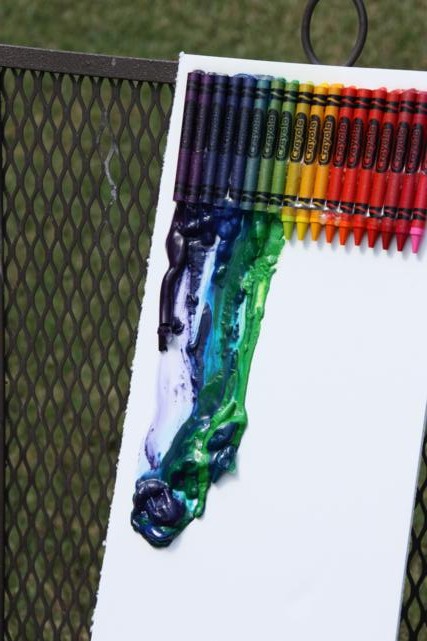
About 30 minutes later I came back out to check on the crayons.  They were starting to look a little sweaty and the darker colors were getting melty on top.  Aww yeah.

Up close of the melty-ness.

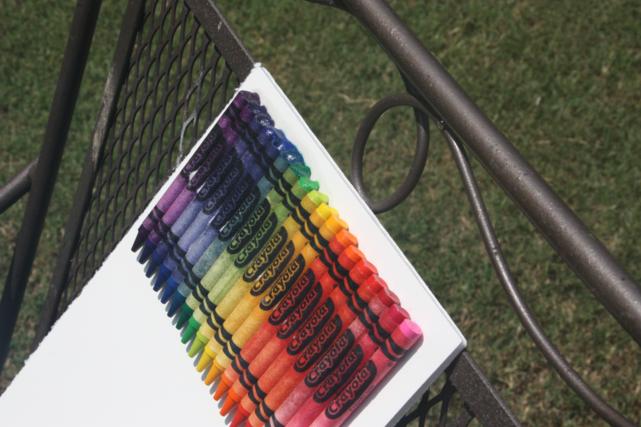
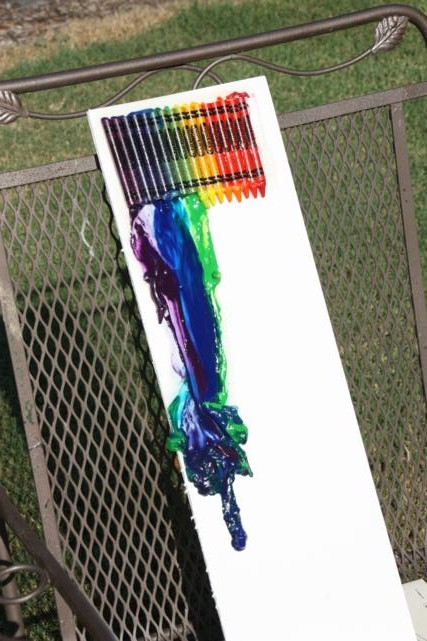
You know what they say - a watched pot never boils - so I went inside and left the crayons to melt on their own.  I did sneak a few peeks from out the window and could tell progress was being made.  On my next trip out with the camera, the crayons looked like this.

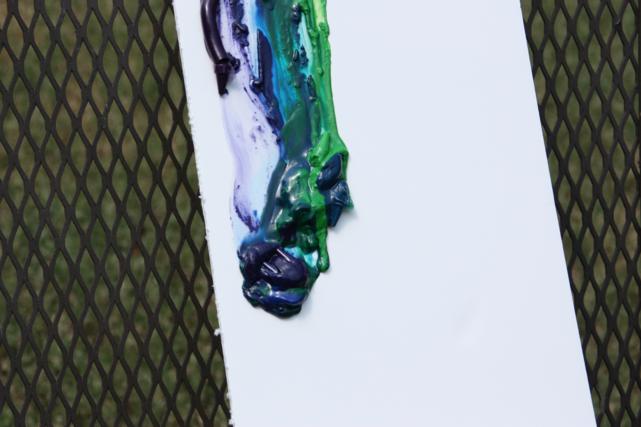
It's like the blue and green were racing down the board and then got stopped by a major crayon wax pile-up.

I was able to make a few observations at this point.  First, the darker colors were obviously melting way faster than the lighter colors since they absorb more heat.  Second, the purple crayon on the far left was my favorite; it looked like it slid completely out of the paper wrapper all at one time but was still kinda intact.  Third, the wax was separating.  See the little white spots in between the crayons in the shot two photos up?  That's wax that was sweating through the paper.  And the lightly smeared purple-y area above the wax pile-up is where all the white wax melted off the purple crayon that's still intact, if that makes any sense.  This was shaping up to be quite the science experiment.

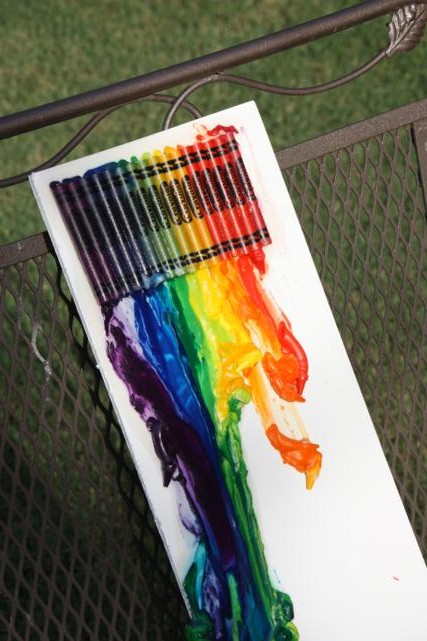
Once again, I headed inside so the sun could work its magic without me watching.  This time I waited a couple hours before heading back out with my camera.  Here's how it looked that time.

Um yea, pretty much the same.  The light colors still weren't budging.  What the heck?  I could tell from barely touching the paper that they were melted inside, they just weren't doing any dripping.  I was about to start running out of daylight, so I tried to help speed them along.  I grabbed a couple toothpicks and did a little poking and prodding.  Then I tapped the board up and down hoping to loosen the wax up a little.

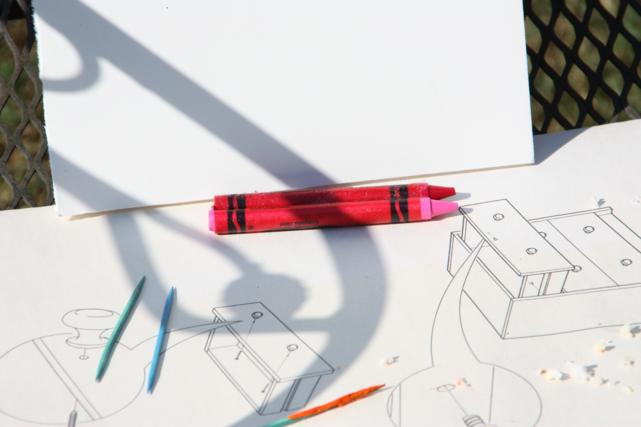
Oh, I loosened it alright.  The pink crayons from the far right fell right off.  Crap!

(Yes, that's the instructions on how to put together a piece of furniture.  Once the melting got into full swing, I slid into under the edge of the board to protect the chair.)

I was majorly bummed about those two falling off.  I guess if the point of the project is for things to start melting, then I probably shouldn't use hot glue as my adhesive of choice.  Another lesson learned.

The view from the top was pretty cool.  You can see how the crayon wrappers are starting to look hollow.  I could see all the way through some of the darker ones that had already dripped out, and I could tell that the reds, oranges, and yellows were melted, they just weren't sliding out.

Then, while I was standing there feeling defeated and disappointed over my failed project, the pile-up of wax started sliding again.  More drips came from the dark colors too.  Can you tell in the picture below how the purple crayon from the left has started melting and there is more blue and green smeared at the top?  The glob at the bottom is moving too.

I can't even tell you how fascinating this was to me.  It was so fun to watch the drips and try to predict which way they would go!

It was blazing hot outside so I went back in, leaving the crayons out to melt a little longer just in case the lighter colors decided to get in on the action.

An hour-ish later I came back out and booyah! The oranges and yellows finally let loose!

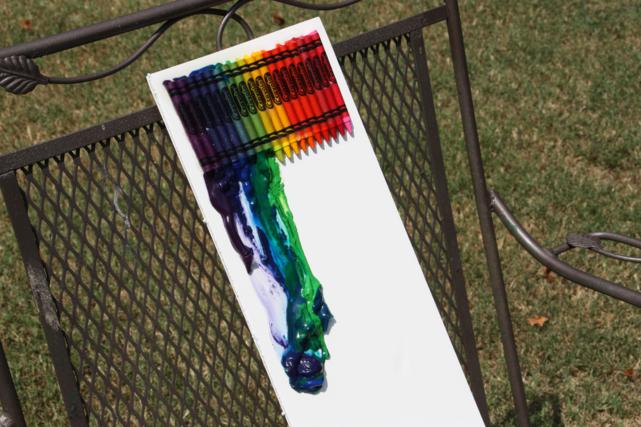
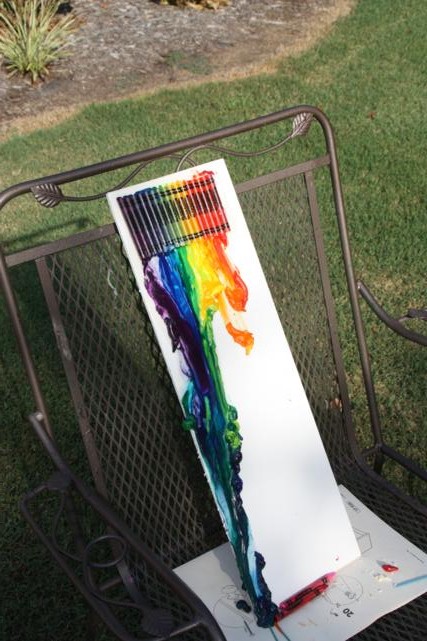
Here's a zoomed out shot where you can see that the blues/greens/purples made it all the way to the bottom.  Good thing I put that paper down.

You can see from the shot above that the shade was creeping in, so that's as far as the melting went.  Obviously this is not worth framing, which is why I'm calling this project a FAIL.

But!  I think I'm going to attempt it again.  Maybe I could get better results if I switch up the variables a bit (like how I'm using my science fair lingo?).  For instance, what if I used a piece of plywood or something that wasn't so smooth?  Then maybe the initial globs wouldn't slide so fast and would leave more of a color streak on their way down.  Or, what if I cut off all the tips before I glued the crayons down?  That was one of the fascinating parts to me - even though the wax inside the wrappers was completely melted, the tips on the lighter colors were still hard as a rock.  Wonder if the colors would melt at an equal pace if I set it up in a hot car?  There are so many things to experiment with!

Of course, my dad insisted all day long that there's no way possible to get it right without using some kind of applied heat.  He even suggested putting it in an oven somehow.  I shot down his ideas, telling him that would just make my foam board melt.  My mom suggested I pull up the tutorial to re-read it, but I reminded her that I didn't read a tutorial, I just saw the one picture.

Turns out the joke's on me.  When I went back to pull up the original inspiration picture from Etsy (where it's for sale for $70!), I was able to read in the description that the artist uses a heat gun and applies a controlled heat application to get this outcome.  Ugh, maybe I should've done my reading before-hand.  I don't know, though.  Now that I've seen that it's possible to get them to melt from the sun, using a heat gun just seems like cheating.  What do you think?

Updated to add: The results are in!  Click here to see Sherry's awesome Clothespin Light Shade, here for Katie's really cool basket weave mirror, here for Emily's swanky nailhead trim on closet doors, and here for Lana's bold chalkboard fridge.  Looks like I'm the only one that majorly failed.  Crap.  Oh well, I'm linking up on their blogs anyway!

Updated again to add: I gave it another try!  Check out my much more successful attempt here.

Paint Night, Again

For Mother's Day, I bought my mom a ticket to a guided paint class.  You may remember that I recently attended one of these classes with some of my friends.  Now, I know Mother's Day was, like, forever ago, but we just attended our class last Thursday.  And Beth and Erin joined us too, making it the perfect girls' night out. Since I had already painted the three trees scene that was being painted that night, I decided to take a stab at freestyle painting.  Here I am with my (almost) blank slate.

Mom and Erin followed along with the three trees scene and got right to work painting their backgrounds.

Beth went with the freestyle option too.

She worked on a "drippy" masterpiece.  Here it is after the first application of drippy paint.

After taking a step back, was she feeling good about her decision?  I think so.

Mom and Erin listened carefully as they were given their next steps.

At this point in the evening, my canvas look like this.  Uh, not so good.

I still didn't really know where I was going with it.  Beth's drips were making a lot of headway.  She went all the way across the top with the yellow, and began adding a little red.

Mom and Erin began layering colors on their background.  Erin, the real artist, had all kinds of fancy techniques up her sleeves.

Mom blended different shades of blue.

Beth's painting started getting real drippy.

Finally, I was starting to make a little headway in a good direction.  The bottom half of my canvas was taking shape, even though I still wasn't sure what to do with the top.

Mom flipped her canvas upside down to work on the ground of her trees scene.

I must've gotten really into my painting because my step-by-step pictures stop here.  When I picked the camera back up, Beth's drippy painting had some new circles.  Pretty cool, huh?

My favorite part is the two red circles down in the corner.

Feeling pretty good about it, Beth decided to take a seat and watch the rest of us.

I have zero photos that show the progress of what I did to the top half of my painting.  First, I realized that bright teal color had to go and started covering it with more of a sky blue.  Then I slapped on some white and tried to blend it in.  A dab of yellow and a touch of grey later, and I ended up with this.

Here's the finished product with my camera flash on.

Here I am with my finished masterpiece.  It's a little blurry, but when the flash was on the light reflected off the painting.

Mom's and Erin's trees were really beginning to look good.  Here's Erin layering on the texture medium.

Mom's finished trees.  Her colors look really good with the colors in my painting.  I have a feeling our paintings might end up living at the beach house.

Erin's masterpiece.  Love how she did her shading.

I guess I didn't take a finished photo of Beth's painting.  Beth cracked me up - she "finished" hers about 6 different times during the class.  But then she'd find some glaze or a texture medium or something and pick her brush back up and keep going.  I guess you can't say your painting's done until you're walking out the door with it!

We took a group photo with our paintings before leaving for the night.  I think we're a pretty talented bunch!


Paint Night!

Once again, Allison has beaten me to the punch and already blogged about our most recent paint night.  Go check out her post for more pictures! Have any of you guys done one of these Girls' Night Out paint parties?  They're the new fun thing to do, and I think most cities are catching on.  I know there are several different companies that do them in our area.  In fact, we've done this once before at a different location.

If you have no idea what I'm talking about, here's the scoop:  you sign up for a paint class and get to paint your own masterpiece.  Now, that might sound a little daunting to anyone that's uncomfortable with a paint brush, but these are almost fool-proof.  The price of the class buys your canvas and painting materials, and a professional artist guides you along so that you don't royally screw up your piece of work.  At most places, you can also bring in your own wine and food to make it a real party.  For this paint night, my friends and I all purchased a $20 Groupon.  Not a bad price for a girls' night out, especially since we got to come home with some new artwork for our walls!

I enjoyed this place a little more than last time because we got to stand up to paint and had a little bit more room.  There were also three different paintings we could choose from, or you could freestyle but we weren't quite brave enough for that.

Even with three paintings to choose from, we all picked the same thing.  Great minds think alike?

I didn't take any pictures of us in action, so these photos are 100% stolen from Mary Elizabeth.  Here we are all working on perfecting our backgrounds.

This could be me coaching Jenny on the perfect painting technique (like I know?) or it could be me scolding her for stealing paint off my plate.  A little sneak, that one...

(Looks like Jenny got cut off.  Karma?)

Here's Mary's painting about 75% of the way through.

I love the colors Mary chose for her painting.  This is it right after she had applied her texture.  This was a scary part since the texture medium is a different color when you apply it than when it dries.

And here are all the finished masterpieces.  I love that they're all the same, but still so different.  I think they'll look great in all of our houses!

I tried to snap a couple of pictures of mine when I got home.  I'm pretty pleased with how it turned out.

You can kinda see the texture in the trees here.  The texture medium I used was HOT pink when wet.  Talk about making me nervous!  I'm so glad it didn't stay that color.

We bought my mom one of these classes for Mother's Day so we've got another paint night coming up soon.  I can't wait!

DIY: Bud Vase

First things first - have you picked my hairstyle?  If not, go do that now.  If yes, you may continue reading. I'm hosting another shower at our house this weekend which means I'm crafting up some decorations this week.  Not too many things though, because I'm going with more of a "pretty" theme and less of a "crafty" one.  The bud vase I'm about to show you is one I found online last week.  I can't remember where so I'm not sourcing it, but if anyone else knows where it came from, feel free to yell at me for stealing someone else's idea  let me know and I'll link to it.

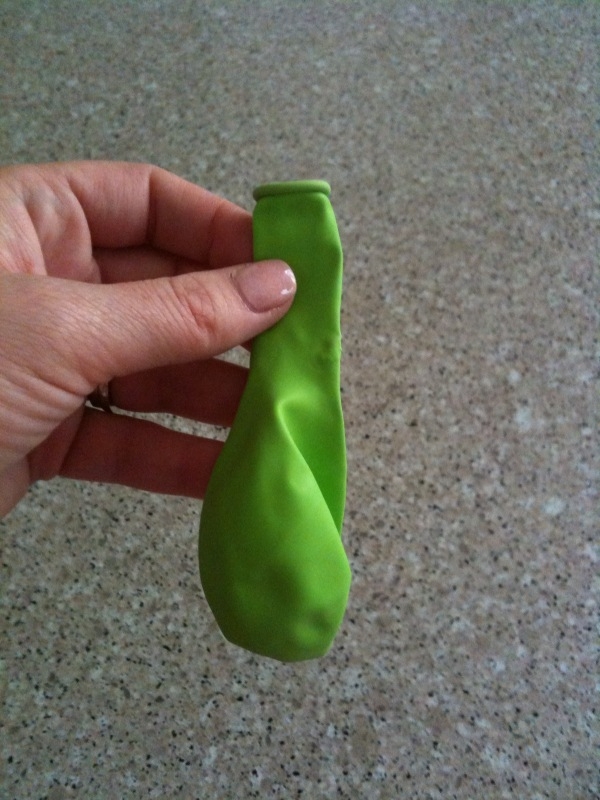
To make one of these cute bud vases you need two things: a balloon...

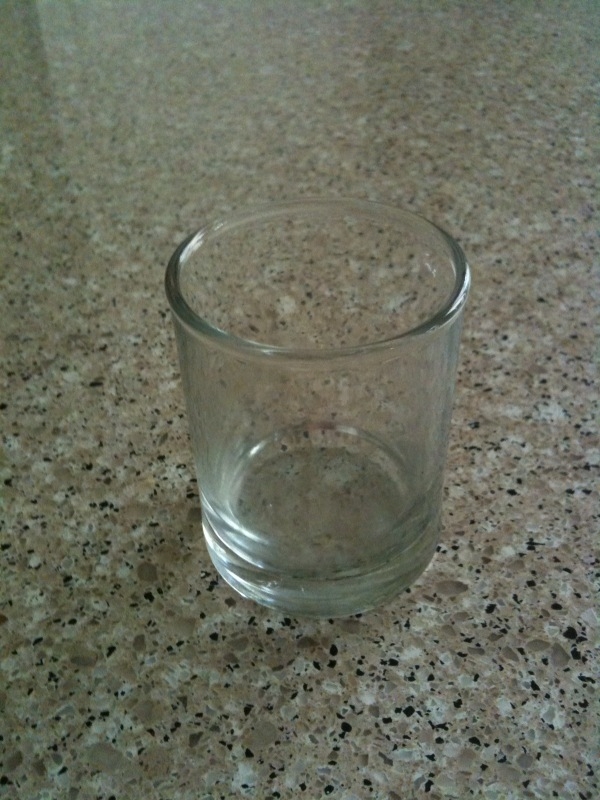
...and a candle votive.

These two things should be about the same size.  Skip the water balloons and those long skinny ones you use to make weiner dog hats.   You just need a regular ol' balloon and a regular small candle votive.

Here's my helpful hint for you:  go ahead and blow up the balloon before you start and then let all the air out.  This helps get the balloon all stretchy-outy.  Then, cut off the tip of the balloon - you know, the rolled up part that you put in your mouth when you blow it up.

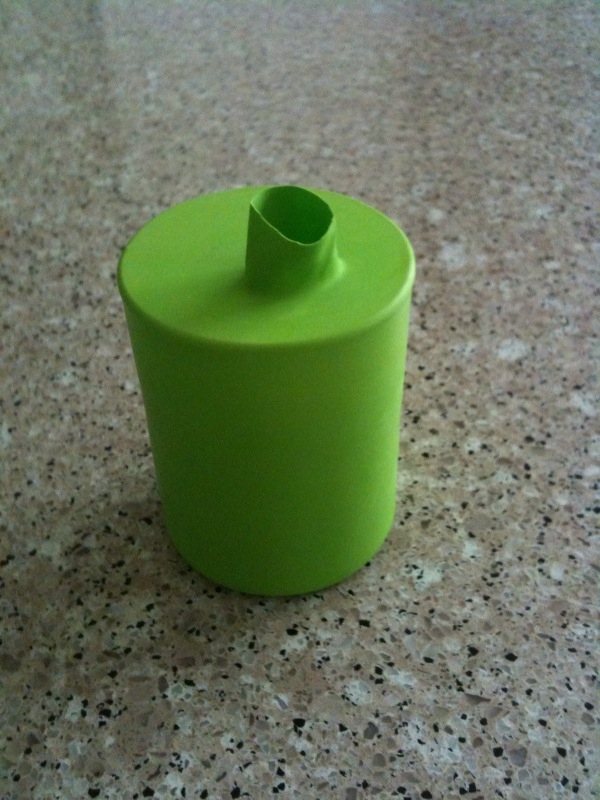
Then just stick the votive inside the balloon!  (Ha, I wrote that like it's the easiest thing ever.  It's not.  It's hard to get the tight balloon all the way up the votive.  It hurts your fingers and takes forever.  And then your hands smell all rubbery and you want to cry.)  (Do like me:  ask your husband to do it for you.)

Make sure you pull the balloon all the way up around the votive so that it looks like this:

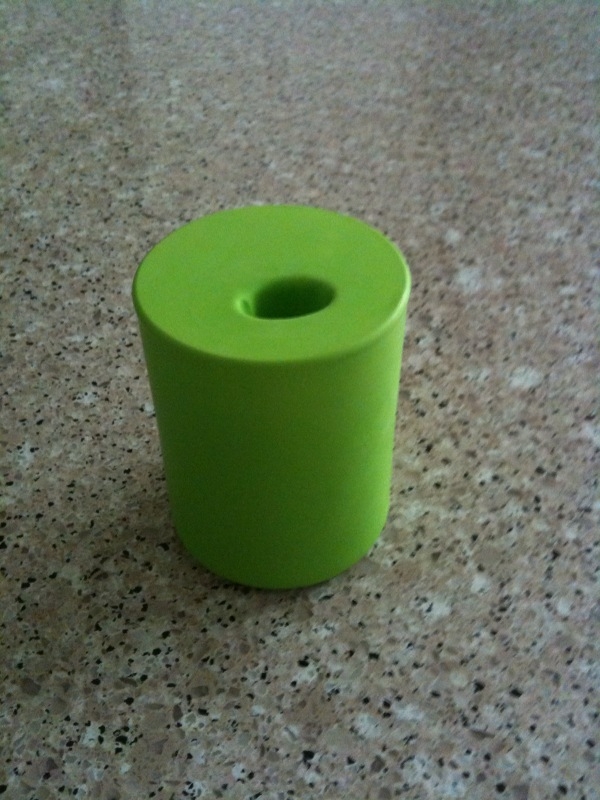
Then just poke that little top part down and bam!  You've got yourself a bud vase.

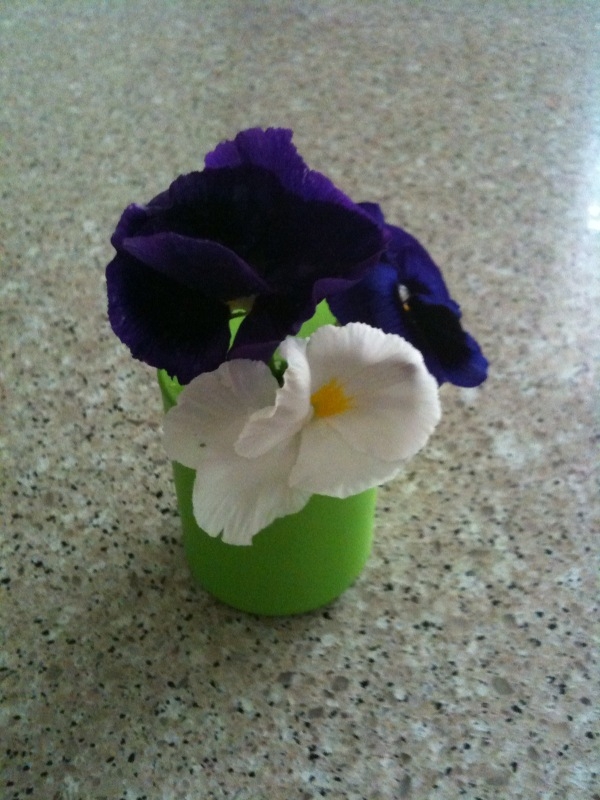
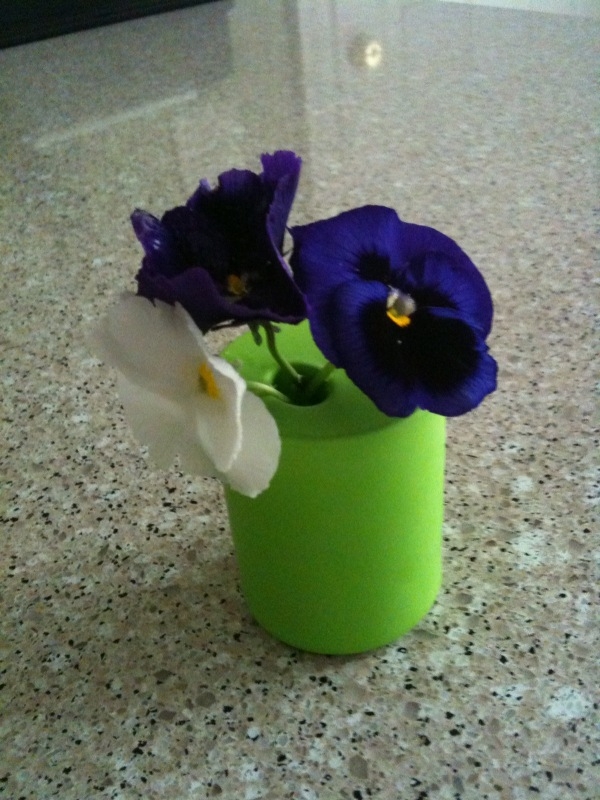
I snipped a couple pansies from my yard to use as a demo.  They obviously aren't the best flowers to use.  Try to picture it with a cute daisy.

Yea, that color scheme's not really doing it for me.  But here's another view anyway.

I've made about ten of these, but I don't know exactly what I'm going to do with them yet.  I think they'd be cute lined up in a row somewhere.  If I had a window above my kitchen sink I'd definitely put some there.  Maybe I'll place one or two on each of the bathroom sinks to cheer them up a little. 

If you are a mom or grandma that receives a lot of picked dandelions and weeds from your kiddos, this would be the perfect way to display them for a day or two.  And, since balloons come in all sorts of colors, you can make one to match your decor or switch them out for the seasons.  Hooray for cute, easy projects!

Aaggghhhhhhh!

There are MONSTERS under my bed!!

No wonder I feel so tired...it's hard to sleep when there are little monsters running around under the bed.

Fortunately, Doc exterminated and I can report that these monsters are no longer at our house.  Phew! 

But where are they now?  Let's back up a little bit...

One of the most exciting presents I opened at Christmas was this kit from my sister-in-law, Jill.

Make Your Own Stupid Sock Creatures by Lark Books.  The kit came with a book of instructions and patterns for about 5 different sock creatures, a bag of stuffing, and the two pairs of socks needed to make the creature on the cover.  I was pumped when I opened the gift and couldn't wait to get home and start creating my own little creatures, or monsters as I like to call them.  But then January became the month from hell and this fun craft project got pushed to the side and forgotten about for a while.

A couple weekends ago, when Anna was making her own bracelets and I was having to fight off the urge to use her kit to make a bracelet too, I remembered that I had a kit of my own to play with.  I was way too nervous to use the pair of socks that came with the kit on my first attempt because I didn't want to screw them up.  So I picked up a super cheap-o pair from Walgreens to use instead.  That was a pretty bad move because those cheap socks were a pain to work with!  I can't find the pictures I took when I was making my first monster, but here's the finished product.

Readers, meet Rainbow Trout:

Miss Trout has a black eye and a bad attitude.  She's way too cool for school.  She's also chock full of mistakes.  For example, if you look closely, you can see that the orange big toe on her right "ear" is at the top, but it's at the bottom on her left "ear."  Oops. 


She's also not stuffed very full so her big head flops around if not supported correctly.  There's a bit of a learning curve to making your own sock monsters, I tell ya. 

I was feeling pretty confident that I could do better than Miss Trout, so I set out to find more socks.  Toe socks are kinda hard to find.  I feel like there was a time when they were everywhere, but they must not be that popular anymore.  It took my mom going all the way to California to find a couple of decent pairs.  It wasn't until after she bought me a couple pairs on her vacation that I flipped through the rest of the book and realized that only the first pattern required toe socks.  Huh.

I stayed the night at my parents' house one night last week (Doc was traveling, Lolli had just had surgery, and I had a way-too-early-in-the-morning dentist appointment the next day) and talked my mom into going to Wal-Mart with me for a sock run.  We made it home with a bag full of socks.

(The toe socks on the far right are the ones from California.  All others are from Wal-Mart.)

I was especially excited about these two pairs of knee socks that already had buttons on them.  Those would be perfect for eyes.

I figured no better time than the present to get started so I sat down at their kitchen table and got to work.  I selected the blue striped pair to use first and laid it out heel side up, just like the instructions told me to.

Making the first cuts is by far the scariest part.  I think I held my breath the whole time.

And here is how the two socks looked after making all of my cuts.  You can see how the body will be pieced together.

I sewed most of what you see above using a sewing machine - the pointed head, the neck slits, the sides of the long legs.  I also used the sewing machine to sew up the sides of the arms and the tail, but then I attached them to the body by hand. 

This is how the monster looked at that point.

From there, it's just a bunch of stuffing and hand-work.  Here's a picture I texted my mom after I had added the eyes and turned the heel into two lips.

I could call that monster D-O-N-E (at least for a while) and he took a seat in our big comfy chair.

By this time I had formed a plan of what I was going to do with this sock monster.  My plan called for at least one more monster to be made, this monster couldn't do it alone. 

I decided to use the same pattern for the next monster, only I wanted everything to be shorter so the end result wouldn't be so long and lanky.  By cutting everything off, I was able to get all the pieces cut out of just one knee sock instead of two, and that's how the idea to do twins was born.  I'll spare you all the details again and just cut to my finished photos.

First, some better shots of the first monster, who was now being called Oscar.  You'll see that I made him a neck tie; I think it adds a nice touch.

And now, the twins: Pickle and Pepper.  They are identical in every way except for their "accent colors."

They have tails, too!

Yes, in case you're wondering, I totally had a photo shoot with my new friends.  Judge me if you want. 

No photo shoot is complete without a family portrait.

I think Oscar looks great with his twin little brothers!  I can definitely see the resemblence. 

Ok, now back to my plan.  The kids were at our house this weekend and they graciously helped me out with some of the details.

Wyatt worked on Oscar's bio.

Oscar Age: 3 years (Feb. 29, 2008) (12:00 am) (Celebrate on March 1st) Birth Name: Chauncey Pet Peeve: Bananas Likes: Jumbo Shrimp, Yoga, Basketball Oscar Fact: Chauncey is to embarrassing so, he went by his middle name Oscar. (Last Name: Finklebury) 

Anna did the bios for both Pickle and Pepper.

Twins Age: 1 year old Favorite Color: Brown Name: Pickle Birth: June 30th (11:59 pm) Likes: Lots of attention and hugs Dislikes: Fish and other things under water Fun Fact: Very proper unlike his brother and likes the park.  And likes bow ties. Favorite Food: Banana Peels ---------- Age: 1 year old Favorite Color: Yellow Name: Pepper Birth: July 1st (12:05 am) Likes: Toy cars airplanes and kites Dislikes: Panda Bears Fun Fact:  Enjoys art and other arts and crafts Favorite Food:  Chicken Bones

I found the perfect sized box for the monsters.  With their bios attached, in went the twins.

And Oscar went in on top.

I sealed up the box, added an address label, and they were ready to go!

The package was put in the mail yesterday so they are en route as I type this, headed to our nephews, Henry and Nathan, in the great state of Indiana.  Hopefully they'll be able to make them feel at home there. 

I'm just glad there won't be any monsters under my bed tonight!