This post is LONG overdue...it's a project that we knocked out in September or October maybe? I absolutely love how it turned out, though, so even months later, it's still worth sharing!
Over the summer, my friend Megan and her family moved into a new house and in the dining room when she toured the house was this big plate rack. It took up a big chunk of the wall and the previous owner's had it full of pretty plates. Turns out, though, that the previous owner's Dad had built it for them and so they removed it from the wall and took it with them when they left. At the same time, Megan had decided she was tired of her big china cabinet and planned to use just the bottom half of it as a sideboard with this plate rack hanging above it. No such luck since it was gone when they moved in! This is when I enter the scene, because she sent me the picture below asking if it was possible to recreate the plate rack.
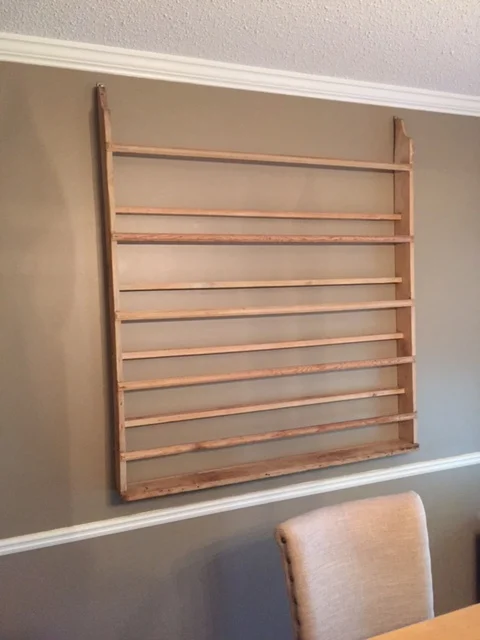
Now, I love a good woodworking project and so of course I told her it was possible. I zoomed in on that picture a hundred times to figure out how we would build it. But I also googled plate racks to see if plans existed and landed on Corey Decker's blog, Sawdust to Stitches, and her plans for a Pottery Barn inspired plate rack. Much different than the one that used to be in Meghan's new house, and in my opinion, so much better! I sent Megan the picture and she was on board with this style!
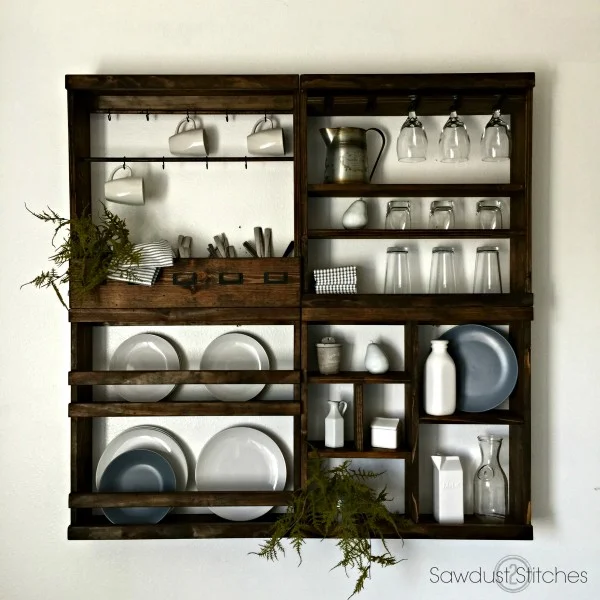
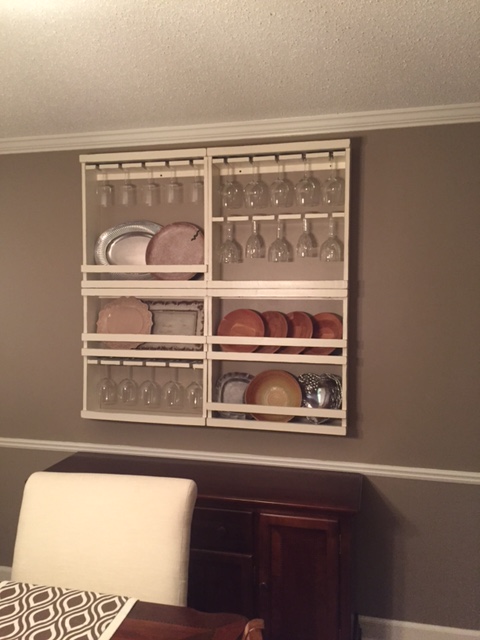
Because Megan wanted to store mostly plates/platters and wine glasses, we modified the plans to hold only those. We left out the hooks for the mugs, the flatware boxes, and the small cubbies for tchotchkes and added more slots for wine glasses and plates.
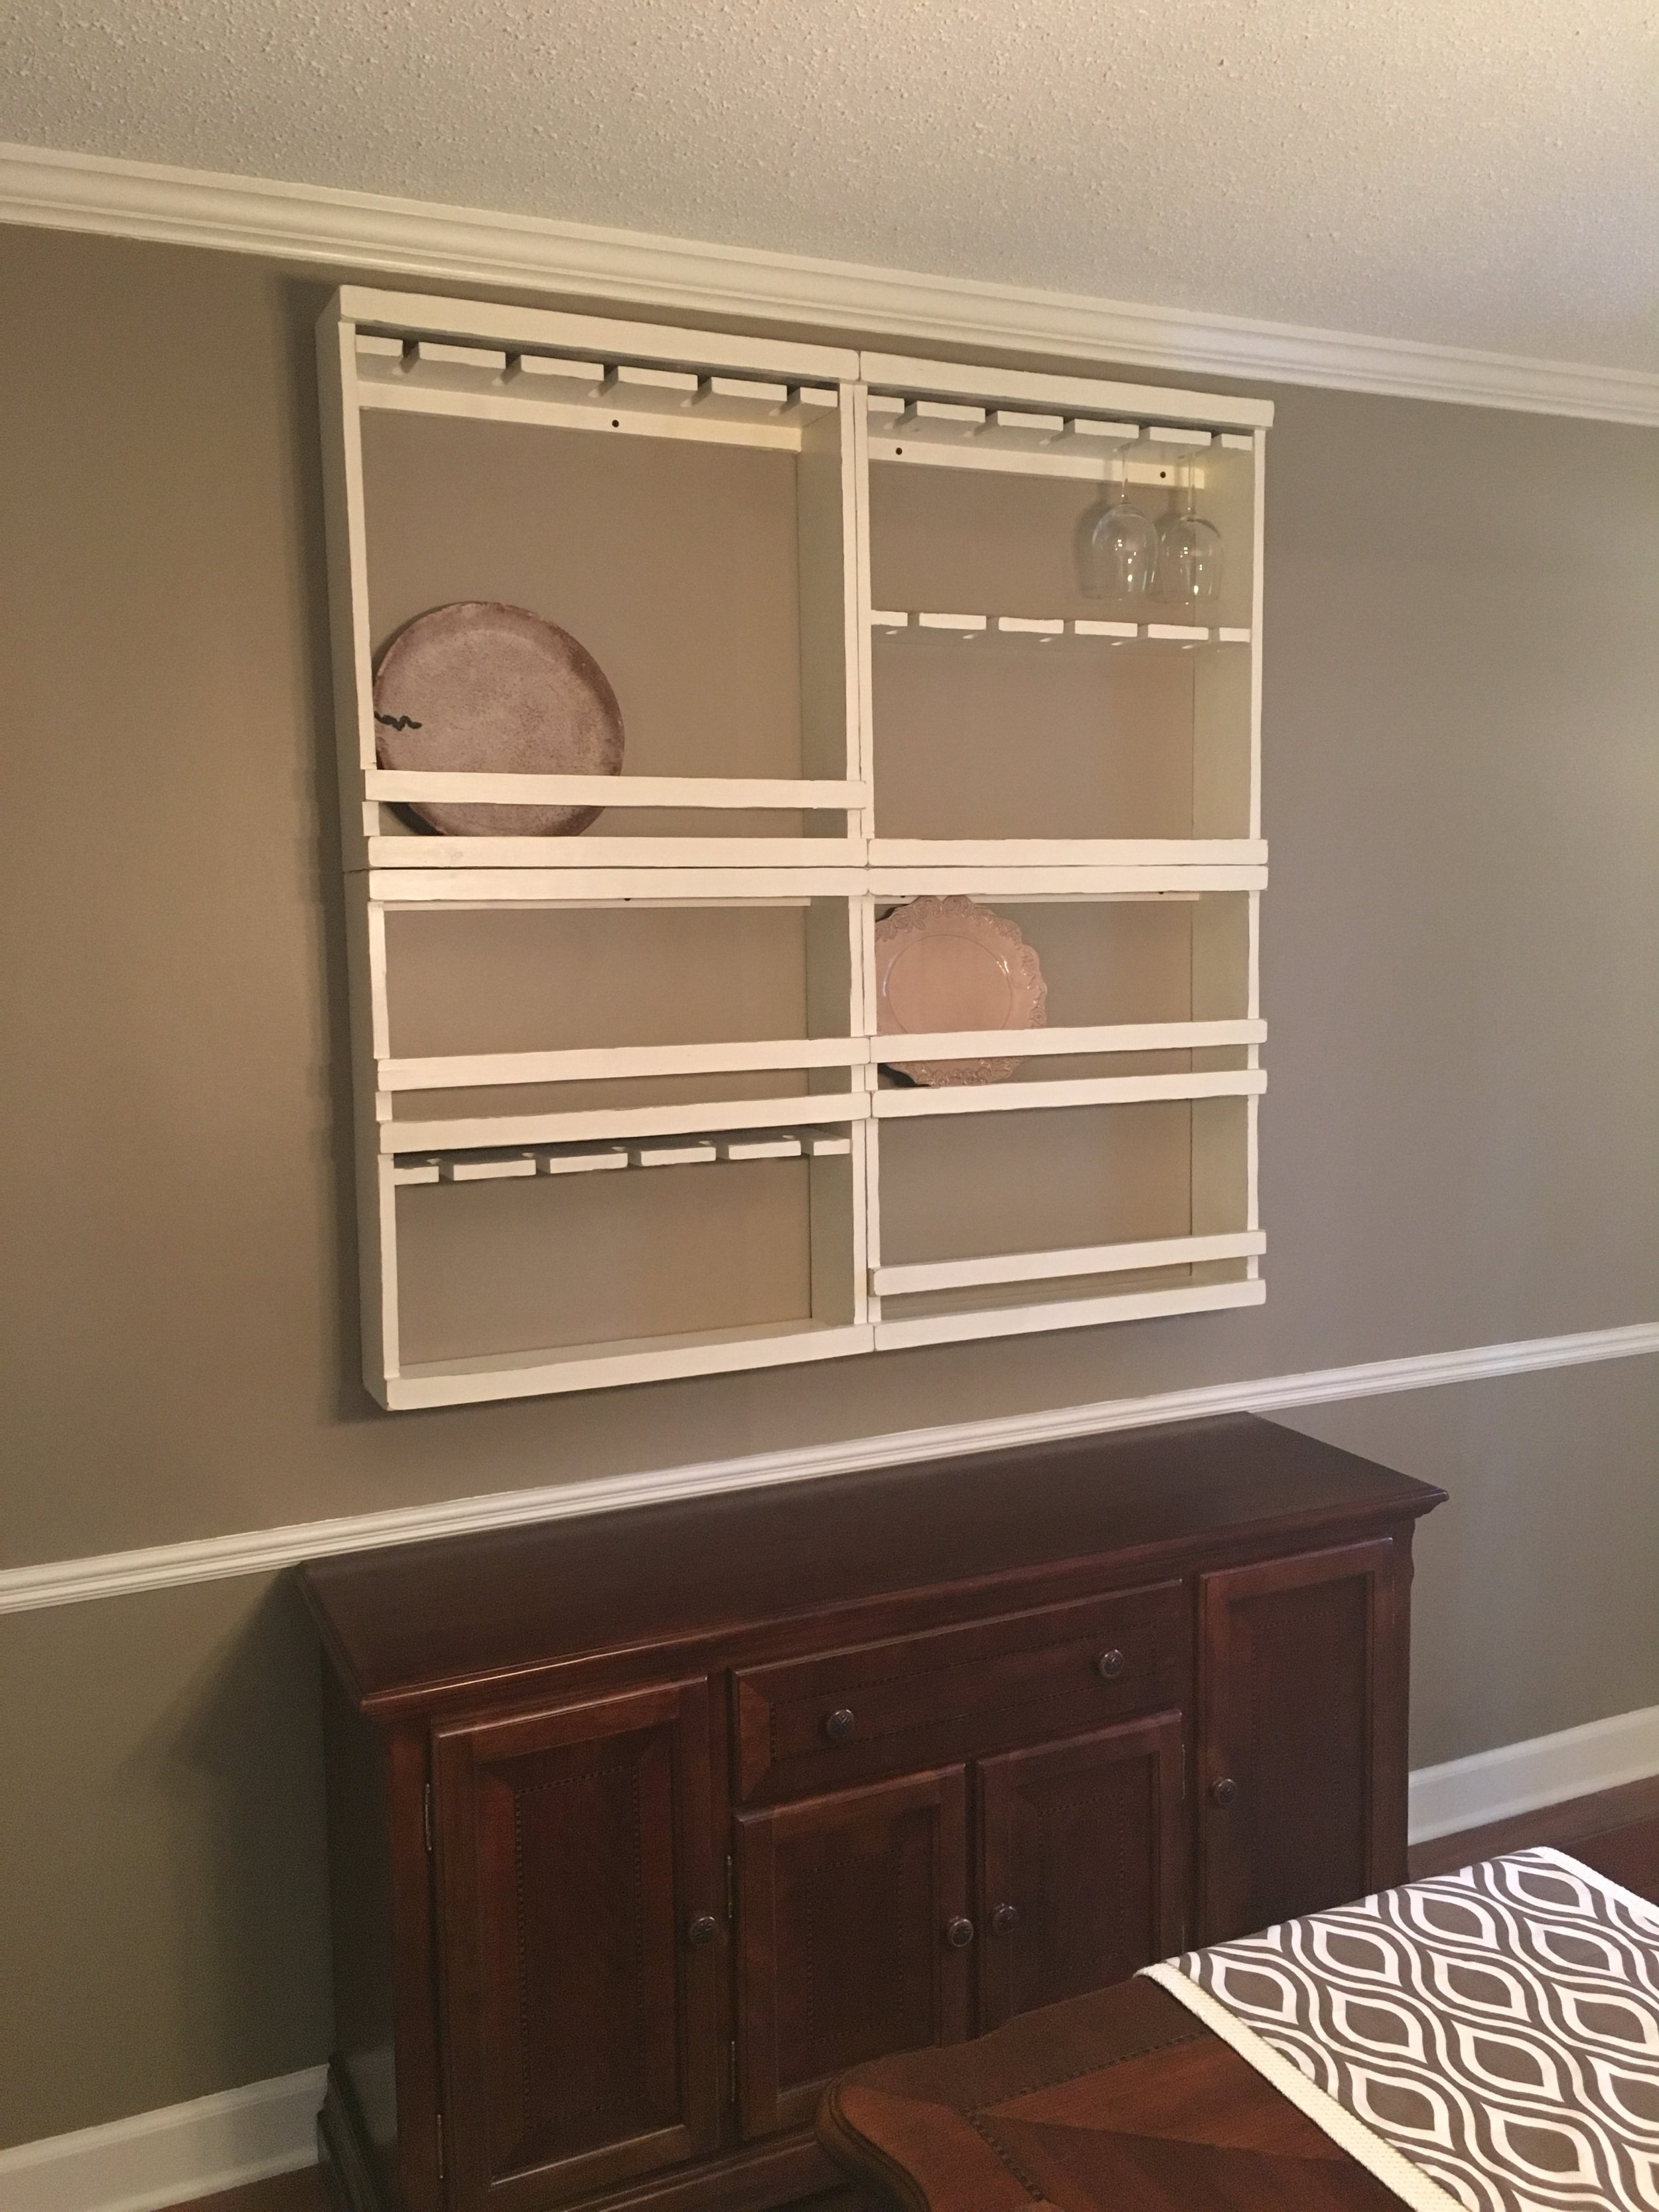
I drew up the design, worked on some measurements, and handed them over to Matt and my Dad so they could do the actual grunt work. :) After cutting all the pieces and assembling the four boxes, I had them stop so that I could start painting. That was the best decision I made in this whole process because I did the last coat of paint with it fully assembled and it was SO hard to get inside all the nooks and crannies.

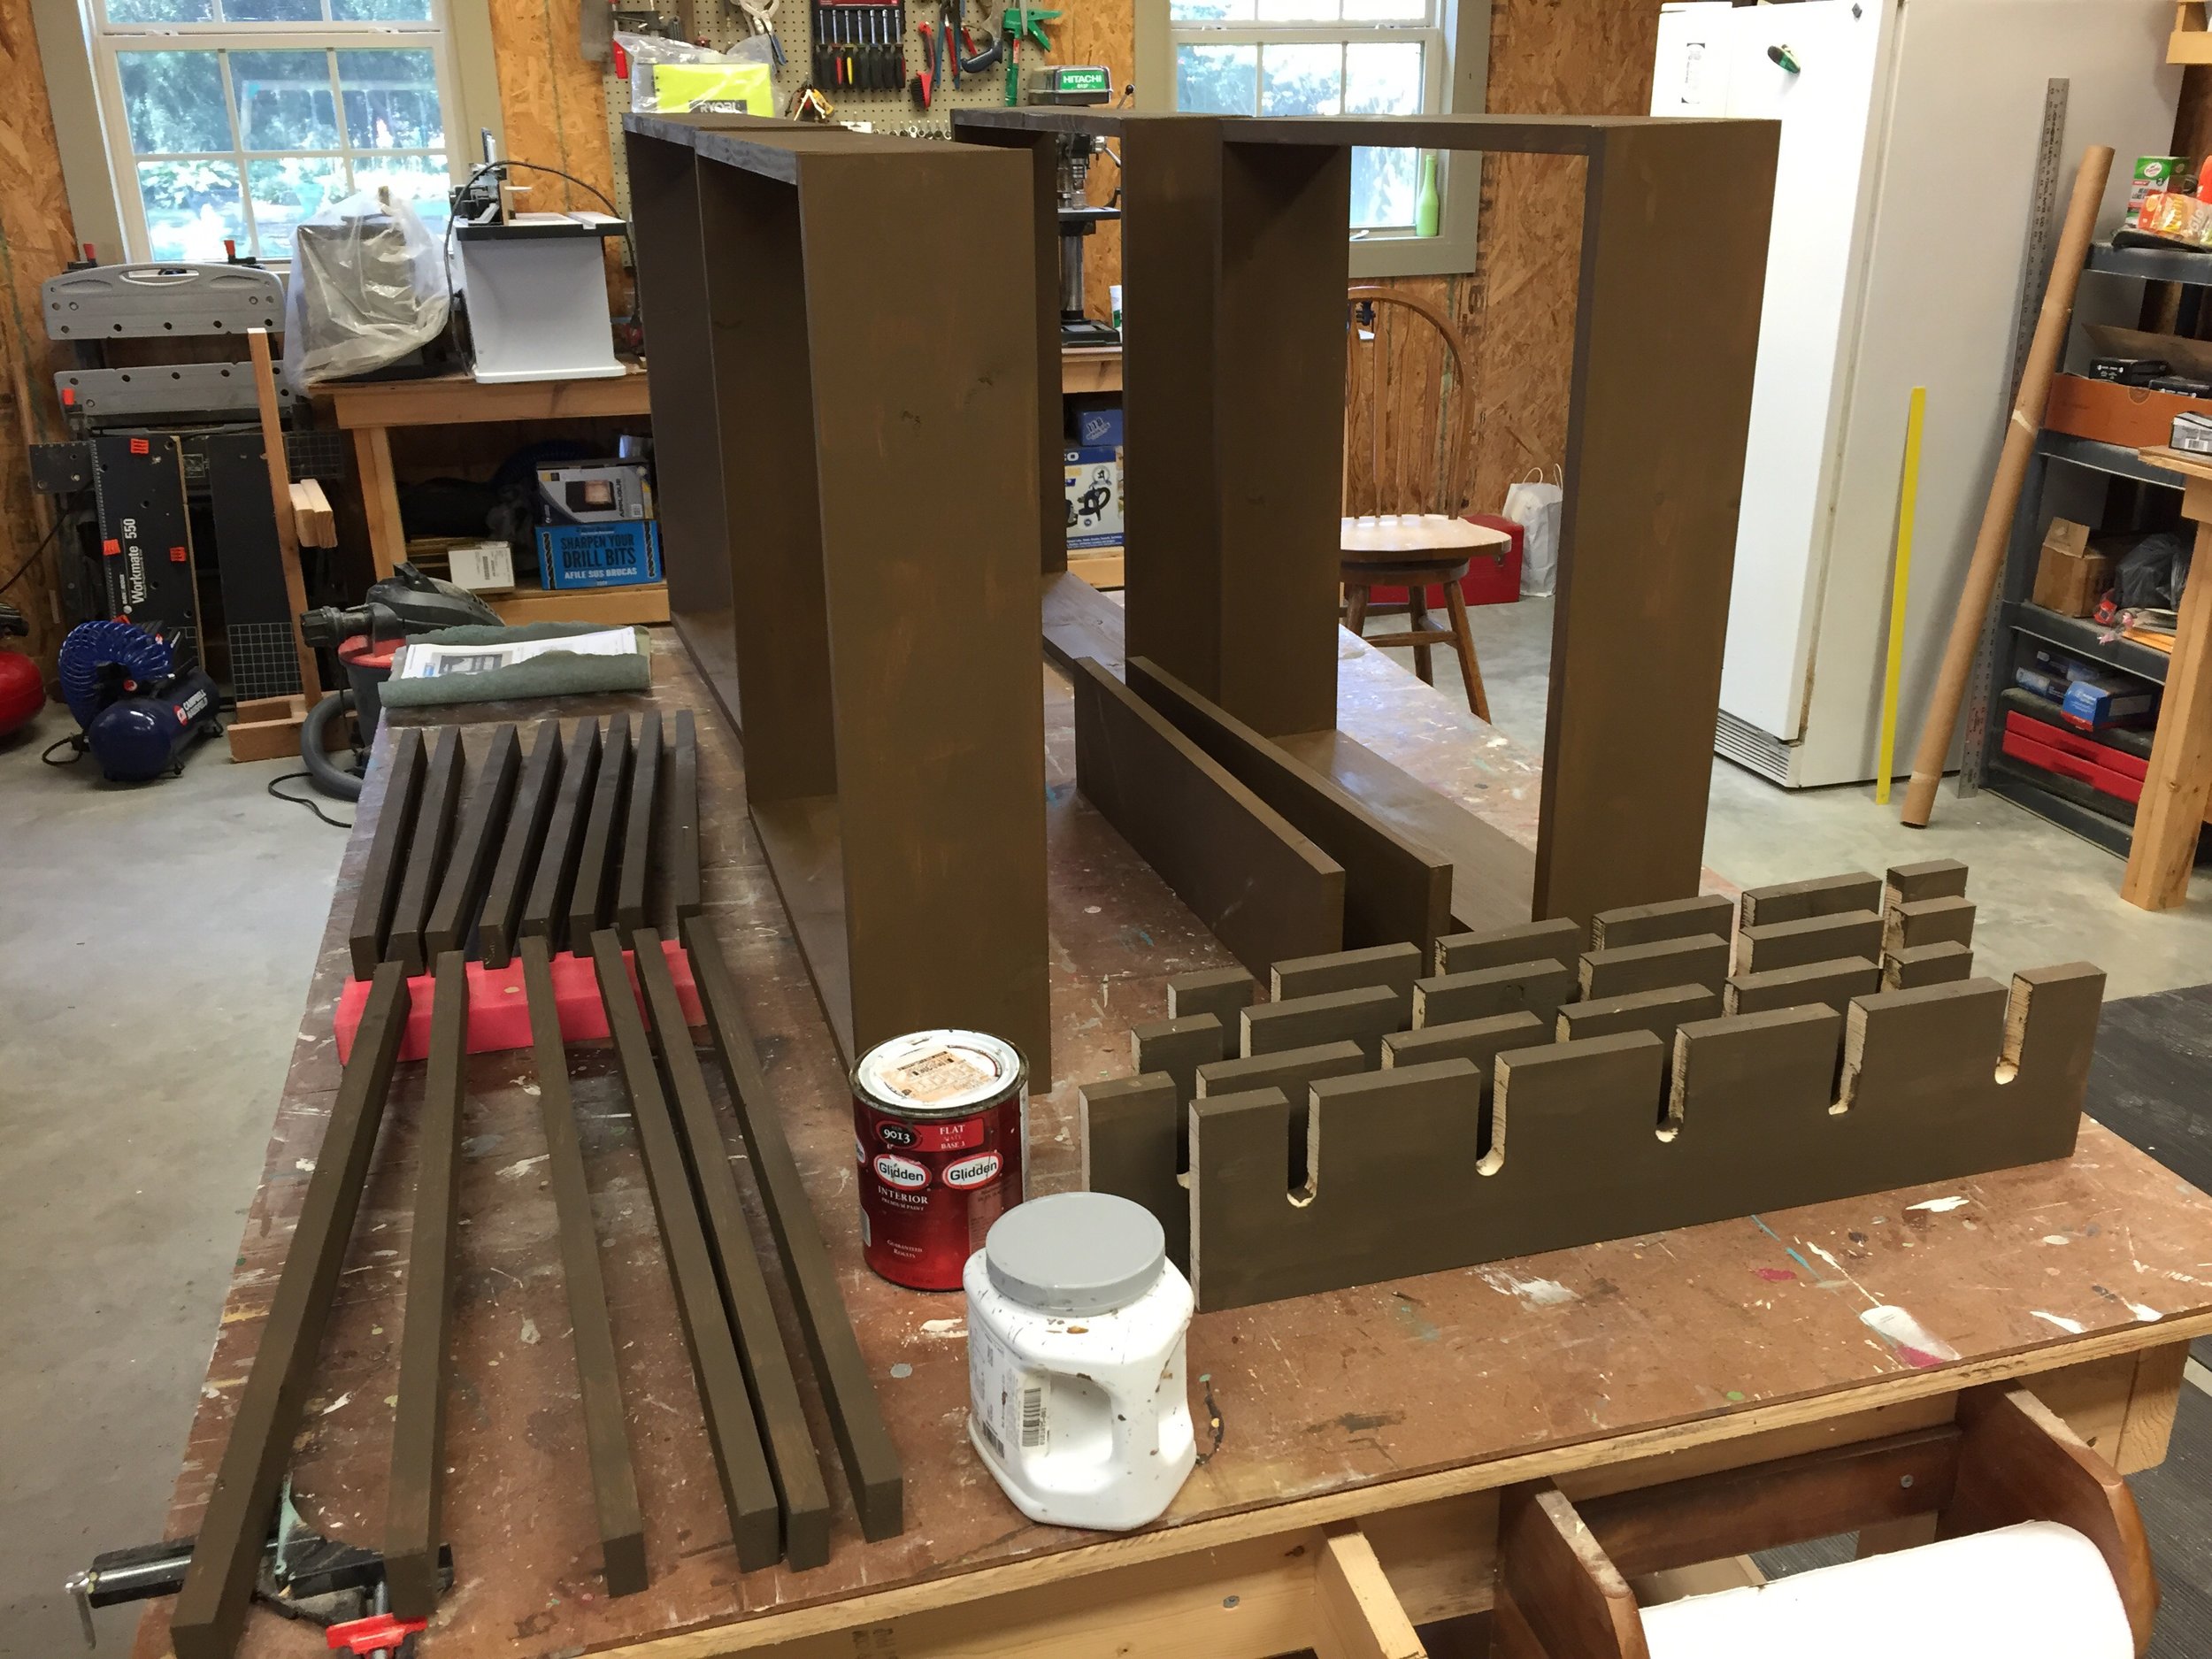
Since it would have a distressed finish, I painted a brown coat first and then three coats of a creamy white chalk paint.

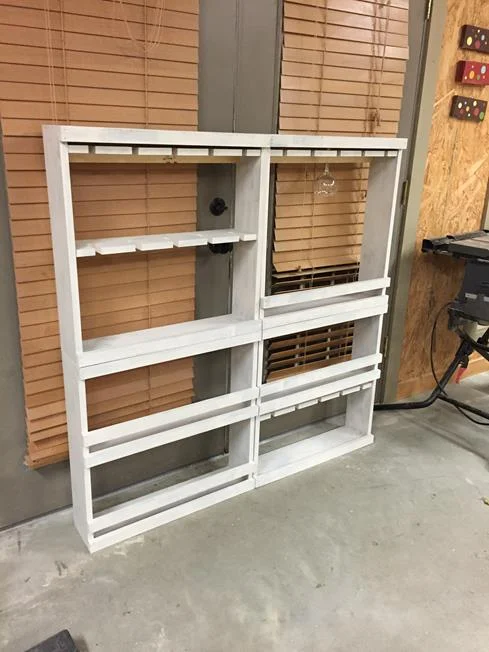
Sanding the edges is always my favorite part! I love how it makes all the details pop and adds character.


The entire plate rack is four separate cubbies that could be arranged in different ways. Matt and I delivered them to Megan's house so that we could help anchor them to the wall. This piece is BIG - four feet by four feet - and it was perfect for the big empty wall she had in her dining room. I love how it turned out in the space and we had fun filling it up with her plates and wine glasses. Even the hubbies got in on the action! Our modified design gave Megan room to hang 20 wine glasses and had four shelves for plates. Since we pretty much cleared out the sideboard underneath it, she has lots of hidden storage for other things now. And you can never have enough hidden storage!
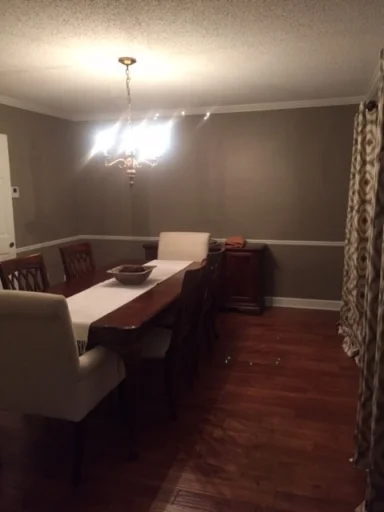
Here is a side-by-side comparison of the room before and after the plate rack. You can see that Megan and Justin also replaced the chandelier. What a difference in the room!

I love how this turned out so much that I have been wandering around my house trying to figure out where I can hang another one for us. Wouldn't it be fun to pop in different plates and glasses for seasonal decor - like a plate for Santa's cookies during Christmas or pastel plates for Easter? I hope you are enjoying it in your new home, Megan!