Painted Built-Ins

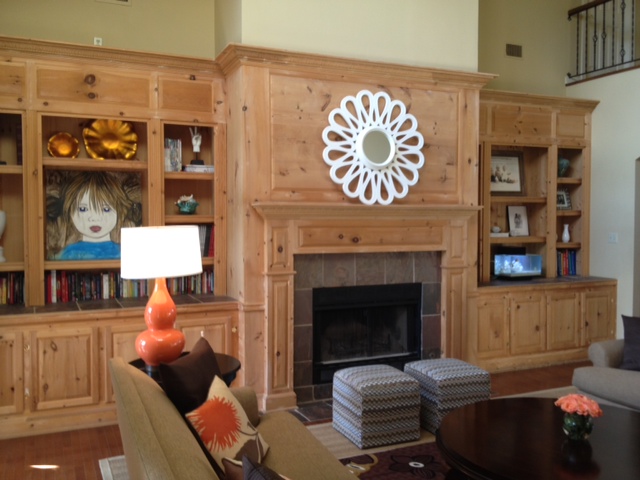
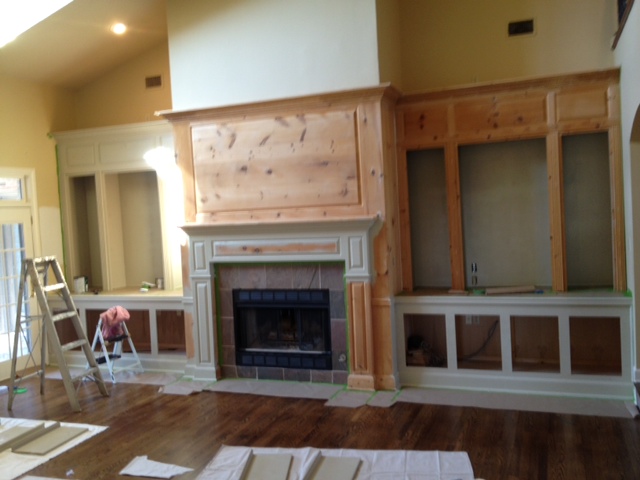
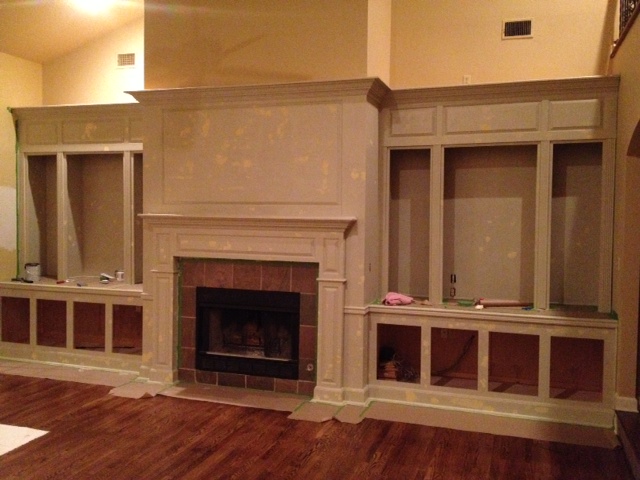
So, we bought this house that has the world's largest built-ins in the living room.  Seriously, they are huge.  I don't think this picture does them justice at all.
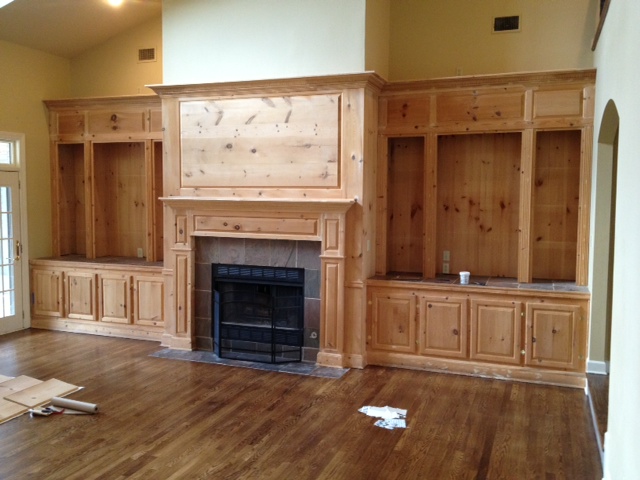
When we toured the house, they were decorated (obviously) and looked really nice.  Here is a picture I snapped that day.  This is not our stuff!

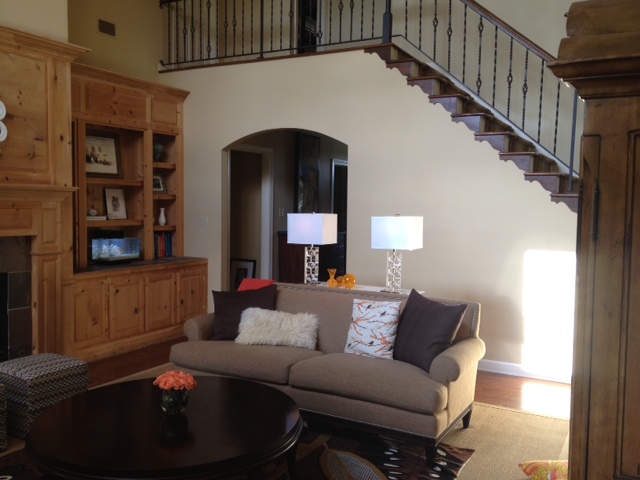
And here's another one that wasn't really focused on the built-ins, but you can still see them.  This picture also shows how the stairs to Anna's and Wyatt's bedrooms are in the living room and have a small balcony overlooking the room.  You can also see how the top of the built-ins goes past the height of the door frame and is almost all the way up to the bottom of the second story floor.  Again, for the slow people in the back, this is not our stuff in the room!

We loved the built-ins when we first saw them.  They looked so nice!  And we learned that the previous homeowner actually built them himself.  Who doesn't love having something custom made for their home?

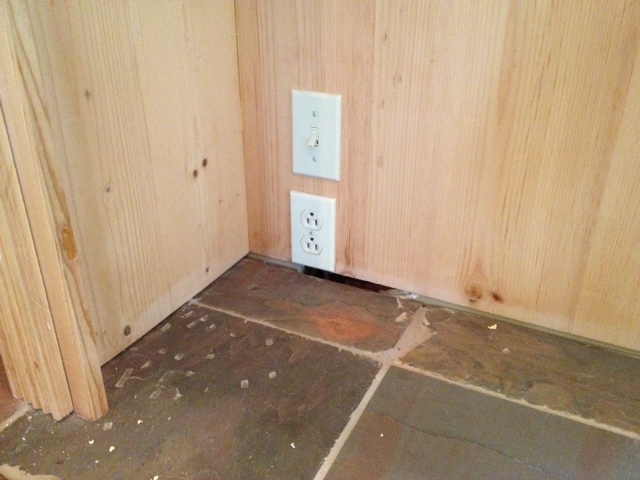
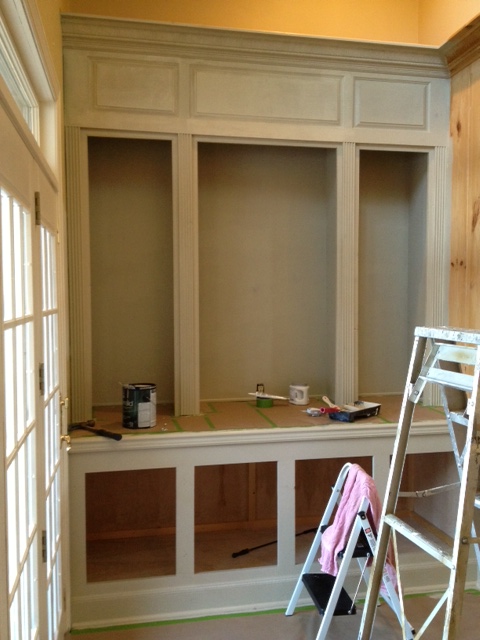
When we finally moved in and they built-ins were all cleaned off and empty, we realized they were actually just raw wood.  No stain.  No polyurethane.  Just the raw wood, complete with all the pencil markings from the previous owner's measurements when building.  And the millions of tiny nail holes?  Not filled in at all.  Oh, and where the top part - the hutch, if you will - met the tile counter top, there were huge gaps like he hadn't finished trimming it out.  See?

This was all good news and bad news.  I mean, hooray for having a completely blank slate and getting to do whatever I want to it, but ugh for having to do so much work!  I knew pretty much immediately that I'd eventually have them painted, but we were in no hurry.  I ruled out the option to stain them because a) I hate working with stain, b) that would make it harder to do all the wood-puttying, and c) the wood was really knotty and probably wouldn't look pretty stained anyway.

Like I said, we weren't really in any hurry to tackle these.  That is, until we had our hardwood floors restained.  The nice, shiny, freshly stained floors made the raw-wood-no-finish built-ins look terrible!  Ugh.

So I decided to paint them.  Yes, me.  Not professional painters.  Nope, I figured I could do it myself.  How hard could it be to paint a couple of bookshelves?

Since we were home from the beach early (after our first trip) but had plans to go back pretty soon after, I gave myself a very strict one-week deadline to get this project done.  I thought that was plenty of time.  The week got here and Monday and Tuesday both flew by without me even starting work on this beast of a project.  This was not looking good for my week deadline!

On Wednesday, I finally got started.  It took me so long to finally make the first move because I knew before any painting could happen, a LOT of pre-work had to be done.  Like, for instance, finishing trimming out the hutch to cover up those huge gaps I showed you above.  That was my first step and I just used a small piece of trim from Home Depot.  I cut them to size and then just glued them to the bottom of the hutch (I didn't have a nail gun at my house but really didn't want even more nail holes to fill anyway).

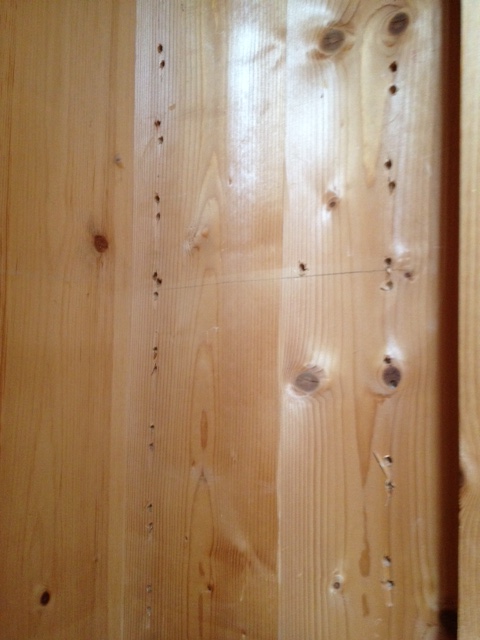
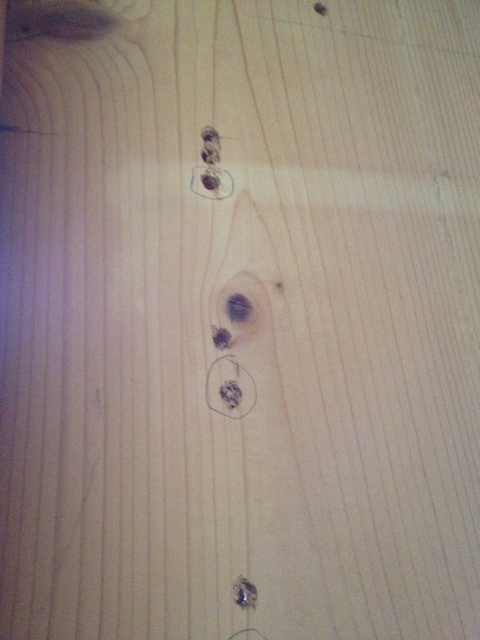
With the trim added, I could start filling in all those nail holes.  I'm pretty sure there were 9,264 of them.  Not that I counted.  There were other things that needed wood putty too.  The sides of the hutch compartments had multiple holes up and down the sides so that the shelves could be adjustable.  That's nice, except that when the previous owner was making those holes, he apparently got off on his measurements on a couple sides and made lots of extra holes.  I'm not sure if you can really tell what you're looking at in the picture below, but all of those little dots are holes (you can also see one of his pencil lines!).

They weren't too terribly noticeable in the raw wood since the wood was so knotty, but I knew once they were painted a solid color, those holes would stick out like a sore thumb.  I needed to fill in the ones that weren't needed.  This required me to get out my ruler and try to figure out which ones were spaced correctly and should stay, and which ones could go.  I circled the ones that I thought were correct.

Filling in holes with putty took the better part of a day to do.  It was exhausting and I hated every minute of it.  I also did just a little bit of caulking on a few seams that had really big gaps.

With all that done, it was time to finally clean the built-ins to get them ready for paint.  My mom was a huge help during this whole process - both with helping me work on the built-ins and watching Katie while I worked away.  She helped me with all the cleaning - one of vacuumed up dust while the other wiped things down with a wet rag.

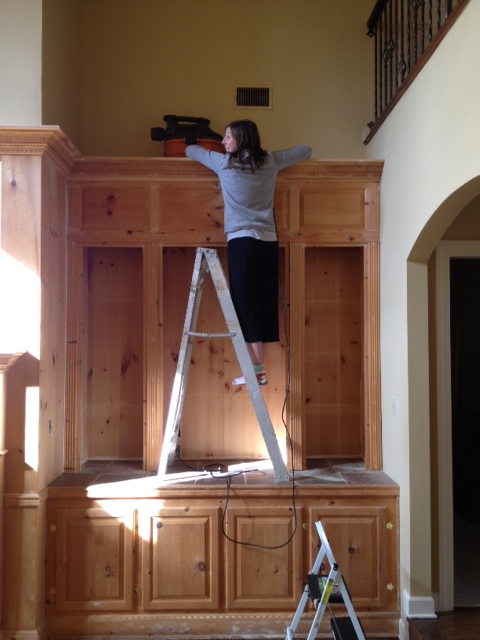
We fought over who would have to climb up on the ladder to vacuum all the dust off the top of the built-ins.  (You may be thinking "Why bother?"  But remember how the upstairs has a little balcony that overlooks the living room?  That means you can also see the top of the built-ins when you're standing upstairs.)  She didn't want me to climb up and I didn't want her doing it.  I eventually won the battle and said I was doing it.

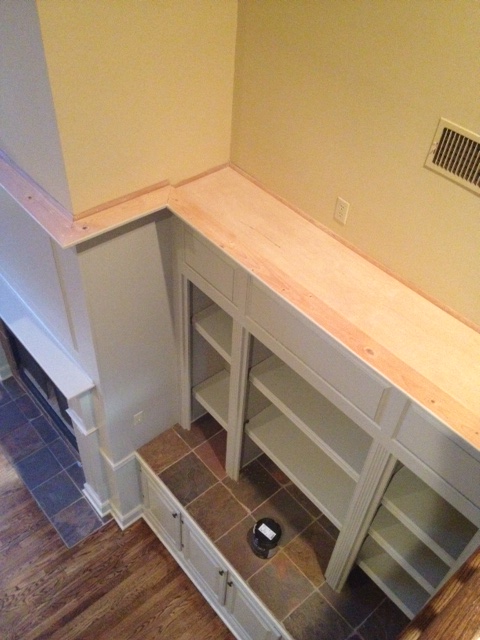
I'm not sure that this picture makes it look as scary and as hard as it was to do.  That's a six foot ladder that we placed on top of the counter tops that I then climbed up.  The trim at the top of the built-ins sticks out so I had to wrap my body around it to see over it.  Oh, and I had to hoist the shop vac up there too since I couldn't just hold it while I was on the ladder.  I was sweating bullets by the time I finished cleaning the top.

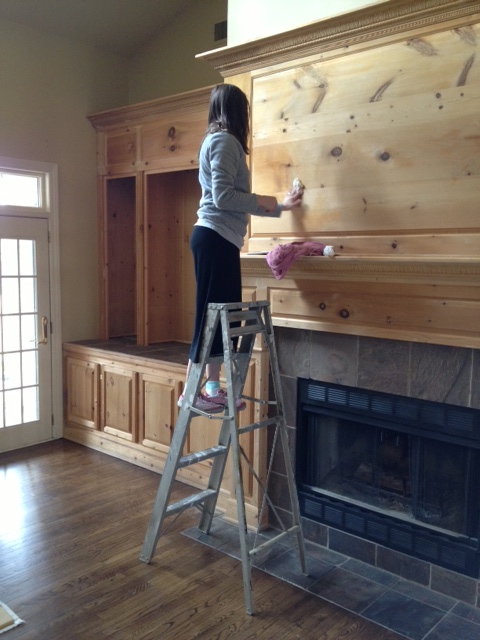
The mantel is in the middle and it is equally as huge as the bookshelves.  I'm guessing the actual mantel is at about six-ish feet tall - much higher than most mantels.  I had to climb back up on the ladder to wipe down the wood above it.  You'd think it would be way less scary to climb the ladder on the ground after climbing it up on the counter, but the tile it was sitting on was not level at all, so it wobbled the whole time I was on it.  More sweating.

And yes, I was wearing blue socks with my pink tennis shoes.  That's how I roll.

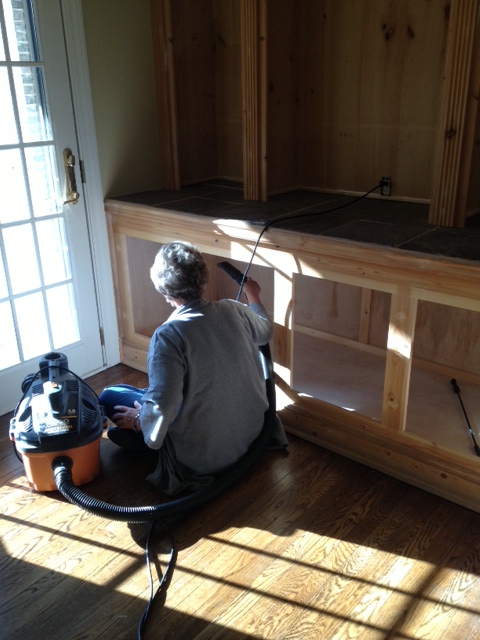
Taking the doors off was one of the last things we did.  Here is Mom vacuuming out the inside of the cabinets.

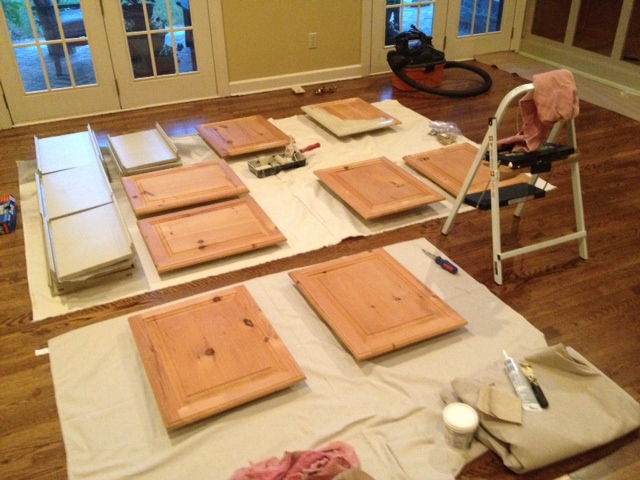
I can't remember now, but I think it was probably about a day and a half of pre-work before I ever even got to start painting.  After getting them cleaned up, we taped everything off.  I normally don't use tape when I paint, but I thought it would be best to do here to protect the tile countertops and my freshly stained hardwood floors.  We also taped down lots of paper to cover everything up.  Because the room was still empty from having the floors done, I was able to spread out several drop cloths to lay all the shelves out on.

I made 3 trips to Sherwin Williams before finally settling on the right paint color.  I had picked up several paint swatches from Home Depot a couple weeks earlier.  My goal was to find a neutral color that would work with both greys and khakis.  I planned on using greys in the room now, but knew that if I ever decided to change it up and go with browns or khakis, I didn't want to have to repaint these built-ins.  After lots of debate and flipping through every paint sample I had, I finally chose a Behr color that I liked.  I had chosen the darkest color on the card for the built-ins and figured I'd use the lighter shade above it for the walls (when they eventually got painted).  After bringing home those two colors, though, I decided they were WAY too light.  They practically looked white.  Back to the paint store I went.  Long story short, I ended up choosing the darkest color on the card tinted at 175% for the built-ins.  (It's Behr's Castle Path at 175% color-matched by Sherwin Williams, for anyone interested.)

Finally!  Time to paint!

I knew the shelves would be a pain to do because they'd require at least two coats of paint on both the top and bottom of each one.  I started with a coat on the tops so that they could be drying.

With the first coat drying on the shelves, I finally made my way to the actual built-ins.  I started on the bottom of the left side and worked my way up.  I was able to knock out this whole side while my mom watched Katie.

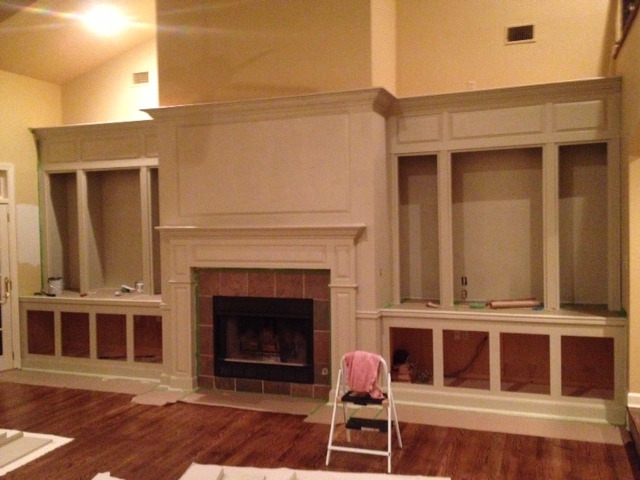
Katie eventually went down for a nap so my mom picked up a paintbrush and helped.  She tackled the mantel while I moved on to the right side.  By the time my mom had to leave and I had to quit to tend to the baby, we'd made it this far.

I hated having to stop after finally starting to see progress being made, but mommy duty called.  I counted down til Doc would be home from work so I could pass off the baby and pick the paintbrush back up.  I was determined to finish the first coat before going to bed!

It was later than I wanted it to be, but I did get it finished before calling it a night.

The next day was Saturday.  My original deadline had been Friday.  I was way behind schedule already.

The first coat brought good news and bad news.  The good news was that I could kinda tell how it was going to eventually look, and I could tell I was going to like it.  The bad news was that I could now see all the millions of cracks from the millions of knots in the wood, and I could also see the many, many places that needed calk.  Sigh...more work to do before putting the second coat on.

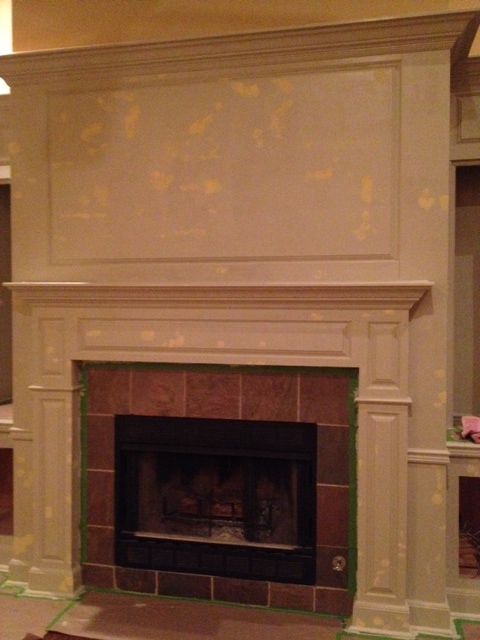
I got up early that Saturday and went to town with the wood putty.  I started out with the mindset that I'd only worry with filling in the big noticeable knots, but then, once I started going, I ended up filling in every little crack I saw.  I put so much wood putty on those built-ins that they soon resembled a kid with chicken pox slathered in calamine lotion.

I so wanted to keep working, but I had to take a break to jump in the shower and get cleaned up.  My family would be showing up soon so that we could take family pictures, so this project was put on hold for the rest of the day.

Late that night, I was back at it.  I grabbed my sanding block and started smoothing out all those spots with wood putty.  That part wasn't too hard, but it created lots of dust which meant I had to get the shop vac out again and vacuum it all up.  Then I had to wipe it all down again to get any remaining dust particles.  And THEN I had to caulk all the many, many seams.  I knew these would show up once I put on the first coat of paint, I just didn't realize it'd take so long to caulk them.  And caulk is so messy!

By the time I went to bed Saturday night, the built-ins were ready for their second coat.  Thank goodness!  I was able to knock that second coat out Sunday afternoon after church.  By the time Sunday evening rolled around, I was down to my last step: painting the doors.  I had already finished painting both sides of all 20 shelves and put them away.  Now I had to do both sides of all eight doors.

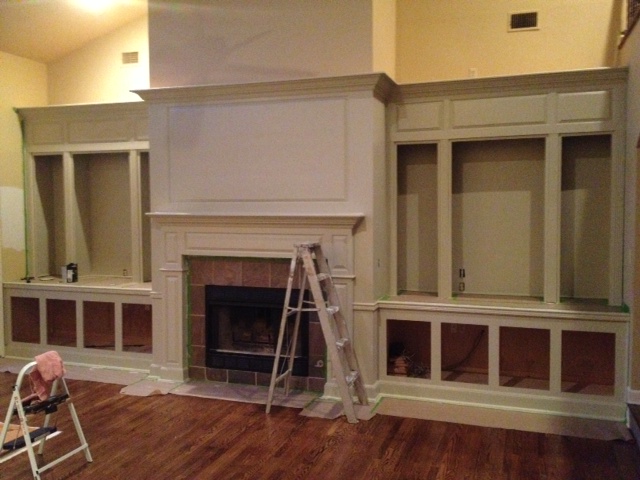
Here's a pic of the built-ins after the second coat.  See that ladder?  Can you tell how I had to climb all the way up it to paint the top part of the trim?  Scary.  Very, very scary.  I tried to play it cool because Doc didn't want me climbing up there in the first place, but now that it's over, I can say this: I was terrified.  The ladder wobbled with every breath I took, and I was painting so it's not like I was standing still up there.  It was also a pretty good workout.  I was so tense that every muscle in my body hurt by the time I was done.  I could barely walk the next day.

Let's see...I think it was Monday at this point.  My Friday deadline was long gone and we were leaving for Beach Trip Round Two in two days.  I needed to get this wrapped up!

When I removed all the doors, I chose not to fill all the holes from the hinges.  In my opinion, doors are really hard to get lined up when hanging them, and since the previous owner had already done that part for me, I wanted to re-use the holes and his hinges.  No need to do it all over again.  The only problem was that the hinges he used were shiny gold.  Blah.  I searched at Home Depot and Lowe's but couldn't find the same hinges in a different finish, so I had to spray paint them.  I chose Oil Rubbed Bronze spray paint and painted the hinges and the screws needed to put hang them.

The previous owners of our house had never put knobs on the doors.  Fine by me because they probably would've been gold too (everything in our house is gold).  I was happy to pick out new knobs (also in oil rubbed bronze) but it did mean that I had to figure the spacing and drill the holes for the knobs myself.  No big deal, just something else that took a little time.

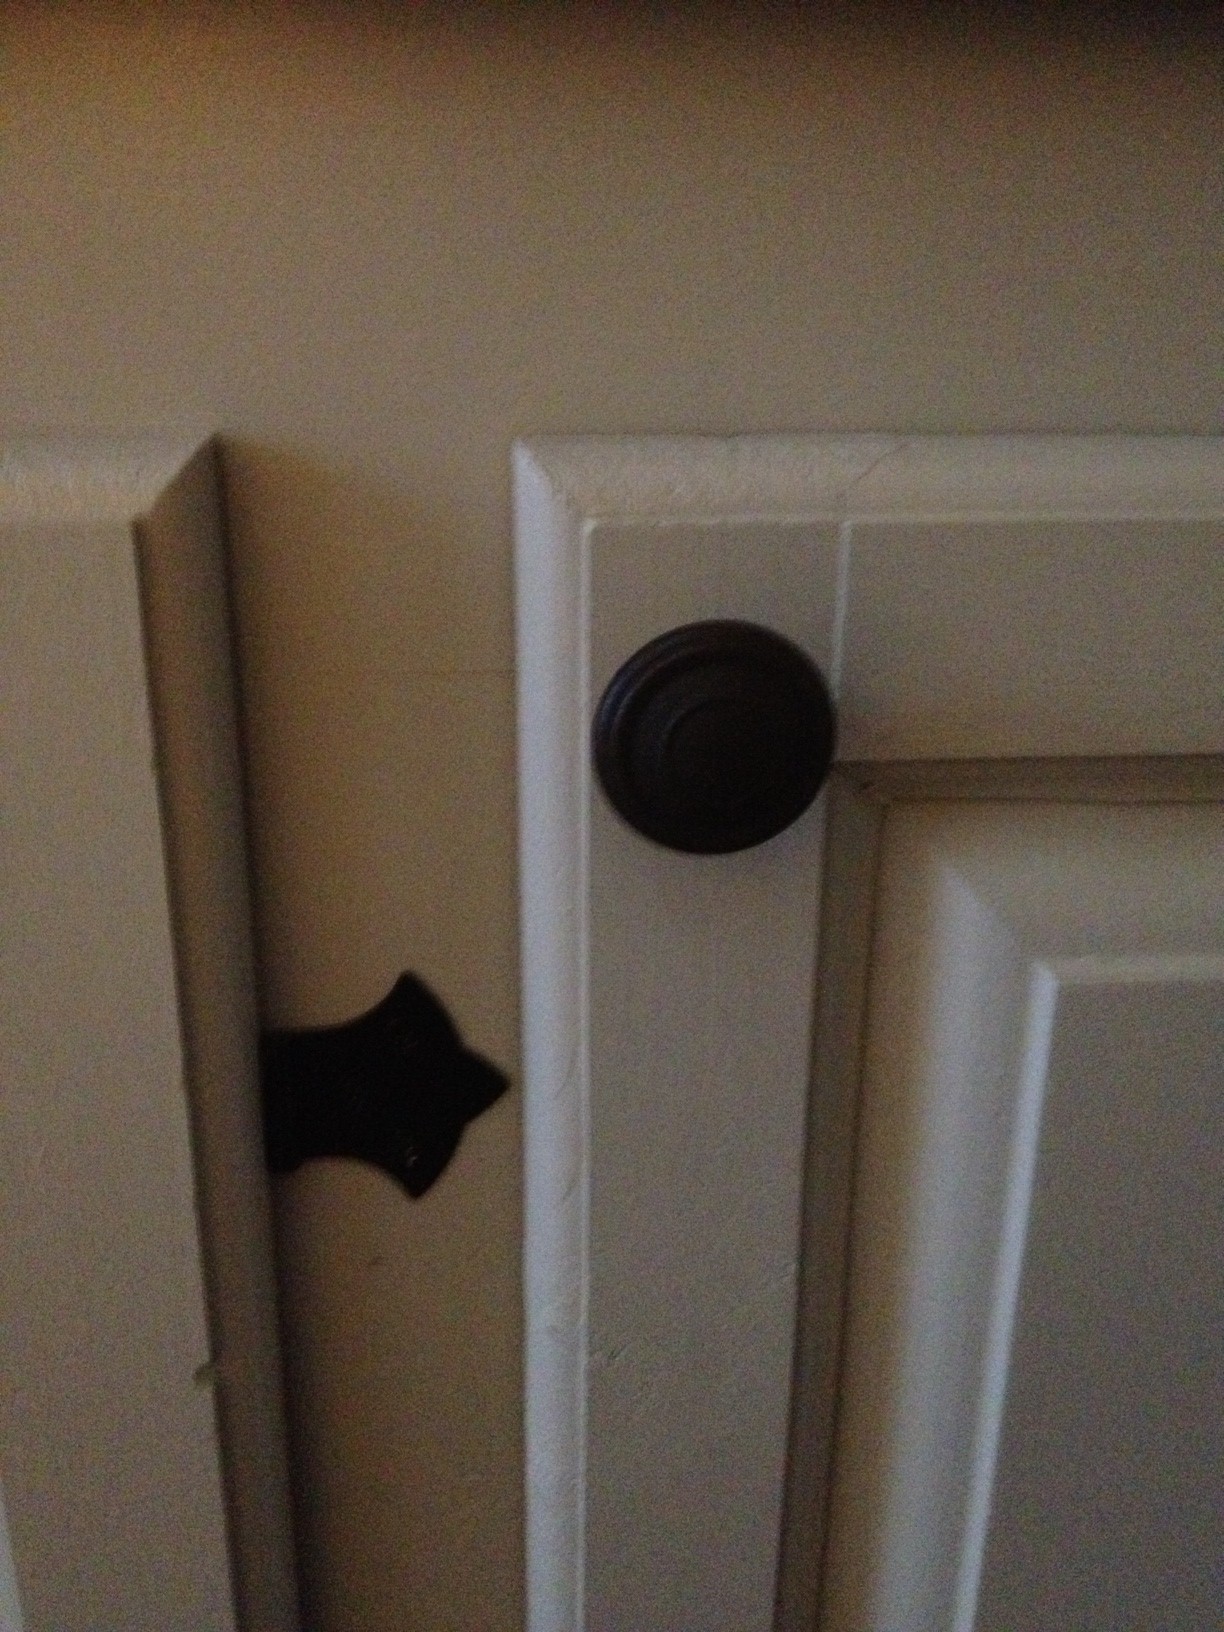
Here's a terrible quality picture of a new knob and a freshly painted hinge.  They're a perfect match!

With the doors rehung, the only thing left to do was put the shelves back in and call this project done!  Are you ready to see them?!  First, remember this is what we started with.

And now, after several days and too many hours of my hard work, sweat, and tears, they look like this!

Ok, that's a HUGE improvement but all I can notice in that picture is how awful the yellow-khaki walls look with them.  But here's the awesome news: after spending so much time painting the built-ins, Doc told me we could go ahead and have the walls in the room painted.  Woohoo!!  This is a two-story room so there was no way I could paint them myself, and I figured we'd have to wait a while before having them professionally done.  As soon as he told me that, I made the call and had the painters there on Tuesday to give us a quote.  They were going to start the very next day and by the time we made it home from the beach, the walls would be done too.  Aww, yeah!

In full disclosure, there is one part of the built-ins I didn't end up painting myself: the very tip top.  That was going to require me to climb up on a leaning ladder and I wasn't sure I had it in me!  Once Doc told me we could hire the painters to do the walls, I decided to ask them if they could just paint the tip top while they were up there doing the walls.  I'm so glad I didn't have to get on another ladder!

So much has already happened in our living room.  I've shown you the new floors and now the newly painted built-ins.  Hopefully I'll be back soon to show you the painted walls and our new furniture!

Enter To Win!

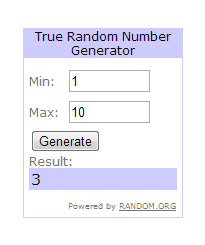
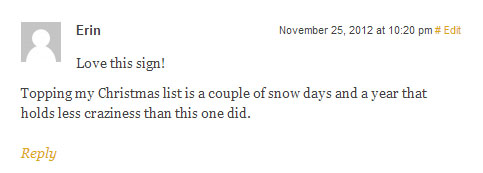
Since posting about the giveaway, my site has been visited 277 times.  Yet only 3 people have entered to win!  Maybe you didn't see it? Or maybe you just haven't had time to leave a comment?  Or...maybe you just don't like my Family Birthdays sign?  Yowch. At any rate, I'm extending the giveaway period until this Thursday evening at 8pm.  Same rules apply: one comment per person and let me know what's on your holiday wish list.  I'll use random.org to pick the winner Thursday night.

Now go! Enter to win!

Meet My Family

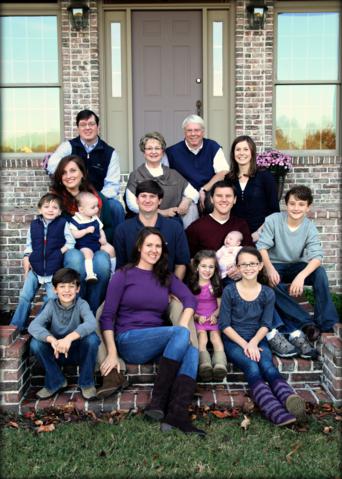
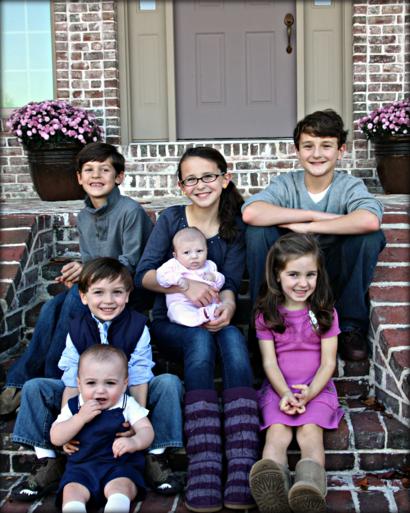
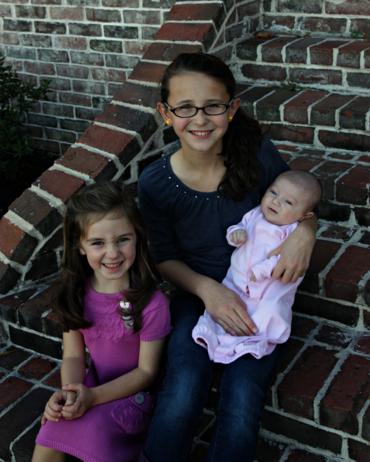
Hello there!  As I mentioned in this post, we tried to take family photos a week or so ago.  Now, our family is full of bankers and teachers, with one accountant (me!) thrown in.  None of us are professional photographers.  But we still drag out a tripod and at least attempt to get a few decent pictures each year.  If anything, just one good enough for a Christmas card is all we're really looking for! This year we gathered at our new house to try to utilize the front steps and brick porch.  The bricks have such a great texture!  I'm not sure we used them as well as a real photographer would, but we tried.  My mom likes to have a full family shot to use as her Christmas card so we all crammed onto the front steps to try to get a decent one.  At first, I was clicking the button on the timer and then running to my spot, but that resulted in lots of pictures of me half straddling the steps trying to get into position.  We learned after a couple takes that maybe someone from the front row should be in charge of pushing the button.  (And maybe I should ask Santa for a remote control!)
In my opinion, this is the best group shot we got.  Sure, Katie's crying and Ramer (the other baby) is looking over at her, but I figured if anyone was going to be looking off, it might as well be the babies.

We try not to be too matchy-matchy for our pictures.  The general rule is to just wear solid shirts in fall colors.  It's just a coincindence that we all showed up in mostly grey, navy, or purple.

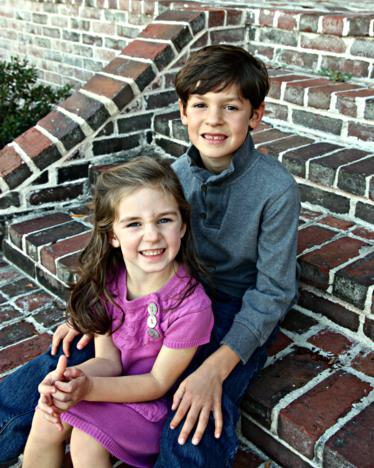
With the group shot out of the way, the adults got out of the way so we could focus on just my parents' seven grandchildren.

Probably the best picture from the pose above would've been if I'd turned my camera around and snapped the seven other adults behind me singing and chanting and waving their arms around trying to get everyone to look and smile.  If only I'd had another camera - couldn't risk missing the kids' smiles!

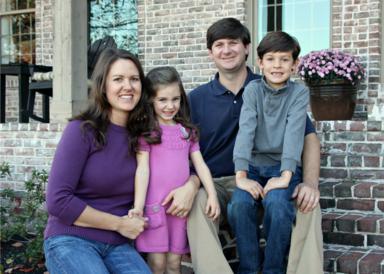
We broke out into our individual families next.  Now usually I don't like to share the picture being used for the card until after cards have been sent out, but since I don't think there are many of my brothers' and parents' card recipients that read this blog, surely it'll be safe to share some of them.

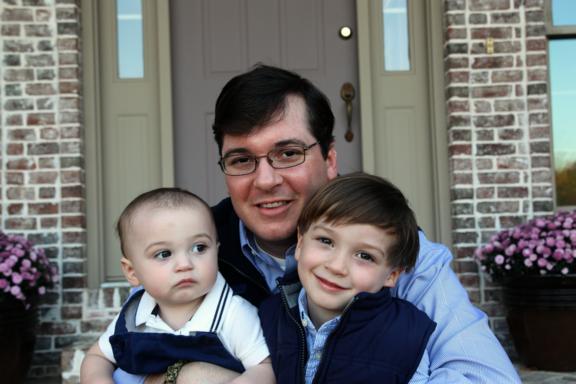
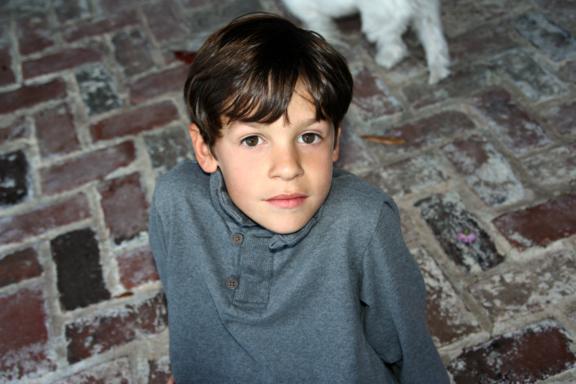
First up is my oldest brother, Nick, and his family.  His wife is Beth and they have two kids: Jett (7) and Bren (4).

Hopefully these pictures will print better than they're showing up on the ol' blog.  I'm using very low-resolution files for this but the real files are bigger.

Jett-bo made me an aunt for the first time 7 and a half years ago.  And Brennie was my very first niece.

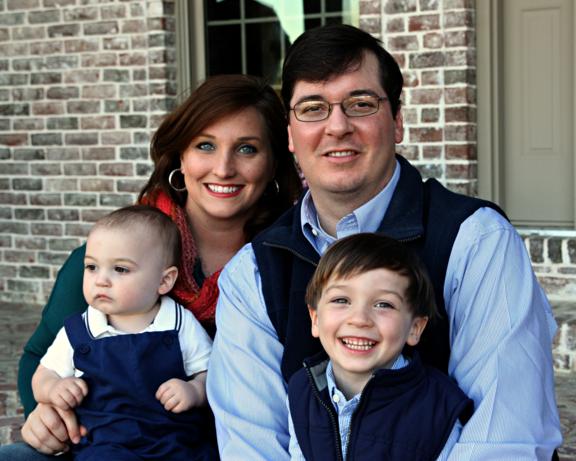
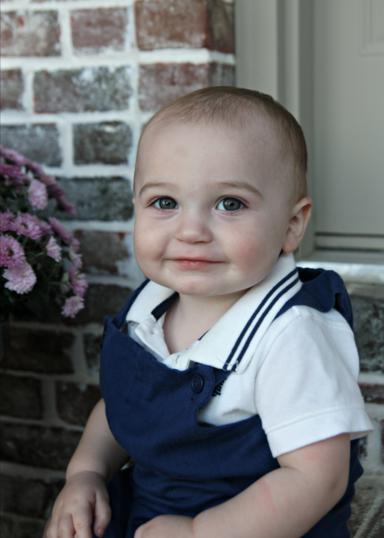
Next in line is my other brother, Ben.  He's married to Erin and they have two boys: Parker (4) and Ramer (1).  Ramer refused to look at me and my camera!

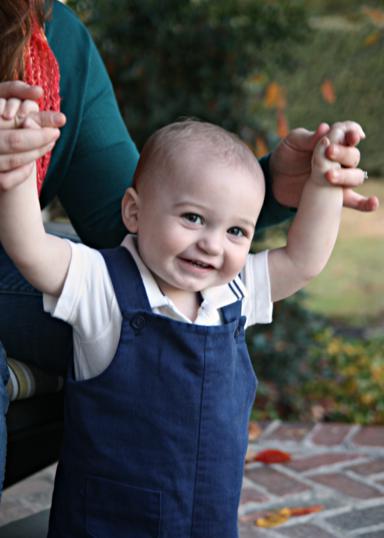
Parker is just 8 days younger than Bren and they are bestest friends.  I love listening in on their conversations.  Ramer is a chunky monkey who loves his mama and just recently took his first steps!

Parker and his daddy were outfit twinkies. :)

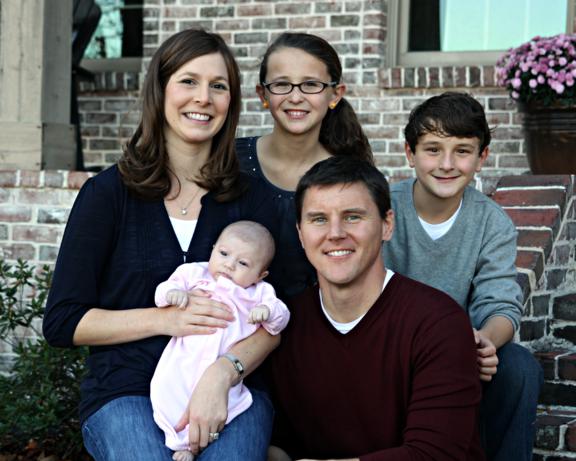
With just two older brothers, that makes me the baby of the family.  As you know, I'm married to Doc and we have Wyatt (12), Anna (11), and Katie Wynn (2 months).

Since a lot of you guys are on our Christmas Card list, I'll refrain from sharing the one we're using just yet.  It's decent, but probably not the best picture ever.  It's hard to photograph two tweens with a floppy newborn!

And, of course, my brothers and I all belong to these two, most commonly known as Mimi and Poppy these days.

This would probably be a more accurate portrayal of them: my dad doing something stupid while my mom laughs at him.

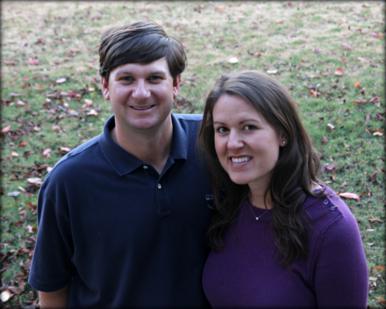
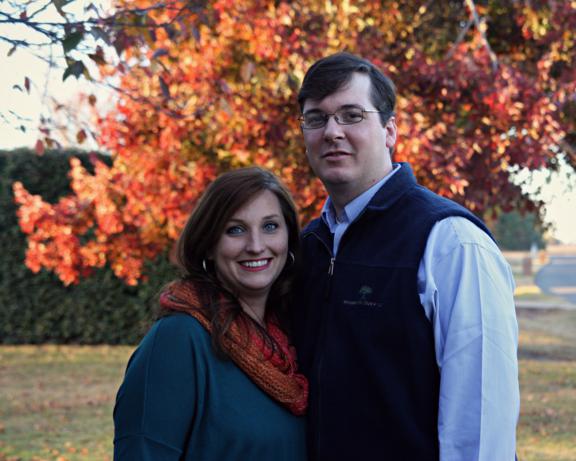
Usually on our family photo-op days we focus on the kiddos.  This time, I made sure each set of adult couples also had their picture made.


Ben and Erin also took this one in front of the fall leaves.  I like all the colors in it.

I had the good idea to get a "girl grandchildren" picture.  Of course, by this time the football had come out so there was no way I could get the boys together for a "boy grandchildren" one.

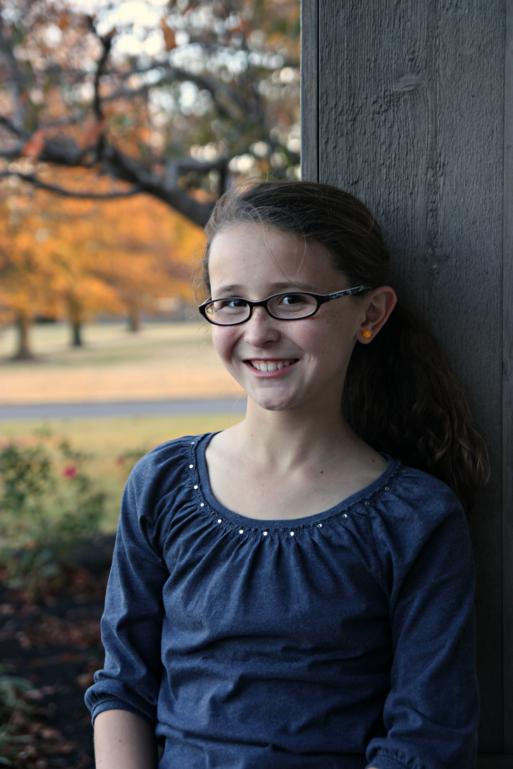
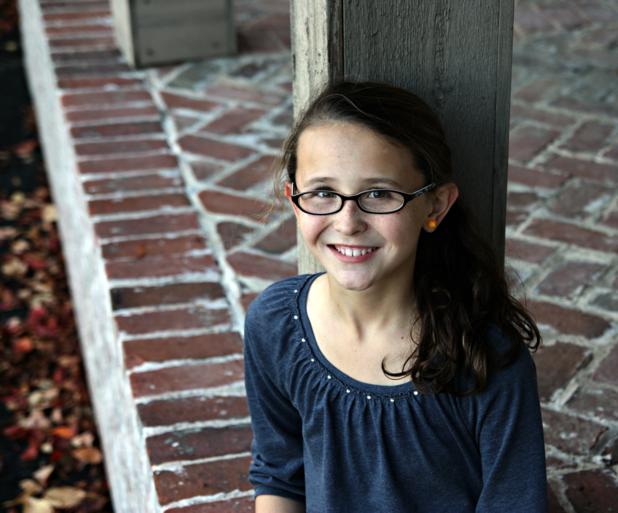
Anna was in the mood to pose, so I got a few cute pictures of her.

I caught Jett between football plays.  Darn Lolli for walking through the background!

I had to sneak in a quick one of Bren too.  As soon as I took her picture she said, "Can I go play now?" I guess they had been tortured long enough.  Also, next year I'll remember not to have red gatorade for them to drink!  (I whitened her teeth in this but she still looks like she's wearing lipstick.)

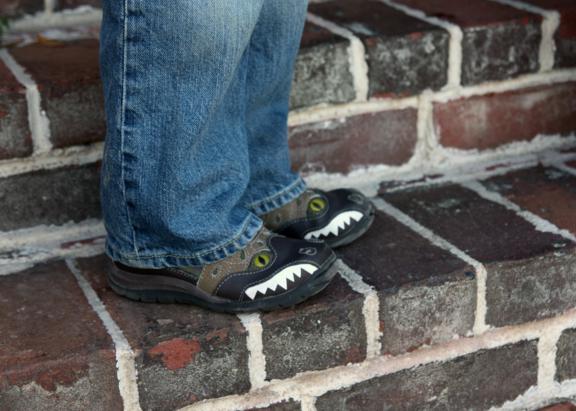
I couldn't pull a smile out of ol' Parker.

Of course, I was hesitant to get too close to him.  Have you ever seen such scary shoes?!

After lots of clapping and snapping and clucking and whistling, I actually managed to get a couple grins from sweet Ramer.

So besides Katie, I think Wyatt is the only other grandkid I didn't get an individual picture of.  That sounds about right since he's the one who hides from my camera the most.

Speaking of Katie, family pictures wore her plum out!

Actually, I think they wore us all out.  And made us hungry, too!  With over 500 pictures on my camera, we called it a day and headed out for a dinner out.  Be on the lookout - some of these pictures may show up in some of your mailboxes soon!

Birthday Sign and a Giveaway

Alternate title for this post:  The Craft Project That Tried To Kill Me. Seriously, I started this "simple" little craft project of making Family Birthday signs last spring.  They were supposed to be Mother's Day gifts.  Mother's Day came and went and they sat unfinished.  I finally completed them sometime around August and I'm just now getting around to blogging about it.  After finally finishing them, I just needed to step away for a while.

But now I'm ready to share them with you!  And, in all honesty, now that I've completed three of them, they really aren't that hard at all.  I just tried to make it really hard.

Before I start with the tutorial, let me make one thing clear: nothing about this is my own original idea.  In fact, the whole idea was found via Pinterest right here. (I would post a picture of her Family Birthdays sign, but don't want to use it without permission.)  I thought it looked really cute when I saw it on Pinterest, clicked over to her blog and read through her short and sweet list of steps, and figured I could knock out a couple of them as gifts in no time.

Ha.  Hahaha.

I'm gonna show you everything I attempted, just so you don't try to get extra fancy and waste your time trying some of the ideas I tried.  Now let's get started.

Step one is to cut a piece of 1x8 to roughly 2 feet long.  No need to get extra picky on this length, just somewhere in that ballpark.  If you have a router, feel free to fancy up the edge a little bit.  I used an ogee bit and went around the edge for a little detail.  Paint your plaque of wood any color you'd like - this will be the base of your Family Birthdays sign.  Here is where I'd show you a picture of my painted plaques if I hadn't deleted it.  D'oh!

This next step doesn't necessarily have to come next, but it makes it easier.  Flip your plaque up on its side so that the bottom is up on top.  Measure the length of your board so you can calculate your spacing...you'll want to divide by thirteen to come out with 12 marks, one for each month of the year.  Here's the pic where I measured one of mine and lined another up with it to cheat and use the same marks.  Hopefully this will make it make more sense.

Here's a helpful tip: use chalk to mark your lines.  It shows up better than pencil and is much easier to wash off when you're done.

With your spacing marked, go ahead and drill holes using a tiny drill bit.  You won't need to screw the eyehooks in until later, but this way you'll already have your holes made if your chalk lines get smudged away while you're working on the rest of it.  Make the holes in the middle of the board so it doesn't split.

To put the writing on the plaque the way I did, you'll need access to a Silhouette machine, or something similar.  I already had a roll of black adhesive vinyl that I planned on using for this project, but you could cut the letters out of paper and modpodge them on or even freehand them with paint.

If you'd like to follow along with my method, here's what I did.  First, I downloaded the free font (Teeny Boppin FN) and laid out my letters on my computer.  I'm self-taught when it comes to using the Silhouette, so I have no idea if I do this the correct way or not.  I prefer to keep as many letters grouped together in one text box as I can while minimizing the amount of wasted vinyl at the same time.  In the picture below, you can see that "Family" fit in one text box and "Birthda" fit in another, but I had to just squeeze in the Y and the S at the end.

I like to keep as many letters together as possible so that they spacing between them is correct and they're lined up the way they should be.  For the Y and the S, I'll have to manually line them up on their own.

For those of you unfamiliar with a Silhouette machine, it looks a lot like a small home printer but instead of printing out your image, it uses a small blade to cut it out.  Here it is being fed into the machine.

And here is the vinyl when it's finished cutting.

The vinyl comes stuck to a piece of white paper, which obviously makes it much easier to work with.  I suppose you could start pulling off each letter one at a time and sticking them down, but I wanted to do them all at one time to keep my spacing and to keep them straight.  To do that, the first step is to pull off all the background vinyl, leaving only the letters.  Below, I've cut out the word Family and pulled off the background.  (I had already stuck down the initials for each of the 12 months using the holes I drilled earlier for my spacing.)

When I initially purchased my adhesive vinyl, I also bought the recommended roll of...tape?  I don't really know what it's called; to me, it resembles a big roll of masking tape that's just not as sticky.  I pulled off a piece of it and stuck the word Family face down.

After pushing down the letters really well to make sure they've stuck down, you can pull off the white paper.  Now the letters should be backwards and have the sticky side out.

Now, I have one more trick that I've learned before just sticking it down.  I like to cut the tape off right below the letters, making a straight line at the bottom that I can use to line up on my sign.  With the font I used, I had to skip over the A, but I still had plenty of straight bottom to use.

Now the letters are finally ready to be stuck down.  I had already drawn a chalk line to line them up with - once you have the size of your letters figured out, just eyeball it to figure out the spacing.

Now, in my opinion, this is where things start getting a little bit tricky.  In a perfect world, you would just be able to make sure the letters have been mashed down and then pull the masking tape backing off, leaving the letters perfectly stuck to the sign.  Unfortunately, this world is far from perfect and it doesn't work that easily.  The stickiness of the masking tape is stronger than the stickiness of the vinyl letters, so if you peel it back the letters usually stay on the tape instead of on the sign.  Grr.  I usually just peel up a small corner at a time and try to hold it down while peeling off the rest of the paper.  It may defeat the purpose of doing this process in the first place, but the important part for me is that it helps keep the spacing between the letters.

With just a little bit of time and patience, they're eventually all stuck down and perfectly spaced.

After that I was able to stick down the bigger section of Birthday, but I still had to manually line up the Y and the S with the rest of the word.

After all the letters were stuck down, I still had one last step to do.  Because the vinyl is not incredibly sticky and can be pulled up, I opted to brush on a layer of a clear polyurethane to kinda help seal them in.  And with that, the sign part of this project was complete.  That was the easy part!

For the wooden discs, I originally tried to take a large dowel rod and slice it into thin pieces.  That didn't work well because I couldn't get them the same thickness.  And let's face it, I really didn't want to have to sand all the slices either, so I was fine with that not working.  Thankfully, I was able to find pre-cut wooden circles at Michael's.  I believe they are about an inch and a half in diameter (give or take a little, it's been a while since I looked at them) and have a nice rounded edge.  They came in packages of 12, I think.

Painting them was not hard at all, just more of a nuisance since they had to be painted on both sides.  Because I wanted the discs of each family to be the same color, I had to do a little bit of prework and figure out how many of each color I needed.  I was also working on three Birthday signs at one time so things got a little confusing!

And now we've reached the part where it all went downhill.

Here's why: I needed to somehow write the names and birthdate of each family member on the discs and the original sign that I was copying had handwritten discs.  So I grabbed two different pens - one a regular sharpie and one a sharpie pen - and gave them a try.  Holy kindergartener handwriting!  They looked terrible!  The thin pen was bumpy on the wood grain, and the fat pen bled too much and got to thick to read.  Imagine if I tried to do a name longer than three letters!
I had come too far in this project to junk it up with some terrible writing, so I set out to figure out a way to print my names and birth dates using the same font from the sign.  After doing some googling, I discovered that I could actually print the text on paper and then transfer them to the wooden discs using elmer's glue and mod podge.  I followed these directions to a T.

The first thing I had to do was get all of my text laid out in a format that would be easy to use.  Being an accountant, I consider myself to be pretty handy in excel, so I used it to set up a nice little grid.  It's uber important to remember to print your text in reverse, or as a mirror image.  I hadn't done that before so I had to click around a bit to find it...I think it's in the Print Setup options.

I got my file set up, painted my white card stock with Elmer's Glue like the directions said, and then printed my text onto the sheet.

After printing, I modpodged the discs facedown onto the print.  According to the tutorial I read, all I had left to do was run the page under water until the disc lifted off, pulling the text off with it.

I got busy sticking the discs down, being careful to put the right colors on the right names.

I cut off the top one in the corner so I could go ahead and see if it was going to work.  I was able to rinse the paper off and the text did transfer to the disc.  Yay!  The print was a little light and slightly spotty, though, so I carefully traced over it with the sharpie pen.

Admittedly it's not the most perfect looking thing in the world, but I liked that the font matched the main part of the sign and it sure as heck beat my kindergartener handwriting.  Onward I went.

I'm not really sure how this went wrong, but after sticking all of the discs down and letting them soak in water for a fair amount of time, I got very splotchy results when I pulled them off.  I got an average of about 2 full letters per name and some of them could've been salvaged, but not all of them.  Whomp, whomp.  Why did I glue down every one of them??  Now I had to start all over again...

I cleaned out the bags of wooden discs at the first Michael's I had gone to, so this time I had to go to a different location.  Luckily they had just enough for me to try again.  This time, after more researching, my plan was to use transfer paper to iron the text onto the discs.

From what I'd read, I pretty much just had to do the exact same thing you'd do if you were ironing a design on to a t-shirt.  Seemed easy enough.  Once again, I got all my text laid out and printed in reverse onto the transfer paper.

I grabbed a handful of painted wooden discs and headed to the ironing board.  I placed the transfer paper print-side down and got to ironing.  This was even worse than the other method!  The discs were slightly cupped, not perfectly flat, so the transfer paper wasn't sticking to the middle.  In fact, it was leaving a bubble in the middle of each disc.  You could also see the clear plastic it was leaving.  I guess I didn't take a picture but trust me, they had to be trashed too.

By this time, this project had already spanned a couple of weeks since I had to keep going and buying supplies and reprinting things.  I was getting majorly bummed out and decided they would not be Mother's Day gifts afterall.

I had one more idea that I thought I would try - Transfer Artist Paper.  For whatever reason, though, I pushed this project aside and gave up on it for a while.  At some point I did order a bulk box of wooden discs since I had already ruined so many and Michael's apparently wasn't planning on restocking them any time soon.

Fast forward to the end of July when we were packing up our house to move and I ran across these things again.  I decided rather than packing them up I might as well try to finish them up.  And, of course, I'd never gotten around to ordering the Transfer Artist Paper and I didn't feel like waiting on it to arrive now, so I had to go on without it.

There was no choice left but to go back to my original method and just handwrite them on.  Grr.  I did make a few improvements, though.  First, I added a layer of clear polyurethane to each of the painted discs (the third set of painted discs at this point, ugh).  I also looked at every different kind of pen and marker that Michael's had before settling on one that had a good tip to use.  It actually had two tips - a thin one and a fatter one - so surely one of them would work.

Thankfully, the pen worked much better and the coat of poly kept the ink from bleeding into the wood grain.  Much better this time!

The last steps went pretty quickly.  I screwed the eyehooks into the 12 holes I drilled at the very beginning.  I also drilled tiny holes in each of the wooden discs.  This required a little bit of planning because some discs needed holes at both the top and bottom and others just needed one at the top.  I used jump rings to hang them from the eyehooks.

The finished product...finally!

The sign above is the one I made for our house.  It has all of our birthdays on it, both of our sets of parents and living grandparents, and also our siblings and their spouses and children.  Each family is in a matching color (for example, my oldest brother's family is all in green).  With all the birthdays added, it just so happened that we only had one month with no birthdays in it...

(I see JASON every time I look at this...he's not even in our family!)

Thankfully, we were able to fill that little hole exactly one month ago!

And now our little sign of Family Birthdays is complete. :)

I told you I was working on three at one time, so here are the other two.  I did one for my mom and one for Doc's mom and I tried to use colors that would work well in their houses.

This one is hanging in my mom's kitchen:

And this one is in my mother-in-law's kitchen:

So, here's the deal.  When I started working on these three, I went ahead and cut out an extra piece of wood and routed the edges.  I also cut out another set of letters out of the vinyl and I have leftover wooden discs.  That means I have all the supplies for one more sign ready to go.  Anyone want one to hang in their house?  You can choose the color scheme and will, obviously, have to provide the names and birth dates, but I'll do all the rest!  I suppose if you don't like my handwriting I can send the discs blank so you can write them yourself.

To enter for a chance to win a Family Birthdays sign, just leave a comment on this post.  And to make it fun, why don't you tell me something that's on your Christmas wish list.  I'd love to see what you guys are hoping for and heck, I might even get some shopping ideas!  We'll be using the honor system here - please just one comment per person.  I'll close the comments Thursday evening at 8:00pm and will use Random.org to choose the winner.  Good luck!