Easy Art

As you may or may not know, I have a new nephew on the way that should arrive within the next month.  My sister-in-law, Erin, has had her hands full with a brand new job and a busy, busy three-year-old, so she told me and my mom that we could be in charge of the new baby's nursery and do whatever we want.  So, to the fabric store we went... We picked out fabric and Mom got busy sewing curtains and bedding and we have already put everything up in the new room.  I'll show you those pics as soon as they're uploaded.  For now, I'll just quickly show you how I quickly made some really easy art for the walls.

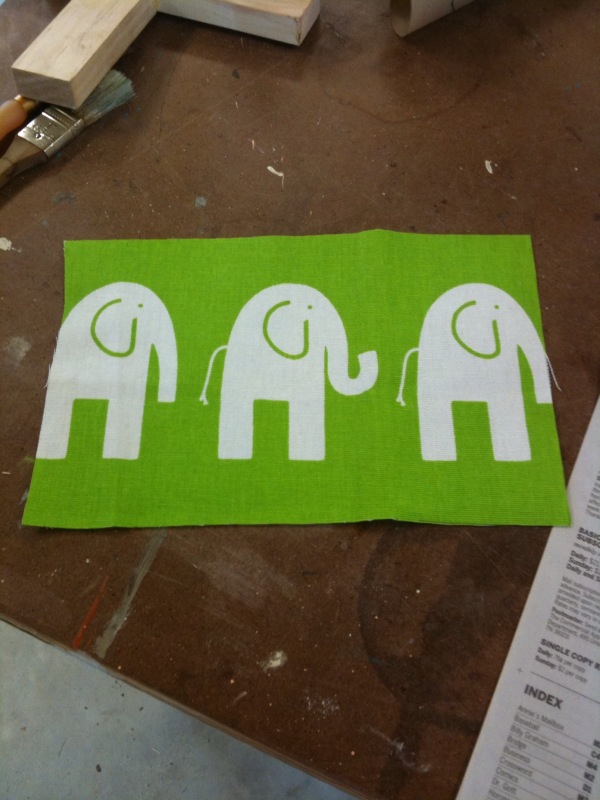
First, here's one of the accent fabrics we used.  Bright green with white elephants.

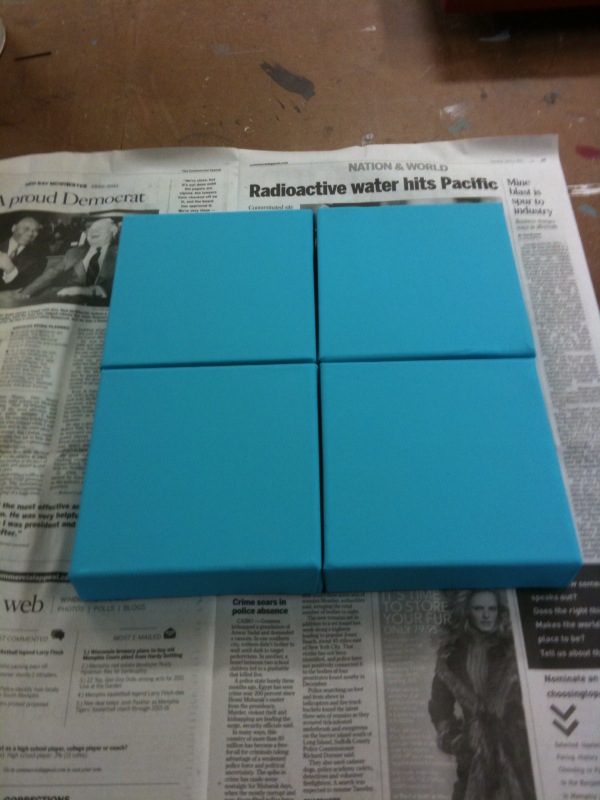
The last time I was at Michael's, their canvases were marked 40% off and I snagged a small package of four.  I can always use canvases for something, and might as well get 'em while they're on sale, right?  I had no idea if Erin already had anything for Still Nameless Baby Boy's room or not, but I figured these canvases were small enough that even if she did, they could be worked in somewhere.  So I contributed them to the nursery.

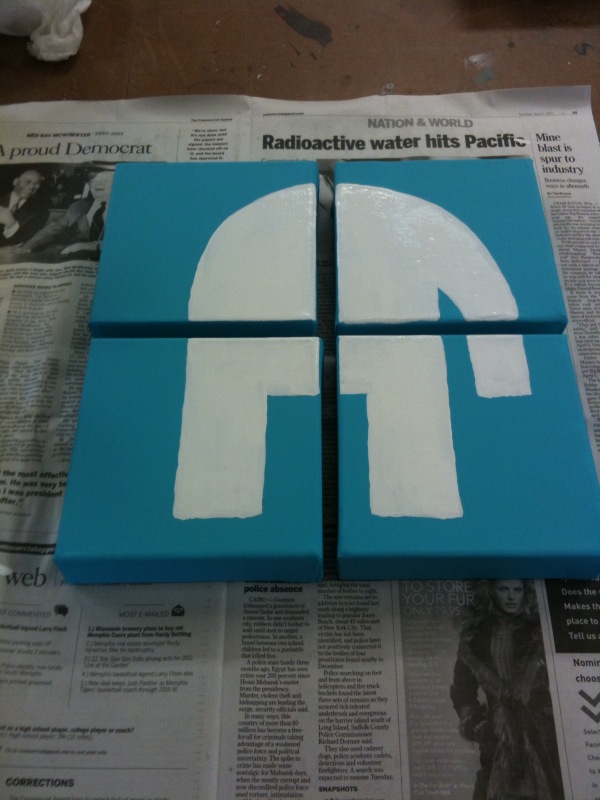
The fabrics we were using in the room were bright green (like pictured above) and turquoise.  We had a lot more of the green than the turquoise, so I wanted my canvases to pull in more of the blue shade.  My first step in making my easy art was painting the four squares solid turquoise.  I just used craft paint and it took two coats.

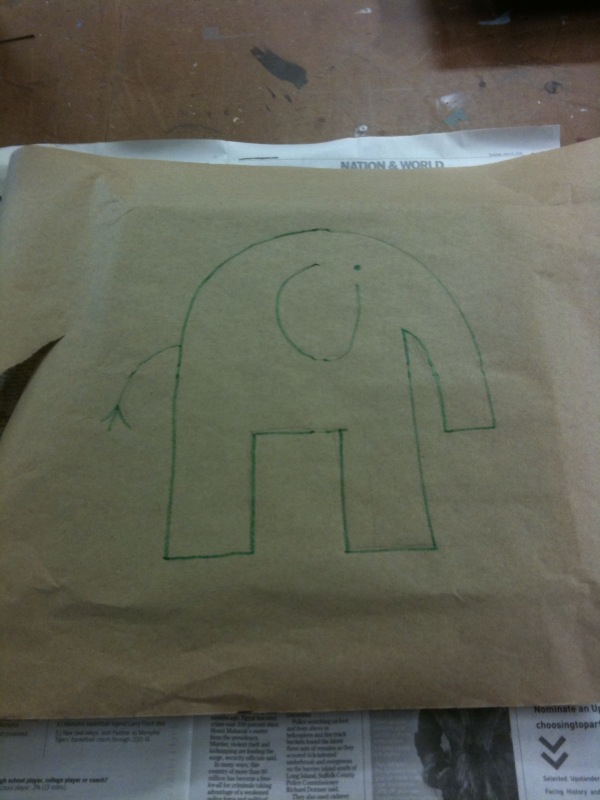
The plan was to draw one of the elephants from the fabric onto the squares.  I really didn't want to mess up drawing over my freshly-painted backgrounds, so I laid a piece of paper over the canvases (to get the size right) and drew the elephant on it.

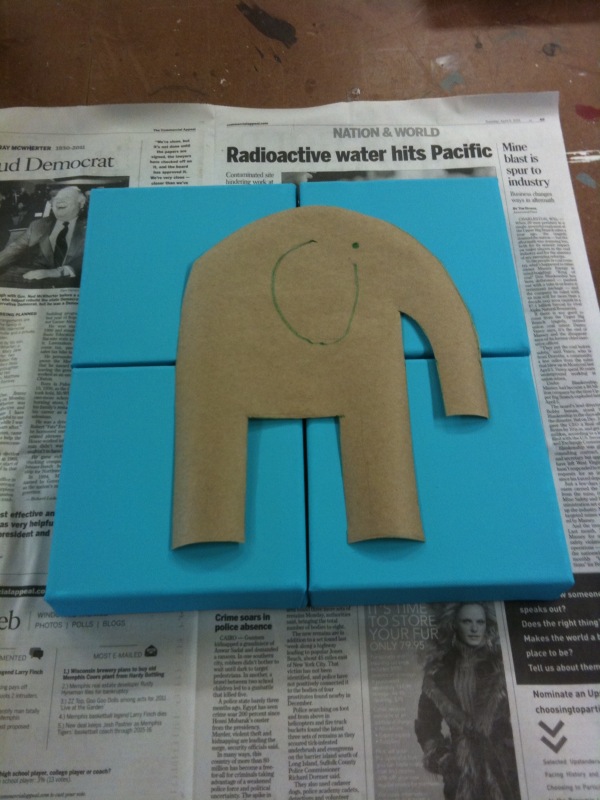
Not perfect, but good enough.  Next, I cut out the elephant so that I could get it centered on my four squares and trace around it.

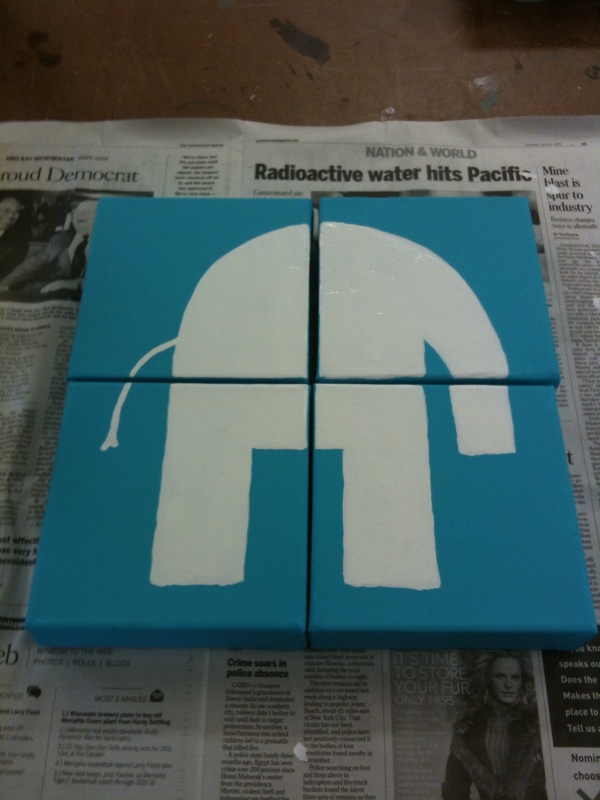
Then all that was left to do was fill the outline in with white paint.  I opted to keep all the sides of the canvases blue, instead of letting the white paint bleed over onto them.

After filling in the body of the elephant, I freehanded the tail with my paintbrush.

At this point, I got to take a nice little break because I wanted the white to be good and dry before I came back and added in the last details.

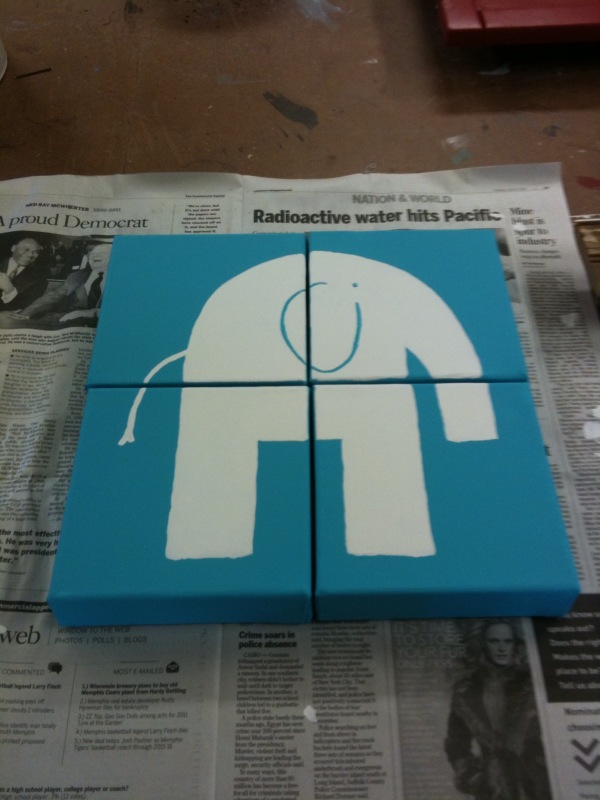
I was kinda nervous about freehanding the ear, so I took the stencil I had used for the outlined and colored the back of the ear with a pencil.  I was able to carefully lay the stencil back on top of the canvases and draw over the ear so that a small line transferred onto the canvas.  Then it was as simple as using the turquoise paint to cover over my pencil line.  I also added a small dot for the eye.

To completely finish it, I added a quick coat of water-based polyurethane to seal the paint and give it just a little bit of shine.

Super easy and, in my opinion, super cute.  Nothing about it is perfect, but I think it's great for a baby's room.  I'll show you where we hung it soon!

DIY: Quick & Easy Table Runner

Last Wednesday night after work, I headed to my parents' house to have dinner with them.  My mom had been to Target earlier in the day and scored these three sets of sheets from the clearance rack.

Pink and white stripe, green and white polka dot, and pink and white polka dot.  She got the queen-size sheet sets for under 20 bucks.  Love a good deal!

So why the sheets?  Well, we've got some more card table tent ideas up our sleeves and buying sheets is a lot cheaper than buying lots of yardage of fabric.  Plus, it's a bigger piece of fabric.  If you're ever making something big, sheets are the way to go if you don't want to have to piece your fabric together and have a seam down the middle.  Just a little tip from me to you.  We'll be able to get several tents made out of these three sets of sheets.

Before we started cutting out walls and roofs, I asked my mom if I could cut off a strip from the side of the striped set.  It didn't take me long after seeing the sheets to decide that they'd make a great table runner for a Pinkalicious party that's being held at my house later today.  Mom did not object, so I grabbed my scissors and cut off a piece.

It was a wrinkly piece because I used the fitted sheet so we'd have as much of the good flat sheet to use for tents as possible.  All I had to do was cut off the elastic and give it a good ironing and you can't even tell it used to be a sheet.

Since this was a spur-of-the-moment idea, I had not measured my table at home nor did I know the measurements of a standard table runner.  I didn't care, though.  I figured I could just wing it.

To give it just a little more detail (and because, truthfully, I was nervous it would be too short since I cut from the edge of the fitted sheet and not the middle where it's longer), I added a 3-ish inch strip of the same fabric turned in the opposite direction on each end of my long strip.

Mom still had some white sheets left over from lining Parker's tent so I was able to use a piece of them to line my table runner.  Like a good little sewer, I placed my right sides together and pinned all the way around.

It didn't take long to make my way all the way around, sewing them together.  I tell ya, sewing striped fabric is the way to go.  It's so nice to have a little line to follow!  I may make that a new sewing requirement for me - I'll only make things out of striped fabric.  It should would make everything easier.

After turning it inside out and ironing it, I did do some quick top-stitching all the way around so it'd keep its shape if I ever washed it.

When I got home, I threw it on our dining table to see how it'd look.  Guess I didn't really need to worry about the length being too short.  It's longer than any other table runner I have.  Oops?

When the chair is pushed up under the table, the edge of the table runner almost kisses the seat of the chair.  I'm ok with that, though.  I figure for something that I knocked out very quickly after work one day, it could be a lot worse.

For some reason, the end of the runner sometimes reminds me of the cuff on a man's shirt.  You know, something like this:

Did anyone else think that?  No?  Just me?  Well, alrighty then.

We're just a few hours away from the Pinkalicious party.  I'll be back with more details soon!

Pirate Tent

I told you that you wouldn't have to wait long to see our second attempt at the card table tent, and so here I am keeping my word.  When we made Bren's for her 3rd birthday, we knew that her cousin Parker would also be turning 3 just eight days later, and we couldn't make a tent for her without making one for him.  So that trip to JoAnn's that turned into a 3 hour affair was spent picking out fabrics for two tents, not just one. Now, with Bren's, we pretty much followed the pattern that I bought and made very few alterations.  We couldn't do that with Parker's though.  What little boy wants a tent that looks like a playhouse, complete with flowers and curtains?  Not Parker, that's for sure.  After doing a little googling, I found this etsy store that had several different themed card table tents.  It was there that we found a Pirate tent and instantly knew that's what Parker's should be.

We were able to use the pattern we had for all the basic measurements.  But for all the details, I had to draw everything by hand.  Luckily his doesn't have as many teeny tiny details like Bren's, but it still turned out just as cute.

And of course, just like with Bren's, I waited until during the birthday party to take pictures of the finished product.  Shame on me.  These aren't great pics by any means, but you know I'm going to share them anyway.

Might as well start with the front.  The door to this one is a flap, just like on Bren's.

Zoomed in on the door, you can see we "hung" an old wooden sign warning trespassers to enter if they dare.

No front door is complete without a lantern.  My mom said the nice thing with working with the black fabric was that it hid any of her sewing mistakes.  The down side is that it showed every single piece of lent, and this fabric picks up everything!

And it wouldn't be a Pirate tent (fort? ship?) without a skull and crossbones.

The two sides of Parker's tent were much less detailed that the playhouse tent.  One side had three portholes.

And the other had a regular window with broken shutters.

For the back, we drew a flagpole and flag so that the skull and crossbones could fly high.

And that's it.  Much simpler than the playhouse version, but perfect for a little boy.  My mom got Parker the perfect gift to go with his Pirate tent.  Check back for his birthday party pictures to see what it was!

Card Table Tent

I'm excited to finally reveal the card table tent, also known as the super secret project that my mom and I have been working on! But first, let's back up.  Waaaay up.  All the way to March.  That's when my sister-in-law, Bren's mom, emailed me a link to this super cute idea.  It was one of those afternoons where it was clear neither of us felt like being at work, as we kept sending fun links back and forth to each other.  With this particular link she wrote, "This is so cute!  I'd never get around to making one but Aunt Lucy might!"

Y'all, it's like she was daring me to do it.  Game on.

That was March.  At the time I thought, "Brennie's birthday isn't until August.  This will be a fun project for me to tackle over the summer."  And then the summer got busy with things like trips to the beach, weddings, and that really big surprise party we threw.  Before I knew it, it was the last week of July and I was just a couple weeks out from Bren's birthday.

I did some googling to refresh my myself on the project and ended up finding this handy tutorial.  At just thirteen bucks, I ordered the pattern without hesitation.  Sure couldn't hurt to have the dimensions listed out for me, right?

Here's the picture from the pattern that I would be recreating for my favorite 3-year-old little girl.

Cute, isn't it?  The idea is to make a fabric playhouse that fits right over the top of a standard card table.  Then it can be folded up and put away easily.  Genius!

Originally, I thought I'd try to tackle this sewing project by myself.  I knew my mom would be super impressed with me if I could pull it off.  But then the pattern came in and I started reading through it and there were a lot of words in there I didn't know.  Plus, time was running out.

I sprung the idea on my mom the weekend I stayed at her house.  I had a feeling she'd think it was cute but I didn't realize how excited she'd be about it.  We headed to JoAnn's first thing that Saturday morning and ended up spending over three hours there!  We decided to go with a pink and green color scheme so that it'd match Bren's room, and in addition to being the right shades of those colors, we also wanted them to be cheap.  We spent a lot of time pulling bolts of fabric and then putting them back before we were finally ready to stand in the ridiculously long line to get them cut.

Later that night, my parents had a wedding to attend so, since I was left to entertain myself, I went ahead and got started cutting out all the pieces.  The nice thing about having the pattern is that it had all the detail pieces drawn to scale so I could just trace them onto a piece of Wonder Under and then iron it to my fabric.  No guesswork - my kind of project.

Now, some of you that have been reading along for a while may be a little confused about the hint I gave.  How do a tree, door, and mailbox fit into this project?  Well, I never said they were a real tree, door, and mailbox.  I'm sneaky like that.

See?  Here's the tree laid out on the kitchen table after I'd cut out all the individual pieces.

I have to say, I had the easy job for this project.  I did all the tracing and cutting out while my mom did all the sewing.  She even took it one step further than the pattern and lined it so you wouldn't see all the seams on the inside.

I didn't do a very good job of photographing all the steps, but here's a shot of one side laid out on the table.

The whole tent is made out of fabric except for those flowers.  We did those out of felt so that we could just sew them down in the middle for a 3-D effect without having to worry about the edges fraying.

We barely got the tent finished in time for the birthday party.  In fact, we were tacking on the curtains just a couple hours before the party started.  Here's where I goofed again.  I should've taken some good pictures of it at my mom's house.  Since I didn't do that, all my pictures were taken while dodging the birthday girl and her friends as they crawled in and out of it.  I apologize in advance for the poor quality of the pictures - it's super cute in real life!

The tree wraps around a corner, in between two windows complete with shutters and curtains.

Close up of window.

The opposite side has the two bushes with felt flowers.

The address for Bren's playhouse is her birthday: August 18.

To the left of her front door is a light.

And to the right is this really cute mailbox.

It even has a pocket so she can receive mail!  I had every intention of putting her birthday cards in the mailbox, but then I forgot.  Bad, Aunt Lucy.

You can see in this picture of the front that my mom lined the hole for the door in white to make it look like a door frame.  (You can also see the doorbell in this picture.)

I waited til the tent cleared out before sticking my head in to get a picture of the inside.  The inside is lined in white even though it looks pink from the sun shining through in this picture.  The curtains are one of my favorite parts of the playhouse.  They're a super cute polka dot on the outside and then lined with this cute green fabric on the inside.  They're tied together with a piece of pink ribbon and then tacked down to the window frame so they don't move.

I'm not 100% sure, but I think the birthday girl liked it.  Here she is sticking her head out to tell us to come in and play.

Later on in the afternoon, I caught her 6-year-old cheetoh-eating brother hanging out in the tent.  Busted!

So there you have it - our first attempt at the card table tent.  There's a good chance you'll get to see our second attempt at it very soon.  It was a fun project to work on and I hope Bren has fun playing in it!

More pictures from Bren's birthday party coming soon!


Pinterest Challenge Redo

I had totally accepted my Pinterest Challenge FAIL yesterday when I wrote my post about it.  Really, I had.  I knew there were some things that I could change before setting my crayons out in the sun to bake again and I had every intention of trying out some of those changes.  I felt like my first attempt hadn't been all that bad.  Heck, some of you even thought it looked good enough to frame.  Even still, I knew I could do better. But then...sigh.

Then I started clicking links and looking around and reading comments and I started seeing all these other melted crayon masterpieces and they looked good.  Like, really good.  And way better than mine.  But from what I could tell, no one else went with the sit-it-out-in-the-sun-to-bake method like I did.  Or actually I guess I should say no one stuck it out all day like I did.  Well, I'm sure someone did, just not anyone whose blog I read.

If using something other than the sun to melt the crayons could be called cheating, then I read about quite a bit of cheating going on!  There was a lot of hair dryer usage to get a nice drippy effect.  I knew that wouldn't work for me, though, because I recently sweet-talked Doc into cleaning out the little lent tray thingy on my hair dryer and now it doesn't get as hot as it used to.  Then, later in the afternoon, I read one blog post that showed the crayons dripping in the oven.  Hmmmm...

Doc is still out of town so after work I drove over to my parents house for dinner.  I know I just spent the whole weekend over there, but I'm not one to pass up on a free meal.  Especially lasagna.  (That meal almost got really expensive for me since I got pulled over on my way to their house.  Luckily I got off with just a warning.  Phew!)  There's a Fred's located just around the corner from their house and I have to pass it to get there and this time I just had to swing my car into the parking lot to pick up another pack of crayons.  This time I sprung for the 64 pack!

So while my mom finished preparing dinner, I dug around in her cabinets to find some baking tools and ignored her comments of "You are NOT cooking crayons in my oven."  I promised her I'd be real careful.

I was originally going to use the big center piece from my tri-fold foam board since I had so many more crayons, but it wouldn't fit into my mom's oven.  And then, since I had to cut it down anyway, I went ahead and made it an even 11x14 so it'd easily fit into a standard sized frame.

The rest of the prep work was all the same as the first time: line drawn at the top for straightness, colors arranged according to Roy G Biv, crayons glued down with Crayola logo on top.  When my board was all ready to go, I placed it on a cookie sheet and leaned it up against a cooking dish.

I made a little tray out of aluminum foil to catch any crazy crayon drippage.

I had no idea what temperature to set the oven to.  250 seemed like a good number to me, so that's what I went with.  Into the oven it went.

Did I mention I left my camera at home?  Yea, these awesome photos are comin' atcha from my iPhone.

I may or may not have squealed when I saw these two drips.

It's working!  And it's working fast!  The crayons started dripping just seconds after being in the oven.

It's hard not to be a cheater when it feels looks this good!

I don't know why, but this was so fascinating to me.  Especially after my first failed attempt.  The crayons that baked in the sun melted inside the wrapper first and most of the tips never really melted, they stayed hard.  But now, in the oven, it's the tips of the crayons that were melting away.  And they were all melting at what seemed to be an equal pace, regardless of their colors.  So freaking awesome.

After about a minute of good dripping, I turned the oven off so it could start to cool down and the wax could harden back up.  I felt like I had reached a good level of drippage.

Here's my masterpiece fresh out tha oven!  It smelled delicious like wax.

I've got these pretty sweet blended smears at the top of my crayon row.  This might be from me getting uber creative and putting my own twist on it, or it might be from the foam board being top heavy and flipping over backwards.  Only my mom and I will know for sure.

It's a good thing I put the aluminum foil tray down at the bottom because my drips definitely made it that far and pooled up at the bottom.  Truth be told, I kinda like the way it looks on the bottom, even though that will probably get covered up by the frame.

Like last time, I took a picture from the top.  This time, the wrappers still had a lot of wax left in them.

I think this photo is my favorite.  I love how the melted wax and blended colors look!

So there you have it.  When making melted crayon art, if at first you don't succeed, try, try again just cheat and stick it in the oven.  You won't regret it.