I'm embarrassed to admit that this project took me forever to complete even though it was really fairly easy, but I guess that's the way it goes when you're big and pregnant and chasing a toddler. I am waiting for one final piece to be completed next week before I reveal the full nursery for our baby boy, but this is what I made to hang above his bed.
His crib is centered on a really big wall, so I knew early on that I wanted more of a grouping to hang above it rather than one big piece since there's a good chance something else would hang to the sides of it. Didn't want it all competing, ya know? It took me a while to come up with an idea, but I eventually settled on fish. Lots of fish!
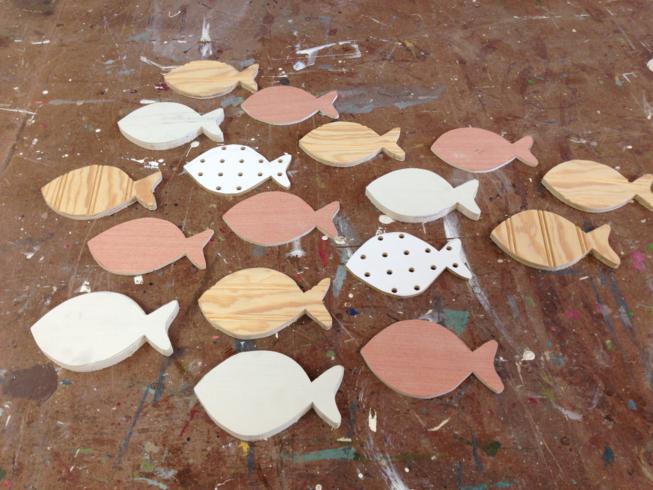
When I started, I didn't know exactly where I was going with it. I just kinda worked out the details and ideas as I went. I started by drawing out a fish shape that I liked (I actually drew three and let my Mom and Matt vote) and then cut it out of paper to use as a stencil. Then, I cut several of them out of a scrap piece of 1/4" thick wood using my Dad's scroll saw.


After cutting out a few of those, I searched around the woodshop for more scrap pieces so that I could have more fish of different thicknesses and textures. I used some beaded board (and cut fish out with the stripes both horizontal and vertical), some peg board, and a piece of 3/4" thick wood.
I was ok with how things were going, but had no idea how many fish I needed! I took a break from cutting them out of wood and started cutting them out of paper so I could play around with them on the wall. On the left is 25 fish which is how many I had cut out of wood at that point. I didn't think the school looked "full" enough (maybe enrollment was down?) so I kept cutting them out and adding them to the wall until I was happy with it. Thirty-six (I think!) ended up being the magic number.


Random arrangements are so incredibly hard for me. I tend to make things symmetrical without even realizing it. But I knew I wanted the school of fish to be random so I tried really hard not to put too much thought into it. I texted pics to my mom occasionally to get her opinion. We debated between having a straggler (on the left) or a slight leader of the pack (on the right). The leader formation won out as we decided it would send a better message to our little guy. :)


Eventually, I made my way back to the woodshop to cut out an extra 11 fish. I had some thin metal that I was able to cut with scissors so I added some out of that. In the end, I had 6 different "species" of fish.

Then I had to figure out what to do next! Paint them all the same color? Paint them all different? Pick a few colors and divide into even numbers of each color? After some debate, my mom and I decided that each "species" should be its own color, so we picked out five different colors of paint (the metal ones weren't getting painted). We landed on two shades of blue, white, cream, and a dark brown. My mom was super kind (as usual) and painted them for me while I was at work.

Then what? I thought maybe distressing them would highlight the textures and give them more character, so I hit them with our hand sander. I'll be honest, there was a big part of me that thought this was not going to turn out very well and I was just wasting my time since I hadn't really thought through it from the beginning, but I kept going anyway.
After the fish were sanded, my mom finished them off with a quick coat of matte polyurethane.

Finally, I could start putting them on the wall! I had left my paper fish up which ended up making it really easy to hang up the wooden ones. Anna and my mom both helped me and we hung up a species at a time. It was easy to just pull down a paper fish and replace it with a painted wooden one. Just one velcro command strip on the back of each fish was enough to hold them up. (The fish are really light weight and should be ok when little hands eventually start grabbing for them. Katie Wynn pulls her alphabet letters off occasionally and with the velcro, they're really easy to pop back up on the wall. We did intentionally hang the metal ones a little higher since they could potentially hurt little fingers.)
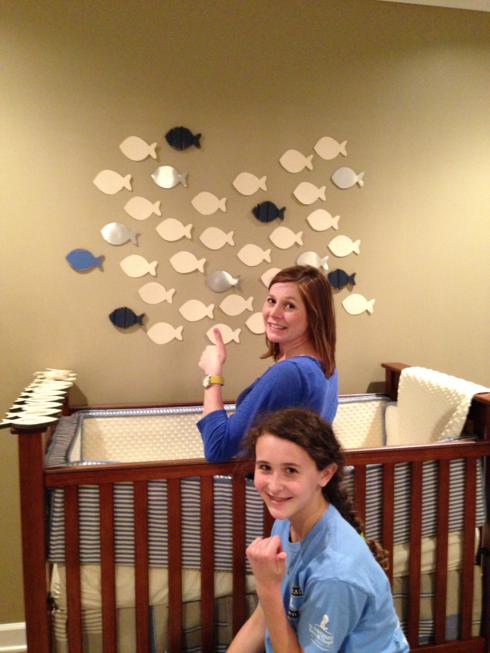
Oh, and yes, I climbed into the crib to work. I think my Dad did a good job putting it together because it didn't fall apart with me (and the baby) in it. Or when my other little helper climbed in with me!
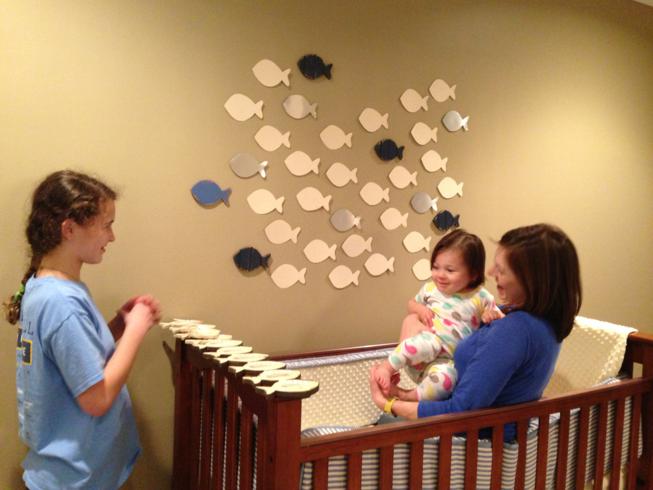
This was another one of those times when I struggled to be random with the placement, but between me, Mom, and Anna, we got them all up on the wall in an arrangement we all liked. They are mostly random with a couple of the same species swimming together here and there. And thankfully, I really liked how it turned out so it was not a big waste of time!
(Sorry for the poor quality phone pic, I plan to take better pics with the real camera when I photograph the whole room.)

So that's the school of fish we created to swim above our sleeping little boy!
Here are some bonus pictures of another project we knocked out this week. I didn't take in-progress photos but Matt took these with his phone when we finished with it. These are shelves we hung on the wall - to the right of the crib and school of fish - that we dressed up with some rope and dock cleats. I saw several different versions of this on Pinterest so we just whipped up our own version. The shelves themselves are anchored to the wall since they're slightly heavy, so the rope is mostly cosmetic.


I've already had fun filling up the three shelves with fun stuff for his nursery. I'll show you what made the cut to go on it in the full nursery reveal!