Window Frames

Ok, so we used to have a big ol' empty wall in our living room.  

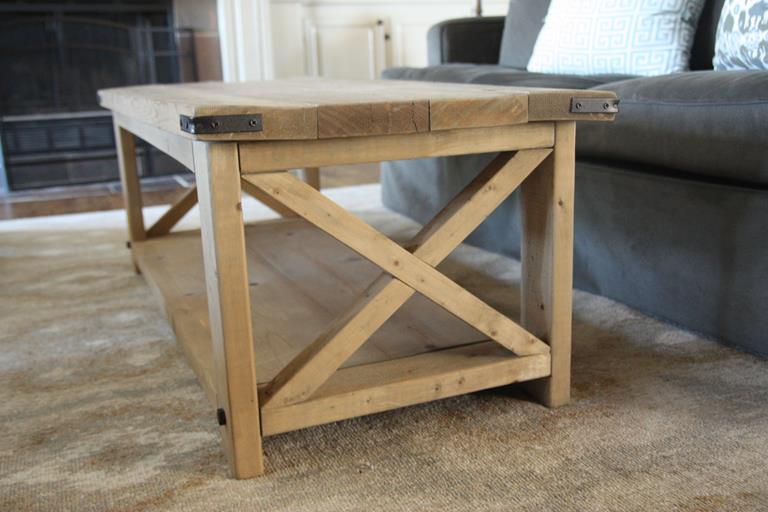
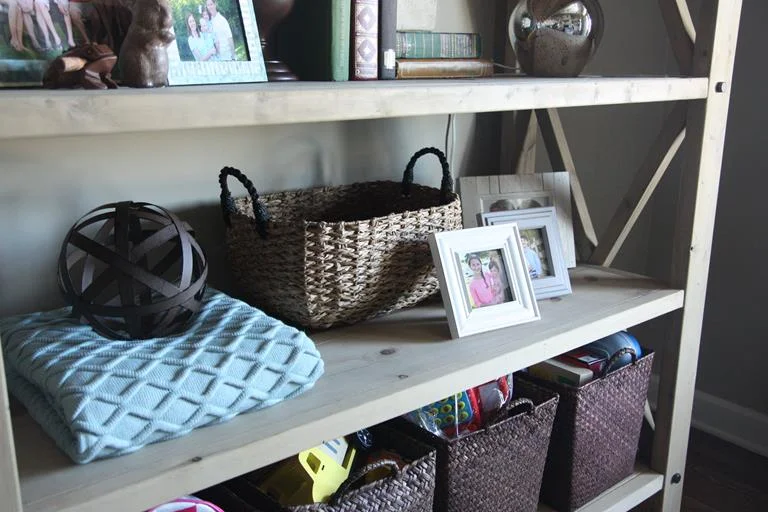
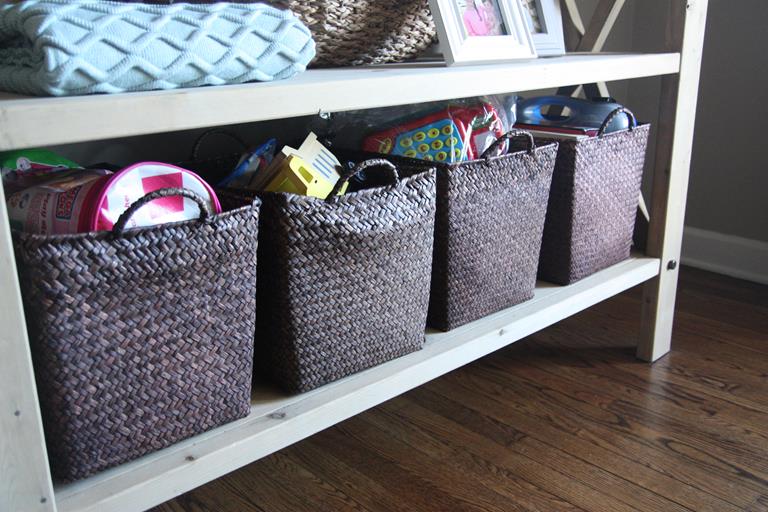
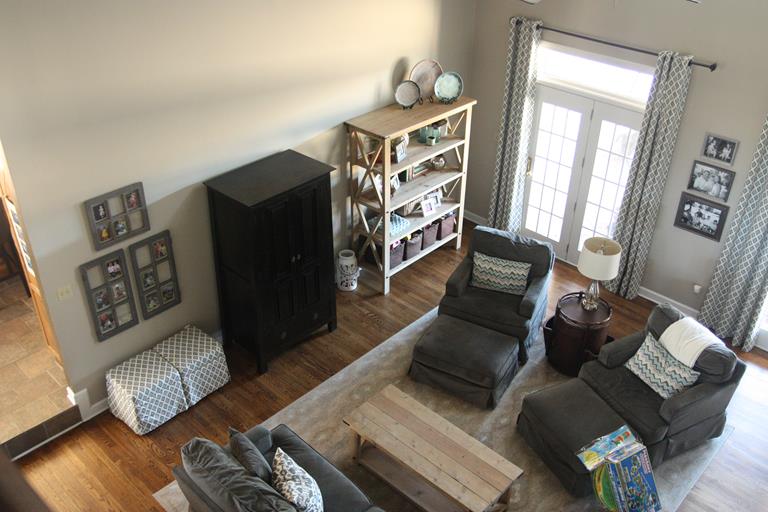
In my last post, I showed you how we filled up the corner on the right with a large Rustic X Bookshelf.  Now, I'm going to show you what we quickly did to fill up the space on the left.

I had received this cute window pane frame for Christmas and had not hung it up anywhere yet.

I thought the colors of it would work well in our living room but it was too small to hang on that wall by itself.  So, for my birthday, my Mom gave me two more window pane picture frames to go with it.  (They're all from World Market and come in white too.)  Grouped together as a set of three, they covered the blank wall nicely.

My camera didn't like all the glares from the glass so my pictures aren't great.  When we hung them on the wall, I intentionally left some of the panes empty so that I'd have room to add new pictures.  Now I kinda like them being half empty so who knows if they'll ever be completely full of pictures.

Matt took the hanging hardware off of one of these windows and re-positioned it on the other end so that I could hang the two windows with the hinges on the outsides.  So technically, one is hanging upside down.

The storage ottomans got pushed to this wall during a baby shower for extra seating and I ended up liking them there so they haven't moved back to in front of the fireplace yet.

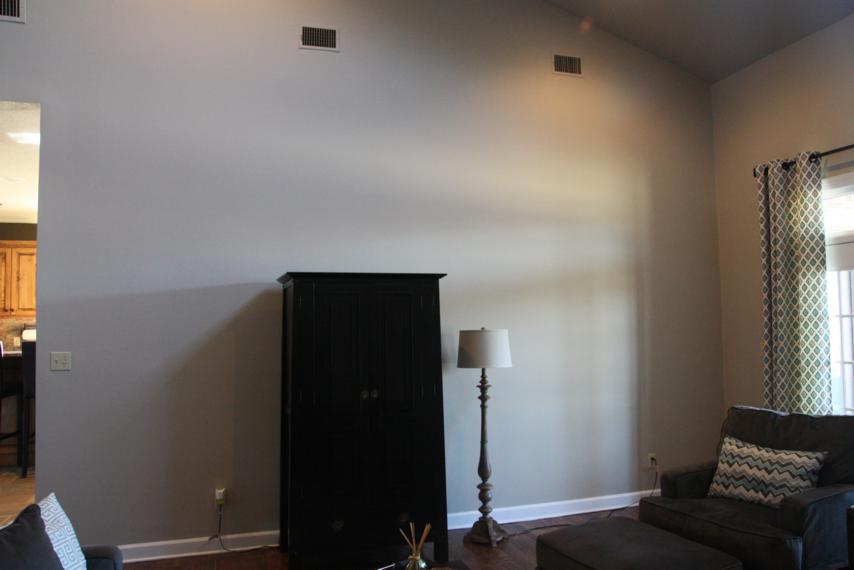
So here is the wall back in it's big, blank days.

And here it is now.  So much cozier with stuff on the walls.  :)

Am I the only person that, after finally hanging pictures on the walls, stands back and says, "Wow, why didn't I do that a long time ago??"  Tell me you do that too.

Rustic X Bookshelf

I considered titling this post "New Bookshelf" but since we completed it last January - as in, January 2015 - it probably can't really be considered new anymore.  That's how far behind I am on this update!  

It all started when we came home from our first Christmas with small children and had SO many new toys with no where to put them.  I was desperate for some kind of toy storage in our living room so we could keep some in there for them to play with.  Luckily, we had plenty of space to add some storage.  If you'll remember from this Living Room post, we pretty much had a big blank wall to play with.

I started thinking maybe a big bookcase of some kind with baskets for toys would A) fill up some empty wall space and B) solve the no-place-for-toys problem.  That fall, before Christmas, Matt had used some plans from Ana White's website to make us a new coffee table.

I have LOVED the Rustic X Coffee Table and was so excited to see that she also had plans for a matching Rustic X Bookshelf.  Perfect solution to our problem!  My sweet husband (and Dad) listened to my idea and graciously built the bookshelf for me in January.  We modified the original plans a bit to better fit our space and to perfectly match the coffee table.  They had the bones of the bookshelf complete in one afternoon.

They finished up the following day with the X's on the ends.  It's never fun trying to figure out those angled cuts!

Just like with the coffee table, my job was to stain it using this driftwood medium.  I love working with that wood finish because it goes on easily and dries quickly.  And no polyurethane is required with this look!  It does kinda stink though...

The veeeery last steps were to add the same L-brackets and hex bolts that we used on the coffee table to give it a little more detail.  I love how they just take the style up a notch.

The dirty truth:  the bookshelf was finished and put in place in our living room in January but it was months later before I put anything cute and decorative on it!  The baskets of toys were there immediately, though, so at least it was serving its purpose.  :)

I'm so glad that it fills up that big empty corner that we had before!  I love that it ties in with the coffee table and that it's light in color to keep that corner bright.  I added the McCarty plates on top of the bookshelf to keep it and the entertainment center from being a straight line at the same height.  I think I will continue to collect things - vases and plates? - to fill up the top of it.

The hubs and my dad did a really good job, didn't they??  One of the best things they did is add a 2X4 across the back right under the top shelf so that we could bolt it to the wall.  No toppling over on little people at our house!

I bought a few knickknacks and shopped my house to fill up the shelves.  Any of it could be changed at anytime.  I like having a space where I can work in new things that I buy or receive as gifts.   Here's the top shelf.

Second shelf...that silver ball is actually a lamp that adds a nice little glow to the corner in the evenings.

Third shelf.

And the bottom shelf with its aforementioned baskets full of toys.  It took forever to find the right size baskets.  I ended up finding them at Hobby Lobby but had to go to four different store locations to get them all.  And you can see one of them has already taken a little bit of a beating but it still holds toys so who cares?!

The baskets work great for the kids!  They both know how to pull them off to dig for toys and are both pretty good about putting the toys back in them when it's time to clean up.  Here are some pictures of them using them from last summer.  They look so little!

Tiny Thomas!  Please stop growing!

Man, am I glad to have finally written about this bookshelf!  Now I can stop thinking that every time I walk through the living room and see it.  I'll be back next with another tiny update on this same wall...

Mantel Decor

Before I jump into my long-overdue Christmas post, I want to share these fun projects we cranked out during the busiest time of the year.  How we managed to get them done, I have no idea.  Definitely couldn't have finished them without my Dad and his willingness to, once again, help me out with my shop projects.  I miss getting to work out there with him!  

Anyway, I actually dreamed up a Christmas tree forest, if you will, for the mantel a year ago and never got around to doing it.  I started thinking about it again in the fall and thought if I could make a tree forest, I could also make a pumpkin patch!

My dad always acts annoyed with my wood-cutting requests, but I secretly think he likes them.  I usually draw out what I'm thinking to help him visualize.  Here was my rough sketch of our fire place, mantel, and the pumpkin patch.  I drew my vase and large candle stick on opposite sides than they are in real life, and Matt gets extra points for actually noticing!

With a roll of his eyes, Dad said, "You'll have to draw the pumpkins however you want them."

So I did.

Then I went out of town overnight and came home to wooden pumpkins!  We had some leftover barnwood that I had pulled out to use.  I knew some of it wouldn't be wide enough so I had instructed Dad to plank them together.  I love that he did some of them on the diagonal.  Aren't they so awesome in their rustic-ness?

Before I could turn them their proper shade of orange, I had to touch up the raw side edges.  We used two different batches of barnwood and one set had a red tone and the other had a green tone.  I gave the sides a quick rub down with one of my favorite stains, Rustoleum's Sunbleached, so they would be more uniform in color.

After that dried, I did a little dry-brushing with some Texas orange paint.  I didn't want a full cover coat of paint, just enough to add some color.

This was done bright and early on a Saturday morning (gotta DIY when you can) and my pajama-clad helper busied herself by making ramps for her trains and asking repeatedly if she could touch the orange paint - cause orange is her favorite color, you know.

I brushed brown paint on the stems and then, as a final coat, rubbed them all down with some brown glaze wax.  Some were just a little too orange in spots and I liked that the brown glaze kinda put the barnwood rustic-ness back on them.  :)

In between coats of paint, I also cut a long 2x6 board to mount them on.  I waffled on what color to paint it but ultimately went with the same color as our mantel so that it would blend in and be nondescript.  I'm glad I did; I love that it doesn't take away from the pumpkins.

Once they were finally dry, I took them home to our house for assembly.  I'm pretty sure assembly happened the weekend before Thanksgiving - that's how behind I was on this fall decorating project!

Originally I thought I would use long screws to attach them from the bottom of the 2x6.  When we thought that threw, it was not going to be very easy.  So I grabbed some L brackets from our local Ace Hardware and used them to attach the pumpkins to the base.

Attaching the L brackets went pretty quickly since I had a little helper handing me my screws.  (Actually, it probably took twice as long since I had a little helper, but at least he's cute!)

Special shout-out to both Matt and Anna who helped hold the pumpkins up while I moved them around into an arrangement I liked.  Then, it was as simple as screwing them into place.

And then up on the mantel they went!  They needed a little something so I gave them all a little neck wear.  I'm not dead set on that part but it was a quick fix that worked perfectly for the last week of pumpkin season.  Now that it's done, how awesome is it going to be next October when all we have to do is grab this one (extremely heavy) thing from the attic and just pop it into place?!

Looks just like the picture I drew, doesn't it?

Ok!  Moving on to Christmas!

Approximately 5 days after finishing the pumpkins, the Christmas tree and decor came out and took over the house.  The pumpkins stayed put because A) I had JUST finished them! and B) I didn't have the trees finished yet.  Mostly because I hadn't started them yet.

Again, super thanks to my Dad for cutting them out for me since I didn't have time.  I left instructions to cut five each of three different sized trees.  (We have made tons of these twinkle trees in the past, so we have templates for them now.)  He delivered and had them all cut out in no time.  I really didn't think I was going to get them done before the end of the year (when the heck did I have time to go paint?!) but I made a firm decision that they would be up on our mantel in time for the Christmas party we were hosting...in a week.

No step-by-step pictures this time, but imagine me using four different shades of green paint to paint 15 different trees - front and back.  I wasn't picky about my shades of green; I used all paint we had on hand.  And just like with the pumpkins, I painted my long base board the same color as the mantel.

I assembled the forest of twinkle trees by myself one night during Thomas's awful sleep regression (read about that here).  I listened to him cry through the monitor (while Matt tried to comfort and quiet him) and took my frustration out with my drill and screws.  

The tricky part was whether or not the white lights that I had ordered would come in in time.  I was going to be SO MAD if I had busted my butt to get this thing finished for the party and then the dang lights didn't arrive in time!  They arrived the day before the party - thank goodness - and Matt helped me power through poking them into all the tiny drilled holes (not as easy a task as you would think).  

The kids stayed up past their bedtimes while we finished but it was fun letting them see it all lit up for the first time.  It is slightly blinding.  But in a totally awesome way.  

"Take our pitch-uh with the trees, Mama!" 

I took a panorama pic of the room so you could see all of the lights.  Maybe I went overboard?  We have our fully lit 12 foot Christmas trees on the far left, the blinding twinkle tree forest in center, a new Christmas tree addition this year sitting at the top of the stairs, and two more twinkle trees over on the right.  And from most places in the room, you could also see the Christmas tree in the kitchen.  Basically, it was my favorite room in the house during the season.  All the lights!  All the magical Christmas goodness!

And, just like with the pumpkin patch, the best part is that they're done now so next year we just have to carry them down from the attic.  Boom.  I am all about that.

Christmas pics coming!

We bought a couch.

I don't think I've ever formally introduced our master bedroom here on the blog.  That's mostly because I've never felt like it was finished.  And it still isn't.  Far from it, actually.  So I'm still not introducing it today but you will get to see a big ol' glimpse of it.

Our master is HUGE.  We had a big master in our old house so I didn't think we'd ever find another house with one as big, but low and behold we did.  This one is even bigger.  When we had the carpets shampooed this past summer, they charged us the price for two rooms for our master.  

It kinda is two rooms, really.  We have the half where we sleep - it has our bed and nightstands and dresser.  And also my wrapping armoir.  Then the other half is where we live.  It's where we watch tv at night after the kids have gone to bed and when they're awake, it's where we spend lots of time on the floor playing.  The two areas are divided by a partial wall and a big arched opening.

Up until about two (or three?) months ago, this is how it looked since we moved in.  

See why I've never given you a tour of this space?  Those chairs look so pitiful!  But, they are both the most comfortable chair ever.  I know, it's impossible for them both to earn that title, but they do.  They're comfortable in different ways.  The one on the left is soft and fluffy and you just sink right into it.  The one on the right reclines so far backwards that you could sleep all night in it.  And they were both bargains!  The white one was given to us (for free!) by some friends and the brownish one was purchased for a whopping 40 bucks.  I've had it recovered twice since it's former white pleather days.  (Yes, I'm aware those arm covers are hideous.)

So if they are both simultaneously the most comfortable chair ever, then why get rid of them?  Well, I'm glad you asked.  First off - check out that ill-fitting slipcover on the white chair.  Don't ever listen to any blogger that tells you an Ikea slipcover will fit on a Pottery Barn basic chair.  As you can clearly see, this is a lie.  (And what you can't see is that the slipcover is completely cut all the way up the back!)  But at just $30 for the slipcover, it was worth a try.  Lesson learned.  I have a big pile of swatches of fabric that I can purchase a Pottery Barn cover for this chair in, but the prices start in the $400 range.  I could get a whole new chair for that!  Secondly, my husband didn't like that we were always in our own separate chairs.  Call him a sap, but on movie nights, he wanted to be able to cuddle up on a couch.  Can't say I blame him - it'd be a heck of a lot easier for him to rub my feet if we were closer together! ;)

We initially shopped for a love seat to replace just one of the chairs with, but we never found what we wanted.  We eventually just bought a full-sized couch and I'm so glad we did.  It has a chaise too and that's something I've always wanted!  After having it for a few months, I'm surprised we ever survived without it.  There's plenty of room for all four (five plus Lolli) of us to pile on while watching Mickey Mouse Clubhouse on a Sunday afternoon.

No, it's not the fanciest couch in the world and that photo above would never show up on a design blogger's page.  But it's big and comfy and easy to clean and that's exactly what we need at this stage in our life.  It's got to be able to withstand a dog and two small, sticky kids.  Plus the drool from when I nap.  :)  

Those pillows are sad and pathetic looking but their days are numbered.  I'm currently shopping for new bedding and fabric to finally spruce up our bedroom like it deserves.  Maybe this will be the year to formally introduce it on the blog.

One of my favorite Christmas gifts was that cute little sofa table.  We had the couch for less than a week before I decided I had to have something.  My spot is in the corner with the chaise and I never had anywhere to put my drink or empty ice cream bowl.

It's wood and metal combined and came from Ballard Designs and is just the most darling little table ever.  I heart it.  It's the perfect size to hold my drink and phone and whatever I'm reading at the time.

Just for fun (seriously, no judgement please!) here's a full view of that side of the room.  It's like a daycare up in here.  I dream of the day when colorful toys won't line the walls of my bedroom, but if having the toys means my kids will stay little forever, then I'll keep 'em!

So that's our three-months-ago update.  I feel like this couch and I have been friends for much longer than that.  We've done some pretty serious Sunday afternoon bonding.

Anyone looking for a new chair?  I've got a couple just hanging out in our playroom.  Wanna play Let's Make A Deal?

Dining Room...Finally!

As of about two months ago, our dining room finally looks like a place where you could possibly enjoy a nice meal!  Of course, we still haven't actually had a meal in there yet, but it's nice to know we could if we wanted to.  :)

Let's back up about 18 months to when we first moved into the house.  We sold our kitchen table from our last house and plopped our old dining table down in the kitchen of our new house.  That meant we no longer had a dining table to go along with our large china cabinet.  So for months our dining room consisted of just the china cabinet and a couple of leftover chairs that we didn't have a place for.  (These pictures were taken before we had the hardwood floors refinished.)  (I just looked through the pictures from that old post and man, our house has come a long way since then!)

dining room before
dining room before

Like I said, the room sat like that for months.  It had grey walls, a chocolate brown ceiling that I love and that ties into the walls of the adjoining kitchen, and that hideous shell chandelier.  And some of those boxes may still not be unpacked, but at least they're up in the attic now!

Shortly after we moved in, I found a table that I immediately fell in love with.  Like, capital L love.  But I didn't buy it because A) it was expensive and B) it didn't come with chairs and C) we were focusing our energy (read: money) in the living room instead.  About a year later, though, the table was still for sale and I could get a deep discount on it if I bought the floor model with the so-small-no-one-would-ever-notice-it imperfection on it.  Um, yes please.  Mama likes a good deal. :)

With the table purchased, I felt motivated enough to start pulling this room together!  I usually don't drag my feet so long on things like that, but the table was ordered in early September and we didn't get it to its current state until this past February.  Life just kept getting in the way, I guess.

Also, I painted the room twice.  After picking out a rug and fabric for curtains, I decided the existing grey walls wouldn't work and that green might be nice.  I wish I had a picture of the first shade of green I painted.  It was like a green screen that the weatherman stands in front of to give his report.  Way too limey and way too bright!  My mom took pity on me and helped me repaint it in January.

With the new table that I capital L love, a new light fixture that is WAY better than the seashell monstrosity, the freshly painted chairs, and some homemade chunky floating shelves, the room now looks like this.  Still not complete, but much further along than before!  (Crappy photos, sorry.)

dining room
dining room

I love the way the fixer-upper chairs turned out and look with the table.  We have seven of them so one end of the table remains empty right now.  The plan is to find a pair of affordable chairs - upholstered? wicker? - to use at the heads of the table and then that 7th chair would just be extra for when we're feeding a crowd.  

chairs

The bar is something I found at Pottery Barn Outlet a while back; it was a deal I just couldn't say no to.  :)  So far our sweet toddler has only thrown down and smashed one martini glass, despite our repeated "no touch!" warnings.  We made the floating shelves one afternoon in the woodshop.  I didn't take any in-progress photos or I'd type out a quick tutorial for you.  They were super easy though!  When I took the photo below in February, I had to borrow a few pitchers from my mom.  Now I've upped my collection size thanks to some birthday gifts so they've since been rearranged.

bar
floating shelves
floating shelves

The table top shows all kinds of pretty wood grain in shades of brown and grey and even some red.

table
table

Even with all this progress, there's still lots left to do.  I'd like to get a sidebar of some kind for the big empty wall and then there are lots of places that could use some artwork.  In time, I suppose!

christmas cards

Our dining room opens up into our front entry hall (the first four pics were all taken from standing in the entry hall if that helps give you a reference?) and while we still haven't really done anything to it yet (we're painting it tonight though!), I did get one new project up on the wall.  I copied off several friends and had all of our Christmas cards framed to display.  I dug out all the ones we've sent since we've been married (5 Christmases) and then, since I wanted a fuller display, also found all the ones my Mom has sent since we're pictured in them too.  All ten cards got a white mat and a coordinating silver frame.  I can't wait to add to this gallery as the years go by!  

Christmas cards

I'm glad to finally have this Dining Room update post done so that I can move on and show you the progress we're making in the new nursery.  Things are coming along nicely in there and I hope to have some progress pics for you soon!