Before I jump into my long-overdue Christmas post, I want to share these fun projects we cranked out during the busiest time of the year. How we managed to get them done, I have no idea. Definitely couldn't have finished them without my Dad and his willingness to, once again, help me out with my shop projects. I miss getting to work out there with him!
Anyway, I actually dreamed up a Christmas tree forest, if you will, for the mantel a year ago and never got around to doing it. I started thinking about it again in the fall and thought if I could make a tree forest, I could also make a pumpkin patch!
My dad always acts annoyed with my wood-cutting requests, but I secretly think he likes them. I usually draw out what I'm thinking to help him visualize. Here was my rough sketch of our fire place, mantel, and the pumpkin patch. I drew my vase and large candle stick on opposite sides than they are in real life, and Matt gets extra points for actually noticing!

With a roll of his eyes, Dad said, "You'll have to draw the pumpkins however you want them."
So I did.

Then I went out of town overnight and came home to wooden pumpkins! We had some leftover barnwood that I had pulled out to use. I knew some of it wouldn't be wide enough so I had instructed Dad to plank them together. I love that he did some of them on the diagonal. Aren't they so awesome in their rustic-ness?

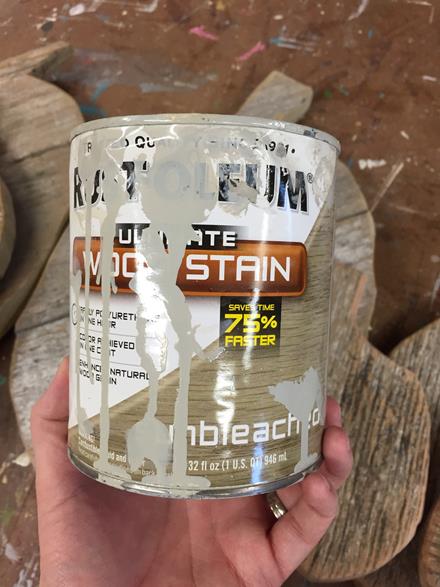
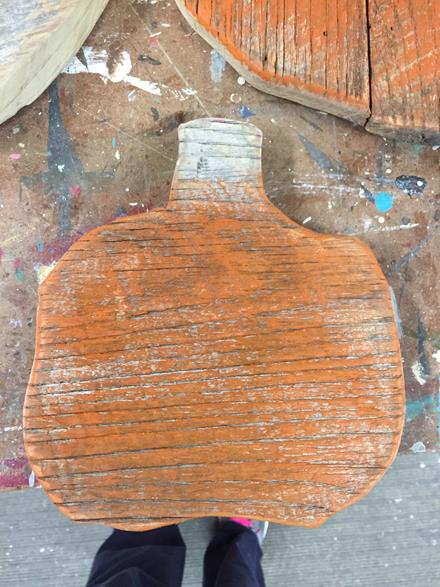
Before I could turn them their proper shade of orange, I had to touch up the raw side edges. We used two different batches of barnwood and one set had a red tone and the other had a green tone. I gave the sides a quick rub down with one of my favorite stains, Rustoleum's Sunbleached, so they would be more uniform in color.

After that dried, I did a little dry-brushing with some Texas orange paint. I didn't want a full cover coat of paint, just enough to add some color.

This was done bright and early on a Saturday morning (gotta DIY when you can) and my pajama-clad helper busied herself by making ramps for her trains and asking repeatedly if she could touch the orange paint - cause orange is her favorite color, you know.


I brushed brown paint on the stems and then, as a final coat, rubbed them all down with some brown glaze wax. Some were just a little too orange in spots and I liked that the brown glaze kinda put the barnwood rustic-ness back on them. :)


In between coats of paint, I also cut a long 2x6 board to mount them on. I waffled on what color to paint it but ultimately went with the same color as our mantel so that it would blend in and be nondescript. I'm glad I did; I love that it doesn't take away from the pumpkins.

Once they were finally dry, I took them home to our house for assembly. I'm pretty sure assembly happened the weekend before Thanksgiving - that's how behind I was on this fall decorating project!

Originally I thought I would use long screws to attach them from the bottom of the 2x6. When we thought that threw, it was not going to be very easy. So I grabbed some L brackets from our local Ace Hardware and used them to attach the pumpkins to the base.


Attaching the L brackets went pretty quickly since I had a little helper handing me my screws. (Actually, it probably took twice as long since I had a little helper, but at least he's cute!)

Special shout-out to both Matt and Anna who helped hold the pumpkins up while I moved them around into an arrangement I liked. Then, it was as simple as screwing them into place.
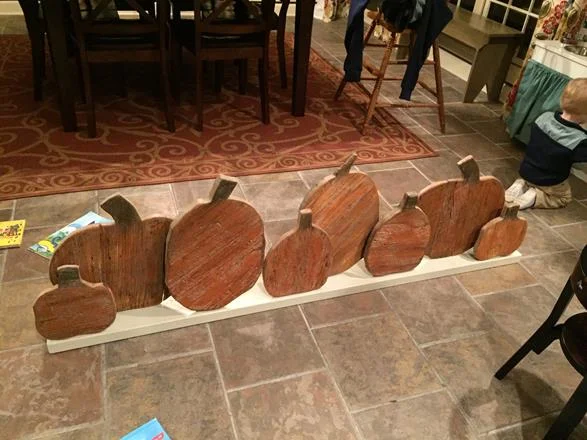
And then up on the mantel they went! They needed a little something so I gave them all a little neck wear. I'm not dead set on that part but it was a quick fix that worked perfectly for the last week of pumpkin season. Now that it's done, how awesome is it going to be next October when all we have to do is grab this one (extremely heavy) thing from the attic and just pop it into place?!

Looks just like the picture I drew, doesn't it?
Ok! Moving on to Christmas!
Approximately 5 days after finishing the pumpkins, the Christmas tree and decor came out and took over the house. The pumpkins stayed put because A) I had JUST finished them! and B) I didn't have the trees finished yet. Mostly because I hadn't started them yet.
Again, super thanks to my Dad for cutting them out for me since I didn't have time. I left instructions to cut five each of three different sized trees. (We have made tons of these twinkle trees in the past, so we have templates for them now.) He delivered and had them all cut out in no time. I really didn't think I was going to get them done before the end of the year (when the heck did I have time to go paint?!) but I made a firm decision that they would be up on our mantel in time for the Christmas party we were hosting...in a week.
No step-by-step pictures this time, but imagine me using four different shades of green paint to paint 15 different trees - front and back. I wasn't picky about my shades of green; I used all paint we had on hand. And just like with the pumpkins, I painted my long base board the same color as the mantel.
I assembled the forest of twinkle trees by myself one night during Thomas's awful sleep regression (read about that here). I listened to him cry through the monitor (while Matt tried to comfort and quiet him) and took my frustration out with my drill and screws.
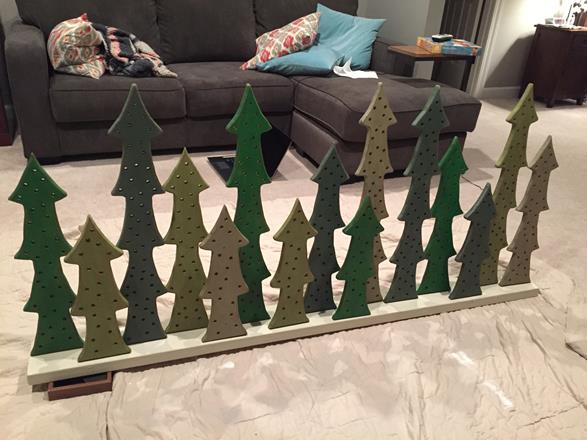
The tricky part was whether or not the white lights that I had ordered would come in in time. I was going to be SO MAD if I had busted my butt to get this thing finished for the party and then the dang lights didn't arrive in time! They arrived the day before the party - thank goodness - and Matt helped me power through poking them into all the tiny drilled holes (not as easy a task as you would think).
The kids stayed up past their bedtimes while we finished but it was fun letting them see it all lit up for the first time. It is slightly blinding. But in a totally awesome way.

"Take our pitch-uh with the trees, Mama!"

I took a panorama pic of the room so you could see all of the lights. Maybe I went overboard? We have our fully lit 12 foot Christmas trees on the far left, the blinding twinkle tree forest in center, a new Christmas tree addition this year sitting at the top of the stairs, and two more twinkle trees over on the right. And from most places in the room, you could also see the Christmas tree in the kitchen. Basically, it was my favorite room in the house during the season. All the lights! All the magical Christmas goodness!

And, just like with the pumpkin patch, the best part is that they're done now so next year we just have to carry them down from the attic. Boom. I am all about that.
Christmas pics coming!