I'm back with another home project that is about a year overdue! Technically, this one was just completed about three weeks ago, but I dreamed it up and received the frames for it for Christmas 2014. Talk about dragging my feet!
Here was one huge holdup: I knew the project was going to take a LOT of frames, I just didn't know exactly how many. And when you're using a LOT of frames, you need them to be pretty cheap...if you want to also buy groceries for the month. I found the perfect solution from Ikea - their line of Ribba frames where the 5x7 ones ring up at a whopping $2.99 a piece. Although I think they used to be just $1.99 apiece.

So my Mom (and Dad, technically) gave me 20 of them for Christmas to get me started. A month or so later, I finally sat down to figure up my grid and decided I would need 50 frames total. Here's where the holdup comes in - I got on Ikea.com to order the remaining 30 and they were gone! No longer available. Whomp, whomp.
True story - Amazon was selling the exact same frames for about $11 bucks each. No way was I going to pay that when I knew they were really only $2, and I needed 30 more of them! I emailed Ikea to see if they were temporarily out of stock or if they'd never have them again, and they told me the manufacturer wasn't going to be making them anymore. (Which is bogus since I just found them on their website today, but whatevs.)
I was pretty bummed out. What was I going to do with those 20 frames since I was dead set on all the ones for this project matching? (I guess I could've sold them for $10 each since that was cheaper than Amazon's price...)
Anyway, fast forward to April when Mom and I attended a conference in Atlanta and made our first Ikea visit ever. We moseyed along looking at everything from cookware to bedding to storage racks to lamps. When we rounded the corner to the wall art and frames section, guess what was the first thing to catch my eye? Those dang $1.99 Ribba frames!!
I decided to forgo my frustration and hatred for their Customer Service telling me they'd never have them again and instead just be excited that I had found them! I needed 30 more. After pulling out every box of them and grabbing every one of them on display, I was able to get 25. Close enough, I could make that work. I put them all in my cart and texted Matt: "Gallery grid project is BACK ON!" I can only imagine his excitement when reading that.
I didn't intend to write this much about this project...
It took me a while to get pictures printed so that delayed the project some. Then I realized 3 of the 20 frames that had been shipped to Mom (to give to me for Christmas) had broken glass in them so I had to get those replaced. Another hold up.
THEN, we could finally get started. I hosted a baby shower at our house the last weekend of January so I used it as my motivation to get these frames up on the wall. But you guys, the math. Oh, the math involved with this! So many fractions. Thank goodness I married a nerdy numbers guy who likes that kind of stuff. :)
Ready to finally get to the project? The idea was to do a full floor to ceiling picture frame gallery on the wall between Anna's and Wyatt's rooms. Except that I wanted it to be a grid...with the frames alternating between horizontal and vertical. And of course all be evenly spaced on the wall, centered between the floor and ceiling. No biggie, right?

Martin Luther King Jr. Day was the perfect opportunity to knock it out. We were off work but the kids' daycare was open so we could send them there and have some work time without tiny helpers! This project took place at the top of our stairs which is probably the hottest area in our entire house. Especially when both of us are crammed into it on top of each other working closely together. It was HOT!
First - double checking frame measurements.

Step two - finding the dead center of the wall and hanging our first picture frame bracket. And testing for level, of course.

Ten-ish minutes later and the first row (of nine total) was done! Never mind those sideways and upside down pictures...

We got into a good groove with our measuring and marking and worked our way up to the top in no time. After testing the first two rows with the frames, we plowed through the rest of them with just hanging the anchors and crossed our fingers the spacing would be right!

Going down from the center was a little trickier; we had to adjust how we made our measurements. Did I mention it was really warm up there? And I was wearing fleece pants and two shirts? So. Hot. Matt took over for the bottom half. In the picture below, you can kinda see how the anchors had to be staggered on each row to account for difference between the vertical frames and horizontal ones. We were constantly asking ourselves, "Is this row three up and two down, or two up and three down?"

All the anchors were up which means the hard part was done! BUT...would they be right when we set the frames over them?

They worked!

MLK Jr. Day selfie with our project complete. (Well, mostly complete.)

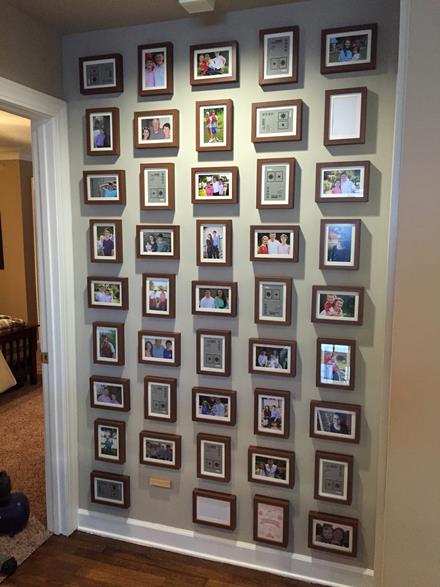
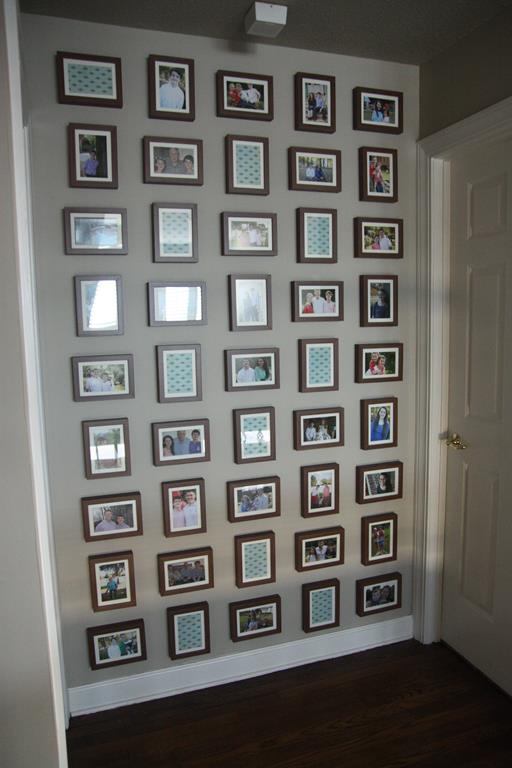
Here is the "finished" gallery that day. I knew I had less pictures then I did frames, but that was by design so that I can add new pictures as they're taken. And one frame was still with the friend that was cutting my new glass for the three that arrived broken.
The frames can slide left and right on their anchors so we cut some small pieces of wood to use as spacers to make sure everything stays evenly spaced. We'll keep those around since I'm sure they will need occasional adjusting.
By the end of the week, I had the missing frame back, new pieces of glass, and scrapbook paper in the empty frames until new pictures are printed for them. (Sorry for the glares from the sun.)
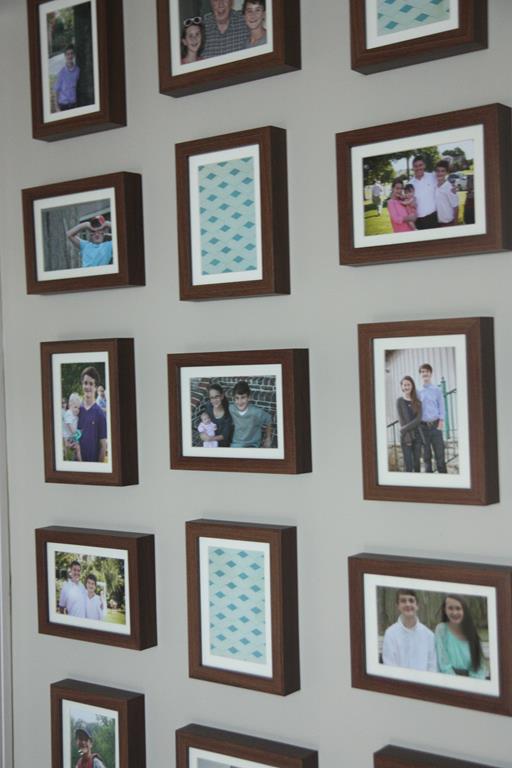
And, in case you can't tell, these are all pictures of Anna and Wyatt! Seemed fitting since this gallery grid is between their bedrooms. For the most part, the left column is all pictures of Wyatt since that's his room, and the right column is pictures of Anna since that's near her room. The three columns in the middle have pictures of the two of them together (with or without other people).

Here's a picture from down in the living room so you can understand where this gallery grid is.

For those of you into numbers, we hung 45 picture frames in the grid. And we used 2 nails to hold each frame's anchor to the wall. So that's NINETY new holes we put into our dry wall that will have to be filled if/when I decided to take the frames down. Yeesh!
But it looks good, right? Totally worth the 90 holes. For now.